
Sandwich Prep Tables
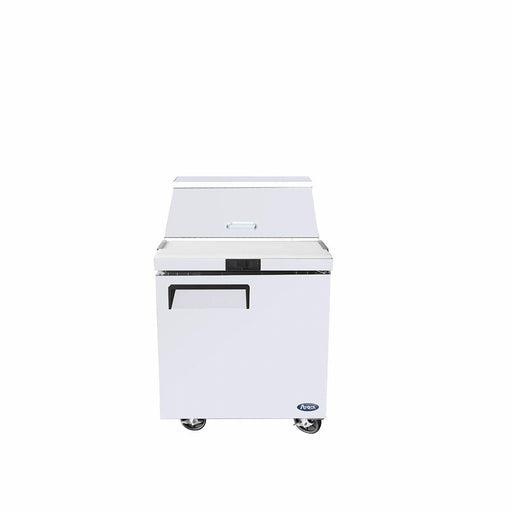
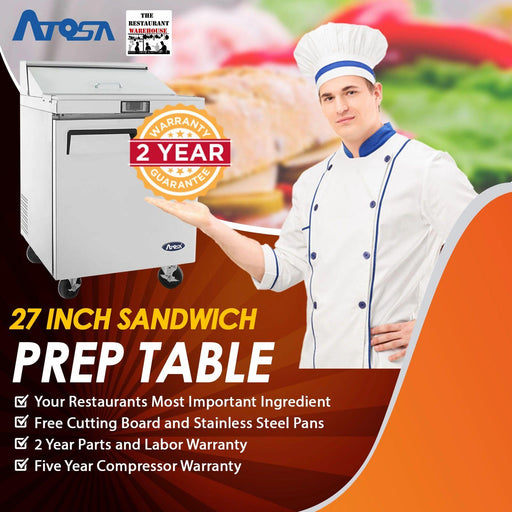
Atosa MSF8301GR 27-Inch Sandwich Prep Table
Atosa
Original price
$2,288.00
Original price
$2,288.00
-
Original price
$2,288.00
Original price
$2,288.00
Current price
$1,649.00
$1,649.00
-
$1,649.00
Current price
$1,649.00
Atosa MSF8301GR 27-Inch One Door Sandwich Prep Table The Atosa MSF8301GR Sandwich Prep Table is built for cafés, sandwich shops, delis, and restaur...
View full details
Original price
$2,288.00
Original price
$2,288.00
-
Original price
$2,288.00
Original price
$2,288.00
Current price
$1,649.00
$1,649.00
-
$1,649.00
Current price
$1,649.00
Save 28%
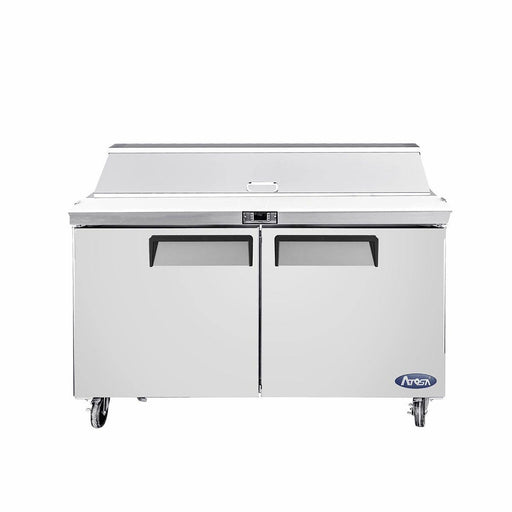
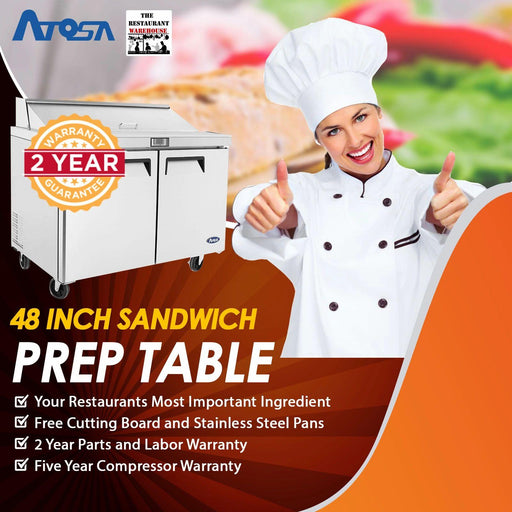
Atosa MSF8302GR 48-Inch Sandwich Prep Table
Atosa
Original price
$3,227.00
Original price
$3,227.00
-
Original price
$3,227.00
Original price
$3,227.00
Current price
$2,326.00
$2,326.00
-
$2,326.00
Current price
$2,326.00
Atosa MSF8302GR 48-Inch Sandwich & Salad Prep Table Speed up service and keep ingredients food-safe with the Atosa MSF8302GR 48" sandwich ...
View full details
Original price
$3,227.00
Original price
$3,227.00
-
Original price
$3,227.00
Original price
$3,227.00
Current price
$2,326.00
$2,326.00
-
$2,326.00
Current price
$2,326.00
Save 28%
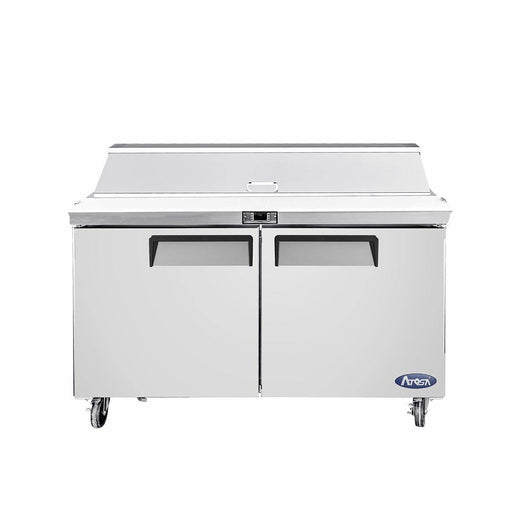
Atosa MSF8303GR 60-Inch Sandwich Prep Table
Atosa
Original price
$3,680.00
Original price
$3,680.00
-
Original price
$3,680.00
Original price
$3,680.00
Current price
$2,652.00
$2,652.00
-
$2,652.00
Current price
$2,652.00
Atosa MSF8303GR 60-Inch Sandwich & Salad Prep Table — Free Shipping The Atosa MSF8303GR 60-inch sandwich prep table delivers a spacious prep ...
View full details
Original price
$3,680.00
Original price
$3,680.00
-
Original price
$3,680.00
Original price
$3,680.00
Current price
$2,652.00
$2,652.00
-
$2,652.00
Current price
$2,652.00
Save 28%
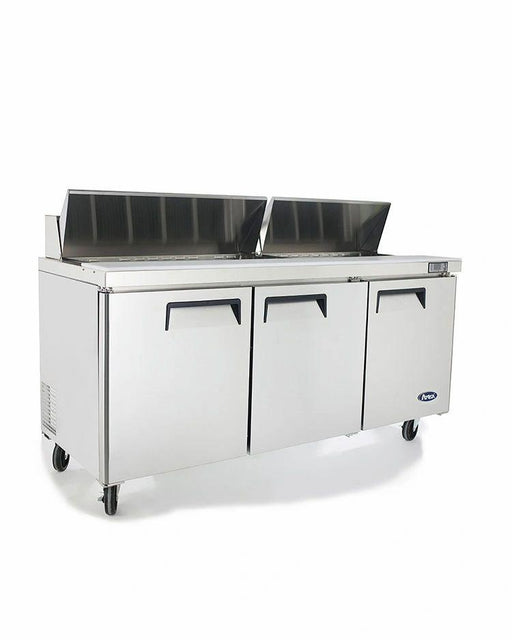
Atosa MSF8304GR 72-Inch Sandwich Prep Table
Atosa
Original price
$4,358.00
Original price
$4,358.00
-
Original price
$4,358.00
Original price
$4,358.00
Current price
$3,140.00
$3,140.00
-
$3,140.00
Current price
$3,140.00
Atosa MSF8304GR 72-Inch Sandwich Prep Table Refrigerator The Atosa MSF8304GR 72-inch sandwich prep table is built for high-volume foodservice ope...
View full details
Original price
$4,358.00
Original price
$4,358.00
-
Original price
$4,358.00
Original price
$4,358.00
Current price
$3,140.00
$3,140.00
-
$3,140.00
Current price
$3,140.00
Save 28%
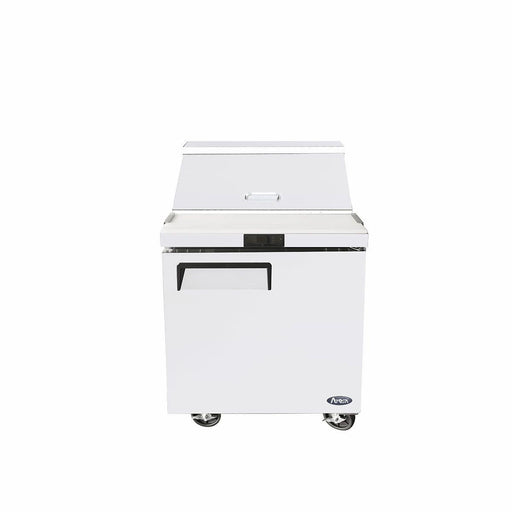
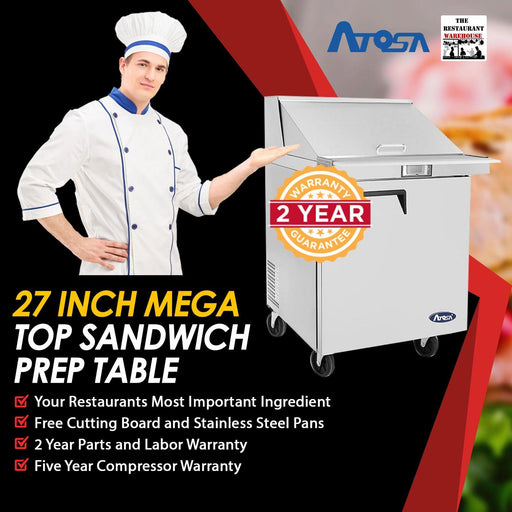
Atosa MSF8305GR 27-Inch Mega Top Sandwich Prep Table
Atosa
Original price
$2,606.00
Original price
$2,606.00
-
Original price
$2,606.00
Original price
$2,606.00
Current price
$1,878.00
$1,878.00
-
$1,878.00
Current price
$1,878.00
One Door Mega Top Sandwich and Salad Prep Table The Atosa MSF8305GR 27-inch Mega Top Sandwich Prep Table is built for kitchens that need more ing...
View full details
Original price
$2,606.00
Original price
$2,606.00
-
Original price
$2,606.00
Original price
$2,606.00
Current price
$1,878.00
$1,878.00
-
$1,878.00
Current price
$1,878.00
Save 28%
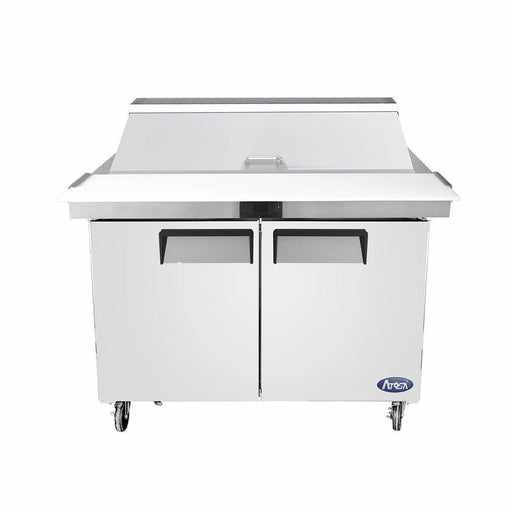
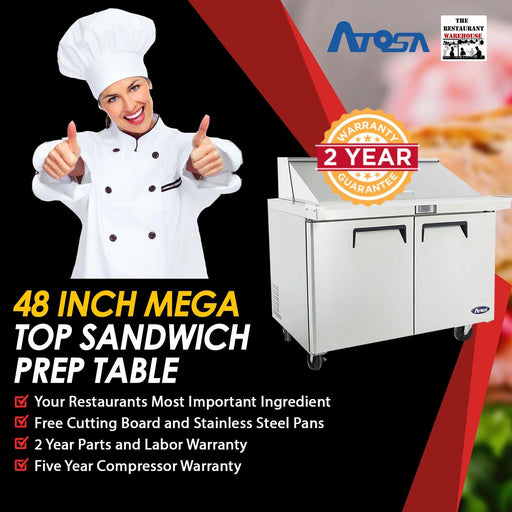
Atosa MSF8306GR 48-Inch Mega Top Sandwich Prep Table
Atosa
Original price
$3,849.00
Original price
$3,849.00
-
Original price
$3,849.00
Original price
$3,849.00
Current price
$2,774.00
$2,774.00
-
$2,774.00
Current price
$2,774.00
Atosa MSF8306GR 48-Inch Mega Top Sandwich Prep Table The Atosa MSF8306GR 48-inch Mega Top Sandwich Prep Table is built for high-volume sandwich a...
View full details
Original price
$3,849.00
Original price
$3,849.00
-
Original price
$3,849.00
Original price
$3,849.00
Current price
$2,774.00
$2,774.00
-
$2,774.00
Current price
$2,774.00
Save 28%
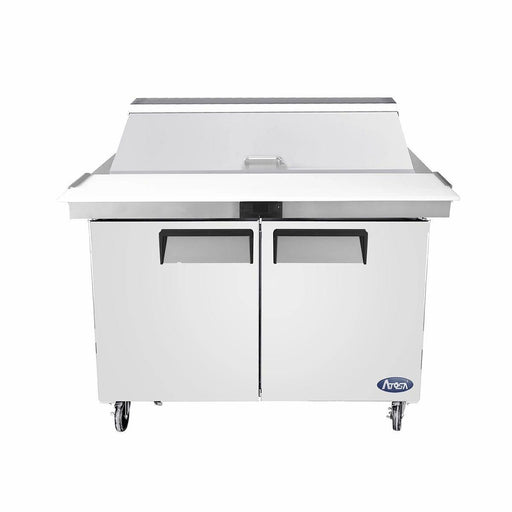
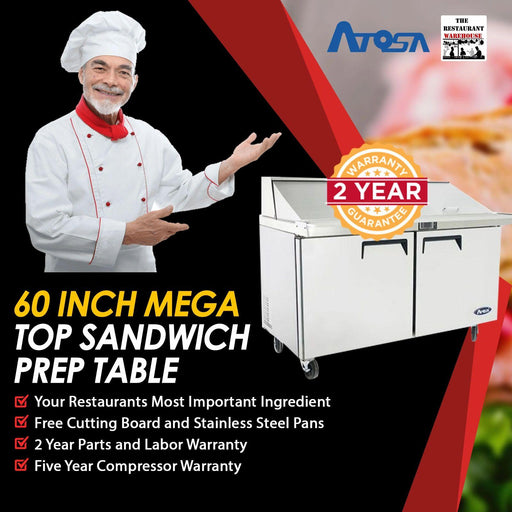
Atosa MSF8307GR 60-Inch Mega Top Sandwich Prep Table
Atosa
Original price
$4,130.00
Original price
$4,130.00
-
Original price
$4,130.00
Original price
$4,130.00
Current price
$2,976.00
$2,976.00
-
$2,976.00
Current price
$2,976.00
Atosa MSF8307GR 60-Inch Mega Top Sandwich Prep Table The Atosa MSF8307GR 60-inch Mega Top Sandwich Prep Table is built for high-output kitchens t...
View full details
Original price
$4,130.00
Original price
$4,130.00
-
Original price
$4,130.00
Original price
$4,130.00
Current price
$2,976.00
$2,976.00
-
$2,976.00
Current price
$2,976.00
Save 28%
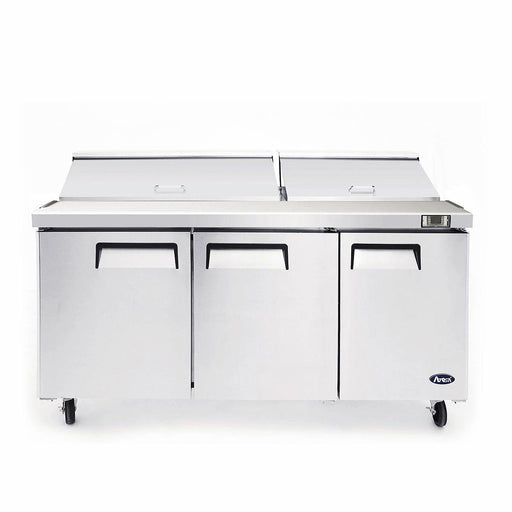
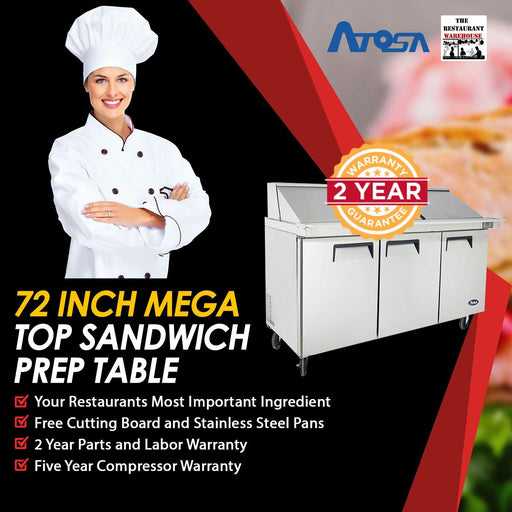
Atosa MSF8308GR 72-Inch Mega Top Sandwich Prep Table
Atosa
Original price
$4,696.00
Original price
$4,696.00
-
Original price
$4,696.00
Original price
$4,696.00
Current price
$3,384.00
$3,384.00
-
$3,384.00
Current price
$3,384.00
Atosa MSF8308GR 72-Inch Mega Top Sandwich Prep Table The Atosa MSF8308GR 72-inch Mega Top Sandwich Prep Table is built for high-volume commercial...
View full details
Original price
$4,696.00
Original price
$4,696.00
-
Original price
$4,696.00
Original price
$4,696.00
Current price
$3,384.00
$3,384.00
-
$3,384.00
Current price
$3,384.00
Save 28%
Atosa MSF17GR-NTCV 17-inch Sandwich Prep Table
Atosa
Original price
$2,700.00
Original price
$2,700.00
-
Original price
$2,700.00
Original price
$2,700.00
Current price
$1,946.00
$1,946.00
-
$1,946.00
Current price
$1,946.00
Atosa MSF17GR-NTCV 17-Inch Slim Sandwich Prep Table The Atosa MSF17GR-NTCV Slim Sandwich Prep Table is built for food trucks, sandwich shops, and...
View full details
Original price
$2,700.00
Original price
$2,700.00
-
Original price
$2,700.00
Original price
$2,700.00
Current price
$1,946.00
$1,946.00
-
$1,946.00
Current price
$1,946.00
Save 28%
Atosa MSF3610GR 36 inch Sandwich Prep Table
Atosa
Original price
$3,009.00
Original price
$3,009.00
-
Original price
$3,009.00
Original price
$3,009.00
Current price
$2,168.00
$2,168.00
-
$2,168.00
Current price
$2,168.00
Atosa Sandwich Prep Table Many types of restaurant equipment are available in the market. These tools are made to help people working in commercial...
View full details
Original price
$3,009.00
Original price
$3,009.00
-
Original price
$3,009.00
Original price
$3,009.00
Current price
$2,168.00
$2,168.00
-
$2,168.00
Current price
$2,168.00
Save 28%
Atosa MSF3615GR 36 inch Mega Top Sandwich Prep Table
Atosa
Original price
$3,271.00
Original price
$3,271.00
-
Original price
$3,271.00
Original price
$3,271.00
Current price
$2,357.00
$2,357.00
-
$2,357.00
Current price
$2,357.00
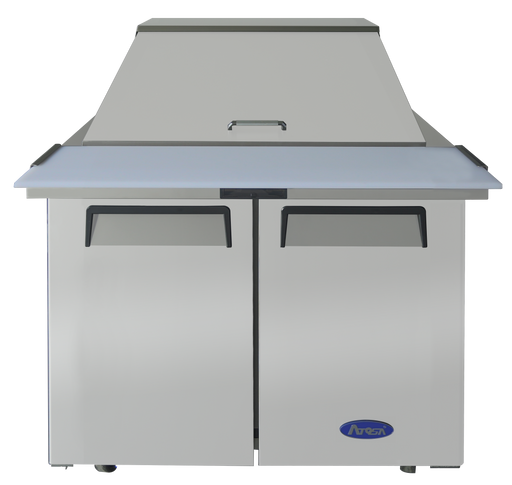
Atosa MSF3615GR Mega Top Sandwich Prep Table The Atosa MSF3615GR 36-inch Mega Top Sandwich Prep Table is designed for high-volume kitchens that n...
View full details
Original price
$3,271.00
Original price
$3,271.00
-
Original price
$3,271.00
Original price
$3,271.00
Current price
$2,357.00
$2,357.00
-
$2,357.00
Current price
$2,357.00
Save 28%
Atosa MROS-2RE 27-Inch Stainless Steel Sandwich Prep Table Over Shelf
Atosa
Original price
$361.00
-
Original price
$361.00
Original price
$361.00
$361.00
-
$361.00
Current price
$361.00
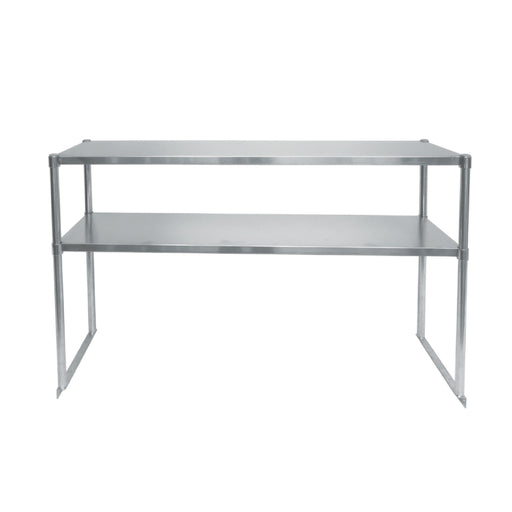
27-Inch Stainless Steel Sandwich Prep Table Over Shelf Maximize vertical storage space with this 27-inch Stainless Steel Sandwich Prep Table ...
View full details
Original price
$361.00
-
Original price
$361.00
Original price
$361.00
$361.00
-
$361.00
Current price
$361.00
Atosa MROS-3RE 36-Inch Sandwich Prep Table Over Shelf
Atosa
Original price
$371.00
-
Original price
$371.00
Original price
$371.00
$371.00
-
$371.00
Current price
$371.00
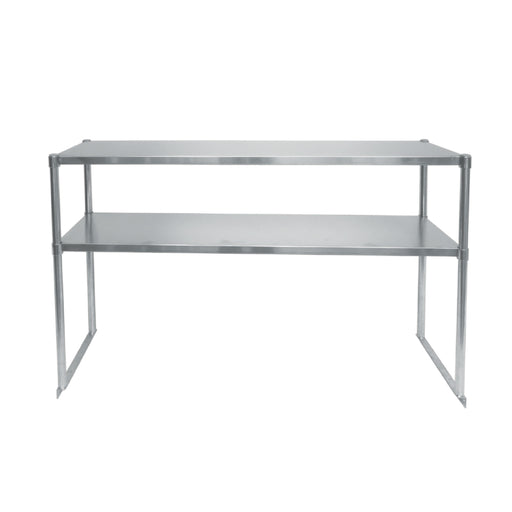
36-Inch Stainless Steel Sandwich Prep Table Over Shelf Increase efficiency and maximize vertical storage with this 36-inch Stainless Steel Sand...
View full details
Original price
$371.00
-
Original price
$371.00
Original price
$371.00
$371.00
-
$371.00
Current price
$371.00
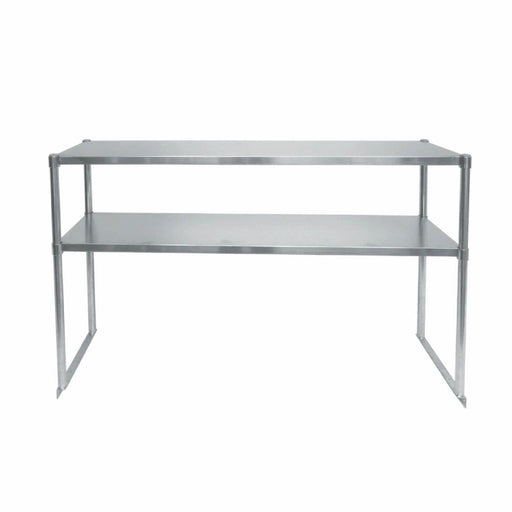
Atosa MROS-4RE 48-Inch Stainless Steel Sandwich Prep Table Over Shelf
Atosa
Original price
$387.00
-
Original price
$387.00
Original price
$387.00
$387.00
-
$387.00
Current price
$387.00
Atosa MROS-4RE 48" Stainless Steel Sandwich Prep Table Over Shelf Upgrade your prep station with the Atosa MROS-4RE 48-inch Stainless Steel San...
View full details
Original price
$387.00
-
Original price
$387.00
Original price
$387.00
$387.00
-
$387.00
Current price
$387.00
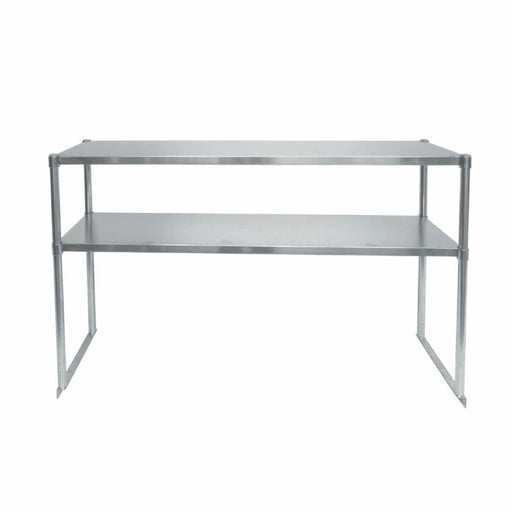
Atosa MROS-5RE 60-Inch Stainless Steel Sandwich Prep Table Over Shelf
Atosa
Original price
$417.00
-
Original price
$417.00
Original price
$417.00
$417.00
-
$417.00
Current price
$417.00
Atosa MROS-5RE 60" Stainless Steel Sandwich Prep Table Over Shelf Maximize storage and improve workflow with the Atosa MROS-5RE 60-inch Stainle...
View full details
Original price
$417.00
-
Original price
$417.00
Original price
$417.00
$417.00
-
$417.00
Current price
$417.00
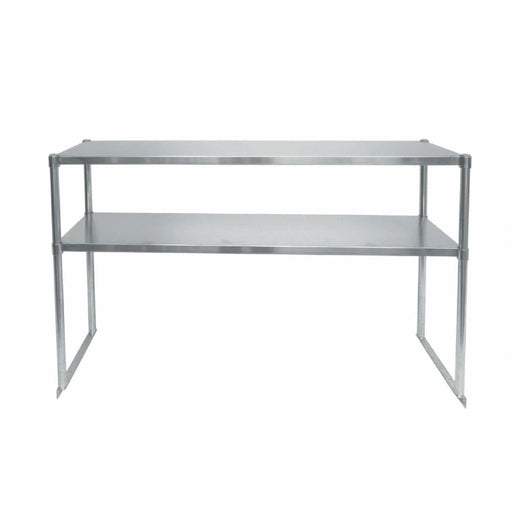
Atosa MROS-6RE 72-Inch Stainless Steel Sandwich Prep Table Over Shelf
Atosa
Original price
$446.00
-
Original price
$446.00
Original price
$446.00
$446.00
-
$446.00
Current price
$446.00
72-Inch Stainless Steel Sandwich Prep Table Over Shelf Add valuable vertical storage to your prep line with this 72-inch Stainless Steel Sandw...
View full details
Original price
$446.00
-
Original price
$446.00
Original price
$446.00
$446.00
-
$446.00
Current price
$446.00

True TSSU-27-08-HC 27 inch Sandwich Prep Table
True RefrigerationTrue TSSU-27-08-HC Sandwich Prep Table True 27 inch Sandwich Prep Table For over 70 years, True has been an industry leader in commercial refrige...
View full details
True TSSU-48-12-HC 48 inch Sandwich Prep Table
True RefrigerationTrue TSSU-48-12-HC Sandwich Prep Table True 48 inch Sandwich Prep Table For over 70 years, True has been an industry leader in commercial refrige...
View full details
True TSSU-60-16-HC 60 inch Sandwich Prep Table
True RefrigerationTrue TSSU-60-16-HC Sandwich Prep Table True 60 inch Sandwich Prep Table For over 70 years, True has been an industry leader in commercial refrige...
View full details
True TSSU-72-18-HC 72 inch Sandwich Prep Table
True RefrigerationTrue TSSU-72-18-HC Sandwich Prep Table True 72 inch Sandwich Prep Table For over 70 years, True has been an industry leader in commercial refrige...
View full details
True TSSU-36-08-HC 36 inch Sandwich Prep Table
True RefrigerationTrue TSSU-36-08-HC Sandwich Prep Table True 36 inch Sandwich Prep Table For over 70 years, True has been an industry leader in commercial refrige...
View full details
True TSSU-27-12M-B-HC 27 inch Mega Top Sandwich
True RefrigerationTrue TSSU-27-12M-B-HC 27-inch Mega Top Sandwich Prep Table True 27-inch Mega Top Sandwich Prep Table For over 70 years, True has been an industry...
View full details
True TSSU-36-12M-B-HC 36 inch Mega Top Sandwich Prep Table
True RefrigerationTrue TSSU-36-12M-B-HC 36-inch Mega Top Sandwich Prep Table True 36-inch Mega Top Sandwich Prep Table For over 70 years, True has been an industry...
View full details
True TSSU-48-18M-B-HC 48 inch Mega Top Sandwich
True RefrigerationTrue TSSU-48-18M-B-HC 48-inch Mega Top Sandwich Prep Table True 48-inch Mega Top Sandwich Prep Table For over 70 years, True has been an industry...
View full details
True TSSU-60-24M-B-ST-HC 60 inch Mega Top Sandwich
True RefrigerationTrue TSSU-60-24M-B-ST-HC 60-inch Mega Top Sandwich Prep Table True 60-inch Mega Top Sandwich Prep Table For over 70 years, True has been an indus...
View full details
True TSSU-72-30M-B-ST-HC 72 inch Mega Top Sandwich
True RefrigerationTrue TSSU-72-30M-B-ST-HC 72-inch Mega Top Sandwich Prep Table True 72-inch Mega Top Sandwich Prep Table For over 70 years, True has been an indus...
View full details
A sandwich prep table is the fastest way to build sandwiches, salads, wraps, and cold menu items during rush service. Also known as a sandwich cooler, sandwich prep cooler, or cold prep table, these refrigerated units combine a cold base with a pan rail and a heavy-duty cutting board so ingredients stay at safe temperatures while staying within arm's reach. If you're shopping for a sandwich prep table, deli prep table, or salad prep table for a café, sub shop, or prep line, you're in the right place.
At The Restaurant Warehouse, we focus on practical, operator-friendly equipment: stainless steel construction, easy-to-clean interiors, reliable temperature control, and layouts that reduce steps and increase ticket speed. Most models are designed to hold food safely in the 33°F to 41°F range when used properly and loaded with pre-chilled product.
Shop Sandwich Prep Tables by Size
Choose width and top configuration together. A narrow mega-top model can offer more ingredient positions than a wider standard-top model, but it still has a shorter assembly surface. Compare your active toppings, backup containers, working space and installation footprint before choosing a cabinet.
| Size class | Model / top | Sixth-size pans | Storage (cu. ft.) | Doors | Cutting-board depth |
|---|---|---|---|---|---|
| 27-inch |
MSF8301GR Standard |
8 | 7.2 | 1 | 9¼ inches |
| 27-inch |
MSF8305GR Mega top |
12 | 7.2 | 1 | 9¼ inches |
| 36-inch |
MSF3610GR Standard |
10 | 8.7 | 2 | 9¼ inches |
| 36-inch |
MSF3615GR Mega top |
15 | 8.7 | 2 | 9¼ inches |
| 48-inch |
MSF8302GR Standard |
12 | 13.4 | 2 | 9¼ inches |
| 48-inch |
MSF8306GR Mega top |
18 | 13.4 | 2 | 9¼ inches |
| 60-inch |
MSF8303GR Standard |
16 | 17.2 | 2 | 9¼ inches |
| 60-inch |
MSF8307GR Mega top |
24 | 17.2 | 2 | 9¼ inches |
| 72-inch |
MSF8304GR Standard |
18 | 21.1 | 3 | 9¼ inches |
| 72-inch |
MSF8308GR Mega top |
30 | 21.1 | 3 | 9¼ inches |
The ten standard and mega-top models above are specified for 115 V / 60 Hz / single-phase power and R290 refrigerant. Atosa lists 30-inch cabinet depth for the standard models and 36¾-inch depth for the mega-top models; compare the full installation footprint, not just the nominal width. See the current standard-top specification sheet and the linked Atosa mega-top specifications in the table.
Atosa's current published specifications list a 9¼-inch cutting board for these models. Check the exact model, suffix and current supplied configuration before ordering; these figures should not be transferred to a night-cover variant, another brand or the separate slim model. Pan-count links reference Atosa's model guide, and linked storage, door and board values open manufacturer specifications. Use the product cards for current pricing.
These pan counts identify the listed Atosa models, not every prep table sold under the same nominal width. Compare the supplied pan layout and current specification sheet for the exact model and suffix you order. Different pan sizes, dividers and accessories can change the usable arrangement.
27-Inch Sandwich Prep Tables: Compact Cafés and Satellite Stations
The useful advantage of a 27-inch unit is keeping a focused assembly job in one place. A café breakfast-sandwich program, small deli or separate salad station can keep its most-used ingredients above refrigerated backups without dedicating four or five feet of wall space. Start with the standard MSF8301GR for a short topping list; compare the MSF8305GR mega top when more ingredients must remain accessible at once.
The size label is not the exact footprint. Atosa lists the standard MSF8301GR at 27½ inches wide and 30 inches deep, while the mega-top MSF8305GR is 27½ inches wide and 36¾ inches deep. That extra depth matters in a food truck or tight aisle. Plan for the actual cabinet, door opening, lid movement and required ventilation; a compact floor-standing prep table is not a countertop appliance.
36-Inch Sandwich Prep Tables: More Menu Flexibility in a Limited Space
A 36-inch unit is worth comparing when a 27-inch station feels cramped but a 48-inch cabinet would take too much room. The MSF3610GR standard top provides ten ingredient positions; the MSF3615GR mega top provides fifteen. That makes the top configuration especially important for a café adding salads or wraps without expanding the whole prep line.
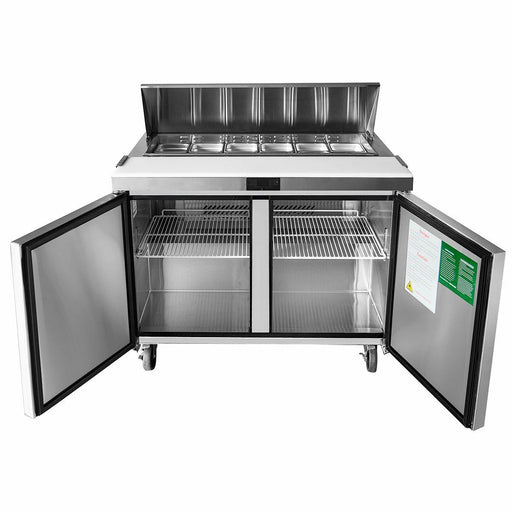
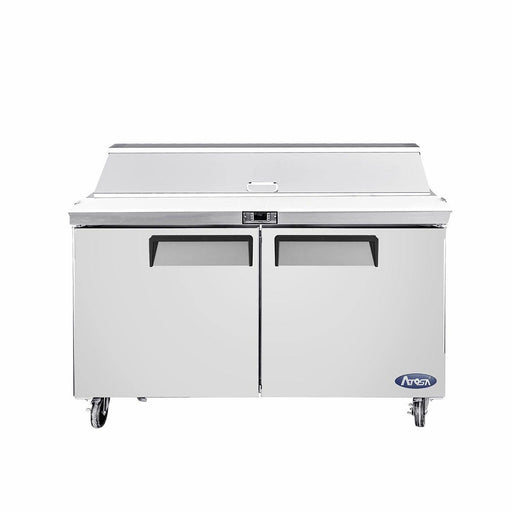
Atosa's specification lists these cabinets at 36 5/16 inches wide with 8.7 cubic feet of refrigerated capacity and two doors. Do not assume that every 36-inch table is a single-door unit. Measure the containers you will store and how staff will access them. A 36-inch mega top adds topping variety, but it does not provide the working length of a 48- or 60-inch station.
48-Inch Sandwich Prep Tables: Balance Assembly Space and Ingredient Variety
The 48-inch category is a practical comparison point for delis serving sandwiches, salads and wraps from the same station. The MSF8302GR standard top offers twelve pan positions, while the MSF8306GR mega top offers eighteen. Choose between them by listing the ingredients that must be available simultaneously, rather than buying extra pans simply because they fit.
The standard MSF8302GR measures 48⅕ inches wide and has 13.4 cubic feet of refrigerated storage. Compare that backup space with the actual containers and replacement pans used during your busiest service. If two people will share the table, mark out their assembly and wrapping positions first. Cabinet width alone does not guarantee comfortable two-person operation or a particular number of sandwiches per hour.
60-Inch Sandwich Prep Tables: Longer Lines and Shared Menus
A 60-inch table gives you more room to divide a sandwich, salad or bowl station into working zones. The standard MSF8303GR holds sixteen sixth-size pans; the MSF8307GR mega top holds twenty-four. A larger topping selection can reduce the need to change ingredients between menu items, but it does not remove the need to replenish high-volume ingredients during service.
The standard MSF8303GR is 60⅕ inches wide with a two-door, 17.2-cubic-foot cabinet. Plan where each person stands and which doors hold their backup ingredients so restocking does not interrupt the other station. Before moving up from 48 inches, establish whether the actual constraint is cutting-board length, topping variety or backup storage. Those are different problems, and not all require a larger cabinet.
72-Inch Sandwich Prep Tables: Extended Production and Catering
A 72-inch station is worth considering for a long assembly line, catering production or a menu with many cold ingredients. The MSF8304GR standard top holds eighteen sixth-size pans, while the MSF8308GR mega top holds thirty. The standard model's three-door cabinet provides 21.1 cubic feet of refrigerated storage for backups.
The standard MSF8304GR is 72 7/10 inches wide, not exactly 72 inches. Check the complete delivery path, turns, doorway openings and available operating space before ordering. Plan distinct ingredient, assembly and packing zones rather than assuming a longer table automatically accommodates a fixed number of cooks. A well-organized smaller station can be a better fit when the larger rail would mainly hold slow-moving ingredients.
One-, Two-, or Three-Door Atosa Sandwich Prep Tables?
Choose the refrigerated base around the backup containers your team needs between replenishment periods. The model comparison above shows the same listed cabinet capacity for standard and mega-top models in each size class: adding pan positions does not automatically add refrigerated storage below.
- One-door sandwich prep tables: The 27-inch MSF8301GR and MSF8305GR provide 7.2 cubic feet of listed storage. Compare container fit and shelf access when planning a compact café, sandwich or salad station. Atosa standard-top specifications; mega-top values are linked in the comparison above.
- Two-door sandwich prep tables: The 36-, 48- and 60-inch Atosa pairs provide 8.7, 13.4 and 17.2 cubic feet respectively. Door count alone does not tell you how much storage you are buying; these are three different cabinet sizes. Atosa standard-top specifications; mega-top values are linked in the comparison above.
- Three-door sandwich prep tables: The 72-inch MSF8304GR and MSF8308GR provide 21.1 cubic feet of listed storage. Plan where each ingredient backup belongs and whether an open door interrupts another operator's assembly space. Atosa standard-top specifications; mega-top values are linked in the comparison above.
These manufacturer-rated volumes are comparison figures, not guarantees that a particular pan or container will fit. Check usable shelf dimensions, door openings, ventilation space and your actual replenishment routine before selecting a larger cabinet.
Measure the Installation, Not Just the Cabinet Width
- Actual dimensions: Use the exact model's width, depth and height, including its installed casters and accessories. Nominal size categories are shopping labels.
- Working clearance: Allow for open doors, staff passing behind the operator, lid travel and access to neighboring equipment. Use the manufacturer's required ventilation and service clearances, not a blanket allowance for every model.
- Delivery path: Confirm packaged dimensions, doorway openings, hallway turns and any elevator limits. Arrange handling with the delivery or installation team; do not assume a refrigerated cabinet can safely be tipped to fit.
- Food trucks: Check the actual layout, equipment weight, operating environment and electrical supply. Truck length by itself does not establish whether a prep table fits.
- Overshelves: Confirm compatibility, mounting and lid clearance before adding a shelf. Keep packaging and tools accessible without blocking the rail or crowding the cutting board.
Dimension and cabinet references: Atosa standard-top specification sheet and Atosa MSF3615GR specifications. Pan configurations are also listed in Atosa's model reference guide; always confirm the current ordered configuration.
Atosa Sandwich Prep Tables
Atosa sandwich prep tables provide an integrated cold-ingredient station for delis, cafés, sandwich shops and restaurant salad lines. The standard and mega-top models compared above combine a refrigerated base, organized ingredient pans and a removable cutting board. Stainless steel interiors and exteriors, electronic temperature control and self-closing doors are practical features to compare when choosing equipment for daily service.
Start with the Atosa size and model comparison to choose among the 27-, 36-, 48-, 60- and 72-inch standard and mega-top configurations. Match the rail to your menu, the cabinet to your backup containers and the working surface to your assembly process. A café making a few signature sandwiches has different requirements from a deli offering a broad selection of sandwich, salad and wrap ingredients.
When comparing Atosa with another brand, compare the exact models rather than the brand name alone. Review current equipment cost, pan layout, usable storage, installation dimensions, included accessories, availability and written warranty terms. Confirm delivery arrangements for your location before ordering. This keeps the buying decision focused on the equipment and support you need rather than paying for capacity your menu will not use.
Atosa MSF Construction and Refrigeration Features
For the ten standard and mega-top models in the comparison, Atosa specifies stainless steel interiors and exteriors, a rear-mounted compressor using R290 refrigerant, and electronic temperature control. The published feature lists also include a removable stainless steel pan liner, locking divider bars, and pre-installed 6-inch-deep poly pans. See Atosa's standard-top specifications and the MSF8306GR mega-top specifications.
Self-closing doors with a stay-open feature, magnetic door gaskets, one pre-installed shelf per section, and pre-installed casters are listed features of these models. Compare how those details fit your daily workflow: door access for replenishment, removable components for cleaning, and enough room to reach the condenser for maintenance. Atosa documents these features in its standard-top sheet and mega-top model information.
Use the current model documentation for component and certification details. These specifications identify stainless steel and an electronic controller without naming a universal steel grade, compressor brand or controller brand; do not assume those details from an older buying guide. The manufacturer's specification sheet also notes that specifications may change.
Need a Narrower Option? Atosa MSF17GR-NTCV
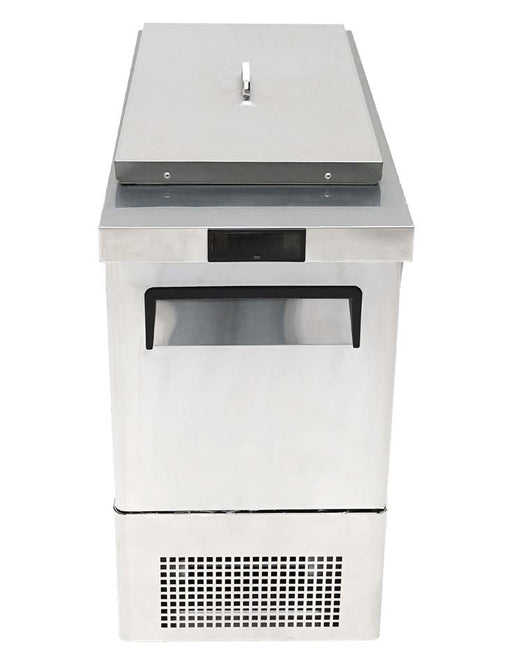
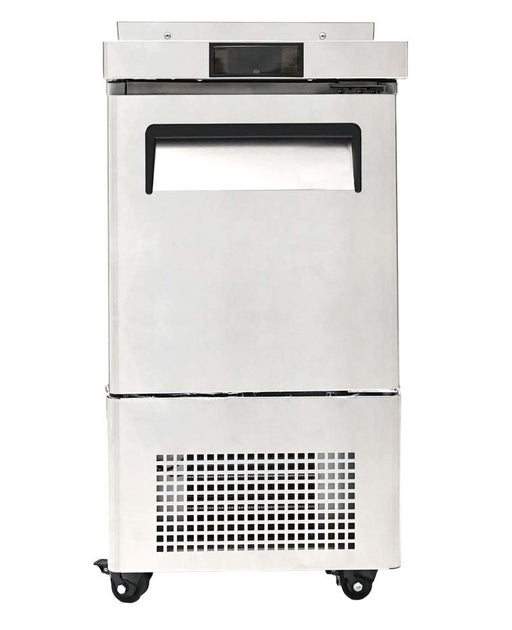
The Atosa MSF17GR-NTCV slim sandwich prep table offers another layout for a narrow station. It measures 17⅜ inches wide, 41⅛ inches deep and 36 11/16 inches high, with 3.7 cubic feet of refrigerated capacity and a single-door base. Its narrow width does not mean a shallow footprint: compare the full depth with your available aisle and working space.
This floor-standing model uses a bottom-mounted compressor, unlike the rear-mounted arrangement of the larger MSF standard and mega-top models discussed above. Check its own installation requirements and supplied pan configuration rather than applying the larger cabinets' dimensions or clearances. See Atosa's slim-model specifications for the manufacturer's details.
For service planning, use our Atosa sandwich prep table parts and manuals to identify model-specific information. Compare equipment financing and rental options if you would rather discuss acquisition choices before buying outright.
Mega Top Sandwich Prep Tables: Standard vs. Mega Top
A mega top sandwich prep table combines an expanded ingredient-pan rail, a cutting board and refrigerated backup storage in one workstation. It is worth comparing for delis, sandwich shops, cafeterias and salad or wrap concepts that need a broad selection of toppings, proteins and sauces within reach. Choose it for the ingredients your menu actually requires, rather than assuming that every busy kitchen needs a mega top.
A standard top is a sensible starting point when your core menu fits its pan layout and you want to preserve aisle space. A mega top adds ingredient positions for a wider selection of sandwich fillings, salad toppings or wrap ingredients. Compare the actual depth and usable cutting board on both models: the term “mega top” does not establish one universal board depth or cabinet footprint.
For example, the 36-inch Atosa mega top offers fifteen pan positions compared with twelve on the 48-inch standard model. The narrower unit has more topping positions, but the wider table has more assembly length and a larger refrigerated cabinet. Decide which advantage your operation needs. More pans do not automatically mean less restocking if the same high-volume ingredients still need frequent refills.
Build a simple ingredient list before ordering: what stays on the rail, what remains in backup storage, which items need larger approved pans, and where an operator will slice and wrap. Check the current model price and included equipment rather than relying on an old price difference between standard and mega-top cabinets. Browse Atosa sandwich prep tables or compare the standard and mega-top models by size.
Plan the Mega Top Around Service and Cleaning
Map the rail to your sandwich and salad menu, then check the refrigerated base for the backup containers used between replenishment periods. Compare adjustable shelving, removable cutting boards, accessible cleaning surfaces and the supplied pan arrangement on the exact model. More ingredient positions help organize a varied menu, but they do not replace proper loading, temperature checks or planned restocking.
The Atosa model comparison above includes mega-top options in the 27-, 36-, 48-, 60- and 72-inch size classes. Compare these alongside the standard-top alternatives before choosing a width. Confirm overall depth, lid clearance, cutting-board space, included accessories and current warranty terms for the model you order.
What a Sandwich Prep Table Actually Does
A sandwich prep table is a refrigerated worktable engineered around three components working together: a top rail that holds chilled sixth-, ninth-, or third-size pans of condiments and toppings, an NSF-approved polyethylene cutting board that runs the length of the unit, and a refrigerated base cabinet with wire or coated shelves for bulk storage of backups, meats, cheeses, and mise en place. The rail and the base share a single refrigeration system, meaning one compressor keeps both the topping pans and the storage below at food-safe temperature. Some operators call this a sandwich prep cooler or sandwich unit; the equipment is the same.
The point of the design is workflow. In a properly set-up sandwich prep table, the cook stands in one place with the cutting board directly in front of them, reaches forward and up for lettuce, tomato, onion, pickles, and other high-turnover toppings from the rail, and reaches down and forward into the base cabinet for backup pans, sliced meats, and cheeses. The cook never has to walk to a refrigerator, never has to open a walk-in during a rush, and never has to interrupt the build. On a busy line, that difference is worth minutes per hour and dollars per shift.
Anatomy of a Sandwich Prep Table
The Rail and Pans
The rail holds the approved food pans and divider arrangement for the model. The Atosa examples above use sixth-size pan layouts, with more positions on mega-top versions. Check supplied pan material and depth, lids or night covers, and any guards separately; these are not identical across every prep table. Keep the manufacturer's pan arrangement intact so ingredients can be held as intended.
The Cutting Board
The board is typically a heavy 1/2-inch or 3/4-inch NSF-approved polyethylene, sized to run the full width of the unit. On a well-designed sandwich prep table, the board is removable for cleaning at the end of service and replaceable when it wears out. White boards are the most common and the easiest to see color changes on for HACCP inspections.
The Refrigerated Base
The base is a stainless-steel-lined refrigerated cabinet with either doors or drawers below the cutting board. Single door, two door, and three door configurations are all common. The right number of doors depends on your volume and how much backup product you need on the line. Doors are typically less expensive; a sandwich prep table with drawers gives you organized pan storage but adds cost and reduces total volume slightly. Interior shelves are coated wire or stainless steel and are usually adjustable to hold half-size or full-size hotel pans, sheet trays, and standard storage containers.
The Condenser
Identify the condenser location and airflow requirements on the exact model before planning the installation. The 27- through 72-inch Atosa MSF standard and mega-top models compared above use rear-mounted compressors. Follow the installation manual for ventilation, surrounding heat sources and service access; do not assume that a unit can be placed flush against a wall.
How to Choose the Right Sandwich Prep Table
Sizing a sandwich prep table isn't hard if you work through it in the right order. Here's the four-step framework we walk buyers through.
Step 1: Count the Pans You Need on the Line
List every cold ingredient that must be within reach during service, then compare the standard and mega-top pan layouts in the sizing table above. Reserve positions for your actual menu and check approved options for higher-volume ingredients. Width alone does not determine pan count: a 36-inch mega top and a 48-inch standard top serve different combinations of ingredient variety and working space.
Step 2: Measure the Footprint
Measure the actual cabinet width, depth and height, then add the model-specific ventilation and service clearances. Check the lid opening, door swing and staff aisle against neighboring equipment. Confirm the route from delivery point to final position before ordering.
Step 3: Match Volume to Base Storage
Measure the backup pans and containers needed between replenishment periods, and compare them with the cabinet's usable shelves and door openings. Total cubic feet is a starting point, not a promise that a particular container fits. Daily sandwich counts alone do not determine the right cabinet.
Step 4: Confirm Electrical and Delivery Access
Confirm voltage, plug, circuit requirements and installation instructions for the exact model with your electrician or installer. Check packaged dimensions, lifting arrangements, doorway openings and turns with the delivery team. Do not assume all models use the same pallet or can be moved through the same doorway.
Peak-Service Buying Checklist
Before choosing a wider sandwich prep table or a mega top, test the proposed station against a real rush. Use your menu, portion sizes and staffing plan to identify what actually needs more capacity.
- Plan for the busiest service window: Count the portions and ingredient quantities needed before the next planned restock, not just the daily average. Map those quantities to approved rail pans and the backup containers that fit in the refrigerated base.
- Test staffing and planned growth: Walk through assembly, replenishment and packing with the people who will work together. Include likely menu additions or an extra operator, but do not assume a particular cabinet width guarantees room for a fixed number of cooks.
- Identify the bottleneck before sizing up: More ingredient choices call for a different pan layout; frequent restocking calls for a review of backup storage and replenishment; crowded assembly calls for a review of usable workspace. Compare standard and mega-top models against the specific problem rather than buying more width by default.
What to Look For in a Sandwich Prep Table
- Pan capacity & layout: match your menu, plan for peak-service topping counts
- Work surface: a stable, thick, NSF-approved cutting board sized to your assembly flow
- Temperature consistency: digital control and proper airflow around the rail and base
- Sneeze guard: a glass or acrylic guard over the pan rail protects toppings from contamination and reduces cold loss
- Easy cleaning: stainless steel construction, rounded corners, removable rails where applicable
- Base storage: refrigerated cabinet sized to hold backup product and prepped pans, in single door, two door, or three door configurations
- Door vs drawer: doors are cheaper and hold more; a sandwich prep table with drawers gives you organized pan storage but costs more
- Mobility: heavy-duty locking casters for cleaning behind the line
- Warranty: at minimum 2 years parts and labor with 5 years on the compressor
- Refrigerant & compressor: newer units use R290 hydrocarbon refrigerant with a lower global warming impact and better recovery after door openings, paired with a commercial-grade compressor (Embraco and similar brands) rated for 100°F ambient so the unit holds temperature in a hot kitchen
- Stainless spec: a type 430 stainless exterior with a type 304 stainless interior is the durable and corrosion-resistant standard, and coved interior corners speed up daily cleaning by keeping food particles from getting trapped in sharp joints
- Digital controller: a Dixell-class digital temperature controller with a lit display lets your team verify the holding temperature at a glance and hold ingredients precisely in the HACCP-safe range
Certifications and Warranty Basics
Every sandwich prep table sold by The Restaurant Warehouse is NSF-certified for foodservice sanitation, meets the electrical safety standards of UL and ETL, and complies with current DOE energy efficiency requirements. Many units are also ENERGY STAR rated, which qualifies them for utility rebates in a growing number of states and cuts monthly electric costs by 15% to 30% versus a non-rated equivalent.
Warranty terms vary by manufacturer, but the industry standard on sandwich prep tables is 2 years parts and labor plus 5 years on the compressor. When comparing tables across brands, always compare the compressor warranty specifically. The compressor is the most expensive part to replace and the one most likely to fail past year two.
Sandwich Prep Table Pricing and Value
Sandwich prep tables are priced by size and rail configuration. Here's what to expect for a new, in-warranty unit shipped free to the contiguous 48 states.
- 27-inch: $1,900 to $2,500
- 36-inch: $2,400 to $3,000
- 48-inch: $2,700 to $3,600
- 60-inch: $3,300 to $4,400
- 72-inch: $3,900 to $5,200
Pricing varies with rail configuration, drawer vs door base, and specific manufacturer. Shopping for the best sandwich prep table for the money usually means matching the size and door count to your actual volume. Buying too big is one of the most common mistakes operators make on a refrigerated prep table purchase. All units in this collection ship free to the contiguous 48 states with 1 to 3 day delivery from a US warehouse.
Getting the Most Out of a Sandwich Prep Table
Sandwich prep tables run for a decade or more when a few simple operating rules are followed. Skip these and the same unit can be dead in three years.
Load the Rail Below the Fill Line
Every rail pan has a stamped fill line, usually about two-thirds of the way up. Overfilled pans push product above the cold-air curtain that flows across the rail, and the top layer starts to warm past the 41°F food-safety threshold. Overfilled pans and lids-off operation are the two most common reasons sandwich prep tables fail a health inspection. Load below the line, keep lids on between assemblies, and use a probe thermometer in the pan (not just the airspace) to spot-check during service.
Keep the Table Away from Heat Sources
Plan the cold station away from cooking equipment's heat discharge and within the manufacturer's specified operating conditions. Leave the required ventilation and service space around the cabinet. Check the installation manual rather than applying the same rear-clearance allowance to every model.
Clean the Condenser Coil Every 30 Days
Dust and grease buildup on the condenser coil is the single most common cause of premature compressor failure on commercial sandwich prep tables, and coil cleaning is not covered by any warranty. Five minutes a month with a coil brush or shop vacuum prevents the most expensive repair bill you can get on this equipment. In a high-grease kitchen, clean the coil every two to three weeks. Set a recurring calendar reminder.
Run FIFO and Rotate Pans Daily
Use first-in, first-out for everything in the cabinet and on the rail. Newer product goes behind older product, every container gets a date label, and rail pans get rotated at the start of each shift. Operators who skip FIFO commonly throw out 10 to 15 percent of perishable inventory every month.
Arrange the Station in Build Order
Use a consistent ingredient layout across shifts: start with bread and spreads, continue through proteins and cheeses, then vegetables and finishing ingredients, with wrapping and packing at the end. Put the most-used ingredients within comfortable reach and keep replenishment paths clear. On a shared line, test the arrangement with both operators before deciding that a larger cabinet is necessary.
Set backup quantities from your own sales and portion sizes. Count the ingredients needed between planned replenishment periods, then check that the actual containers fit the base cabinet. Use labeled, pre-chilled replacement pans and follow your food-safety procedures for rotation and date marking. Do not assume that a pan's advertised volume equals a fixed weight of every ingredient.
Keep dedicated utensils and cleaning procedures for allergen controls; color coding or a separate end of the rail alone does not make a station allergen-free. Inspect removable boards and pan supports during cleaning and replace components that can no longer be properly cleaned and sanitized. Confirm replacement-board dimensions, approved pan depths and divider compatibility against the model rather than treating every accessory as universal.
Sandwich Prep Table or Pizza Prep Table?
Compare the work surface and ingredient usage, not just the refrigerated cabinet. A sandwich and salad station emphasizes a variety of smaller topping positions and space for assembling individual orders. A pizza prep table generally combines larger ingredient pans with a deeper preparation surface for dough and pies. Exact pan arrangements and board dimensions vary by model.
If pizza is only an occasional menu item, check whether your preparation can take place on a separate suitable work surface while the sandwich unit holds compatible cold ingredients. For regular pizza production, compare a dedicated pizza table's board depth, bulk cheese and sauce capacity, and loading arrangement. Neither format should be placed beside hot cooking equipment without checking its installation and ambient-temperature requirements.
Comparing a Used Prep Table with a New Unit
A used prep table's asking price is only a starting point. Record the model and serial number, refrigerant, electrical requirements, and included pans, shelves, rails, and cutting board. Check these against your menu and installation before paying for equipment that will need additional parts or repairs.
Inspect the cabinet for corrosion and damaged surfaces, the cutting board for deep wear or distortion, and the gaskets, hinges, doors, and drawers for secure operation. Ask for an operating demonstration and a qualified refrigeration assessment rather than treating a brief cool-down or a controller reading as proof of reliable food holding. Refrigeration-system and electrical faults require qualified service.
Get any refurbishment work, service history, warranty coverage, geographic service limits, return conditions, and restocking charges in writing. Compare purchase, transport, installation, replacement components, and likely repair needs with a current new-equipment quote. Neither a used-equipment label nor a low price establishes the better overall value.
Make sure the equipment format matches the job. A sandwich or pizza prep table provides an ingredient-pan arrangement; a worktop refrigerator combines a working surface with cold storage below. Confirm the exact pan layout, usable preparation area, and storage access rather than buying solely on exterior width.
Ways to Acquire a Sandwich Prep Table
Not every operator wants to write a check for a new table on day one. The Restaurant Warehouse offers three ways to get equipment on your line.
Buy outright. The simplest path. Order online, ship in 1 to 3 days, own the table on day one. This is the right choice for operators who have the capital and want the depreciation benefit at tax time.
Finance the purchase. For operators who want to preserve working capital. Fixed monthly payments over 24 to 60 months, with quick approval for most established businesses. Learn more on our equipment financing options page.
Rent the equipment. For pop-ups, catering operators, seasonal businesses, and operators who want equipment without a long-term commitment. Rental terms are flexible and include maintenance. See details on our equipment rental program.
Delivery, Installation, and Lead Time
Every sandwich prep table in this collection ships from a US warehouse via LTL freight with liftgate service to the address on your order. Standard transit time is 1 to 3 business days from ship date, with tracking provided at every step. Delivery is to the curb. The driver will lower the pallet with the liftgate but does not bring the unit inside.
Installation is straightforward: uncrate, level, plug into a standard 115V/60Hz outlet on a dedicated circuit, let the refrigeration settle for at least 4 hours before loading with product, and confirm the base and rail hit their setpoint before service. Most sandwich prep tables come with a factory-set thermostat that hits 36°F to 38°F out of the box.
Related Equipment for a Sandwich or Deli Line
Shopping by brand? See the Atosa sandwich prep tables section for brand-specific buying guidance and model links. Comparing sizes head to head? Start with our 48-inch guide (the most popular size) or the 60-inch guide for mega-top layouts. Need service parts? See the Atosa sandwich prep table parts & manuals for OEM part numbers by model.
A sandwich prep table is the anchor of any deli prep line, but a working sandwich or salad station needs a few other pieces. Extra sixth-pan and ninth-pan sets to rotate through service, and a spare NSF-approved polyethylene cutting board so a fresh one is always ready to go. A dedicated undercounter refrigerator keeps pre-portioned meats and cheeses cold when the sandwich cooler base runs tight, and for slicing volume, a meat slicer sized to your daily throughput speeds up morning prep.
For broader kitchen planning, browse our full prep tables selection and our refrigeration collection to round out the cold side of your line.
Sandwich Prep Table FAQ
What is a mega top sandwich prep table?
A mega top sandwich prep table is a refrigerated prep station with an expanded ingredient-pan rail, a cutting board and cold storage below. It provides more ingredient positions than a comparable standard-top layout so sandwich, salad and wrap ingredients can remain organized within reach.
What is the difference between mega top and standard prep tables?
The main difference is the ingredient-pan layout. Mega-top models offer additional pan positions, but cabinet depth, cutting-board space and refrigerated storage vary by model. Compare the exact specifications; a narrower mega top can hold more ingredient pans without providing the assembly length of a wider standard table.
Who should use a mega top sandwich prep table?
Consider a mega top when a deli, sandwich shop, cafeteria or salad line needs many different ingredients available at once. Choose from your actual menu, backup-storage needs and installation space. A busy operation with a focused topping list may still be better served by a standard top.
What is a sandwich prep table?
A sandwich prep table is a refrigerated prep station with a cutting board and a pan rail on top, plus cold storage below. It's also called a sandwich cooler, sandwich prep cooler, sandwich unit, or cold prep table. It keeps ingredients chilled and organized so staff can assemble sandwiches and salads quickly during rush service.
What temperature should a sandwich prep table hold?
Cold ingredients should be held at safe temperatures, commonly 33°F to 41°F. For best performance, pre-chill product and avoid overloading the top pans above the fill line.
How much does a sandwich prep table cost?
Expect roughly $1,900 to $2,500 for a 27-inch, $2,700 to $3,600 for a 48-inch, and $3,900 to $5,200 for a 72-inch. Pricing varies with configuration and manufacturer.
What size sandwich prep table should I buy?
Choose from your actual ingredient list, assembly space, backup containers and available installation footprint. Compare both standard and mega-top layouts at 27, 36, 48, 60 and 72 inches. More pan positions do not necessarily mean more working length, and the nominal size is not the exact cabinet width.
How long does a sandwich prep table last?
A sandwich prep table that is installed correctly and maintained on a regular schedule will typically last 10 to 15 years. Key maintenance tasks include monthly condenser cleaning, gasket inspection every six months, and calibration of the temperature controller annually.
What warranty comes with a sandwich prep table?
Standard warranties on sandwich prep tables are 2 years parts and labor plus 5 years on the compressor. Terms vary by manufacturer, so check individual product pages for details.
Can I use a sandwich prep table as a salad prep table?
Yes. A sandwich prep table and a salad prep table are typically the same piece of equipment; the terminology depends on your menu. The same refrigerated prep table works well for cold ingredients like greens, toppings, and proteins, and many operators use one unit for sandwich, salad, and wrap production on the same line.
Can I rent a sandwich prep table?
Yes. The Restaurant Warehouse rents sandwich prep tables to pop-ups, catering operators, seasonal businesses, and any operator who wants equipment without a long-term commitment. Rental terms are flexible and include maintenance. See our equipment rental program for details.
Do I need a dedicated electrical circuit?
Sandwich prep tables typically run on a standard 115V/60Hz outlet with a NEMA 5-15P plug. A dedicated circuit is recommended so the compressor doesn't share power with a fryer, oven, or dishwasher. Confirm with your electrician before install.
Do these units come with pans and shelves?
Many models include pans, adjustable shelving, and casters. Always confirm what's included on the specific product page before ordering.
What's the difference between a sandwich prep table and a sandwich cooler?
Nothing. They're the same equipment. "Sandwich cooler," "sandwich prep cooler," "sandwich unit," "cold prep table," and "refrigerated prep table" all describe the same refrigerated worktable with a pan rail on top and cold storage below. Manufacturers and operators use the terms interchangeably.
Do you sell countertop sandwich prep tables?
Do not confuse a compact floor-standing sandwich prep table with a countertop ingredient cooler. The Atosa 27-inch MSF8301GR and MSF8305GR models discussed here are floor-standing refrigerated cabinets with casters. Check the intended installation and support requirements of any countertop model separately.
What's the difference between R290 and older refrigerants?
R290 is a high-purity propane hydrocarbon refrigerant with a low global warming potential. It is more energy-efficient than legacy R404A or R134a, pulls cabinet temperatures down faster after door openings, and stays future-proof as EPA rules continue to tighten on legacy HFCs. New units on R290 cost less to operate over time and are typically cheaper to service.
How often should I clean the condenser coils?
Every 30 to 60 days in a normal kitchen, more often in a high-grease environment. Clogged coils force the compressor to work harder and are the single most common cause of premature compressor failure on commercial sandwich prep tables. The clean takes about five minutes with a coil brush or shop vacuum and is not covered by any warranty.
Can I use a sandwich prep table for pizza?
Compare the model's usable cutting-board depth, ingredient-pan arrangement and your actual pizza workflow. A sandwich table may hold compatible cold toppings beside a separate preparation surface, but regular dough handling and pizza assembly often call for a dedicated pizza prep table. Confirm the equipment's installation and operating conditions.
Can a sandwich prep table go on a food truck?
A compact 27- or 36-inch unit may suit a food truck, but fit must be checked against the actual cabinet dimensions, lid and door movement, ventilation, equipment weight and operating conditions. Confirm power requirements and suitability for the installation with the manufacturer and your installer; truck length alone is not enough.