

Manitowoc Ice Machine Troubleshooting Your Go-To Guide
When your Manitowoc ice machine suddenly quits on you, those first five minutes are absolutely critical. Before you even think about grabbing a manual or calling for a service tech, a quick once-over can often pinpoint the issue and save you a seriously expensive service call. More often than not, it's something simple.
Performing Your First Five-Minute Diagnosis
Think of this as triage for your ice machine. This initial check is all about ruling out the most common—and most easily fixable—culprits first. It’s not just about saving money, either. In a busy kitchen, downtime is the enemy, and every hour without ice can throw your entire service into chaos. Let’s get you back up and running.
Start With the Obvious: Power and Placement
First thing's first: does the machine even have power? I know, it sounds almost too simple, but you’d be amazed how many times a unit gets unplugged by accident or a breaker gets tripped during a hectic shift. Make sure the power switch on the machine itself is flipped to "ON".
Next, give the machine some breathing room. Proper airflow is non-negotiable for any kind of refrigeration equipment. You need at least six inches of clearance on all sides, especially around the air intake and exhaust vents. If your machine is shoved up against a wall or has boxes stacked around it, it can't get rid of heat properly, and it'll shut itself down to prevent damage.
Pro Tip: Stop and listen to your machine for a second. Is it dead silent when it should be humming along? Or do you hear something weird—a buzz, a grind, or a repetitive clicking? Those sounds are clues. A humming compressor but a silent fan probably points to a bad fan motor, while that constant clicking often means a component is trying to start but keeps failing.
Check the Water Supply
No water, no ice. It's that simple. Your next step is to make sure water is actually getting to the machine. Check that the main water line connected to the unit is turned on and that the hose isn’t kinked or crushed behind the machine.
One of the most overlooked culprits is the external water filter. If you can't remember the last time it was changed, or if it's been more than six months, there's a good chance it's clogged with sediment. This will choke the water flow down to a trickle, leading to low ice production or those thin, hollow cubes nobody wants.
Speaking of common issues, it's worth knowing where Manitowoc units stand in the grand scheme of things. Field studies from 2018 showed that these machines account for about 8–10% of all refrigeration service calls in restaurants. That might sound like a lot, but here’s the kicker: over 60% of those service calls are for preventable problems like dirty condensers, scale buildup, or restricted airflow. You can read more about what causes Manitowoc service calls on therestaurantwarehouse.com.
Getting comfortable with this quick diagnostic routine can help you fix a huge number of common faults. It empowers you to handle basic Manitowoc ice machine troubleshooting on your own, keeping your kitchen running smoothly.
A lot of the time, the fix is simpler than you'd think. Before diving into the more technical error codes and internal components, it's always best to start with the basics. The table below outlines some of the most frequent symptoms I see in the field, their likely causes, and the very first thing you should do.
Quick-Check Troubleshooting for Common Manitowoc Issues
| Symptom | Most Likely Cause | First Action to Take |
|---|---|---|
| No ice production at all | Power or water supply issue | Confirm the unit is plugged in, the breaker is on, and the water valve is open. |
| Thin or hollow ice cubes | Restricted water flow or dirty components | Check for a kinked water line and inspect/change the external water filter. |
| Machine shuts off frequently | Overheating due to poor airflow | Ensure there's at least 6 inches of clearance around all vents. |
| Unusual noises (grinding/clicking) | Failing component (e.g., fan motor, relay) | Listen closely to identify the source of the noise. Power off if it's severe. |
| Low ice production | Clogged water filter or scale buildup | Change the water filter and schedule a descaling/cleaning cycle. |
Running through these quick checks first will solve the majority of day-to-day hiccups, saving you time and the cost of a service call for something you can easily fix yourself.
Translating Common Manitowoc Error Codes
That blinking light on your Manitowoc’s control panel isn’t just some random flicker—it’s the machine’s way of talking to you, telling you exactly where it hurts. Learning to speak its language is the secret to fast, effective troubleshooting. Every code points to a specific issue, which turns a frustrating guessing game into a clear plan of attack.
Think of these error codes as your diagnostic cheat sheet. Instead of just staring at a dead machine, you now have a direct clue about what went wrong. An E01 (Long Freeze Cycle) error, for instance, tells you the machine is struggling to get cold enough to make ice within its preset time limit. This immediately lets you rule out a bunch of electrical problems and points you straight toward potential refrigeration or water issues.
Likewise, an E02 (Long Harvest Cycle) alert means the ice slab isn’t dropping off the evaporator plate like it should. In my experience, this is a classic sign of either scale buildup creating a stubborn bond or a problem with the harvest assist mechanism itself. Understanding these little distinctions is the first step to getting your hands dirty and fixing the problem yourself.
Before you get bogged down in specific error codes, though, this visual guide is your best friend for running through the most fundamental checks.
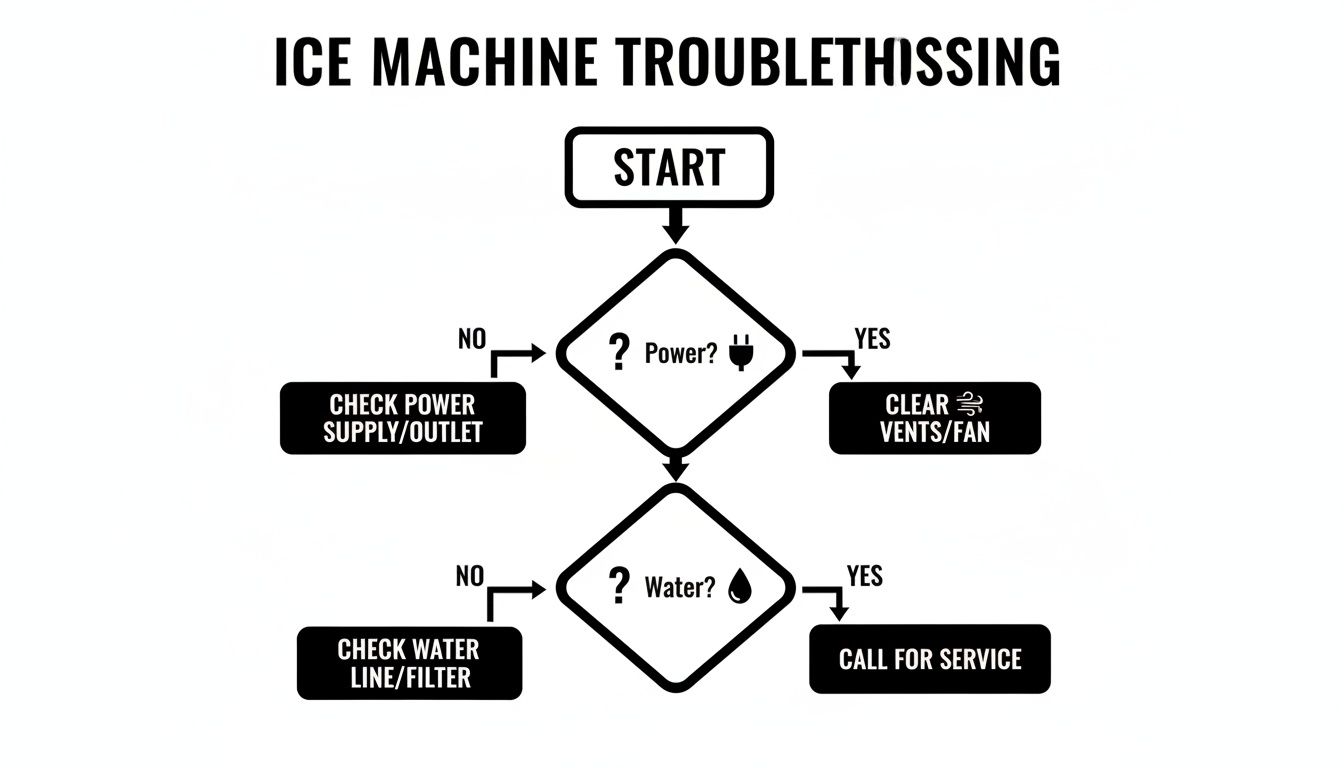
This flowchart really hammers home a key point: always start with the basics. Check your power, airflow, and water supply first. You’d be surprised how often a simple fix like this resolves what seems like a major machine shutdown.
Interpreting Heat and Power Related Errors
Some of the most common alerts you'll run into are tied to the machine's environment and power supply. Codes like E04 and E05 are frequent flyers in the hot, chaotic world of a commercial kitchen.
An E04/E05 (High Condenser Temperature) code is a straightforward warning that your machine is overheating. But before you start worrying about a major component failure, your first move should always be to check the simple stuff:
- Blocked Air Filter: Is it caked with dust, grease, or flour from the kitchen? A dirty filter is the number one culprit behind this error.
- Poor Ventilation: Is the machine shoved right up against a wall? Remember, it needs at least six inches of clearance on all sides to breathe properly.
- High Ambient Temperature: Is the unit sitting next to a hot oven or fryer? An environment consistently above 90°F will force the refrigeration system into overdrive, often triggering this shutdown.
Expert Insight: Take it from me—simply pulling the machine away from the wall and giving the condenser coil and filter a good cleaning resolves an E04 or E05 error more than 80% of the time. It’s a 15-minute job that can save you from a pricey service call.
These environmental factors are a bigger deal than many operators realize. Field data shows that the E03-E05 series of error codes are responsible for 35% of all shutdowns in commercial settings, stemming directly from power, pressure, or heat issues. A simple E03 (Input Power Loss) might just be a tripped breaker, but it can also signal voltage drops below the required 208V—a situation that affects roughly 10% of installations in older buildings.
Decoding Water Circuit and Sensor Faults
Other error codes will point you directly to the water system or the sensors that manage the whole ice-making process. These are often related to routine cleaning and maintenance—or a lack thereof.
For example, if your machine is flashing an E08 or E09 (Ice Thickness Probe Error), it means the sensor that measures the ice slab is either dirty or has finally given up the ghost. Mineral scale from hard water loves to build up on this probe, effectively insulating it and preventing it from accurately sensing when the ice is ready. This can lead to thin, garbage-quality ice or cause the machine to shut down entirely.
Luckily, the fix is usually straightforward:
- Kick off a cleaning cycle with the proper solution.
- Carefully remove and clean the probe with a soft cloth and an approved nickel-safe cleaner.
- Make sure you reinstall it correctly and securely.
A Water Inlet Fault (E13) is another one you'll see often. This code tells you that the water trough didn't fill up in the time it was supposed to. Don't immediately jump to the conclusion that the water inlet valve is bad. The problem is usually much simpler, like a clogged external water filter, a kinked supply line, or someone accidentally turning off the main water valve.
Always check these external factors before you start ordering replacement parts for the machine itself. By methodically working through these codes, you can diagnose and solve a huge range of issues on your own, keeping your kitchen cool and your ice bin full.
Fixing Water Supply and Drainage Glitches
It seems obvious, but since ice is just frozen water, a massive number of machine problems trace right back to the water circuit. When your ice production starts to slow down, gets inconsistent, or just stops completely, your very first suspect should always be the water supply or the drainage system.
The good news? These issues are often the simplest to diagnose, and you can usually fix them yourself without having to call a technician. We'll walk through the entire path water takes, from the inlet valve where it enters to the drain line where it exits. This is a critical first step in any Manitowoc ice machine troubleshooting process.
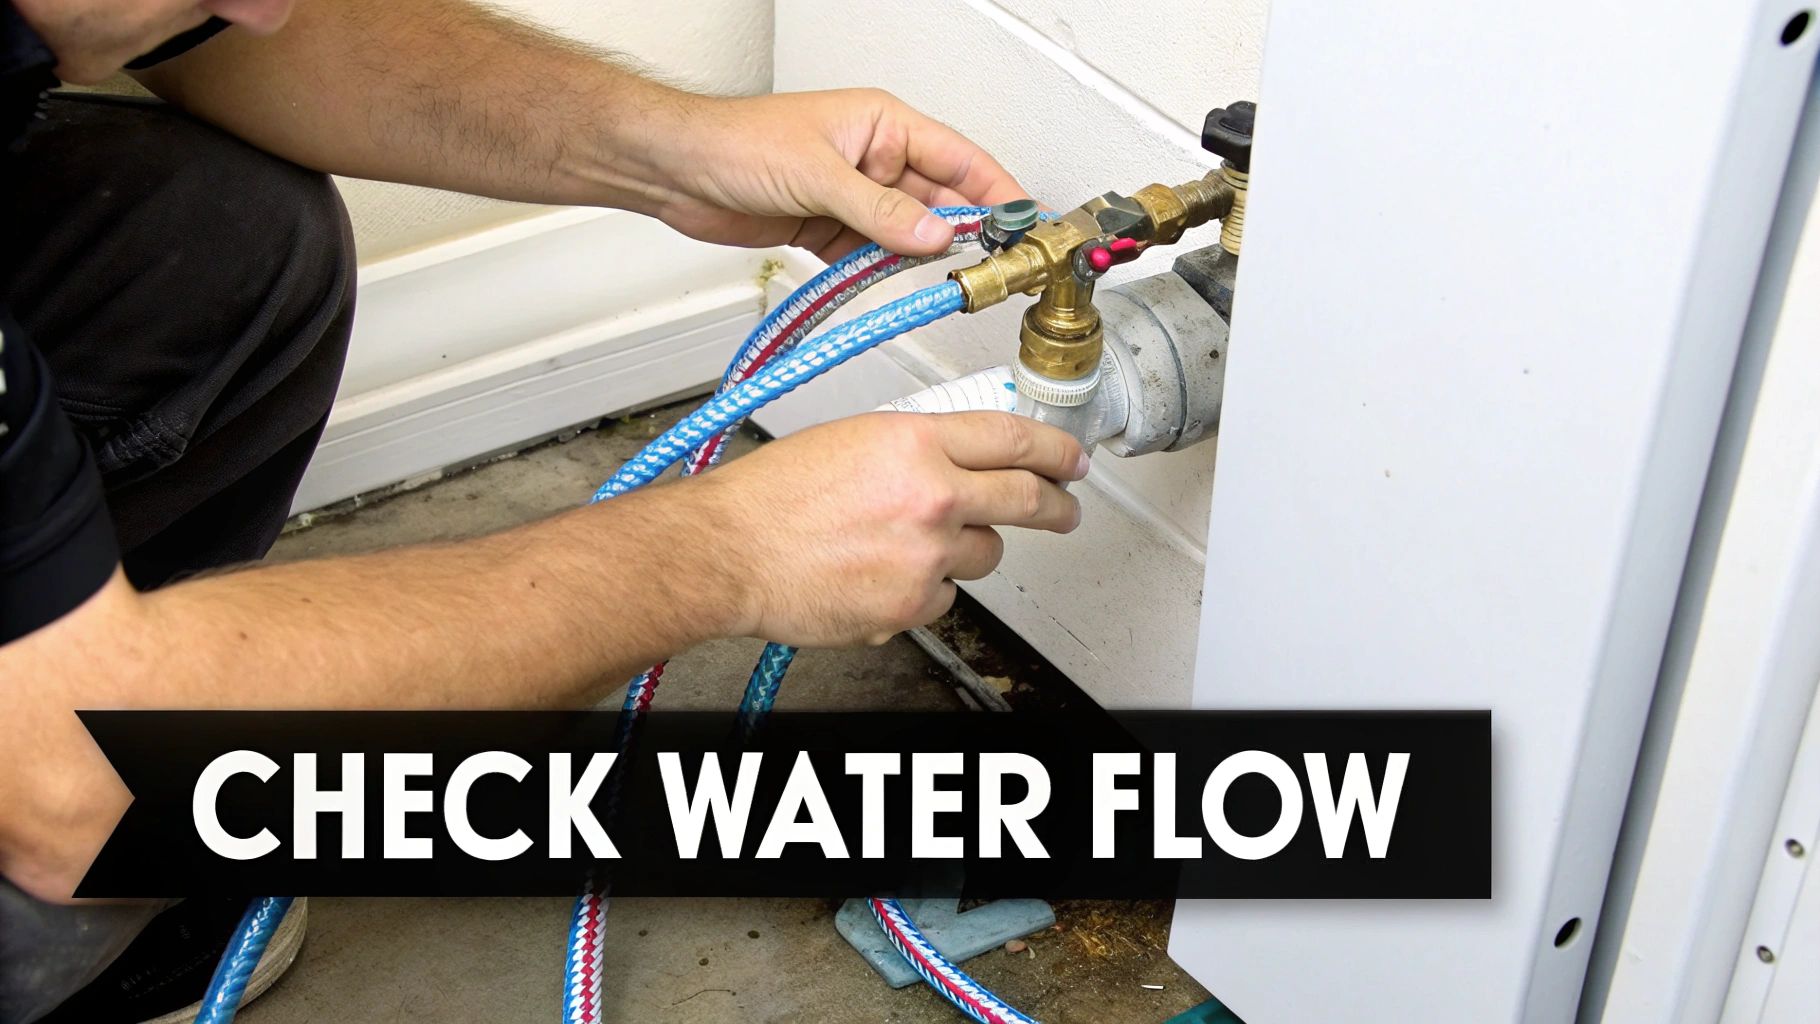
Verifying Your Water Pressure and Inlet Valve
Your Manitowoc machine is built to work within a specific water pressure range. It needs a bare minimum of 20 PSI (pounds per square inch) to operate correctly. If the pressure drops too low, the water trough simply won't fill up fast enough, which leads to thin ice sheets or can cause the machine to shut down entirely.
You can easily check this with a water pressure gauge that screws onto a nearby hose bibb. If the pressure is low, the problem is likely with your building’s plumbing, not the ice machine itself.
Assuming the pressure is good, the next place to look is the water inlet valve. This small but crucial part controls every drop of water entering the machine. Over time, it can get clogged with mineral deposits and sediment, a common headache if you're dealing with hard water.
To check it out, you'll need to shut off both the water and power to the unit for safety. Carefully disconnect the water line from the valve and inspect the small screen filter inside for any gunk. A quick, gentle cleaning can often get the water flowing properly again.
Troubleshooting the Dump Valve and Drain Line
Once water is in the machine, it also needs a clean way out. At the end of every harvest cycle, the dump valve opens up to drain the leftover water from the trough. This is important because that water is now heavy with minerals, and flushing it ensures the next batch of ice is made with fresh, clean water.
If this valve gets stuck open, water will just pour down the drain, and your machine will never manage to make a full batch of ice. If it's stuck closed, that old, mineral-heavy water gets recycled, leading to cloudy ice and a much faster buildup of scale inside the machine. A good trick is to just listen for the sound of water draining at the end of a cycle to confirm it’s working.
Proper drainage is just as important. The drain line has to have a steady downward slope—I'm talking about a quarter-inch drop for every foot of pipe.
A common installation mistake I see all the time is a drain line that dips or has a "trap" in it. This lets water just sit in the line, and eventually, it can back up into your ice bin. That creates a messy, unsanitary situation nobody wants to deal with. Always make sure it has a straight, clear path to the floor drain.
If you've checked everything and still suspect unseen contaminants are causing blockages, a professional mould assessment can help identify hidden issues affecting your water quality.
The Critical Role of Your Water Filter
Nearly every major water-related problem, from a clogged inlet valve to a scaled-up evaporator plate, can often be traced back to a single component: the water filter. This is your machine’s first and best line of defense against minerals, sediment, and chlorine.
Neglecting your filter is basically like rolling out the welcome mat for problems. A clogged filter will starve the machine of water, causing low production and putting a serious strain on its components. You can learn more about the importance of proper filtration right from the start by reading about connecting an icemaker to a water line.
Here’s a quick guide to keeping up with your filter:
- Check the date: Most filters need to be replaced every six months. Do yourself a favor and write the installation date directly on the new cartridge with a marker.
- Monitor ice quality: If your ice starts looking cloudy or you spot little flakes of scale, your filter is probably exhausted.
- Listen for strain: A machine that’s struggling to pull water through a clogged filter might sound different, with the pump working harder than usual.
Regularly replacing this one part can prevent a whole cascade of expensive issues down the road. It protects the evaporator, keeps probes clean, and makes sure your ice tastes fresh and clean.
Solving Refrigeration and Airflow Problems
So, your Manitowoc is humming away, you can hear it running, but the ice bin is stubbornly empty. If you've already ruled out water problems, you've likely waded into the territory of refrigeration and airflow. This is where the machine does its real magic—or, in this case, fails to. The refrigeration system is the heart of your ice maker, pulling heat out of the water so it can freeze.
Don't worry, you don't need an HVAC license to handle the most common checks. In fact, a huge majority of "it's running but not freezing" issues boil down to two simple, related culprits: a dirty condenser coil and restricted airflow. These are things you can absolutely diagnose and fix yourself, and it's a core part of effective Manitowoc ice machine troubleshooting.
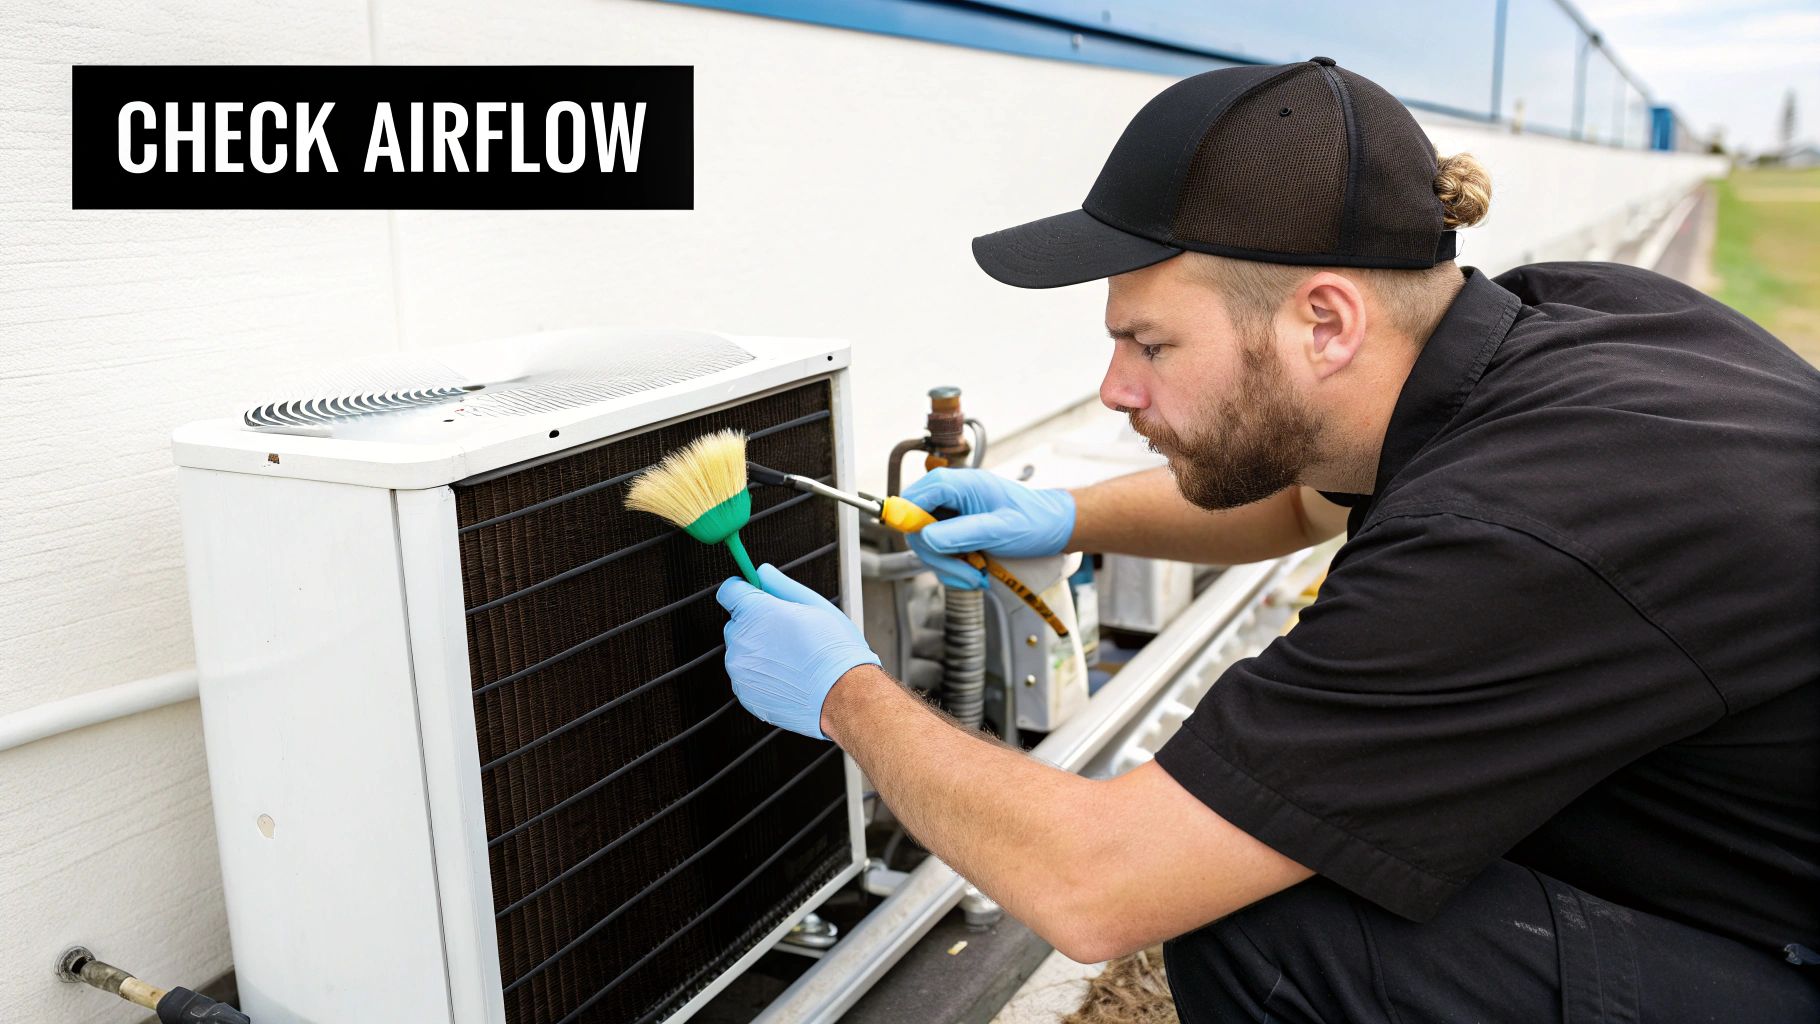
The Number One Task: Cleaning the Condenser
Think of the condenser coil as the radiator for your ice machine. Its entire job is to get rid of all the heat it has pulled from the water on the evaporator plate. When that coil gets caked with grease, dust, and flour from the kitchen air, it's like putting a winter coat on it. It can't breathe and it can't release heat.
The result? The machine runs and runs, trying desperately to get cold, but it never quite gets there. Eventually, its internal safety sensors detect the dangerously high temperatures and shut the whole system down to prevent catastrophic damage to the compressor.
Cleaning the condenser is thankfully a straightforward job:
- Power Down Completely: Safety first. Always turn off the power switch on the machine itself, then unplug it or flip the circuit breaker that controls it.
- Remove the Filter and Panels: Slide out the air filter and set it aside. You'll probably need a screwdriver to remove a front or side panel to get direct access to the condenser coil itself.
- Brush and Vacuum: With a soft-bristled brush, gently loosen the built-up crud from the delicate aluminum fins. Always brush in the same direction as the fins (usually up and down), not across them, or you'll bend them flat. Follow up with a shop vacuum to suck away all the loose debris.
- Consider a Coil Cleaner: If you're dealing with heavy grease, a can of foaming, no-rinse coil cleaner from any hardware store works wonders. Just spray it on and let the foam do the heavy lifting.
Field Tip: Make this part of your regular cleaning routine. In a busy kitchen, that condenser can get clogged in as little as one month. A quick clean every few weeks takes 10 minutes and will prevent 90% of heat-related shutdowns.
Why Airflow and Clearance are Non-Negotiable
Cleaning the condenser won't do a bit of good if fresh, cool air can't get to it in the first place. This is where proper placement and clearance become absolutely critical. I've been on countless service calls where the only "problem" was that the machine had been pushed flush against a wall, literally suffocating it.
Your Manitowoc needs a bare minimum of six inches of clearance on all sides that have vents, but honestly, more is always better. This space allows the fan to pull in cool ambient air and push out all the hot air it has collected. Without this buffer, the machine just recycles its own hot exhaust, getting warmer and warmer until it trips its safety limit and shuts down.
Here are some of the most common airflow mistakes I see:
- Storing boxes of supplies, cleaning chemicals, or other equipment right next to the machine.
- Tucking the unit into a tight, unventilated closet.
- Placing it directly beside heat-producing equipment like ovens, ranges, or fryers.
Spotting Signs of More Serious Trouble
While cleaning and clearance solve the vast majority of these issues, sometimes you are facing a genuine component failure. It’s important to know the signs so you can stop troubleshooting and call a professional before you cause more damage.
Listen for a loud buzzing or humming from the fan motor without the blades actually spinning. This is a classic sign that the motor has seized up and will need to be replaced. Another major red flag is any sign of an oily residue on or around the copper refrigeration lines or the compressor. This almost always indicates a refrigerant leak—a serious problem that only a certified technician is legally allowed to repair.
By methodically checking your condenser and airflow first, you can confidently rule out the simple stuff. This systematic approach saves you time and ensures that if you do end up making that service call, you can give the technician a clear and accurate picture of what's going on.
Building a Proactive Maintenance Routine
Let's be honest, the best way to troubleshoot your Manitowoc ice machine is to stop problems before they even begin. If you're just waiting for something to break, you're setting yourself up for expensive downtime, frantic emergency service calls, and lost revenue. A proactive maintenance routine is your best defense—it keeps the machine humming along efficiently, ensures your ice is always clean, and protects your investment for the long haul.
This isn't about adding a bunch of complicated chores to your team's already packed schedule. It's about building a few simple, consistent habits that pay for themselves over and over. You’d be surprised how many common error codes and performance headaches, from long freeze cycles to shoddy ice quality, link directly back to a lack of routine cleaning.
The Descaling and Sanitizing Process Explained
Over time, your ice machine faces two persistent enemies: mineral scale and biological slime. Scale is that hard, chalky deposit left behind by minerals in your water supply. Slime is a biofilm that grows from airborne yeast and bacteria. Both can absolutely wreck your machine's performance and land you in hot water with the health inspector.
Thankfully, Manitowoc makes this process incredibly straightforward with its automated cleaning cycle. A quick but important warning: never use unapproved chemicals like bleach or vinegar. They can permanently damage the machine's sensitive nickel-plated components and will definitely void your warranty.
Here's the typical process:
- First, flip the machine's power switch to the "OFF" position, then switch it over to "CLEAN".
- The machine will run a cycle and then prompt you when it's time to add chemicals.
- Carefully pour the correct amount of Manitowoc-approved descaler into the water trough. The machine will take over from there, circulating the solution to dissolve all that mineral buildup.
- Once the descaling cycle wraps up, you'll repeat the process with the Manitowoc-approved sanitizer to knock out any lingering biofilm.
The whole thing is mostly automated and is absolutely critical for keeping parts like the evaporator plate, water pump, and various sensors working correctly. For a more detailed walkthrough, check out our complete guide to the ice machine cleaning process and why it's so important.
Creating Your Maintenance Checklist
Consistency is everything. When you break down tasks by how often they need to be done, the routine becomes second nature and nothing falls through the cracks. A solid maintenance plan can dramatically extend the life of your Manitowoc. If you're looking to organize upkeep for all your equipment, using a comprehensive preventive maintenance schedule template is a great way to keep everything on track.
Here’s a simple, practical schedule you can put into action for your Manitowoc unit.
Key Takeaway: A disciplined maintenance schedule prevents over 70% of common service calls. The time you spend on cleaning is just a fraction of the time you'd lose during an unexpected shutdown.
Your Manitowoc Preventive Maintenance Schedule
A simple checklist is the best way to stay on top of the essential cleaning and inspection tasks your ice machine needs. Following this schedule will ensure you get the best performance and longest life out of your unit.
| Frequency | Task | Why It Matters |
|---|---|---|
| Daily | Wipe down all exterior surfaces and inspect the ice bin for any foreign objects. | Maintains a clean appearance and prevents external contaminants from getting into the ice supply. |
| Weekly | Remove and clean the air filter. For air-cooled models, this is the single most important weekly task. | A clogged filter restricts airflow, causing the machine to overheat, work harder, and eventually shut down. |
| Monthly | Inspect the water filter cartridge and check the installation date. | Ensures a steady flow of clean water, preventing scale buildup and protecting internal components from sediment. |
| Semi-Annually (Every 6 Months) | Perform a full descaling and sanitizing cycle using manufacturer-approved chemicals. | This is non-negotiable. It removes harmful mineral scale and biofilm, ensuring food safety and optimal performance. |
| Semi-Annually (Every 6 Months) | Remove and clean the water level probe, ice thickness probe, and water distribution tube. | Buildup on these sensors leads to inaccurate readings, causing thin ice, long cycles, and other common faults. |
| Annually | Schedule a professional service call with a certified technician. | A pro can check refrigerant levels, inspect electrical connections, and perform a deep clean on components you can't easily access. |
By sticking to this simple yet powerful routine, you'll turn your ice machine from a potential headache into a reliable asset. Regular maintenance doesn't just cut down on troubleshooting—it guarantees that every single cube of ice you serve is clean, clear, and safe, protecting both your customers and your reputation.
Common Questions About Your Manitowoc Ice Machine
Even with the best troubleshooting guide, you're going to have specific questions. I get them all the time from kitchen managers and restaurant owners who are just trying to get through a frantic dinner service. Let's cut through the noise and get you some direct, practical answers to the problems we see most often.
How Often Should a Professional Service My Manitowoc?
While your own daily and monthly cleaning is the backbone of a healthy machine, you absolutely need a professional service by a certified tech at least once or twice a year. An expert has the tools to check critical systems you can't, like refrigerant pressures and electrical component performance, and they can deep clean areas that are tough to reach.
Think of it as a vital health check-up. This becomes non-negotiable in kitchens with high levels of airborne grease, flour, or yeast. Scheduling this service is an investment that catches big problems before they can cause a complete—and expensive—shutdown right in the middle of a rush.
Why Are My Ice Cubes Thin or Incomplete?
Seeing thin, hollow, or "shelling" ice cubes almost always points back to a water issue. The most common culprit is a dirty or misaligned ice thickness probe. When mineral scale builds up on this sensor, it sends a false reading, telling the machine to start the harvest cycle long before the ice slab is fully formed.
Your first move should always be to run a cleaning cycle and manually scrub the probe. If that doesn't solve it, the next suspects are a clogged water filter or low water pressure. Your machine needs a steady 20 PSI to fill the trough correctly. These simple checks will fix the problem nine times out of ten.
Pro Tip: Don't let water issues slide. Consistently making thin ice puts extra wear and tear on the harvest components, which can easily lead to more serious repairs. Consider it a clear warning sign that needs your attention.
Can I Use Bleach or Vinegar to Clean My Machine?
The answer is a hard no. Using unapproved chemicals like bleach or vinegar is one of the absolute worst things you can do to your ice machine. These substances can cause permanent damage to sensitive parts, especially the nickel-plated evaporator plate, and will immediately void your warranty.
Always use Manitowoc-approved descaler and sanitizer. These solutions are specifically formulated to break down mineral deposits and biofilm safely and effectively. They protect your expensive equipment and, more importantly, ensure the ice you serve is safe for your customers. You can learn more about proper upkeep in our complete guide to commercial ice machine care.
What Should I Do If My Machine Is Leaking Water?
First thing's first: find the source of the leak immediately. Start with the basics. Check the water inlet hose at the back for a loose connection and make sure the drain line isn't clogged or kinked, which can cause water to back up and overflow.
If the leak seems to be coming from inside the unit, it could be a cracked water trough or a misaligned pump. If you can't spot the source of the leak easily, shut off the water supply to the machine and call for service. A small leak can quickly become a major water damage problem for your floors and subflooring.
When it's time to upgrade or find reliable replacement parts for your kitchen, The Restaurant Warehouse has you covered with a wide selection of top-tier commercial equipment. Equip your business for success by visiting https://therestaurantwarehouse.com.
About The Author

Sean Kearney
Sean Kearney is the Founder of The Restaurant Warehouse, with 15 years of experience in the restaurant equipment industry and more than 30 years in ecommerce, beginning with Amazon.com. As an equipment distributor and supplier, Sean helps restaurant owners make confident purchasing decisions through clear pricing, practical guidance, and a more transparent online buying experience.
Connect with Sean on LinkedIn, Instagram, YouTube, or Facebook.
Leave a comment