


Solving Manitowoc Ice Machine Problems A Practical Guide
When your Manitowoc ice machine starts giving you trouble, the root of the problem usually boils down to one of three things: the water supply, high temperatures, or a component that's given up the ghost. Most Manitowoc ice machine problems are pretty straightforward to diagnose once you know what to look for. By simply observing the symptoms—like no ice coming out at all or tiny, thin cubes—you can start connecting the dots to likely causes, such as a clogged filter or a dirty condenser.
Your First Step in Diagnosing Manitowoc Ice Machine Problems
Before you even think about grabbing a screwdriver or taking off a single panel, the best thing you can do is a quick but thoughtful diagnosis. Guessing is just a fast track to wasted time and buying parts you don't need. A structured approach helps you whittle down the dozens of potential issues to just one or two likely culprits. This first assessment is everything; it tells you whether you're looking at a simple fix you can knock out in minutes or a more complex repair.
This kind of logical troubleshooting applies to almost any complex system. For example, this practical guide to VoIP troubleshooting follows the same universal diagnostic steps that work just as well here. You identify the symptom, figure out the most probable cause, and then decide on the right course of action.
Quick Diagnostic Chart for Common Manitowoc Issues
To make this process even easier, I’ve put together a quick-glance table below. Think of it as your command center for troubleshooting. It links the most common symptoms you'll run into with their most likely causes and gives you a realistic idea of how tough the repair will be. The goal here is to give you the confidence to decide whether to tackle it yourself or call in a certified technician.
| Symptom | Most Likely Cause | Repair Difficulty |
|---|---|---|
| No Ice Production at All | No power, water supply issue, or safety limit switch tripped | Low to Medium |
| Making Small or Thin Ice | Clogged water filter, low water pressure, or dirty evaporator | Low |
| Machine Won't Turn On | Tripped breaker, faulty power switch, or control board issue | Low to High |
| Ice Won't Drop (Harvest) | Dirty or faulty ice thickness probe, stuck harvest valve | Medium |
| Leaking Water | Clogged drain line, cracked water trough, or loose fitting | Low to Medium |
Pro Tip: Always, and I mean always, start with the simplest solutions first. From my experience, more than 50% of service calls could be avoided by checking the absolute basics—power, water supply, and filter cleanliness—before assuming a major component has failed.
Using this chart helps you jump right past the "what's wrong?" stage and get straight to "here's how to fix it." For instance, if your machine is spitting out thin ice, your immediate focus should be on the water system—checking the filter and pressure—not worrying about the more complicated refrigeration circuit. This targeted approach saves a ton of time and builds your confidence in managing your own equipment. From here, you’ll be ready to dive deeper into specific issues.
How to Fix Water-Related Failures and Production Issues
When a Manitowoc ice machine starts acting up, the water system is almost always the first place I look. Whether you're getting thin ice, low production, or the machine just won't complete a cycle, water problems are the number one cause of headaches. Getting a handle on these issues doesn't just get your ice production back on track—it helps prevent bigger, more expensive breakdowns down the road.
The great thing is, you don't always need to call in a technician for every little hiccup. Many common water-related problems, like a clogged filter or a stuck valve, are things you can diagnose and fix yourself with a bit of know-how.
This flowchart is a great starting point. It helps you quickly figure out if you're dealing with a water flow issue or something electrical, which really helps narrow down your troubleshooting.
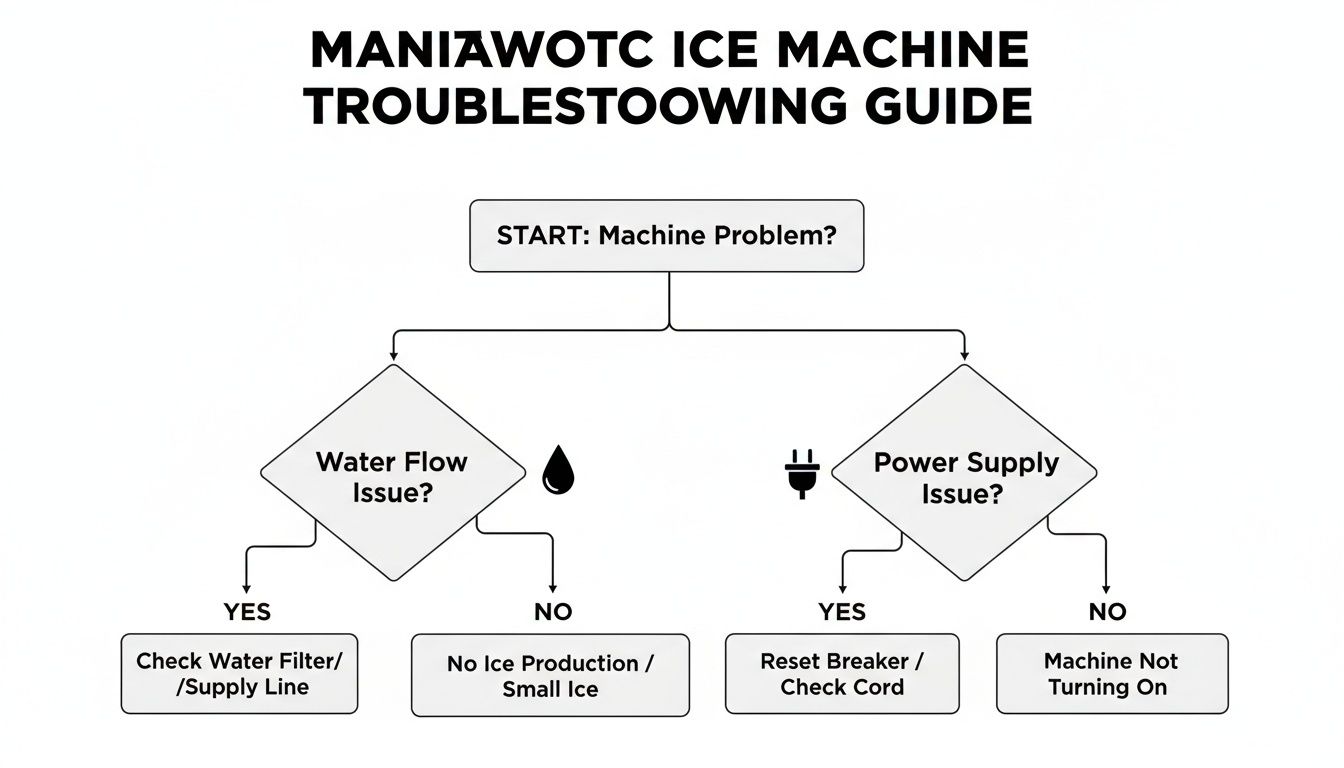
As you can see, separating water problems from power problems right from the start makes the whole process a lot less frustrating.
Checking the Water Filter and Supply Lines
Your first stop should always be the water filter. A clogged filter is one of the most common culprits behind poor ice quality. It chokes the water supply, starving the evaporator plate and resulting in those classic thin, hollow, or incomplete cubes.
Most manufacturers say to change the filter every six months, but if you're in an area with hard water, you might need to swap it out every three. If you can't remember the last time you changed it, that's probably your problem. A fresh cartridge can often bring your machine right back to life. While you're at it, make sure the main water valve is fully open and the supply line behind the unit isn't kinked or crushed.
For more details on setting up your water lines correctly from the start, check out our guide on connecting an icemaker to a water line.
The Critical Role of Water Pressure
Even with a brand-new filter, low water pressure can stop your machine dead in its tracks. Manitowoc units need a steady pressure, usually between 20 and 80 psi, to work correctly. If the pressure dips below 20 psi, the water inlet valve might not even open, which means no water and no ice.
You can easily check this with a water pressure gauge from any hardware store; just attach it to a nearby spigot or utility sink. If it's low, the issue might be with your building's plumbing, not the machine. On the other hand, pressure above 80 psi can damage sensitive internal parts, so you might need a pressure regulator if your building's pressure is too high.
Inspecting the Float Valve and Water Trough
Inside the machine, the water trough is where the magic starts. Its water level is managed by a float valve, which works a lot like the one in a toilet tank. If mineral buildup causes the valve to get stuck open, the trough will overfill, leading to leaks. If it gets stuck closed, it won't get enough water, and you'll end up with thin ice before the machine eventually shuts down on a safety error.
Take a look at the float valve and see if it moves freely. If it feels sticky, it's likely caked with scale. Sometimes a good cleaning with a descaling solution will fix it, but if it's really worn out, just replacing it is your best bet.
Dealing with Scale Buildup on the Evaporator
The evaporator is the heart of your ice machine—it's the grid that gets super cold and freezes the water into cubes. In places with hard water, a nasty layer of white, chalky mineral scale can form on its surface. This scale acts like an insulator, making it much harder for the machine to do its job.
When scale builds up, a few things happen, and none of them are good:
- Longer Freeze Cycles: The machine has to run much longer to make a single batch of ice, wasting energy and stressing the components.
- Poor Ice Quality: Cubes might come out cloudy, undersized, or even have a weird taste.
- Harvest Failures: The scale can make the ice stick to the evaporator, preventing it from dropping into the bin. This will almost always trigger a shutdown.
Managing High Temperatures and Condenser Faults
A hot kitchen is a tough environment for any piece of refrigeration, and that intense heat can be your ice machine's absolute worst enemy. When your trusty Manitowoc suddenly stops dropping ice or just shuts down completely with a high-temperature warning, the first two things you should immediately suspect are the air around it and its own internal cleanliness.
Temperature-related faults are some of the most common issues we see with Manitowoc machines, but the good news is they are often the easiest to prevent. Overheating doesn't just happen out of nowhere; it’s a clear sign that the machine is struggling to get rid of heat. This almost always points directly to a dirty or blocked condenser—the part that acts like the machine's radiator. When it's clogged, heat gets trapped, and the system shuts itself down to protect the most expensive component: the compressor.

Why a Clean Condenser Is Non-Negotiable
Think of your ice machine's condenser coils like the radiator in your car. If you cover it with a thick blanket of grease, dust, and all the other grime floating around a busy kitchen, air can't pass through. Without that essential airflow, the refrigerant can't release its heat, causing the pressure inside the system to skyrocket.
This pressure spike trips a high-pressure safety switch, shutting the machine down cold. On the display, you might see error codes like E04 (High Condenser Temperature) or E05 (High-Pressure Control Activated). These aren't just polite suggestions; they are urgent warnings that your machine is suffocating.
Regularly cleaning these coils isn't just a good idea—it's absolutely essential maintenance. The process is pretty similar for most commercial refrigeration, and our guide on cleaning an Atosa refrigerator condenser has some great tips that apply here, too.
Expert Takeaway: Ignoring a dirty condenser forces the compressor to work much harder, leading to higher energy bills and significantly shortening its lifespan. A simple 15-minute cleaning every month can prevent a multi-thousand-dollar repair bill.
Your Step-by-Step Guide to Cleaning the Condenser
Cleaning the condenser is a straightforward job you can definitely handle yourself without calling a technician. Just make sure to put safety first.
- Power Down Completely: Before you touch anything, turn the machine off and unplug it from the wall. No shortcuts here.
- Access the Condenser: Find the condenser coils. On most models, they're sitting behind a front or side panel that you can remove with a screwdriver.
- Brush Away Debris: Grab a soft-bristled brush and gently clean the fins. Always brush in the same direction the fins run (usually up and down) to avoid bending them. This will get rid of the top layer of dust.
- Vacuum the Rest: Use a shop vac with a brush attachment to pull out all the loosened gunk from deep between the fins.
- Use a Coil Cleaner (If Needed): For greasy kitchen environments, a can of foaming, non-acidic coil cleaner is your best friend. Spray it on, let it work its magic for a few minutes to break down the grease, and then wipe it away as directed.
- Reassemble and Test: Once the coils are clean and dry, put the panel back on, plug the machine in, and turn it on. You should notice it running quieter and feel cooler air coming from the exhaust.
The Impact of High Ambient Temperatures
Even if you have a spotless condenser, the room itself plays a huge role. Air-cooled ice machines need the surrounding air to cool down. If your kitchen consistently gets above 90°F (32°C), you can expect a serious drop in ice production—sometimes by as much as 40%.
Manitowoc's own service documentation confirms that most of their air-cooled models need to be in an environment below 110°F (43°C) for reliable operation. Anything hotter pushes the unit way past its design limits, leading to constant shutdowns and major stress on the compressor.
To fight this, make sure your machine has enough "breathing room."
- Mind the Gap: Leave at least six inches of clearance around all air vents. Shoving the machine up against a wall or another piece of equipment is a recipe for an overheating disaster.
- Location Matters: Try to avoid installing your ice machine right next to heat-generating equipment like ovens, fryers, or dishwashers.
- Ventilation is Key: A well-ventilated kitchen with a good HVAC system is a win for all your equipment. It helps move the hot air out, creating a better environment for everything to run efficiently.
Turning Blinking Lights Into a Clear Game Plan
Those blinking lights on your Manitowoc’s control board aren’t just there for decoration—they’re a language. Each flash and code is your machine’s way of telling you exactly what’s wrong, which means you can skip the frustrating guesswork. Learning to translate these signals is the key to going from confused to having a clear, actionable repair plan.
Instead of just looking up a code, it’s so much more effective to understand why the machine is flagging that specific issue. This helps you tell the difference between a minor annoyance, like a dirty sensor that needs a quick wipe-down, and a more serious alert that points to a failing harvest valve or a stressed-out compressor. This is the kind of knowledge that lets you tackle a ton of common Manitowoc ice machine problems yourself.
Decoding the Most Common Faults
Your machine is constantly running self-diagnostics. When any part of the ice-making process takes too long or a sensor reading is out of whack, it triggers a specific error code. Let’s break down what the most frequent alerts mean and what your immediate first step should be.
- Long Freeze Cycle (Safety Limit 1): If the machine takes too long to form a full sheet of ice, it will shut itself down to prevent damage. This is one of the most common issues I see, and it almost always points back to a problem with heat transfer or water flow.
- Long Harvest Cycle (Safety Limit 2): This error means the ice sheet isn't releasing from the evaporator grid in the time it's supposed to. The culprit is often something preventing a clean release, like scale buildup or a faulty part in the harvest system.
These two errors alone account for a huge percentage of service calls. The key is that they don't just tell you something is wrong; they point you in a very specific direction.
Your Actionable Error Code Guide
When your machine throws an error, don't panic. The machine's own diagnostic data is your best troubleshooting tool, guiding you toward a quick and accurate solution.
The table below breaks down the most common codes, what your machine is trying to tell you, and the first thing you should do to fix it.
Manitowoc Ice Machine Error Code Guide
| Error Code | Meaning | Recommended First Step |
|---|---|---|
| Safety Limit 1 | "I'm working too hard to freeze the water." | Check and clean the condenser coils. A dirty condenser is the #1 cause of this error because it traps heat. |
| Safety Limit 2 | "The ice is stuck and won't release." | Inspect the evaporator plate for mineral scale. Scale buildup makes ice stick, preventing it from dropping. |
| E01 (Ice Thickness Probe) | "I can't tell how thick the ice is." | Gently clean the ice thickness probe. Mineral deposits or slime can coat the sensor and give a false reading. |
| E02 (Water Level Sensor) | "I'm not sure how much water is in the trough." | Check the water trough for scale and make sure the float valve or sensor moves freely without sticking. |
| E04 (High Condenser Temp) | "The condenser is getting dangerously hot." | Turn off the machine and clean the condenser immediately. Also, ensure at least 6 inches of clearance for airflow. |
| E05 (High-Pressure Control) | "The pressure in my refrigeration system is too high!" | This is a direct result of the E04 condition. Cleaning the condenser is the primary fix. |
Once you understand what these codes are trying to tell you, you can address the root cause with confidence.
Real-World Insight: A restaurant owner I worked with kept getting a "Long Freeze Cycle" error. They assumed it was a major refrigeration issue, but a quick inspection revealed the ice machine was pushed against a wall right next to a hot fryer. After we cleaned the greasy condenser and moved the unit, the problem vanished completely.
For example, seeing an E01 code immediately tells you to focus on a small, specific sensor rather than worrying about the entire water or refrigeration system. This targeted approach is what separates a quick fix from a long, expensive headache.
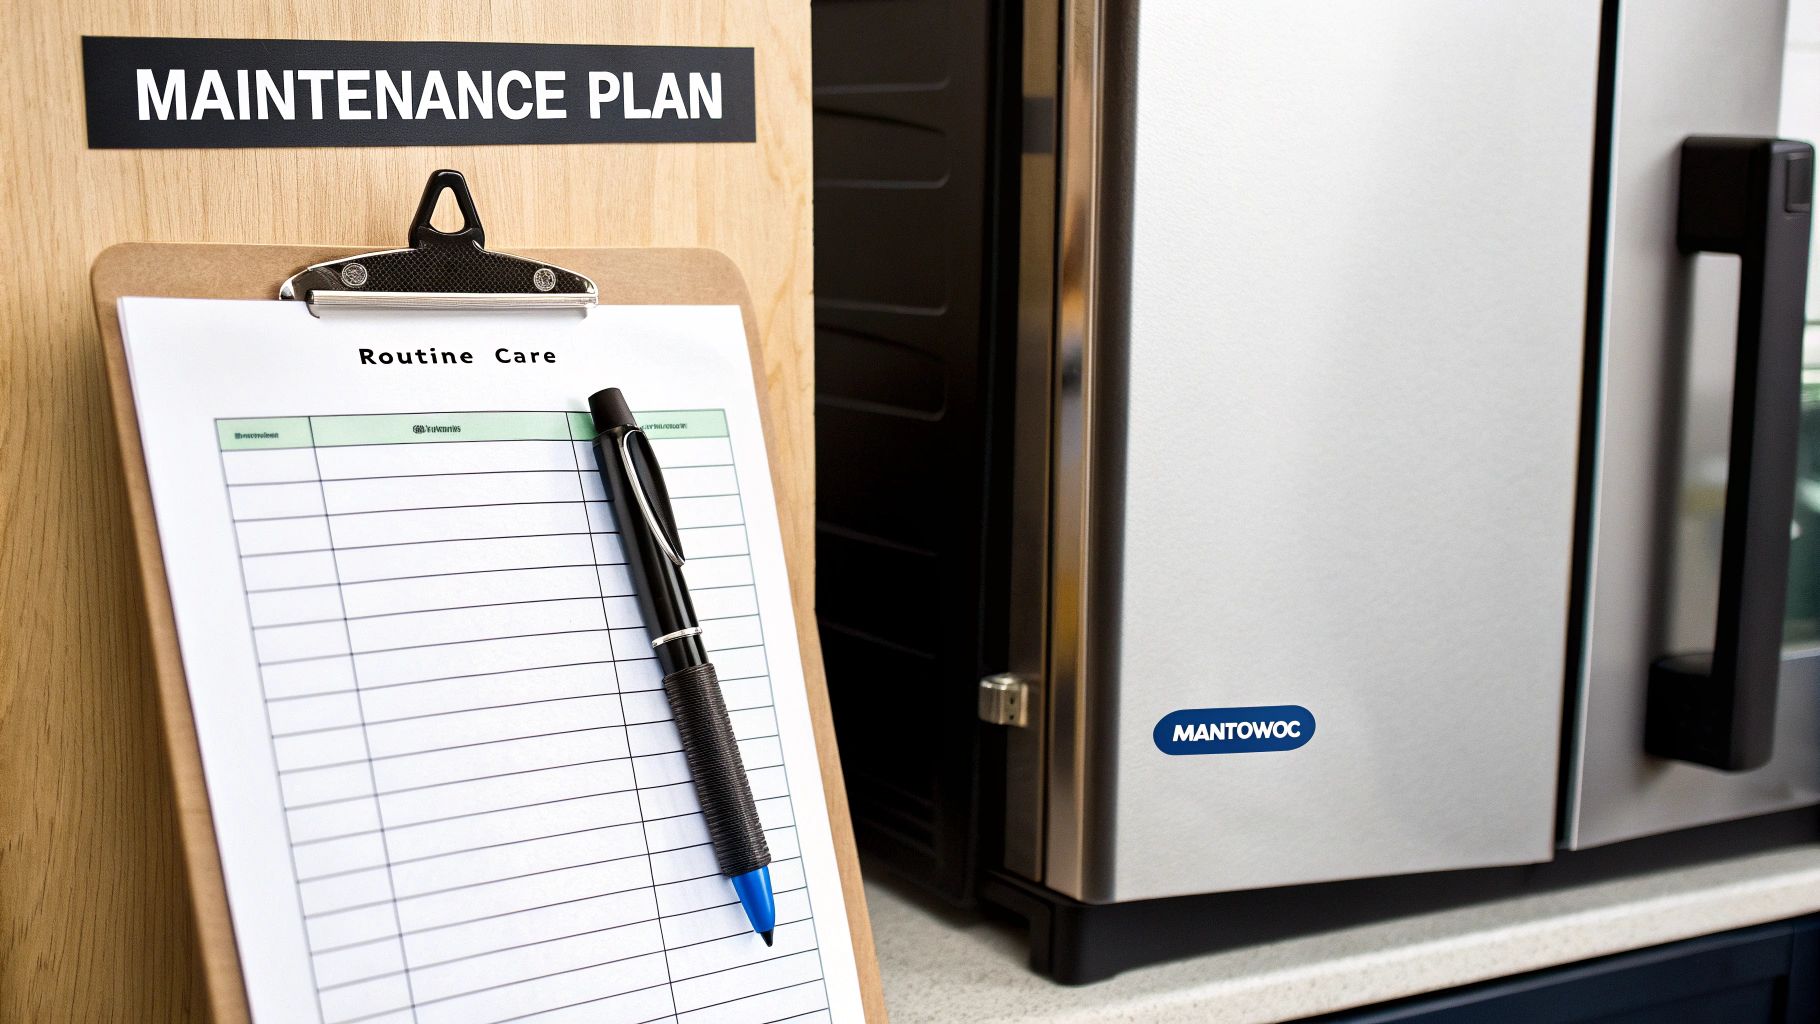
A Proactive Maintenance Schedule to Prevent Breakdowns
The easiest Manitowoc ice machine problem to fix is the one that never happens. While knowing how to troubleshoot is a fantastic skill, a consistent maintenance routine is your absolute best defense against surprise breakdowns that can shut down your drink service. Neglecting regular care is a lot like skipping oil changes in your car—sooner or later, you're going to face a much bigger, more expensive problem.
A proactive schedule doesn't have to be complicated or eat up your whole day. In fact, breaking it down into simple daily, weekly, and semi-annual tasks makes it incredibly manageable. This approach keeps your machine hygienic, efficient, and reliable, preventing the slow buildup of issues that lead to those dreaded emergency service calls.
Daily and Weekly Checks
These quick inspections only take a few minutes but are your first line of defense against the most common failures. The easiest way to stay on top of them is to integrate them right into your opening or closing procedures.
- Daily Visual Inspection: Just take a quick look at the machine. Listen for any weird noises, check for leaks on the floor, or see if any error codes are flashing on the display.
- Daily Ice Quality Check: Scoop some ice and really look at it. Is it clear and fully formed? Cloudy, thin, or hollow ice is often the very first sign of a developing water or temperature issue.
- Weekly Exterior Cleaning: Wipe down the outside panels and the area around the machine. Keeping the surrounding space clean helps prevent dust and debris from getting sucked into the condenser coil.
Semi-Annual Deep Cleaning
Twice a year, you need to set aside time for a more thorough cleaning and sanitation cycle. This is a non-negotiable task that's critical for both machine health and food safety. The process involves two very distinct steps: descaling and sanitizing.
Key Distinction: Descaling uses a nickel-safe acid solution to dissolve mineral buildup (scale) from the evaporator and water system. Sanitizing uses a different solution to kill bacteria, slime, and mold. You have to do both.
This deep cleaning is so important that we have a whole guide on it. For a complete walkthrough, you can learn more about proper ice machine cleaning procedures in our detailed post. Performing this maintenance isn't just about preventing breakdowns; it's also a key factor when you need to know how to protect your equipment warranty, as many manufacturers require proof of regular professional maintenance for coverage.
Your Essential Maintenance Checklist
Sticking to a schedule is so much easier when you have a clear plan. Use this checklist as your guide to keep your Manitowoc in peak condition.
| Task | Frequency | Why It Matters |
|---|---|---|
| Inspect Ice Quality | Daily | Early detection of water flow or refrigeration problems. |
| Wipe Down Exterior | Weekly | Prevents dirt buildup and maintains a professional look. |
| Clean Air Filter/Condenser | Monthly | Ensures proper airflow to prevent overheating—the #1 cause of compressor failure. |
| Change Water Filter Cartridge | Every 6 Months | Guarantees clean water, better-tasting ice, and prevents scale. |
| Descale & Sanitize System | Every 6 Months | Crucial for food safety and preventing harvest failures caused by scale. |
When to Call a Certified Technician
While you can handle most routine maintenance yourself, some jobs are best left to the pros. You should always call a qualified technician for any task involving the sealed refrigeration system, like handling refrigerant, or for complex electrical repairs involving the control board or compressor.
Attempting these repairs without proper training is not only dangerous but can also cause irreversible damage to your machine. A good rule of thumb is if the fix requires specialized diagnostic tools or involves messing with refrigerant lines, it's time to make the call.
Common Questions About Manitowou Ice Machines
When you rely on a workhorse like a Manitowoc ice machine every single day, you're bound to have a few questions. From routine upkeep to figuring out what a strange noise means, getting the right answers quickly can save a ton of time and keep small quirks from turning into big, expensive problems. Here are some of the most common questions we get from owners just like you.
How Often Should I Clean My Manitowoc Ice Machine?
As a solid rule of thumb, plan on giving your machine a deep cleaning every six months. That’s the standard advice that keeps most machines running hygienically and efficiently.
But honestly, your specific kitchen environment is the real deciding factor. If your machine is in a high-grease kitchen or a bakery with lots of yeast floating around, you’ll probably need to clean it every three to four months. On the other hand, an ice machine tucked away in a clean office breakroom might be perfectly fine with that six-month schedule.
Just remember that a proper cleaning is always a two-part process:
- Descaling: This is what gets rid of that hard, chalky mineral scale that builds up in the water system and on the evaporator.
- Sanitizing: This step is all about killing bacteria, slime, and mold to make sure your ice is safe and tastes fresh.
If you skip one of these, you’re only doing half the job.
Why Is My Machine Making Thin or Hollow Ice?
Seeing thin, hollow, or slushy ice is almost always a dead giveaway that you've got a water-related issue. This is one of the most common Manitowoc ice machine problems we hear about, but the good news is, it's usually pretty easy to track down.
The number one culprit is a dirty or scaled-up evaporator plate. When mineral deposits build up on that freezing grid, they act like an insulator, which stops the water from freezing evenly and completely. The result? Weak, incomplete ice cubes.
Other likely suspects include a clogged water filter that's choking off the water flow or even a faulty water inlet valve that isn’t letting enough water into the trough in the first place. Always start your troubleshooting with the water system before you even think about more complex refrigeration issues.
What Does It Mean When My Machine Is in Safe Mode?
Think of "Safe Mode" as your machine's self-preservation instinct kicking in. It's not an error code itself, but rather a warning that the machine has tried and failed to do its job multiple times in a row. It usually activates after the machine can’t complete a freeze or harvest cycle within its pre-set time limit for several consecutive attempts.
Important Takeaway: Safe Mode is basically your machine's last cry for help before it shuts down completely. It might keep running at a reduced capacity for a little while, but it’s telling you a fault needs to be fixed immediately.
Ignoring this warning will lead to a full shutdown. Check the control panel for the error codes that triggered it—it's usually a "Long Freeze Cycle" or "Long Harvest Cycle" error—and fix that root cause.
Can I Use Any Cleaner on My Machine?
Absolutely not. This is a critically important point that can save you from making a very expensive mistake. You must only use Manitowoc-approved, nickel-safe cleaners and descalers on your machine.
The evaporator plate—the heart of the whole ice-making process—has a special nickel plating. This plating is incredibly sensitive and can be permanently damaged or even stripped away by harsh, unapproved chemicals, especially certain acid-based cleaners.
Using the wrong stuff will corrode the plating, causing ice to stick, harvest cycles to fail, and eventually requiring a costly evaporator replacement. It will also almost certainly void your warranty. Protect your investment and always check the label to make sure you're using the correct, manufacturer-recommended products.
At The Restaurant Warehouse, we understand that keeping your equipment in peak condition is essential for your business. We offer a wide range of commercial kitchen equipment and the expertise to help you maintain it. Explore our selection and find everything you need to keep your kitchen running smoothly at https://therestaurantwarehouse.com.
About The Author

Sean Kearney
Sean Kearney is the Founder of The Restaurant Warehouse, with 15 years of experience in the restaurant equipment industry and more than 30 years in ecommerce, beginning with Amazon.com. As an equipment distributor and supplier, Sean helps restaurant owners make confident purchasing decisions through clear pricing, practical guidance, and a more transparent online buying experience.
Connect with Sean on LinkedIn, Instagram, YouTube, or Facebook.
Leave a comment