


How to Properly Clean a Water Cooler: A Guide
That water from your cooler might look crystal clear, but what's really going on inside? Over time, an invisible, slimy layer of bacteria called biofilm can coat the internal reservoir and water lines, affecting both the taste and safety of your water. A quick wipe-down of the outside just won't cut it. Properly cleaning a water cooler means you have to sanitize every part the water touches. This guide will walk you through the simple steps to flush the entire system, ensuring every glass you pour is as fresh, clean, and safe as it should be.
Is Your Office Water Cooler Secretly Gross?
That office water cooler isn't just a place to grab a drink—it’s a central hub where people chat, connect, and take a quick break. But if it's neglected, that source of refreshment can quickly turn into a breeding ground for bacteria and slimy biofilm. This isn't just an "ick" factor; a dirty cooler can pose real health risks that affect your entire team.
Try to think of the cleaning process less as a chore and more as a direct investment in your work environment. When you commit to cleaning your water cooler on a regular schedule, you're sending a clear message that you value the health and well-being of your employees. It's a simple act that contributes to a healthier, more productive office.
What's Really Lurking in a Dirty Cooler?
The main threat hiding inside an uncleaned water cooler is biofilm. This is a slimy, often invisible layer of bacteria that sticks to all the internal surfaces, from the main reservoir down to the spigots. Biofilm can house all sorts of microorganisms that mess with the water's taste, smell, and safety.
If left to its own devices, this buildup can cause a few problems:
- Unpleasant Taste and Odor: The first and most obvious sign something is wrong is when the water starts tasting musty, stale, or just "off."
- Potential Health Concerns: While it's not an everyday occurrence, certain bacteria can lead to gastrointestinal issues. Regular sanitization is a simple and crucial preventative step.
- Reduced Employee Trust: An obviously dirty or bad-tasting water source can make employees lose confidence in the workplace amenities and management’s commitment to their well-being.
A sparkling clean cooler does more than just provide safe hydration. It actively reduces the risk of waterborne contaminants, which can contribute to fewer sick days and a more resilient workforce. It's a foundational element of workplace hygiene.
Beyond Biofilm: Tackling Mineral Buildup
Biofilm isn't the only uninvited guest that can set up shop in your water cooler. Depending on your water source, you might also be dealing with mineral buildup, often called limescale. This is that chalky, white residue that can accumulate inside the reservoir and clog the lines and spigots. While it’s generally harmless to drink, a heavy buildup can slow down the water flow and make the machine work harder than it needs to. Regular cleaning removes mineral buildup, ensuring your cooler runs efficiently and continues to provide fresh, clean water without any blockages or bad smells.
The best way to handle limescale is to prevent it from getting out of hand in the first place. A good rule of thumb is to clean and disinfect your water cooler every time you change the bottle. For a simple and effective descaling solution, you can use a mixture of equal parts white vinegar and water. Let the solution sit in the reservoir for about 20-30 minutes to break down the deposits, then scrub gently and flush the system thoroughly with clean water a few times to remove any lingering vinegar taste. This simple routine keeps germs at bay and ensures your equipment stays in top working condition.
How a Clean Cooler Improves the Office Vibe
The "water cooler effect" is a real thing—those informal chats are where team bonds get stronger and new ideas spark. When that central gathering spot is clean and inviting, it encourages people to use it and interact. A dirty cooler does the opposite; it can become a place people avoid, subtly discouraging the very conversations that help build a great office culture.
The demand for clean drinking water is a massive global trend. Driven by health concerns and a greater focus on water quality, the global water cooler market was valued at USD 1.8 billion in 2023 and is expected to hit USD 3.1 billion by 2033. This growth highlights just how much people expect safe and accessible hydration options.
Beyond just the cooler, understanding broader strategies to improve water quality at home or in the office can further protect your health. For commercial spots like restaurants, pure water is non-negotiable, not just for drinking but for ice machines and beverage dispensers, too. Be sure to check out our guide on the importance of water filtration for restaurants to see how comprehensive systems can protect both customers and your equipment. Making regular maintenance a priority is a clear signal that your organization values health, safety, and a top-notch work environment.
Everything You Need for Cleaning Your Water Cooler
Walking into a cleaning job unprepared is the fastest way to get frustrated and cut corners. Before you even think about unplugging the cooler, take a few minutes to gather your supplies. Having everything you need within arm’s reach is the difference between a frustrating chore and a smooth, efficient task.
This isn’t just about grabbing a cloth and some soap. Each tool has a specific job, from protecting your hands to getting into those hidden nooks where bacteria love to grow. Think of it like prepping for a recipe—you wouldn’t start baking without having your flour and eggs ready to go.
Choosing the Right Cleaning Solutions
The most critical items in your kit are your cleaning and sanitizing solutions. It’s important to know the difference: cleaning gets rid of the visible dirt and grime, while sanitizing kills the invisible germs.
- Mild Dish Soap: A little bit mixed with warm water is perfect for the initial cleaning. This will cut through any light grime or dust on both the inside and outside surfaces. Just be sure to avoid heavily scented soaps, as that fragrance can linger.
- Food-Grade Sanitizer: This is the non-negotiable hero of your kit. You absolutely need a solution that’s safe for any surface that touches drinking water. A simple, time-tested option is a solution of unscented household bleach and water.
Pro Tip: The go-to ratio for a bleach sanitizing solution is one tablespoon of unscented bleach per one gallon of water. This concentration is strong enough to kill nasty bacteria like E. coli and Salmonella but rinses away cleanly, leaving no harmful residue or aftertaste once you’ve done a thorough flush.
Gathering Your Scrubbing Tools
With your solutions mixed, you'll need the right applicators to do the actual work. Your everyday kitchen sponge can harbor its own bacteria and tends to fall apart, so it’s much better to use dedicated tools for this job.
Here are a few specific items you'll want on hand:
- Long-Handled Bottle Brush: This is your best friend for scrubbing the inside of the water reservoir. Its length lets you easily reach the bottom and sides without straining, making sure you dislodge any early signs of biofilm buildup.
- Small Spigot or Detail Brush: The dispenser spigots are a prime spot for bacteria to set up shop. A small, flexible brush—like one you’d use for reusable straws—is perfect for getting deep inside the taps and clearing out any hidden gunk.
- Lint-Free Cloths or Paper Towels: When you’re wiping down surfaces after cleaning and during the final drying stage, lint-free is a must. It prevents tiny fibers from being left behind in the reservoir or on spigots, which could otherwise get into the water.
Specialty Tools for Disassembly
Depending on your water cooler model, you might need a couple of basic hand tools. A simple Phillips head screwdriver is often all it takes to remove the top cover or access the reservoir. It’s a great idea to have a small bowl nearby to hold any screws so nothing gets lost. But the most important tools are for your own safety. Since you’ll be working with a bleach solution, you absolutely need to protect yourself. Pull on a pair of disposable gloves to keep the sanitizer off your skin, and wear safety glasses to shield your eyes from accidental splashes. As health authorities like MyHealth Alberta advise, taking these simple precautions is non-negotiable for a safe and effective cleaning.
Don't Forget Your Safety Gear (PPE)
Finally, don’t forget about your own safety. While these cleaning agents are pretty mild, it’s always smart to protect yourself during any cleaning task.
| PPE Item | Why You Need It |
|---|---|
| Rubber Gloves | Protects your hands from the bleach solution and hot water. |
| Safety Goggles | A simple but effective way to prevent accidental splashes from getting in your eyes. |
| Optional Apron | Helps keep your clothes from getting stained by bleach or water splashes. |
With this complete toolkit ready, you're fully equipped to tackle the cleaning process safely and efficiently, ensuring every part of the water cooler is left pristine.
Before You Start: Know Your Cooler
Before you roll up your sleeves and start mixing sanitizing solutions, take a moment to identify what kind of water cooler you’re actually working with. Not all models are created equal, and knowing your machine’s specific features can save you a lot of time and effort. Some modern units come with built-in cleaning cycles that do most of the heavy lifting for you, while others might be best left to the pros. Figuring this out first ensures you’re not creating unnecessary work or missing a key maintenance step that could impact your water quality.
Self-Cleaning Models
Some of the more advanced water coolers on the market come with a game-changing feature: self-cleaning technology. These special dispensers are designed to sanitize themselves automatically, often using ozone to eliminate bacteria and biofilm without any manual scrubbing on your part. This can be a huge advantage in a busy restaurant or office, as it drastically cuts down on maintenance time and ensures the cooler stays hygienic with minimal effort. While you’ll still need to wipe down the exterior and drip tray, the internal sanitization is completely hands-off, giving you one less thing to worry about.
Hiring a Professional Cleaning Service
If you don’t have a self-cleaning model and the idea of adding another deep-cleaning task to your team’s plate seems daunting, hiring a professional service is a fantastic option. Many companies offer affordable and thorough full cleaning services for water dispensers, taking the responsibility completely off your hands. These pros typically service coolers every three to six months, ensuring your equipment meets health standards and consistently provides fresh, clean water. For a busy establishment, outsourcing this task guarantees it gets done right and on schedule, allowing your staff to focus on customers instead of equipment maintenance.
How to Deep Clean Your Water Cooler: A Step-by-Step Guide
Alright, you've got your supplies lined up. Now it's time to get your hands dirty with a proper deep clean. This isn't just a quick wipe-down; we're talking about a methodical process to make sure every part that touches your drinking water is scrubbed, sanitized, and safe.
The goal here is to get into all the hidden spots where biofilm and mineral deposits love to build up. Think of it like detailing a car instead of just running it through a car wash—one cleans the surface, while the other gets it back to pristine condition. We'll break down the whole procedure into clear, manageable steps that work for any standard bottled or plumbed-in water cooler.
First: How to Safely Unplug and Disassemble
First things first: safety. Before you do anything else, unplug the water cooler from the wall outlet. This is non-negotiable. You’re going to be working with water, and this simple step eliminates any risk of electrical shock. If you have a bottled model, go ahead and lift off the empty water bottle and set it aside for recycling.
Next, you need to get all the old water out. Grab a bucket, place it under the spigots, and press both the hot and cold taps until they stop flowing. Don't forget that both taps often have their own lines from the reservoir, so make sure you drain them completely.
With the unit unplugged and empty, you can start taking it apart. Most coolers are designed for easy cleaning and have a few key removable parts:
- The Drip Tray: This usually just slides or lifts right out. It's almost always the grimiest part, catching all the little spills and drips.
- The Baffle: Look inside the reservoir, and you'll probably see a plastic divider. That's the baffle, and it should lift straight out.
- The No-Spill Top or Bottle Receptacle: The part that punctures the bottle cap can typically be twisted and lifted off, giving you clear access to the water tank.
Toss all these removable pieces into a sink or a separate basin. This keeps your workspace tidy and makes sure nothing gets lost while you're cleaning.
A Special Note for Hot Water Dispensers
When your water cooler is equipped with a hot water dispenser, you need to take special care during the cleaning process. Using bleach is not advisable for these models because it can damage the internal heating components and leave behind a chemical residue. Instead, the safest and most effective method involves using boiling water to sanitize the system. Start by boiling a sufficient amount of water and carefully pour it into the cooler's tank, making sure to avoid any splashes. Let the hot water sit for about five minutes to loosen any buildup of biofilm and bacteria.
After the water has had time to sit, drain some of it through the spigots to ensure the entire system gets treated. For a more thorough clean, use a long-handled brush with soft bristles to scrub the inside of the tank and dislodge any stubborn residue. Once you're done scrubbing, drain all the water and rinse the tank completely before refilling it. This method is backed by health experts, with MyHealth Alberta advising, "Do NOT use bleach on water coolers that have a hot water dispenser." This chemical-free process is the best way to keep your hot water dispenser safe and sanitary.
How to Scrub the Internal Reservoir
The internal reservoir is the heart of the cooler and the most critical part to clean. Water sits in here for long periods, making it the perfect breeding ground for biofilm. Once you’ve removed the baffle, you’ll have a clear view of the tank.
Using your long-handled brush and a simple solution of mild dish soap and warm water, give the inside of the reservoir a thorough scrubbing. Get the bottom, all the sides, and really focus on any corners or seams where gunk likes to hide. You want to apply enough pressure to break up any of that slimy film or mineral scale that's built up.
Don’t just swirl the brush around; be methodical. Use firm up-and-down and side-to-side motions. The whole point is to physically remove that layer of biofilm, not just spread soapy water over it. A good scrub is what preps the surface so the sanitizer can actually do its job later.
This manual scrubbing is the most important step in the entire cleaning water cooler process. Sanitizers are far more effective on surfaces that are already physically clean.
This simple workflow—sanitize, scrub, and wipe—is the foundation of an effective cleaning routine.
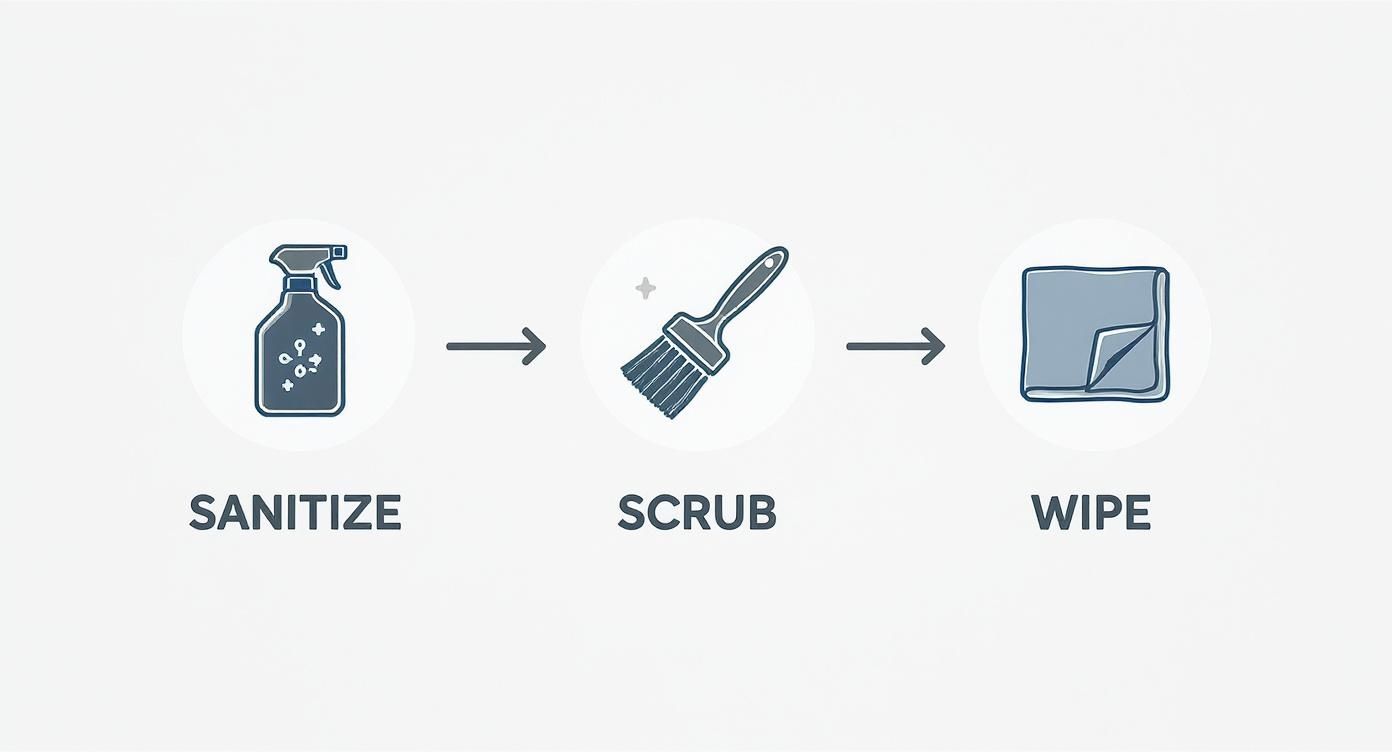
By following this order, you ensure that sanitizing agents can directly attack bacteria without being blocked by dirt, and the final wipe removes any remaining residue.
Wiping Down Spigots, Drip Trays, and Surfaces
While the reservoir is soaking, let's tackle the smaller components. The spigots, or taps, are high-contact areas that can hide a surprising amount of buildup. Grab your small detail brush, dip it in the soapy water, and get right inside each spigot opening. Scrub vigorously, working the brush in and out to clean the inner walls of the nozzle.
Now, turn your attention to those removable parts you set aside earlier—the drip tray, baffle, and bottle receptacle. Use a cloth or sponge with the same soapy water and clean them thoroughly. Make sure you get all the nooks and crannies, especially the underside of the drip tray grid, which is a spot people often miss. Once everything is scrubbed clean, rinse these parts well with clean water to get all the soap residue off.
Finally, give the entire exterior of the cooler a good wipe-down. Use a clean, damp cloth with a little soap to clean the sides, front, and top. Pay extra attention to the dispenser buttons or levers, since those are touched constantly. While you're at it, take a quick look at the back of the unit. Gently wiping the dust off the condenser coils helps the cooler run more efficiently.
The demand for clean, accessible drinking water is huge, and the global water cooler market proves it. North America is leading the charge, holding over 38.0% of the market share in 2024. This trend is driven by a strong focus on health and better filtration, which just underscores how important it is to maintain these units properly. You can dive deeper into the numbers in this in-depth analysis of the water cooler market.
Once every single component—inside and out—has been scrubbed clean and rinsed, you're ready for the most important phase: sanitization. This next step is what ensures your water isn't just clean, but truly safe to drink.
How to Sanitize and Reassemble Your Water Cooler
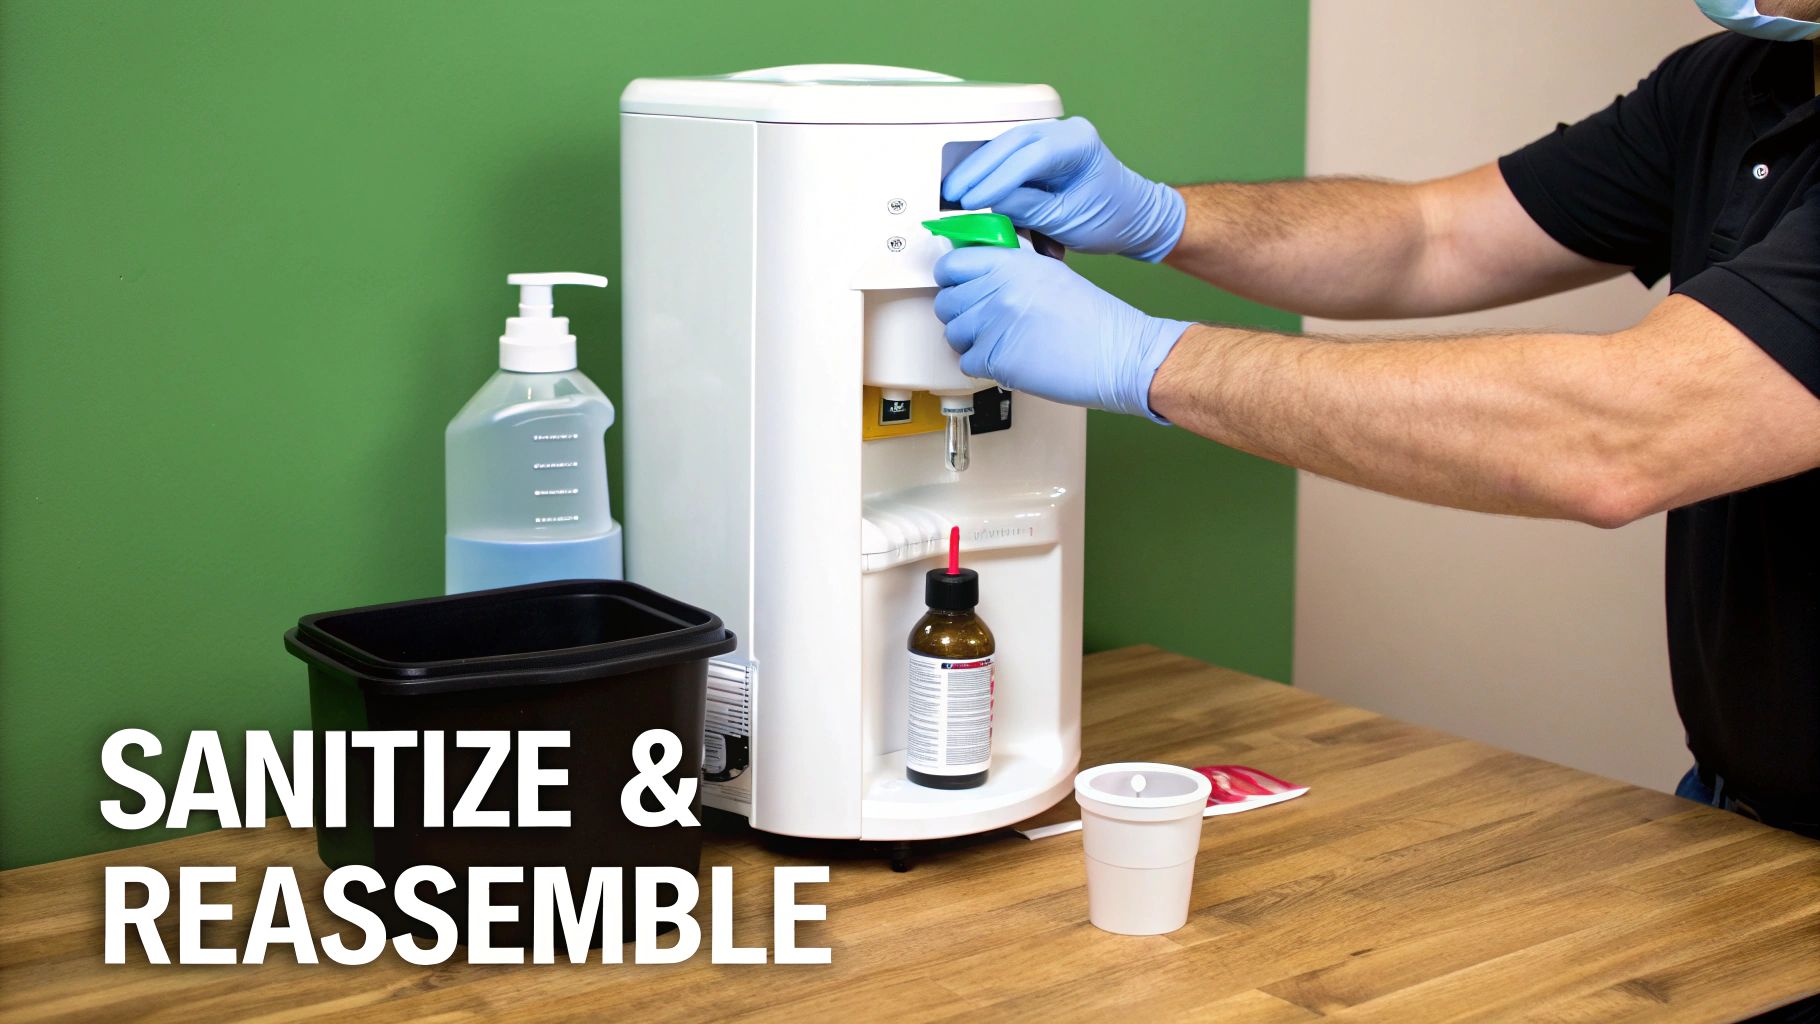
With every surface physically scrubbed clean, you've won half the battle. Now it's time for the most critical phase: sanitization. This is the step that eliminates the invisible bacteria and microorganisms that cleaning alone can't touch, ensuring the water is genuinely safe to drink.
We're moving beyond just wiping away grime and into true disinfection. This process isn't complicated, but it does demand precision. The right solution, the correct contact time, and a thorough rinse are the three pillars that support a safe, great-tasting water supply for your team.
Mixing and Applying Your Sanitizer
Your primary tool for disinfection will be a food-grade sanitizer. For most businesses, the most accessible and effective option is a simple, unscented household bleach solution. The concentration here is everything—too weak, and it won't kill harmful bacteria; too strong, and it can be a real pain to rinse away completely.
The gold standard for a safe and effective sanitizing solution is one tablespoon of unscented bleach per gallon of cool water. This ratio packs enough disinfecting power to neutralize common contaminants without being overly harsh.
Once you've mixed your solution, go ahead and pour it directly into the cooler's internal reservoir until it's about two-thirds full. Then, dip a clean, lint-free cloth in the solution and wipe down all those removable parts you cleaned earlier—the baffle, drip tray, and bottle receptacle. Make sure every surface gets a good coating.
Bleach Solution Ratios
The go-to ratio for a bleach sanitizing solution is one tablespoon of unscented bleach per one gallon of water. This concentration is strong enough to kill nasty bacteria like E. coli and Salmonella but rinses away cleanly, leaving no harmful residue or aftertaste once you’ve done a thorough flush. It's crucial to use plain, unscented bleach to avoid adding any chemical fragrances to your water system. After applying the solution to the reservoir and components, let it sit for at least five to ten minutes. This contact time is what allows the bleach to effectively neutralize any lingering germs before you drain and rinse the system.
Using a Vinegar Solution
If you prefer a more natural approach, white vinegar is a great food-safe alternative. It’s especially effective at breaking down hard water mineral deposits, a process known as descaling. For a vinegar solution, mix one part white vinegar with three parts water and fill the reservoir. Run some of the solution through the spigots to ensure the lines are filled, then let it sit for about 15 minutes. The main drawback is the strong taste and smell, so a meticulous rinse is non-negotiable. You will need to flush the entire system with several gallons of fresh water, tasting it after each flush until the vinegar flavor is completely gone.
Why You Need to Let It Sit (Contact Time)
Here’s a step that people often rush: letting the sanitizer actually do its job. Simply wiping it on and immediately rinsing it off isn't going to cut it. For the bleach solution to effectively kill bacteria, it needs to sit on the surfaces for a specific amount of time. We call this contact time.
Allow the sanitizing solution to sit undisturbed in the reservoir and on all components for at least five minutes. This dwell time is crucial for the chemical reaction that neutralizes harmful microorganisms. I recommend setting a timer to ensure you don’t cut this step short.
While the reservoir soaks, you can sanitize the spigots. Just place a bucket underneath and press each tap to run the sanitizing solution through all the internal lines. Let the solution sit in those lines for the same five-minute period. This ensures the entire path the water takes, from the tank to the tap, is fully disinfected.
A Quick Word on Safety: Contact Time Limits
It might seem like leaving the bleach solution in for an hour would make things extra sterile, but more is definitely not better here. Sticking to that five-to-ten-minute window is crucial. Bleach is a corrosive chemical, and prolonged exposure can start to degrade the plastic and rubber components inside your cooler, like seals and tubing. Over time, this can lead to brittleness and cracks, which means leaks and a shorter lifespan for your machine. Protecting your restaurant equipment is key to avoiding costly repairs, and that includes not overdoing it with harsh chemicals. After about ten minutes, you’re not getting any additional sanitizing benefits—you’re just increasing the risk of damage and a lingering chemical taste that’s tough to rinse away.
How to Properly Rinse and Flush the System
After that five-minute contact time is up, the rinsing stage is just as critical. Any leftover sanitizer can leave a nasty chemical aftertaste in the water, which completely defeats the purpose of providing fresh, clean hydration. Your goal here is to flush the system until there's no trace of bleach left.
Start by draining all the sanitizing solution from the reservoir through the spigots. Next, rinse all the small, removable parts under clean, running water until you can no longer smell any bleach.
Now, for the main unit:
- Fill the reservoir completely with fresh, clean water.
- Drain the entire reservoir through both the hot and cold spigots.
- Repeat this process at least three more times.
This repeated flushing is non-negotiable. It's the only way to be certain you've removed all traces of the cleaning agent. After the final flush, use a clean, dry, lint-free cloth to wipe the inside of the reservoir dry.
Just as a pristine water cooler is essential for office hygiene, other equipment requires similar attention. For instance, the principles of sanitizing and flushing apply directly to other foodservice equipment. If your establishment uses an ice machine, you can find detailed instructions in our comprehensive guide on proper ice machine cleaning and maintenance.
How to Know When It's Fully Rinsed
Your best tool for this final check is your own nose. After you’ve completed the multiple flushing cycles, lean in and take a sniff of the reservoir and the spigots. If you can detect even the faintest scent of bleach, it’s not ready. That lingering smell is a clear sign that you need to run at least one more full rinse cycle with clean water. Your goal is to flush the system until there's absolutely no trace of the sanitizer left, ensuring the water tastes fresh and clean, not like chemicals. This isn't a step where "good enough" cuts it; the water should smell like nothing but water before you move on to reassembly.
Safely Disposing of Cleaning Solutions
Once you've drained the sanitizing solution from the cooler, you need to get rid of it responsibly. The safest and most common method is to pour the used solution directly down a toilet. A toilet sends the diluted bleach solution straight to a municipal water treatment facility, which is equipped to handle and neutralize these types of chemicals. Never pour it down a storm drain, as that can harm local wildlife and ecosystems. While this method is widely accepted, it's always a good practice to be aware of your local regulations for disposing of cleaning solutions, as rules can vary by area.
Putting It Back Together and Final Checks
With everything sanitized, rinsed, and dried, it's time to put your water cooler back together. This part is pretty straightforward—it's essentially the reverse of how you took it apart.
Start by placing the baffle back into the reservoir. Next, re-attach the no-spill top or bottle receptacle, making sure it twists and locks securely into place. Finally, slide the clean drip tray back into its slot.
Place a new, full water bottle onto the cooler. You should hear that classic "glug-glug" sound as water fills the reservoir. Check carefully for any drips or leaks around the bottle's connection point. Once the reservoir is full, plug the unit back into the wall outlet.
As a final test, dispense a small amount of water from each spigot. Check for any unusual taste or smell. If you rinsed thoroughly, the water should be fresh and clean. This reassembly marks the final step in a complete cleaning water cooler routine.
It’s worth noting that trends in the water cooler market are shifting. Market research shows environmental concerns are pushing consumers toward bottle-less units, a segment seeing major growth. However, the traditional bottled water cooler market remains significant, projected at over USD 252 million in 2025 with steady growth. You can explore more data on these market trends in this bottled water cooler industry report.
Creating a Simple Water Cooler Cleaning Schedule
A deep clean is a great reset, but the real secret to consistently safe, fresh-tasting water is all about routine. If you don't have a regular maintenance schedule, even the cleanest water cooler will eventually build up biofilm and other gunk. The most effective move you can make is shifting from a reactive, "clean it when it looks gross" mindset to a proactive, scheduled approach. It's the best way to protect your team's health.
Building this routine doesn't have to be some complicated chore. The trick is to break down the tasks by how often they need to be done. This makes the whole process feel manageable and ensures nothing important gets skipped. You’re basically turning one big, daunting job into a few simple, quick habits.
Your Daily and Weekly Checklist
The foundation of any solid maintenance plan is giving a little daily attention to the high-touch areas. These quick checks take less than a minute but make a huge difference in overall hygiene and stop grime from building up in the first place.
- Daily Wipe-Down (1-2 Minutes): At the end of the day, grab a food-safe disinfectant wipe or spray and give the spigots, dispenser levers, and buttons a quick clean. This gets rid of fingerprints and neutralizes germs from all the hands touching it throughout the day.
- Weekly Check-Up (5 Minutes): Once a week, pull out the drip tray and empty it. Give it a good wash with warm, soapy water, rinse it well, and let it dry completely before you pop it back in. This simple step prevents that standing water from becoming a breeding ground for mold.
Planning Your Quarterly Deep Clean
While your daily and weekly tasks handle the surface-level stuff, a full-on deep clean is what tackles the internal sanitation. This is the more involved process we talked about—the full disassembly, scrubbing, and sanitizing—and it needs to happen on a regular basis.
We recommend a full sanitization at least once every three to six months. If your cooler is in a high-traffic spot like a busy office breakroom or a restaurant waiting area, you'll want to stick closer to that three-month schedule.
Beyond the deep clean, a little long-term care will keep your cooler running safely and efficiently for years. Building these checks into your schedule helps you catch problems before they turn into breakdowns.
- Power Cord Inspection: Each quarter, just take a second to look over the power cord for any signs of fraying or damage.
- Filter Replacement (For Bottle-less Models): If you have a plumbed-in unit, changing the filter is non-negotiable. Check the manufacturer's guidelines and set a reminder on your calendar—most filters need to be swapped out every six months.
Making water cooler cleaning a regular routine is a key part of comprehensive facility management best practices. This same proactive mindset applies to all the equipment in a commercial space. For example, these principles of scheduled cleaning are just as vital for maintaining a sanitary kitchen, which we cover in our guide on cleaning restaurant equipment properly.
Here’s a simple template you can adapt for your team:
| Task Frequency | Action Items |
|---|---|
| Daily | Wipe down spigots and dispenser buttons with a food-safe disinfectant. |
| Weekly | Remove, wash, and dry the drip tray. Wipe down the cooler's exterior surfaces. |
| Quarterly | Perform a full deep clean and sanitization of the reservoir, baffle, and internal lines. Inspect power cord. |
| Bi-Annually | For bottle-less units, replace the water filter according to manufacturer instructions. |
By putting a simple schedule like this in place, cleaning your water cooler stops being a forgotten task and becomes a predictable part of your facility’s operational rhythm.
Ongoing Maintenance for a Healthy Cooler
Once you’ve completed a deep clean, the goal is to keep your water cooler in top shape with a few simple, ongoing habits. Think of these as the small check-ins that prevent bigger problems down the road. Integrating these quick tasks into your regular routine ensures the cooler runs efficiently and the water stays pure between those quarterly sanitizations. It’s the same principle you’d apply to any piece of essential kitchen equipment—consistent care is what guarantees longevity and reliable performance day in and day out.
Clean the Condenser Coils Monthly
Just like the commercial refrigerators and freezers in your kitchen, your water cooler has condenser coils that need to breathe. These are typically the wire grids on the back of the unit. Over time, they collect dust, lint, and grease from the air, which forces the compressor to work harder to cool the water. Once a month, take 60 seconds to unplug the cooler and gently vacuum the coils with a brush attachment or use a soft brush to wipe the dust away. This simple step improves energy efficiency and helps prevent the unit from overheating, extending its lifespan.
Prep New Water Bottles Before Use
This is a small habit that makes a big difference. Before you place a new water bottle on the cooler, take a moment to clean it. Water bottles can pick up dust and germs while sitting in storage or during transport. Use a clean, damp cloth to wipe down the outside of the bottle, paying special attention to the neck and cap area that will be in direct contact with the cooler’s reservoir. This prevents any external contaminants from getting into your freshly sanitized system, ensuring the water inside stays as clean as possible from the start.
Check for Dishwasher-Safe Parts
To make your cleaning routine a bit more efficient, find out if any of your cooler’s removable components are dishwasher-safe. Parts like the drip tray, baffle, and bottle receptacle can often be placed in the top rack of a dishwasher for a thorough, high-temperature cleaning. Always check the manufacturer’s manual first to confirm. If it’s approved, this can save you valuable time and effort during your quarterly deep clean. If the manual doesn’t say, it’s always safer to stick with handwashing to avoid any risk of warping or damaging the plastic parts.
A Note on the Compressor
Here’s a quick but important tip on what not to do. You might be tempted to perform maintenance on the cooler’s motor or compressor, but this component is a completely sealed unit. It is permanently lubricated at the factory and does not require any oiling or additional maintenance from you. In fact, attempting to lubricate it can cause serious damage to the cooling system. The best thing you can do for the compressor is to keep the condenser coils clean, as mentioned earlier, to ensure it can run efficiently without unnecessary strain.
Got Questions About Cleaning Your Water Cooler? We’ve Got Answers.
Even with the best instructions, a few questions always pop up when it's time to clean. You might wonder if you’re doing it right, or if that cleaning "hack" you saw online is actually a good idea. Let's clear up some of the most common questions we hear so you can tackle the job with total confidence.
How Often Should You Clean the Office Water Cooler?
For a typical office, you should plan on a full, deep clean and sanitization every three to six months. Where you fall in that range really depends on how much action the cooler sees. A unit in a busy lobby or breakroom will need attention closer to the three-month mark, while one tucked away in a small office might be fine for six.
But don’t forget the daily stuff. The spigots, buttons, and drip tray are high-touch surfaces that need a quick wipe-down every day with a food-safe disinfectant. This simple habit is huge for preventing grime and biofilm from getting a foothold, and it makes your big quarterly clean way less of a chore.
The "Every Bottle" Recommendation
Some health authorities, like Alberta Health Services, suggest the gold standard is to clean and disinfect your water cooler every single time you change the bottle. While that might feel like overkill for a busy workplace, the logic is sound. Each time you swap a bottle, you're creating an opportunity for airborne dust and germs to settle into the reservoir. A quick sanitization at this stage stops any potential contamination right in its tracks, ensuring every drop of water from the new bottle stays pure. Think of it as the ultimate preventative measure for maintaining the highest level of hygiene and safety.
Regional Cleaning Standards
While there isn't a single federal law dictating water cooler cleaning frequency, the general consensus among health experts is clear. For most commercial settings, a full sanitization every three to six months is the recommended baseline. If your cooler is in a high-traffic area like a bustling restaurant kitchen or a popular office breakroom, you should definitely aim for that three-month mark. This proactive approach is more than just good practice; it reflects a growing global demand for safe, high-quality drinking water, a trend that has seen the water cooler market expand significantly as businesses prioritize health and wellness.
Can You Use Vinegar to Clean a Water Cooler?
Vinegar is a fantastic cleaner for a lot of household jobs, like descaling a coffee pot, but it is not an EPA-registered disinfectant. That’s a critical distinction. It means vinegar just doesn't have the muscle to kill the full spectrum of germs, bacteria, and other pathogens that love to set up camp inside a water cooler.
In a commercial space where you're responsible for employee health, you absolutely have to use a proper sanitizing agent.
For a true, reliable disinfection, stick with a simple solution of one tablespoon of unscented household bleach per gallon of water, or grab a specifically formulated food-grade sanitizer. These are proven to kill the nasty stuff and are designed to be rinsed away completely, leaving behind zero unsafe residue or funky aftertaste.
Signs Your Water Cooler Needs a Clean, ASAP
Ideally, your regular cleaning schedule will keep problems from ever showing up. But if you see, smell, or taste any of the following, drop what you’re doing and give that cooler a deep clean immediately—no matter when you last did it.
- A Musty or "Off" Taste: This is the biggest red flag. If the water tastes like anything other than pure, clean water, it’s a sure sign that biofilm or mold has taken hold in the lines or reservoir.
- Visible Slime or Mold: Grab a flashlight and take a good look inside the reservoir. See any slimy film on the surfaces (that's biofilm) or any black or green spots? That’s a serious contamination that needs to be sanitized right away.
- Slow Dispensing Speed: Is the water trickling out of the spigots much slower than usual? This often points to a clog in the lines caused by a buildup of mineral scale or biofilm.
Don't wait for these warning signs to appear. Proactive cleaning of your water cooler is always the smartest, safest, and most effective approach.
At The Restaurant Warehouse, we understand that keeping your operation clean and efficient is the key to success. From water coolers to commercial-grade cooking equipment, we provide the tools you need to keep your business running like a well-oiled machine. Equip your kitchen with reliable, top-tier supplies by visiting us at https://therestaurantwarehouse.com.
Key Takeaways
- Scrub the Inside, Not Just the Outside: The main cause of bad-tasting or unsafe water is biofilm, an invisible layer of bacteria that grows inside the reservoir and water lines. A simple wipe-down isn't enough; you must physically scrub all internal surfaces to remove this buildup.
- Sanitize with Patience for a True Clean: After scrubbing, use a solution of one tablespoon of unscented bleach per gallon of water to kill any remaining germs. Let this solution sit for at least five minutes—this contact time is crucial for the sanitizer to work before you rinse the system thoroughly.
- Establish a Simple Cleaning Rhythm: Proactive maintenance is key. Create a schedule you can stick to: wipe down spigots daily, wash the drip tray weekly, and perform a full deep clean and sanitization every three to six months to ensure your water is always fresh and safe.
Related Articles
About The Author

Sean Kearney
Sean Kearney is the Founder of The Restaurant Warehouse, with 15 years of experience in the restaurant equipment industry and more than 30 years in ecommerce, beginning with Amazon.com. As an equipment distributor and supplier, Sean helps restaurant owners make confident purchasing decisions through clear pricing, practical guidance, and a more transparent online buying experience.
Connect with Sean on LinkedIn, Instagram, YouTube, or Facebook.