

Your Guide to Atosa Refrigerator Parts
When you’re in the middle of a busy service, the last thing you want is for your Atosa refrigerator to start acting up. Finding the right Atosa refrigerator parts quickly is key to keeping your unit running efficiently and protecting your valuable inventory. This guide is your go-to resource, breaking down everything from compressors and fan motors to door gaskets and digital controllers, so you can diagnose issues and get back to business.
Your Go-To Atosa Refrigerator Parts Reference
Think of this guide as your complete roadmap for Atosa refrigerator components. It’s laid out to help you pinpoint problems fast, find the exact part number you need, and feel confident in your repair choices. Before we dive into the specific components, let's talk about why sticking with genuine Atosa parts is so important for keeping your unit at peak performance, staying energy-efficient, and making sure your warranty remains intact.
We'll start by looking at some common parts and the tell-tale signs that they might be failing. This quick-reference table is designed to help you make a fast initial diagnosis based on what you're seeing (or hearing) from your unit.
Common Atosa Parts and Failure Symptoms
This table is a great starting point for troubleshooting. It connects the dots between a specific part, its job, and the symptoms you're likely to experience when it's on its way out.
| Part Name | Primary Function | Common Failure Symptom |
|---|---|---|
| Compressor | Circulates refrigerant to create cold air. | Unit not cooling, humming or buzzing noises, tripping breaker. |
| Evaporator Fan Motor | Blows cold air over the evaporator coils. | Uneven cooling, ice buildup on coils, strange rattling noises. |
| Condenser Fan Motor | Pulls air through the condenser coils to dissipate heat. | Unit overheating, not cooling efficiently, fan blade not spinning. |
| Door Gasket | Creates an airtight seal around the door. | Frost or condensation around the door, unit running constantly. |
| Digital Controller | Regulates temperature and defrost cycles. | Incorrect temperature readings, unit not defrosting, error codes on display. |
Having this handy chart can save you a lot of guesswork. If your refrigerator is constantly running, a quick look at this table might point you toward a worn-out door gasket before you assume it's a more serious compressor issue.
Why Genuine Atosa Parts Always Win
When a part fails, it can be tempting to grab a generic alternative, but choosing official OEM (Original Equipment Manufacturer) parts is one of the smartest moves you can make. Genuine parts are built to the exact specs of your refrigerator model, which means a perfect fit and seamless operation every time. This precision is what keeps the delicate cooling system balanced, preventing extra wear and tear on other components and ultimately extending the life of your equipment.
On top of that, using authentic Atosa refrigerator parts ensures your unit keeps hitting its original energy efficiency numbers. A poorly fitting part, like a generic door gasket, can cause cold air leaks. This forces the compressor to run overtime, which not only spikes your electricity bill but can also cause that crucial component to fail much sooner than it should.
Built on a Foundation of Quality
Atosa’s dedication to quality isn't just a marketing slogan; it's built into their massive global manufacturing and supply chain. Founded back in 2003, the company has since become a major player in commercial refrigeration, producing equipment from a huge facility in China and shipping to over 80 countries.
Their reputation is built on using top-tier components from trusted brands like Embraco and Dixell. This ensures their refrigerators can handle the tough, demanding environment of commercial kitchens in the United States, Europe, and beyond. This focus on durability is precisely why Atosa can back their equipment with such strong warranties, giving you confidence that you've made a solid, long-term investment. You can learn more about Atosa's industry reputation and product standards.
Identifying Critical Cooling System Components
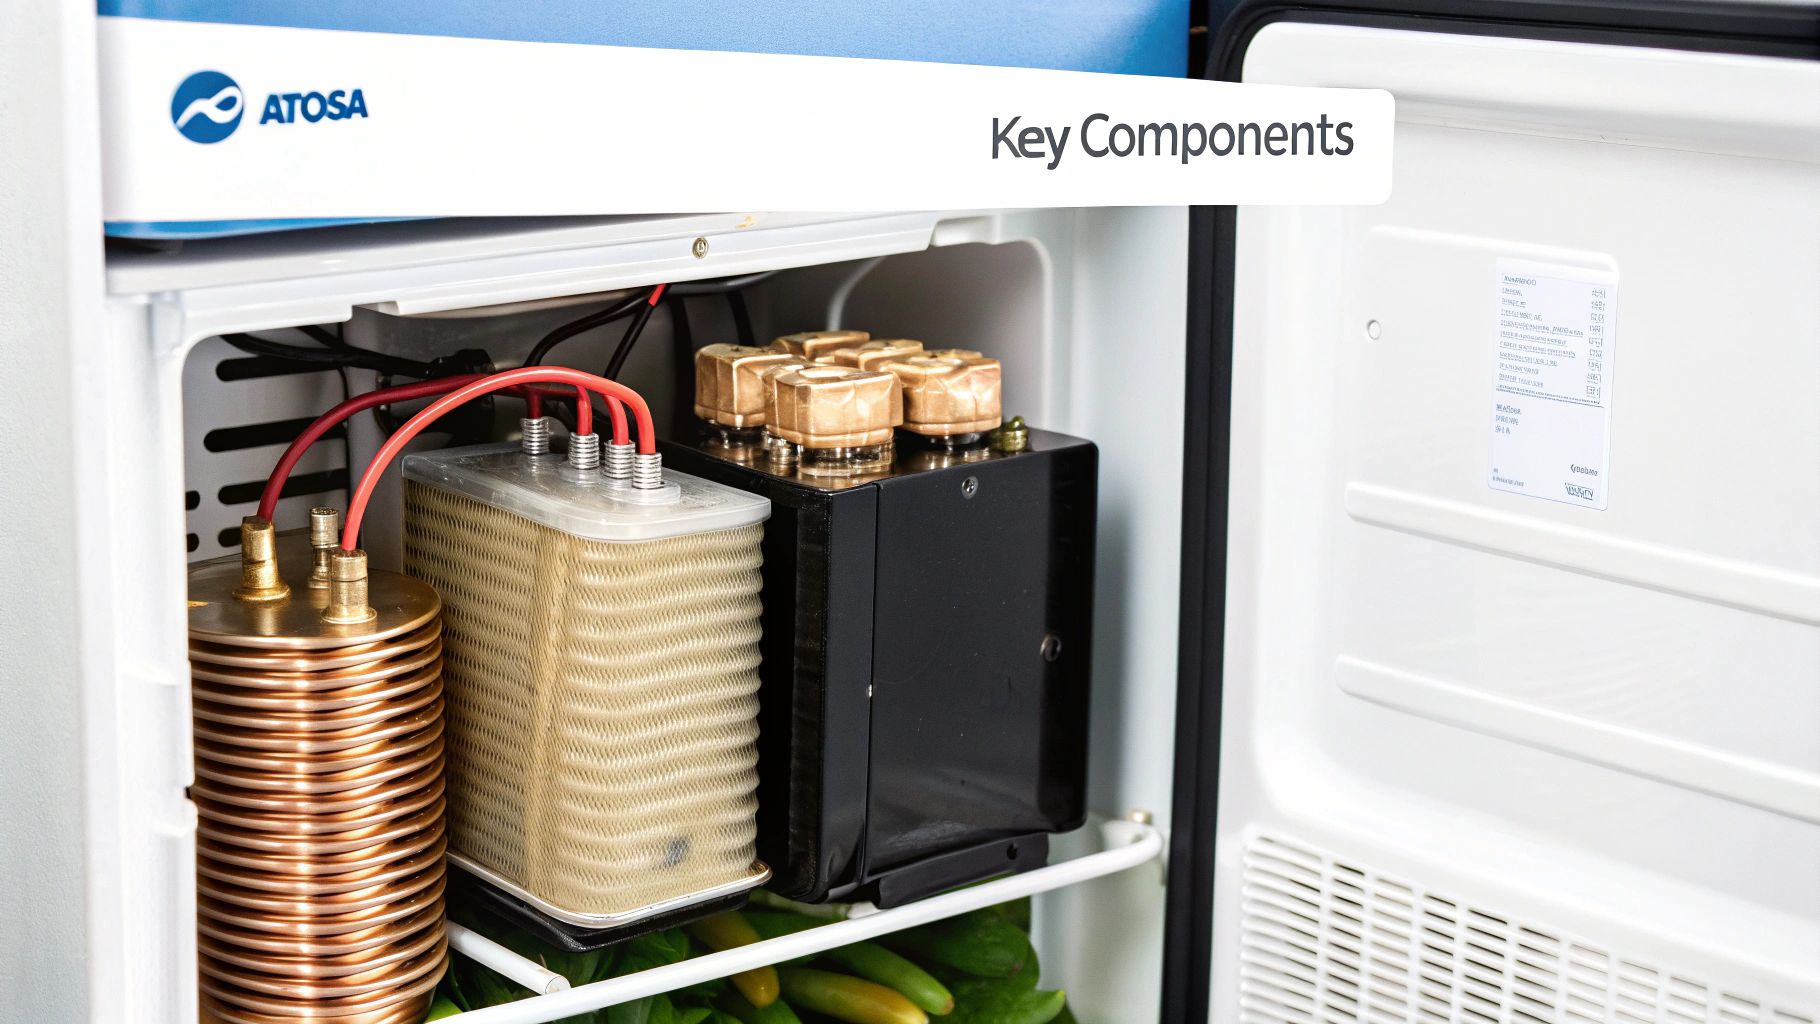
The cooling system is the absolute heart of your Atosa refrigerator. It’s what drives the entire refrigeration cycle, the process responsible for keeping your valuable inventory safe and chilled. Getting familiar with its key components is the first step any good technician or savvy owner takes to diagnose problems and track down the right Atosa refrigerator parts for a repair.
When this system starts to act up, you'll see the signs—maybe the unit isn't holding temperature, or you're hearing some pretty alarming noises.
At the center of it all is the compressor. Think of it as a powerful motor that pressurizes the refrigerant gas, kicking off the whole heat exchange process. If your unit has stopped cooling or you’re hearing a constant humming or buzzing, the compressor is always one of the first things to check. A failing compressor can even trip your circuit breaker over and over as it struggles to get going.
The Role of Coils and Fans
Working right alongside the compressor are two sets of coils and their matching fans. Honestly, these parts are just as essential for transferring heat, and their condition has a direct and immediate impact on your refrigerator's efficiency. A problem with any one of these can cause a system-wide headache pretty quickly.
The parts that most often need a little attention are:
- Condenser Coils and Fan: You'll find these on the outside of the unit, usually at the bottom or top. The condenser coils are where the heat from the refrigerant gets released into the air around the fridge. To help things along, the condenser fan pulls air across these coils. If they get caked with kitchen grease and dust, the unit simply can't get rid of heat, which forces the compressor to work way too hard and guzzle energy. A broken condenser fan will cause the exact same problem.
- Evaporator Coils and Fan: Tucked away inside the refrigerated cabinet, the evaporator coils do the opposite job—they absorb heat from the interior, which is what actually cools the air. The evaporator fan then circulates all that cold air through the unit. If you see ice building up on these coils or hear a rattling sound, it's often a sign of a bad evaporator fan or a problem with the defrost system.
Key Insight: A dirty condenser coil can spike your refrigerator's energy use by as much as 30%. Regular cleaning isn't just a maintenance chore; it’s a direct cost-saving move that also helps your compressor last longer. For a step-by-step walkthrough, check out our detailed maintenance guide.
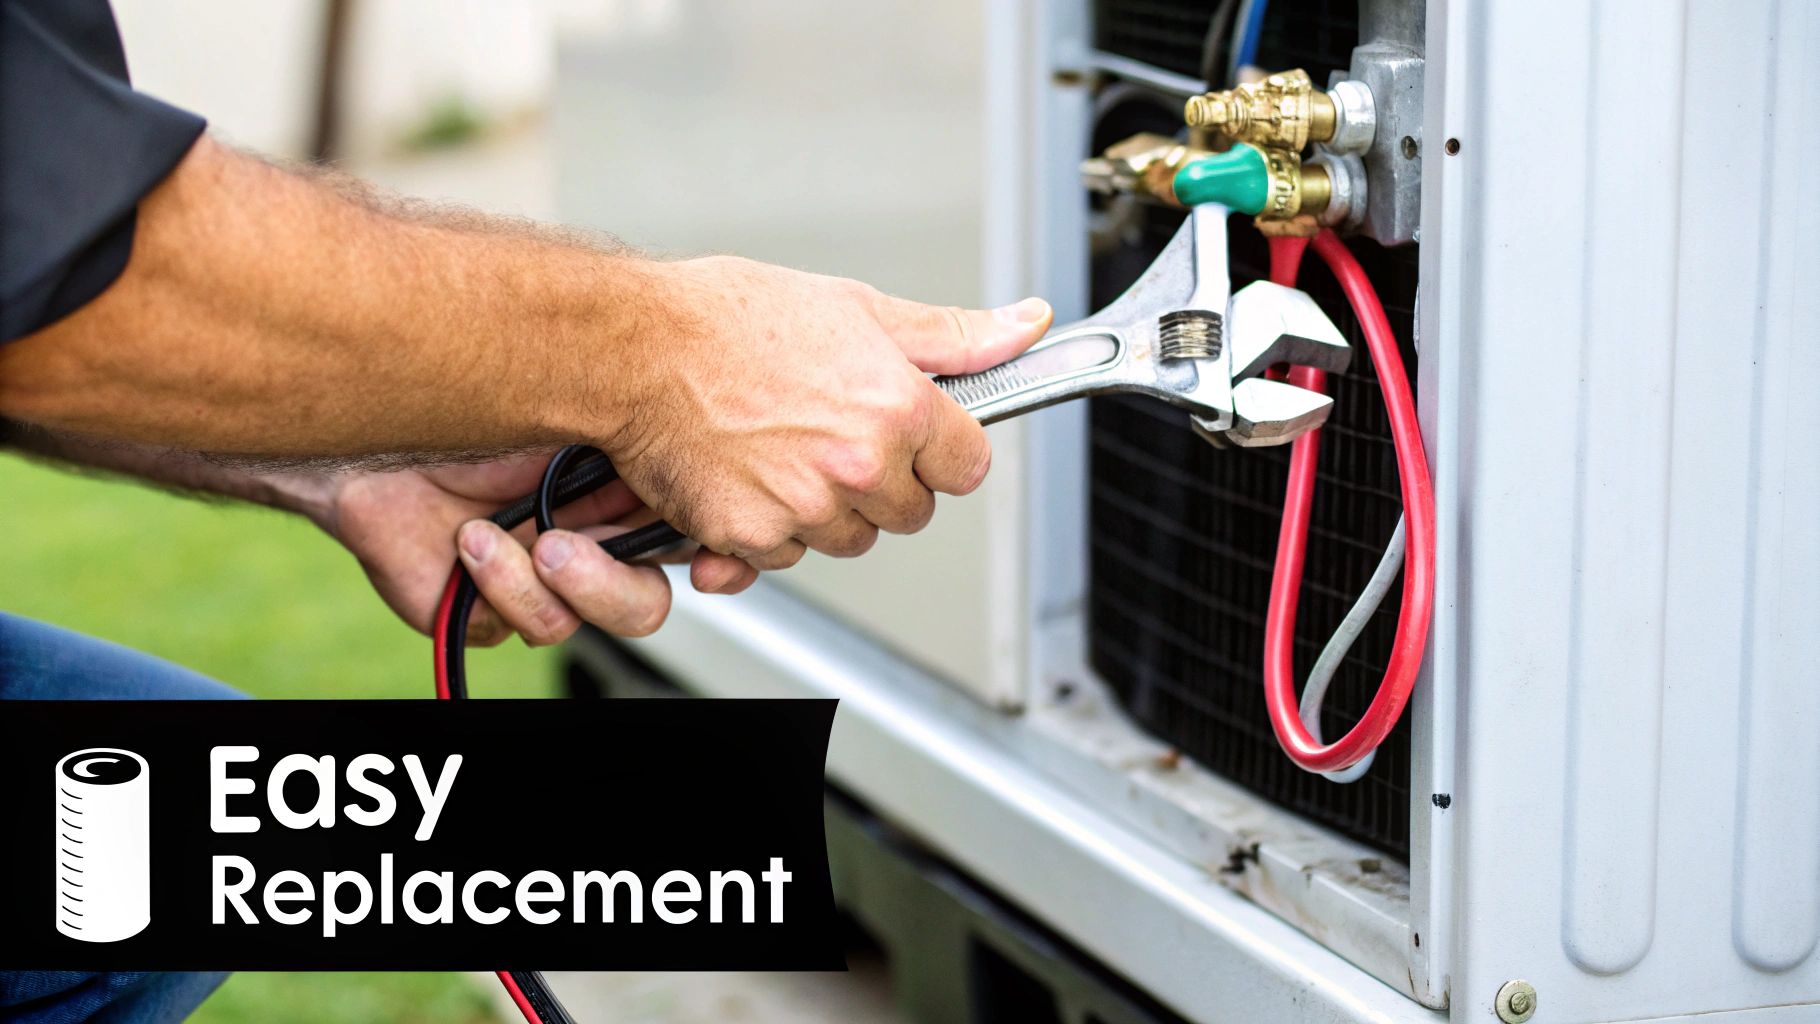
Locating the Right Part Numbers
So you've figured out which component is the culprit. Now, finding the exact replacement is critical. Atosa part numbers are almost always located right on the component itself. For a compressor, look for a sticker or a small metal plate on its casing. Fan motors will also have labels with all the model and part number details you need.
Example Scenario: Your Atosa prep table just isn't holding its temperature. You've set it to 38°F, but it’s hovering around 50°F, and you can hear the compressor running nonstop.
- Diagnosis: A constantly running compressor usually points to a heat transfer problem. You take a look and find the condenser coils are clogged with a thick blanket of dust.
- Action: After giving the coils a thorough cleaning, the unit is still struggling. You then check the condenser fan and realize it isn't spinning at all.
- Part Identification: You locate the label on the fan motor, jot down the part number, and now you know exactly which replacement to order.
Following this simple diagnostic process—starting with the most common and easiest fixes—helps you pinpoint the exact Atosa refrigerator parts you need, saving you a whole lot of time and money.
Navigating Electrical and Control System Parts
If the cooling system is the muscle of your Atosa unit, then the electrical and control components are the brains. These parts handle everything from keeping the temperature steady to running the defrost cycles. When one of them fails, your whole refrigerator can grind to a halt. Getting to know these critical Atosa refrigerator parts is key to figuring out what’s wrong and getting it fixed fast, saving you from a costly shutdown.
Sooner or later, you'll face an issue like the temperature display being way off, the unit refusing to start, or frost building up because the defrost cycle isn't kicking in. More often than not, the problem is hiding somewhere in this system. Finding the right culprit—whether it’s the controller, a relay, or a capacitor—is all about a smart, step-by-step approach.
The Digital Temperature Controller
Think of the digital temperature controller as the command center for your entire refrigerator. Most Atosa models feature advanced controllers, often from trusted brands like Dixell. These aren’t just simple thermostats; they display the current temperature, tell the compressor when to run, and manage those all-important automatic defrost cycles.
A wonky temperature reading is a classic sign of trouble. For instance, if the inside of the cabinet feels perfectly cold but your display is showing 60°F, you’re likely dealing with a faulty temperature probe, not a major cooling failure. On the other hand, if the unit isn't responding when you try to adjust the temperature, the controller itself might be on the fritz.
Relays and Start Capacitors
Ever hear your compressor hum but never actually kick on? Or maybe it just clicks on and off over and over? Nine times out of ten, the problem lies with the start relay or the start capacitor. These components work together to give the compressor the electrical jolt it needs to get going.
- Start Relay: This small but mighty part is a switch that directs power to the compressor’s start winding. If it burns out or fails, the compressor won’t turn on, and you'll often hear that tell-tale clicking sound.
- Start Capacitor: The capacitor is like a battery, storing up an electrical charge to give the compressor an extra kick for startup. When a capacitor gets weak or fails, the compressor just doesn't have enough juice to overcome that initial resistance. You'll hear it humming, but it won't be able to start.
Pro Tip: You can sometimes spot a bad relay just by looking at it. Keep an eye out for any burn marks or listen for a rattle when you shake it. A bad capacitor, however, is sneakier. You'll need a multimeter to test its capacitance (measured in microfarads, or µF) and see if it’s still within the manufacturer's specified range.
Diagnosing Common Electrical Failures
Pinpointing the exact electrical problem will save you a ton of time and money. For example, if your Atosa prep table has stopped cooling and the compressor is dead silent, the first thing to check is the digital controller. If the display is lit up and showing a normal temperature setting, your next move should be to investigate the start relay and capacitor.
Example Scenario: Your Atosa reach-in refrigerator stops cooling, and you start hearing a "click... hum... click" sound every few minutes.
- Symptom Analysis: That sound pattern is a dead giveaway for a startup failure. The "click" is the relay trying to do its job, and the "hum" is the compressor trying—and failing—to start.
- Part Inspection: After safely unplugging the unit, you get access to the compressor. You take a look at the start relay and notice a faint burnt smell. That’s a good clue.
- Troubleshooting: You swap out the old relay for a genuine Atosa refrigerator parts replacement. You plug it back in, and voilà! The compressor kicks on, and the unit starts cooling down. This quick diagnostic correctly identified the problem, helping you avoid a much more expensive—and unnecessary—compressor replacement.
Finding the Right Structural and Door Parts
It’s easy to focus on the cooling and electrical systems, but the physical structure of your Atosa refrigerator is just as critical to its performance. The parts that see the most action every day—door gaskets, hinges, handles, and shelves—are the unsung heroes of energy efficiency and smooth kitchen operations. Letting these Atosa refrigerator parts wear out can lead to some surprisingly big problems, from out-of-control energy bills to serious food safety risks.
A worn-out door gasket is probably one of the most common and costly issues I see. It breaks that airtight seal, letting cold air pour out while warm, humid air seeps in. This forces the compressor to run nonstop, jacking up your electricity costs and putting a ton of strain on the whole cooling system. A bad seal is also the number one reason you’ll see condensation and frost building up around the door.
Essential Door Components to Inspect
The door gets more use than any other part of your refrigerator, so its components are ground zero for wear and tear. A quick, regular inspection can help you spot problems before they turn into major headaches. The key parts to keep an eye on are the door gasket, hinges, and handle.
A great trick for checking a gasket is the "dollar bill test." Just close the door on a dollar bill. If you can pull it out with absolutely no resistance, the gasket isn't creating a proper seal and it’s time for a replacement. Before you order a new one, make sure to measure the old gasket's dimensions and note its profile type to guarantee you get a perfect fit.
The door hinges are another critical failure point. If you notice the door is sagging, doesn’t close smoothly, or feels loose, the hinges are likely worn or knocked out of alignment. This doesn't just compromise the seal; it can cause permanent damage to the door and the frame if you let it go. Properly aligned hinges are what ensure the door closes flush every single time.
Shelving Systems and Organization
Moving inside, the internal shelving system is crucial for proper airflow and food safety. Something as small as a damaged or missing shelf clip can lead to wobbly, unstable shelves—a clear safety hazard. Atosa refrigerators use very specific shelving systems designed to maximize how cold air circulates.
Common shelving components include:
- Shelf Clips: These small but vital pieces hold your shelves firmly in place. Always use original OEM clips that are made for your specific model.
- Coated Shelves: The epoxy or PVC coating protects the metal from rust and corrosion. If this coating gets chipped or starts peeling, it can become a food safety issue and should be replaced.
- Shelf Standards: These are the vertical tracks that the shelf clips attach to. Make sure they are secure and not bent out of shape.
Important Note: A sagging door is a major energy waster. A door that is misaligned by just a quarter of an inch can increase energy consumption by over 15%. Regularly checking and tightening hinge screws is a simple maintenance task that delivers real savings.
The structural integrity of your unit is directly tied to its efficiency. This is especially true for specialized units, and you can explore more about how these components function on different models by reading our guide to Atosa sandwich prep tables. By maintaining these fundamental Atosa refrigerator parts, you ensure your equipment runs reliably and economically for years.
Your Guide to Atosa Model and Part Compatibility
Ordering the wrong component is more than a simple headache—it’s a recipe for expensive downtime, restocking fees, and a whole lot of frustration. This compatibility chart is your go-to tool to take all the guesswork out of finding the right Atosa refrigerator parts. By matching your specific unit with the correct part numbers for high-failure items like compressors and gaskets, you can order what you need with total confidence.
Your first step is always to find the data plate on your unit. This sticker, which holds the crucial model and serial number, is usually attached to the interior wall of the refrigerated cabinet. Once you’ve got that information, you're ready to make sure you get the perfect part.
How to Cross-Reference Your Model
Using a compatibility chart is a straightforward way to prevent costly mistakes. Just find your refrigerator’s model number in the first column, then slide across that same row to pinpoint the part numbers for the components you need. This direct cross-reference saves time and stops you from ordering something that simply won't fit.
For example, a busy kitchen manager needing a new door gasket can skip the hassle of taking the old one off to measure it. Instead, they can just use the chart to instantly find the exact OEM part number for their specific Atosa model. This is especially helpful for common parts, and our complete guide on Atosa parts goes into even more detail.
To make this even easier, here's a quick-glance table for some of the most popular Atosa models.
Atosa Model to Part Number Cross-Reference
| Atosa Refrigerator Model | Compressor Part Number | Door Gasket Part Number | Condenser Fan Motor Part Number |
|---|---|---|---|
| MBF8001 / MSF8301 | W10515121 | W10886134 | W11094030 |
| MBF8002 / MSF8302 | W10515122 | W10886135 | W11094031 |
| MBF8003 / MSF8303 | W10515123 | W10886136 | W11094032 |
| MBF8501 / MGF8401 | W10515124 | W10886137 | W11094033 |
| MBF8502 / MGF8402 | W10515125 | W10886138 | W11094034 |
This table covers just a handful of models, but it shows how quickly you can find what you need without digging through manuals or disassembling equipment.
Understanding the Energy Cost of Key Parts
Different parts use different amounts of energy, and knowing which ones are the biggest power hogs is key to diagnosing problems and managing your long-term operating costs.
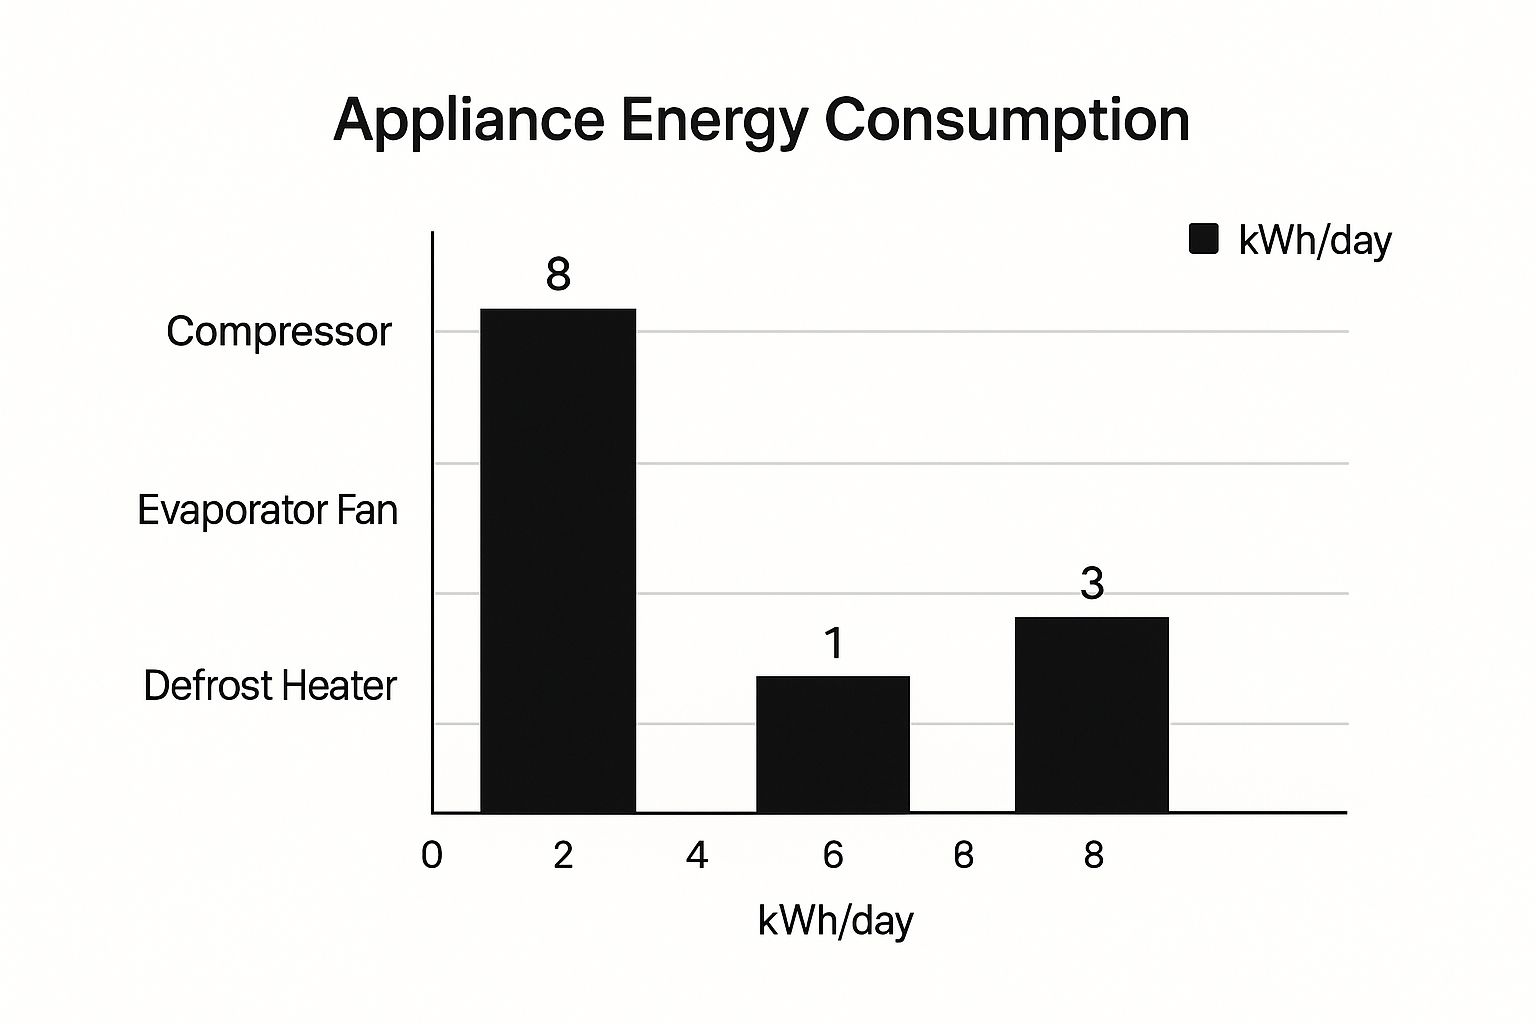
As you can see, the compressor is by far the most energy-hungry component, which really highlights why keeping it running efficiently is so critical.
Any problem that makes the compressor work harder or longer than necessary—like a worn-out door gasket or a dirty condenser coil—will have an immediate and significant impact on your electricity bill.
Atosa's commitment to efficiency is clear in their designs. Take the Atosa MBF8507GR reach-in refrigerator, for example. It offers a huge capacity of about 46.77 cubic feet but runs on a surprisingly efficient 1/5 horsepower compressor and uses eco-friendly R290 refrigerant. This focus on pairing substantial storage with low energy consumption is a hallmark of the brand, ensuring their equipment meets the real-world demands of modern commercial kitchens.
Troubleshooting Common Atosa Refrigerator Problems
 When your commercial refrigerator starts acting up, you don't have time to waste. You need answers, and you need them fast. This troubleshooting guide is designed to help you quickly connect the symptoms you're seeing—or hearing—with the most likely culprit from our catalog of Atosa refrigerator parts.
We’ve set this up so you can skip the guesswork. Just find the problem you’re experiencing in the headings below, and you'll see a list of potential parts to investigate. This approach helps you zero in on the root cause, saving you precious time, money, and a whole lot of frustration.
Symptom: Unit Not Cooling
This is easily the most critical problem you can face. If your Atosa unit isn't holding its temperature, the issue is almost always somewhere in the core cooling system. Before you assume the worst, it’s best to check these components, starting with the simplest fixes first.
- Dirty Condenser Coils: This is the number one cause of cooling problems. Take a close look at the coils for any buildup of dust, dirt, or grease.
- Failed Condenser or Evaporator Fan Motor: If you don't feel any air moving, heat isn't being properly exchanged. The fan motor is likely the problem.
- Faulty Compressor or Relay: The compressor is the heart of your refrigerator. If it isn't kicking on, your unit simply won't get cold.
Symptom: Water Leaking on Floor
Finding a puddle of water around your unit is alarming, but it’s usually caused by a drainage problem, not a catastrophic failure. Thankfully, this is often a straightforward fix once you find the source.
- Clogged Defrost Drain: During the defrost cycle, ice buildup can block the drain tube, forcing water to overflow onto the floor.
- Cracked or Disconnected Drain Pan: Don't forget to inspect the drain pan located underneath the unit for any signs of damage or disconnection.
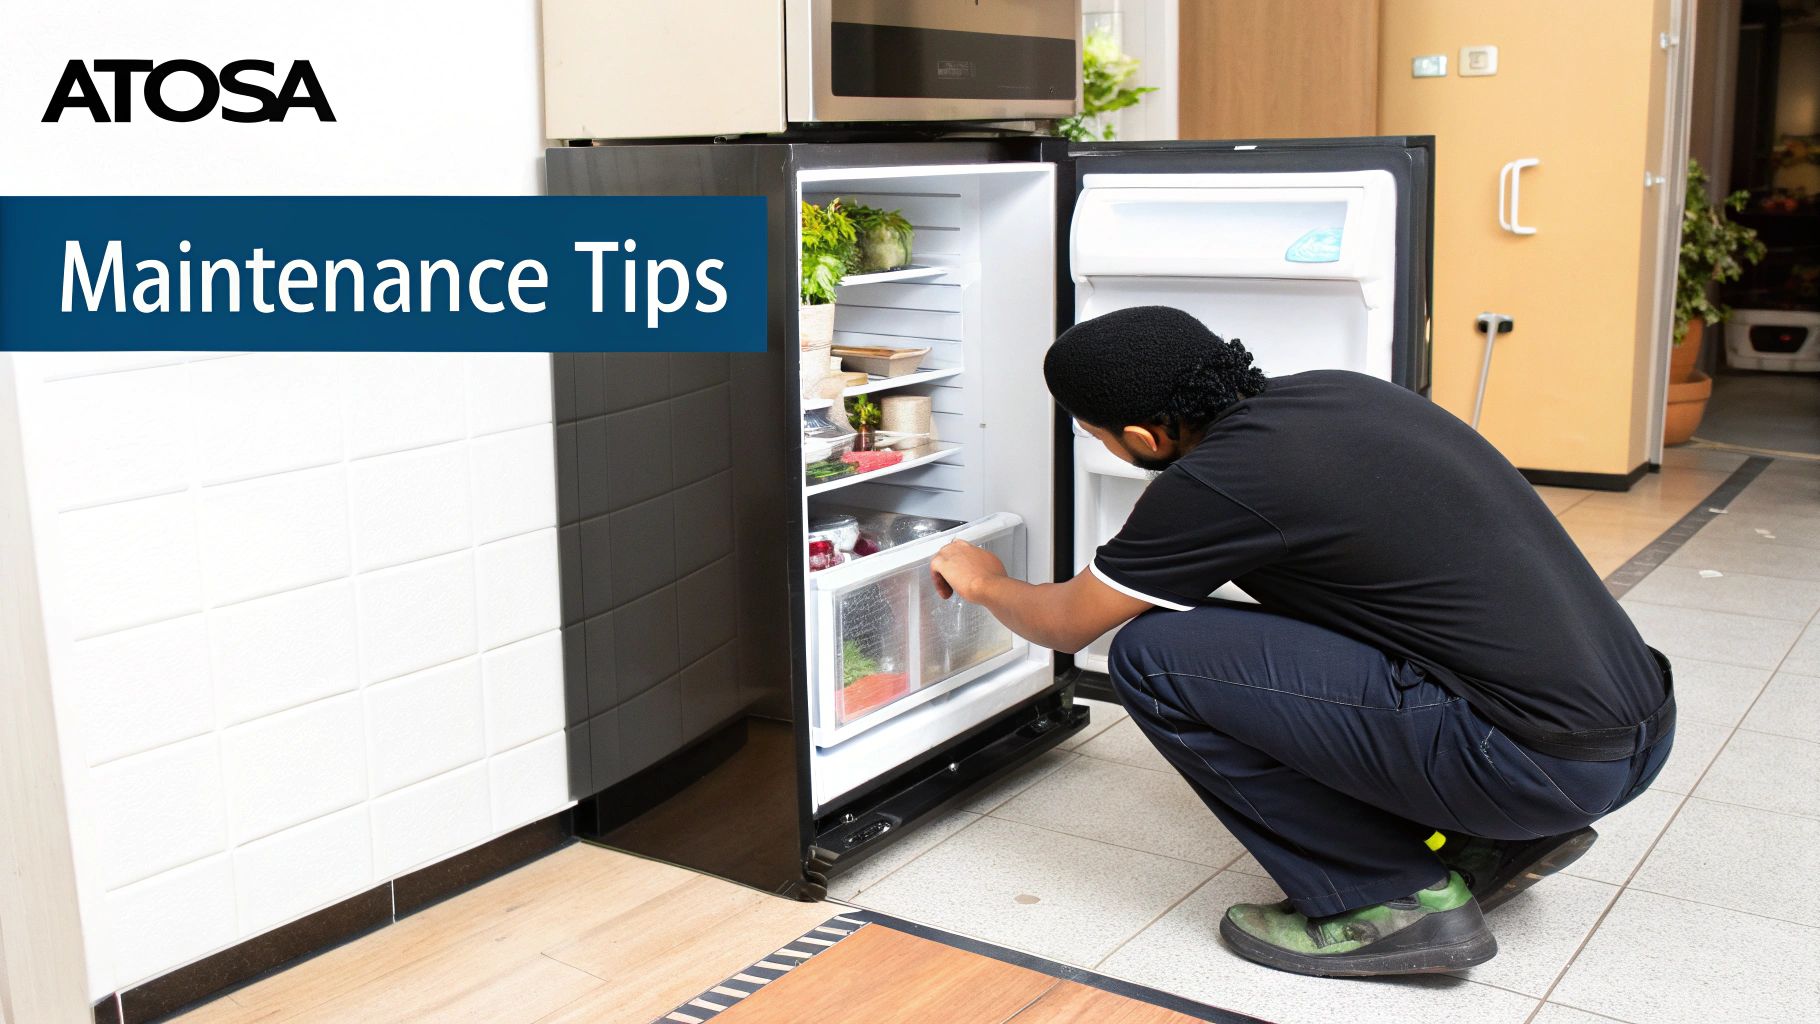
Expert Tip: Your best defense against downtime is proactive maintenance. A consistent cleaning schedule for your coils and drains can prevent over 70% of the most common cooling and leaking issues. For a full rundown, check out our guide on Atosa refrigerator and freezer maintenance instructions.
Symptom: Refrigerator Making Loud Noises
Strange noises are your refrigerator's way of telling you something is wrong. Paying attention to the specific sound can help you pinpoint the problem part. A worn-out fan motor often makes a distinct rattling or screeching sound, while a struggling compressor might produce a loud, persistent humming or buzzing.
Got Questions About Atosa Parts? We’ve Got Answers.
When you're in the middle of a kitchen crisis, you need answers, and you need them fast. I get it. Diving into the world of commercial appliance repair can bring up a lot of questions. This section is designed to give you direct, no-nonsense answers to the things we hear most often, helping you troubleshoot problems and get the right Atosa refrigerator parts ordered with confidence.
First things first: where do you find the model and serial number? This is the golden ticket to getting the right part. On Atosa units, this crucial info is printed on a data plate, which you’ll almost always find on an interior wall of your refrigerator. Jotting these numbers down before you even start searching is the single most important step you can take to guarantee you get a part that fits and functions perfectly.
Can I Get Away with Using a Universal Part?
This one comes up a lot. It’s tempting to grab a universal part that looks like it might fit, especially if it’s a bit cheaper. But honestly, I strongly advise against it. The only way to ensure your Atosa unit performs correctly, maintains its energy efficiency, and keeps your manufacturer's warranty intact is by using genuine OEM (Original Equipment Manufacturer) Atosa refrigerator parts.
Aftermarket or universal parts can cause all sorts of headaches you don’t need—from creating compatibility issues to causing other components to fail prematurely. It’s a shortcut that often leads to a much bigger, more expensive problem down the road.
What Are These Error Codes on My Display?
Those little codes on your Atosa’s digital controller are actually a huge help. Think of them as the machine telling you exactly where it hurts. They are a diagnostic tool that points you toward a specific problem, saving you a ton of guesswork. For example:
- P1 / P2 Error: This code usually means there’s a problem with one of the temperature probes.
- HA Error: This is a high-temperature alarm. It’s telling you the cabinet temperature has climbed above its set point, and you need to investigate.
For a full rundown of what each code means for your specific refrigerator, your unit's manual is the best resource. You can also check out our electrical section for more details.
A Quick Word on Prevention: The best repair is the one you never have to make. Simple, consistent maintenance can prevent so many common service calls. For instance, cleaning your unit's condenser coil is one of the most critical yet simple tasks you can do. For your unit to run at its best, you should inspect and clean that coil at least every 90 days. If you're in a high-grease environment like a busy fryer station, you'll want to do it even more often to stop the system from overheating and straining itself.
For all your genuine component needs, trust The Restaurant Warehouse to provide the exact parts to keep your equipment running smoothly. Explore our full inventory of Atosa parts at https://therestaurantwarehouse.com.
About The Author

Sean Kearney
Sean Kearney used to work at Amazon.com and started The Restaurant Warehouse. He has more than 10 years of experience in restaurant equipment and supplies. He graduated from the University of Washington in 1993. He earned a BA in business and marketing. He also played linebacker for the Huskies football team. He helps restaurants find equipment at a fair price and offers financing options. You can connect with Sean on LinkedIn or Facebook.
Leave a comment