


Unlocking undercounter refrigerators dimensions: A Quick Guide
Finding the right undercounter refrigerator is a lot like getting a suit tailored—if the fit isn't right, nothing else matters. Before you get swept away by fancy features and different models, the first and most critical step is understanding the standard dimensions. These numbers are the foundation for a smooth, hassle-free installation.
Your Quick Guide to Undercounter Refrigerator Dimensions
Thankfully, manufacturers have standardized these sizes to solve a common kitchen headache: how to add accessible, efficient refrigeration without tearing out your existing setup. By designing units to fit perfectly under typical counters, they’ve made installation a whole lot easier. Getting a handle on these core measurements will help you make a smart, confident decision.
The Three Core Dimensions
Every undercounter unit is defined by three key measurements. Getting these right ensures your refrigerator not only slides into place but also works properly for years to come.
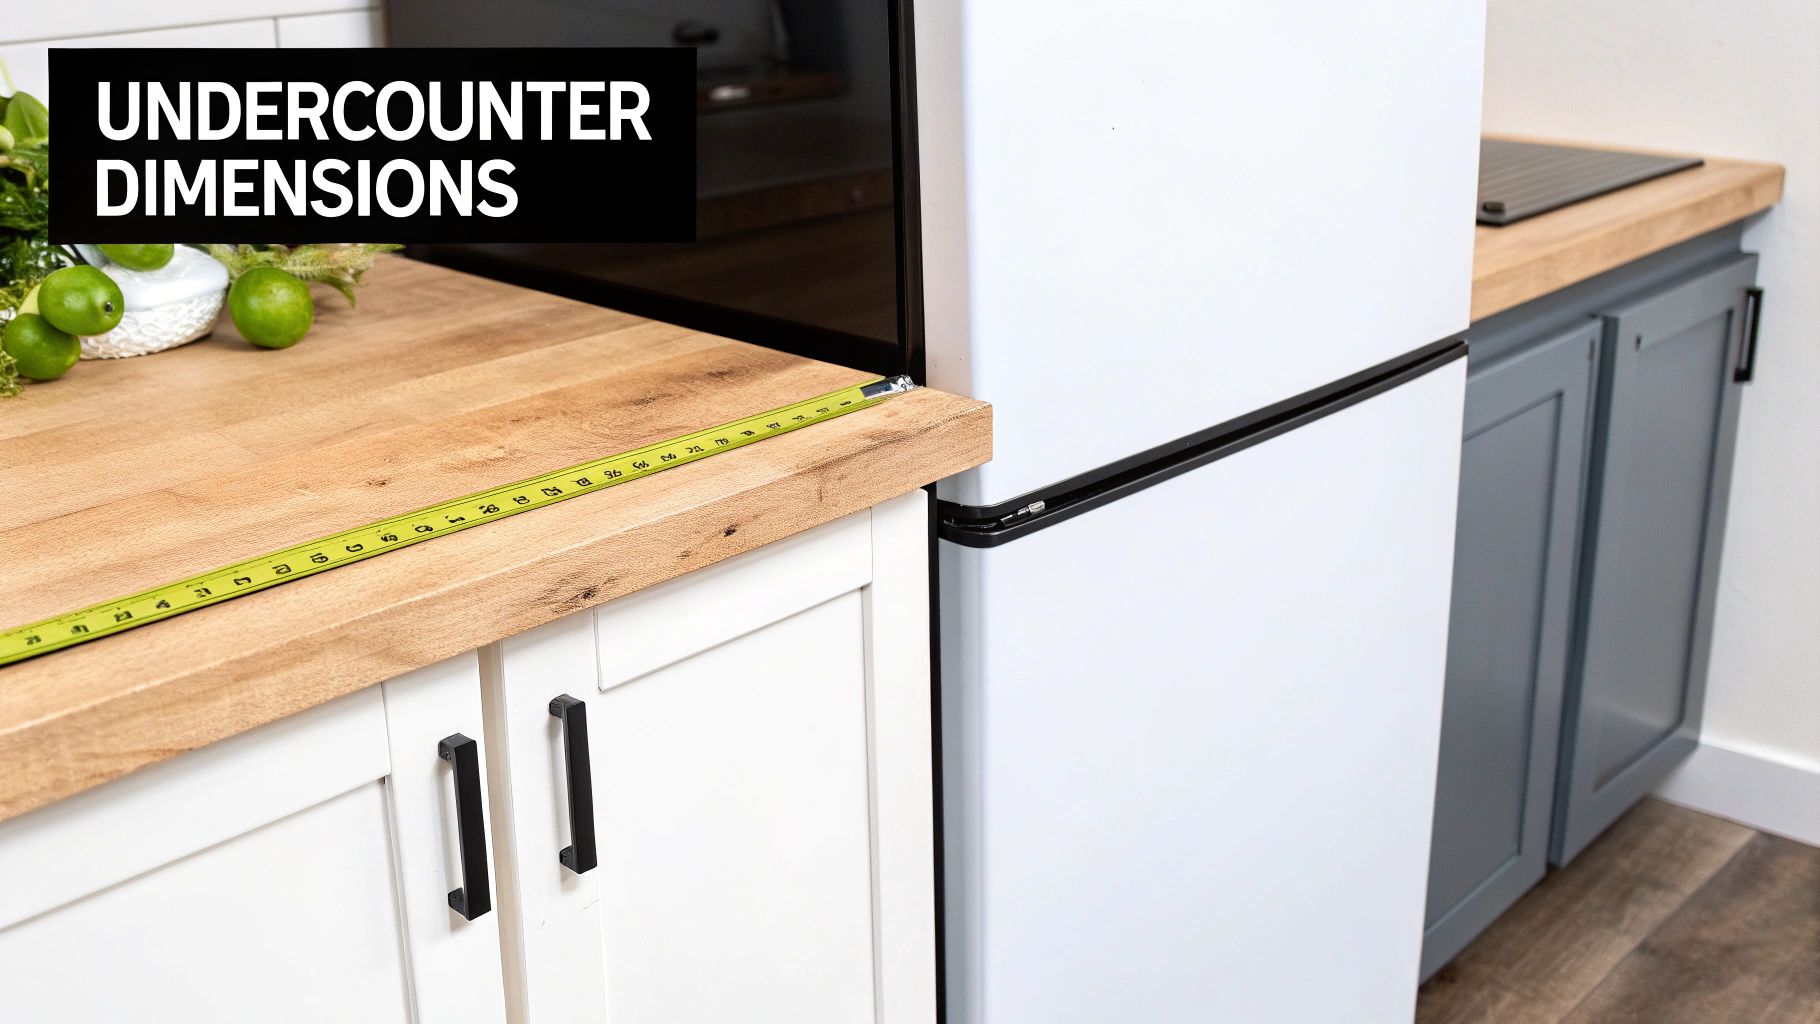
- Height: This is the most crucial dimension. Standard height is 32 to 34.5 inches, designed to fit perfectly under a typical 36-inch countertop while leaving just enough of a gap for air to circulate.
- Width: The most common widths you'll find are 15, 18, and 24 inches. That 24-inch model is an industry favorite, hitting the sweet spot between storage capacity and a compact footprint.
- Depth: Standard depth is typically right around 24 inches. This allows the front of the unit to sit flush with your cabinets, giving you that clean, professional built-in look.
These standard dimensions didn't happen by accident. They evolved to meet the space constraints of busy commercial kitchens and have been the gold standard since the early 2000s. In fact, by 2024, this dimensional sweet spot helped fuel a global undercounter refrigerator market valued at a whopping USD 3.42 billion.
Pro Tip: Always measure your cabinet opening in three different places for both height and width—top, middle, and bottom. Cabinet openings are rarely perfectly square, so use the smallest of these measurements to guarantee a perfect fit.
To make things even easier, here's a quick reference table with the common undercounter dimensions. For a deeper dive into different models and their features, be sure to check out our comprehensive undercounter fridges guide.
Standard Undercounter Refrigerator Dimension Ranges
This table sums up the typical dimensions you’ll see when shopping for a commercial undercounter unit.
| Dimension | Common Range | Key Consideration |
|---|---|---|
| Height | 32" – 34.5" | Must fit under your countertop while leaving space for ventilation. |
| Width | 15", 18", or 24" | Select based on your cabinet opening and required storage capacity. |
| Depth | ~24" | Designed to sit flush with standard cabinets for a built-in look. |
Getting these measurements right from the start is the key to a successful installation. It prevents the headache of returns and ensures your new unit works efficiently from day one.
Why the 24-Inch Model Is an Industry Favorite
In any professional kitchen, some pieces of equipment just become legends. They aren't always the biggest or fanciest, but they're the ones you can't imagine working without—like a trusted chef's knife or a classic stainless steel prep table. When it comes to undercounter refrigerators, the 24-inch wide model has absolutely earned that legendary status.
Think of it as the ultimate utility player on a championship team. It’s the one that shows up every day, does its job flawlessly, and fits in wherever you need it. This specific dimension hits a perfect balance between a compact footprint and genuinely useful storage, making it the go-to choice for countless kitchens.
The Sweet Spot of Size and Storage
The magic of the 24-inch model is its brilliant compromise. Sure, a skinny 15-inch unit can squeeze into a tiny gap, but you can barely fit anything inside. On the other hand, larger 36- or 48-inch models offer plenty of room but eat up valuable floor space you might not have. The 24-inch model lands right in that perfect middle ground.
It's wide enough to comfortably hold standard-sized food pans, line up multiple rows of beverage bottles, or stack containers of prepped ingredients. At the same time, it’s still narrow enough to slide into a busy prep line, tuck beside a low-boy grill, or fit neatly under a coffee shop’s service counter without creating a traffic jam. That unique blend of utility is exactly why it’s become the unofficial industry standard.
And that’s not just a gut feeling; the numbers back it up. In the world of commercial kitchens where every inch is prime real estate, models in the 5-10 cubic feet capacity range—which is right where these 24-inch models live—accounted for roughly 50% of the revenue in the global undercounter refrigerator market. You can dig deeper into the undercounter refrigerator market on dataintelo.com to see just how dominant this size really is.
Adaptable for Diverse Kitchen Environments
The real power of a 24-inch undercounter fridge is its chameleon-like ability to adapt. It can play a different role depending on what the kitchen needs, much like a versatile ingredient that works in an appetizer, a main course, or a dessert.
Here are just a few places you’ll see it in action:
- High-Volume Prep Stations: Slotted at the end of a prep line, it holds all the mise en place, keeping chopped veggies, sauces, and proteins chilled and ready.
- Busy Bar Service: Under the bar, it’s the perfect home for cocktail garnishes, juices, milk, and backup craft beers, ensuring bartenders never have to miss a beat.
- Compact Coffee Shops: It fits perfectly under the counter next to an espresso machine, providing crucial cold storage for milk, cream, and oat milk.
- Quick-Service Restaurants: Placed near the sandwich or salad station, it gives staff instant access to fresh ingredients, which is key for speeding up orders.
Key Insight: The 24-inch model thrives because it solves a universal kitchen problem: the need for accessible, localized cold storage without forcing a major layout change. It's a plug-and-play solution for instant efficiency.
This adaptability also extends to what’s inside. You can find 24-inch models configured as general-purpose refrigerators, specialized wine coolers, high-capacity beverage centers, or even freezers. This range of options means you can get the exact function you need in a footprint you know will work. For a great example of this versatility in action, you might want to check out this overview of a popular 24-inch undercounter fridge.
Ultimately, the 24-inch model’s popularity isn’t a fluke. It comes down to an unbeatable combination of practicality and performance. It's the dependable, hardworking choice that fits just about anywhere, proving that sometimes, the most popular option is popular for a very good reason.
How to Measure Your Space for a Perfect Fit
Picking out the perfect undercounter refrigerator is only half the job; making sure it actually slides into your space without a hitch is where you really seal the deal. This is where the old carpenter's rule, "measure twice, cut once," becomes your best friend. One little mistake here can lead to the headache of a costly return or, even worse, an appliance that's crammed in so tight it overheats and dies an early death.
We're going to go beyond just the basic height, width, and depth. I'll walk you through the details that often get missed but are absolutely crucial for a flawless installation. Getting this right means your new fridge won't just fit—it'll run efficiently and reliably for years.
The Essential Three-Point Measurement Technique
Let's be honest, cabinet openings are almost never perfect squares. Floors can have a slight slope, and cabinet walls can bow a little. To make sure you account for these real-world imperfections, you need to take three separate measurements for both the height and the width.
- Measure the Height: Grab your tape measure and check the distance from the floor to the bottom of the countertop. Take this measurement on the left side, right in the middle, and then again on the right side.
- Measure the Width: Now, do the same for the width. Measure the space between the side cabinets at the very back of the opening, in the middle, and at the front.
- Measure the Depth: Finally, measure from the back wall to the front edge of the cabinets next to the opening. This is key to ensuring the unit will sit flush and not stick out into your walkway.
Crucial Reminder: Always, and I mean always, use the smallest of the three measurements you took for both height and width. This is your true, usable space, and it's the secret to preventing that awful moment when the fridge gets stuck halfway in.
Beyond the Basics: The Hidden Measurement Details
A successful installation is about more than just fitting a box into a hole. You have to think about how the appliance will actually function once it's in place. Trust me, overlooking these next few details is a common mistake that leads to a ton of frustration.
- Door Swing Clearance: Can the refrigerator door swing open all the way without smacking into a cabinet handle, another appliance, or the wall? You'll want to check the manufacturer's specs for the door swing radius and make sure you have that much room. A door that only opens 90 degrees can make it impossible to pull out the shelves or drawers.
- Utility Access: Take a look at where your electrical outlet is. If you're getting a unit with an icemaker, where's the water line? The fridge's power cord and water line need to reach these hookups without being pulled tight or getting kinked. Make sure there’s enough slack to pull the unit out for cleaning or service down the road.
- Ventilation Gaps: This one is completely non-negotiable. Every unit's manual will specify the clearance needed on the sides, back, and top. Ignoring these gaps is a recipe for disaster; it will cause the compressor to overheat, spike your energy bills, and eventually lead to a total system failure.
This visual guide breaks down the key decisions you'll make when choosing a unit, from its physical footprint to its overall function.
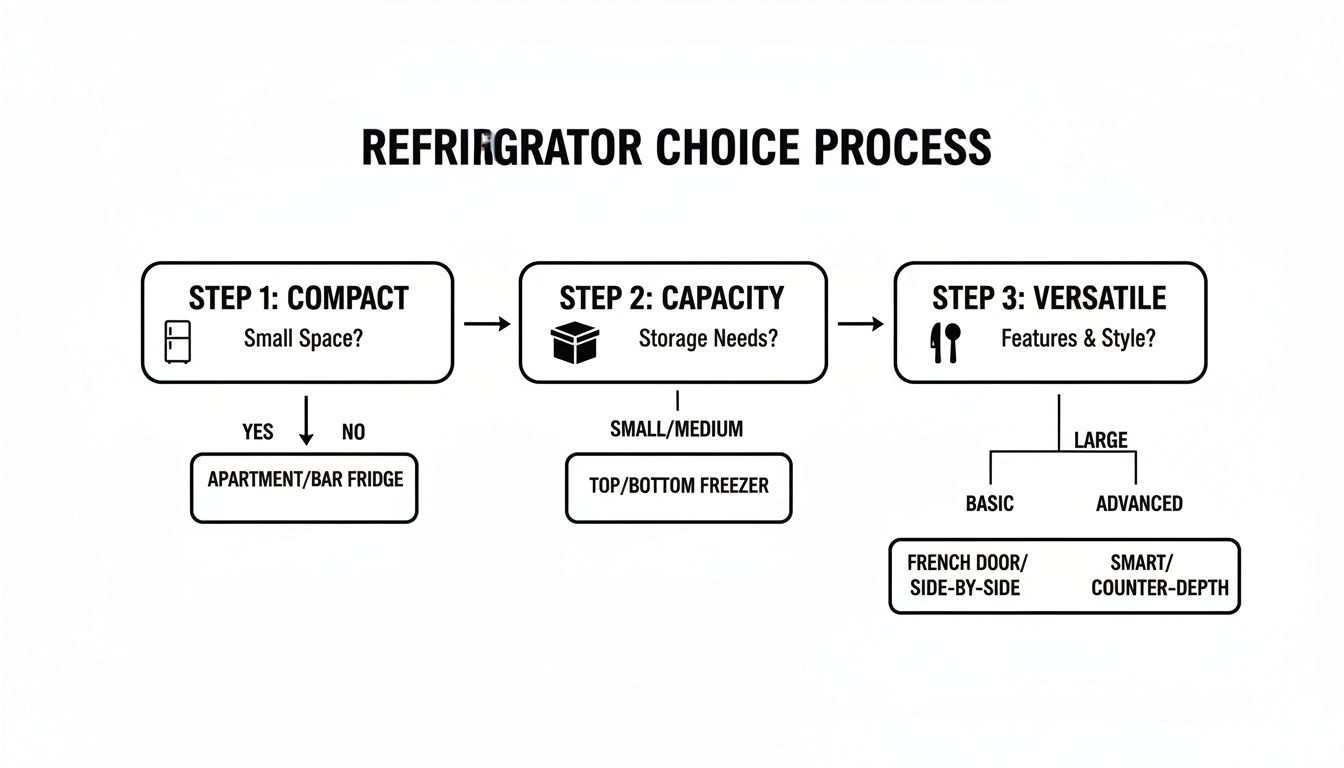
As you can see, picking the right unit is really a balancing act between its physical size (compactness), how much it can hold (capacity), and the role it will play in your kitchen (versatility).
Your Pre-Purchase Measurement Checklist
Before you hit that "buy now" button, run through this quick checklist. It pulls together all the undercounter refrigerator dimensions you need and makes sure you haven't missed a single detail. Measuring accurately is vital, and for those taking on a bigger project, an Appliance Sizing Guide for Your Kitchen Renovation can be a huge help.
My Space Measurements (Using Smallest Values):
- Height: _______ inches
- Width: _______ inches
- Depth: _______ inches
Appliance & Installation Checks:
- Does the refrigerator's height fit under the counter with top ventilation space? (Yes/No)
- Is the refrigerator's width narrower than my opening, leaving side clearance? (Yes/No)
- Will the door open completely without obstruction? (Yes/No)
- Can the power cord and water line easily reach their connections? (Yes/No)
Taking these few extra minutes to measure with care will set you up for a smooth, stress-free installation. A little diligence now protects your investment and ensures everything works perfectly from day one.
The Hidden Dimensions of Ventilation and Clearance
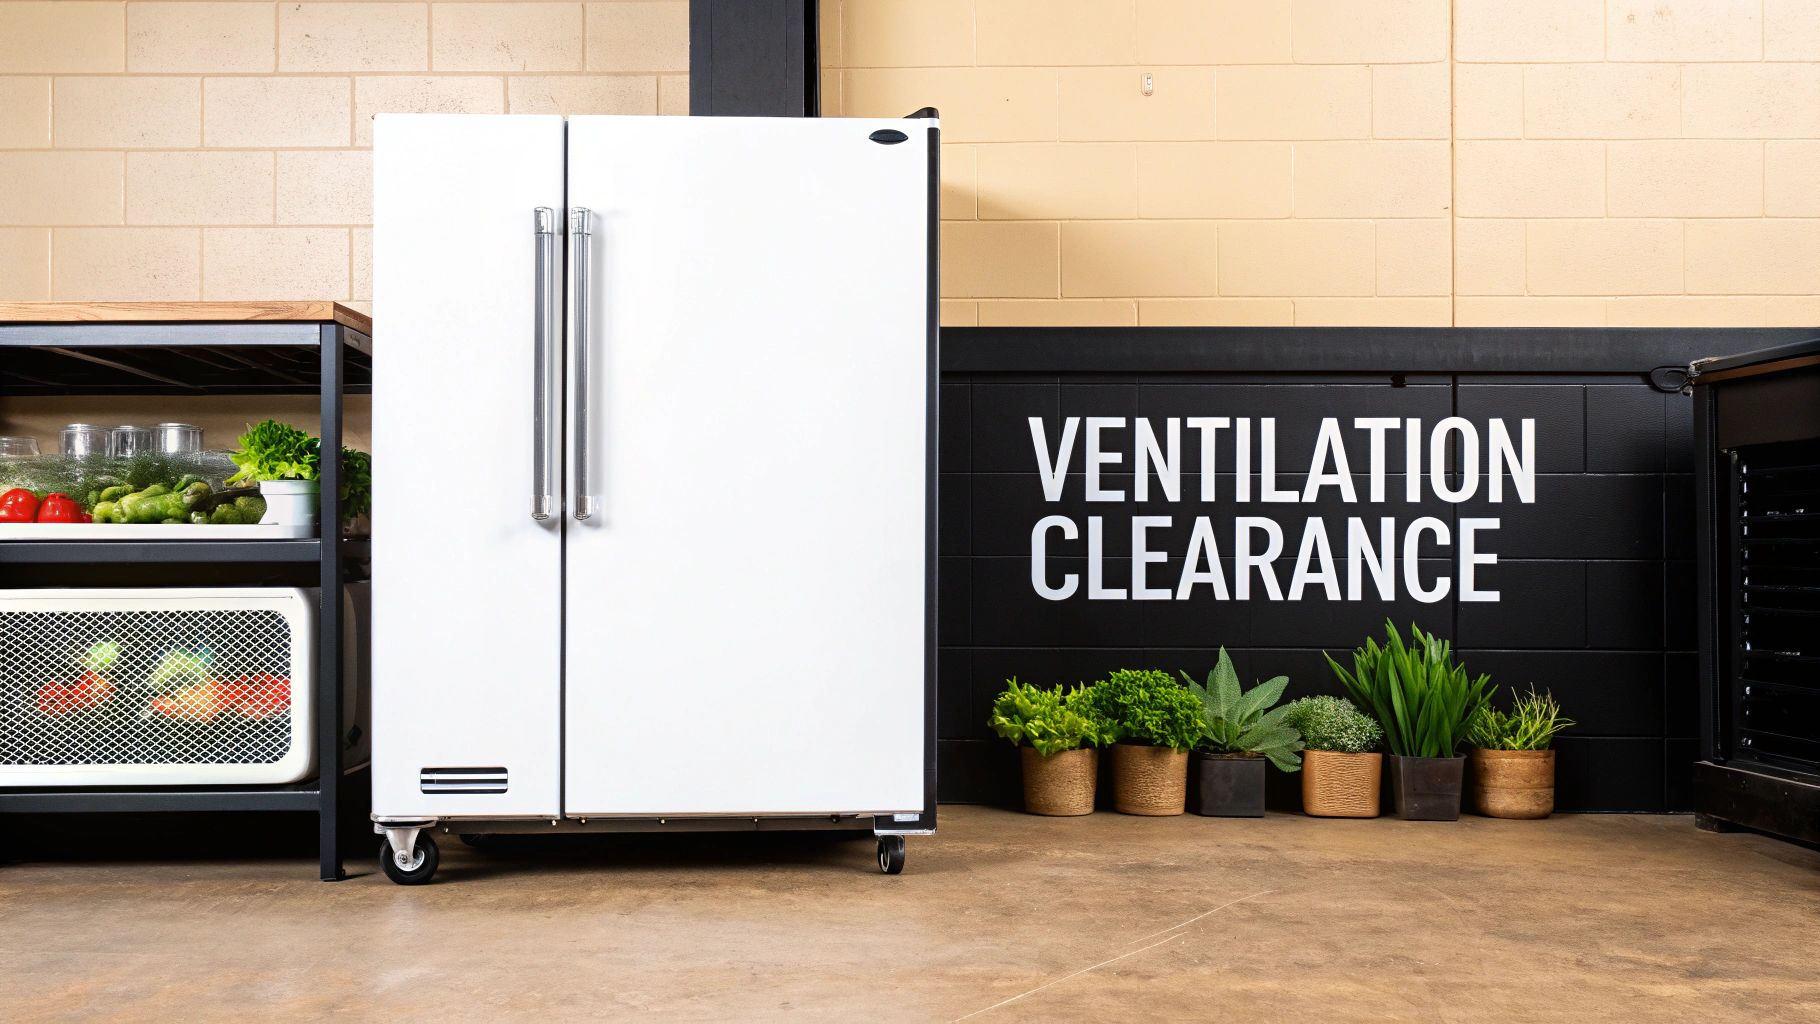
The numbers you get from your tape measure are just the beginning. When you're fitting an undercounter refrigerator, the most important dimensions are often the ones you can't see—the gaps you leave around it for proper airflow. Without enough room to breathe, even the best refrigerator will start to struggle, kind of like asking a marathon runner to perform without oxygen.
Think of the refrigerator's compressor as its engine. That engine throws off a lot of heat while it's working hard to keep everything inside cold. Ventilation is simply the system that gets rid of that heat, stopping the engine from burning out. Ignoring these "hidden" dimensions is a surefire way to cause yourself headaches, from sky-high energy bills to your equipment failing way too soon.
Figuring out how your unit vents is the key to a good installation. It’s what separates a refrigerator you can build seamlessly into your cabinetry from one that needs open space to survive. Get this one detail right, and you're set up for success.
Front-Venting Built-In Models
Front-venting models are the rockstars of integrated kitchen design. They’re specifically engineered to be enclosed on the top, back, and sides because they do all their breathing through a grille on the front, usually right at the bottom. This clever design allows them to pull in cool air and push out hot air, all from the same spot.
This makes them the only real choice for a true "built-in" or "undercounter" setup where you want the unit to sit flush with your cabinets. But even these space-savers need a tiny bit of wiggle room—usually just 1/8 inch on the sides and top—to keep them from vibrating against the cabinetry and make it easier to slide them in and out for service.
Rear-Venting Freestanding Models
Rear-venting models, on the other hand, are designed to be freestanding. Their cooling coils are on the back of the unit, and they count on open space all around to dissipate heat. Shoving one of these into a tight cabinet enclosure is a recipe for disaster.
Critical Insight: Enclosing a rear-venting refrigerator is like putting it in a hot box. It's forced to breathe in its own hot exhaust, making the compressor run constantly. This can spike your energy use by as much as 15% and burn out the motor in no time.
These units need a good amount of clearance to work properly:
- Back: You need at least 2-3 inches of open space behind it for heat to escape.
- Sides: Give it about 1 inch on each side for air to circulate.
- Top: Another 1-2 inches up top helps prevent heat from getting trapped.
This need for breathing room makes them a poor fit for a seamless undercounter look. Understanding the bigger picture of airflow is a huge part of kitchen design, and you can learn more about how it all connects by checking out these commercial kitchen ventilation requirements.
A Quick Ventilation Comparison
Choosing the right ventilation style isn't just a suggestion; it's a critical step in making sure your refrigerator works as intended. This simple table breaks down the key differences.
Ventilation Type and Required Clearances
| Ventilation Type | Typical Clearance Needed (Sides/Back/Top) | Best For | Common Mistake |
|---|---|---|---|
| Front-Venting | 1/8" on sides/top, 0" in back | True built-in, undercounter installations where a flush look is desired. | Blocking the front grille with floor mats, boxes, or other debris. |
| Rear-Venting | 1" on sides, 1-2" on top, 2-3" in back | Freestanding placement where it has open space around it. | Pushing it flush against a wall or trying to enclose it in cabinetry. |
At the end of the day, respecting these "hidden dimensions" is what protects your investment. It keeps the unit's parts from being overworked, holds your energy costs down, and ensures you get reliable cooling for years. Always, always check the manufacturer’s spec sheet for the exact clearance needed before you finalize your purchase.
How Dimensions Translate to Real-World Capacity
It’s easy to get caught up in the physical measurements of an undercounter refrigerator. Will it slide neatly into that 24-inch gap? Perfect. But that only tells you if it fits the space, not if it fits your workflow. The real question is, how much can it actually hold? This is where we move past the tape measure and talk about usable internal capacity, which is measured in cubic feet.
Think of it like buying a suitcase. You might find two bags that look identical on the outside, but one is packed with bulky dividers and thick padding, leaving you with surprisingly little room for your stuff. The other has a smarter, more streamlined interior and holds way more. Refrigerators are the exact same; the internal design is what truly defines its storage potential.
What Determines Usable Space?
A unit's external shell is just the start. The real magic—or frustration—happens inside, where manufacturers have to balance performance with pure, unadulterated space. Several factors can eat into that precious storage area, even in units that share the exact same width or depth.
- Insulation Thickness: A true commercial-grade unit needs thicker insulation to hold its temperature during a chaotic dinner rush. Thicker walls, however, mean less interior space.
- Compressor Location: We’ve all seen it—that awkward hump at the bottom of a refrigerator where the compressor lives. That hump can kill the flat surface you need for neatly stacking sheet pans or large containers.
- Shelving Design: Bulky shelf supports and fixed dividers can seriously limit your storage flexibility. Adjustable shelves are a must-have for fitting items of all different shapes and sizes.
This is why two refrigerators that are both 24 inches wide might offer wildly different capacities. One could give you a roomy 5.5 cubic feet of storage, while another only provides 4.8 cubic feet. That 0.7 cubic feet difference might not sound like much, but it’s roughly the space you'd need for about 20 standard 12-ounce cans.
Key Takeaway: Don't ever assume that a wider footprint automatically means more usable space. Always, always check the manufacturer's listed capacity in cubic feet and look at interior photos. Make sure the layout actually works for what you need to store, whether it’s bottles, food pans, or specific containers.
Matching the Right Size to Your Kitchen's Needs
Now, let's connect these numbers to your actual kitchen workflow. Choosing the right size isn’t just about cramming a box into a space; it's about selecting a tool that's perfectly suited for its job. What works for a quiet little café is completely different from what a high-volume prep station needs to survive the lunch rush.
A slim 15-inch unit is a champion at saving space but offers limited capacity, making it a specialist for low-volume tasks. On the other end of the spectrum, a wide 48-inch model is a storage powerhouse built for the relentless demands of a bustling kitchen.
Recommended Sizes for Common Foodservice Jobs
To help you visualize this, here are some practical scenarios that match the right dimensions to the right task. Getting this right ensures your investment actually boosts efficiency instead of creating a new bottleneck.
1. The Compact Bar Station (15-inch to 24-inch Models)
At a bar, speed and easy access are everything. A slim 15-inch unit is perfect for tucking into a tight spot to hold essential garnishes, juices, and a few backup bottles. A more standard 24-inch glass door model is a better fit for storing milk for lattes, creams, and craft beers, keeping everything a bartender needs right within arm's reach.
- Typical Capacity: 2.5 to 5.5 cubic feet.
- What It Holds: Cocktail garnishes, mixers, backup beverage cans, milk cartons.
- Best For: Coffee shops, small bars, dessert stations, or anywhere space is tight.
2. The All-Purpose Prep Line (24-inch to 36-inch Models)
This is where the industry-favorite 24-inch model truly shines. It’s the perfect size to hold multiple third-size or half-size food pans filled with prepped ingredients. If you step up to a 36-inch unit, you gain even more flexibility, giving you enough room to hold both your prepped items and backup sauces or proteins, which means fewer trips to the walk-in cooler.
- Typical Capacity: Ranges from 5.0 to 9.0 cubic feet.
- What It Holds: Standard hotel pans, containers of sauces, pre-portioned proteins.
- Best For: Sandwich shops, salad stations, and busy restaurant prep lines.
3. The High-Volume Workhorse (48-inch and Larger Models)
When you need the absolute maximum undercounter storage and an extra prep surface, a 48-inch or 60-inch worktop refrigerator is the answer. These units are designed for intense, high-volume kitchens where entire trays of prepped food need to be stored and accessed in an instant. The top surface provides valuable extra counter space, making them a dual-purpose efficiency machine.
- Typical Capacity: Often 12.0 cubic feet or more.
- What It Holds: Full-size sheet pans, multiple large food pans, bulk ingredients.
- Best For: Busy institutional kitchens, large restaurants, and central prep areas.
By carefully thinking through your menu and daily workflow, you can choose the undercounter refrigerator dimensions that will directly support your team, turning a simple appliance into a strategic asset.
How Regulations Like ADA and NSF Impact Dimensions
Picking out an undercounter refrigerator isn't just about making sure it slides neatly under your counter. You also have to think about industry standards that dictate safety and accessibility. These aren't just bureaucratic hoops to jump through; think of them as a blueprint for a kitchen that's safer, more efficient, and welcoming to every member of your team.
Getting this wrong can lead to some serious headaches, from failed health inspections to costly fines or operational bottlenecks. Let's break down how crucial standards from the National Sanitation Foundation (NSF) and laws like the Americans with Disabilities Act (ADA) shape the very design of the equipment you use every day.
NSF Certification and Food Safety Dimensions
When you spot that little NSF certification logo on a piece of equipment, it's basically a seal of approval for food safety. This isn't just a sticker; it's a guarantee that the unit was built from the ground up with cleanability and public health in mind.
NSF standards demand that every surface that comes into contact with food must be smooth, non-porous, and ridiculously easy to clean. This means no tiny cracks or crevices where bacteria can hide out. You'll see this in features like coved (rounded) interior corners and the use of tough, corrosion-resistant stainless steel. These details ensure the fridge can handle the daily grind of a commercial kitchen, including harsh cleaning chemicals.
- Materials: NSF insists on materials like 300-series stainless steel that laugh off rust and are simple to sanitize.
- Construction: You'll find sealed seams and rounded corners designed to eliminate those annoying dirt traps.
- Clearance: Some units are designed with specific leg heights, which adds to the overall height but makes it much easier to clean underneath—a major plus for health inspectors.
While NSF doesn’t dictate a refrigerator’s exact width or depth, its strict rules on construction and materials mean that a certified commercial unit is in a different league of durability and hygiene compared to a residential model.
Key Insight: An NSF certification is your assurance that the refrigerator's design prioritizes public health. It confirms that every component, from the shelving to the door gaskets, is built to be thoroughly and easily cleaned, directly supporting your food safety protocols.
ADA Compliance and Accessible Design
The Americans with Disabilities Act (ADA) is all about making sure workspaces are accessible to everyone, including employees with disabilities. For undercounter refrigerators, this boils down to two main things: counter height and how easy the unit is to operate.
ADA guidelines state that countertops in accessible work areas can't be higher than 34 inches off the floor. This means an ADA-compliant undercounter refrigerator has to be short enough to fit, usually maxing out at 34 inches in height, including its legs or casters. That's a little shorter than the standard 36-inch counter height you see in many kitchens.
But it’s not just about height. ADA compliance also covers usability:
- Forward Reach: The controls and door handles need to be within comfortable reach for someone using a wheelchair.
- Operating Force: It shouldn't take much effort to open the door—less than 5 pounds of force, to be exact.
- Clear Floor Space: The layout must provide enough clear floor space in front of the unit for easy approach and use.
Choosing ADA-compliant equipment isn't just a legal checkbox. It’s about building an inclusive kitchen where your entire team can work safely and efficiently. A 34-inch tall unit not only fits under an accessible counter but also brings the contents to a more comfortable height for everyone, improving ergonomics across the board.
A Few Final Questions on Undercounter Refrigerator Dimensions
When you're down to the final measurements, a few practical questions always seem to pop up. Getting these details sorted out ahead of time is the key to making a confident purchase and avoiding any installation day surprises. Let’s tackle some of the most common concerns we hear from operators.
Can I Just Use a Residential Model in My Kitchen?
I get this question a lot, and the answer is a hard no. It's tempting to try and save a few bucks, but it's a mistake that will cost you much more in the long run.
Commercial units are built like tanks with heavy-duty parts designed for constant use. More importantly, they're NSF-certified, which is a non-negotiable requirement for meeting health codes. A residential model simply won't pass inspection, and it will break down quickly under the demands of a professional kitchen, creating safety risks and operational headaches.
What Really Happens If I Ignore the Ventilation Clearance?
Failing to leave enough breathing room for your refrigerator is like forcing a marathon runner to breathe through a coffee stirrer. The compressor has to work overtime to get rid of heat, and that leads to a whole cascade of problems.
- Sky-High Energy Bills: The unit will run almost constantly, burning through electricity.
- Component Burnout: Overheating is the fastest way to kill critical parts and cause a premature breakdown.
- Serious Food Safety Risks: When the unit can't hold a steady temperature, your inventory is at risk.
Always, always follow the manufacturer's specified clearance. It’s the single best way to protect your investment and keep your food safe.
Final Takeaway: The difference between residential and commercial isn't just about price—it's about performance, safety, and compliance. Choosing the right type of unit is just as crucial as getting the dimensions perfect.
How Do I Figure Out the Right Capacity for My Needs?
Start by taking a hard look at your menu and how your team works. A small coffee shop that just needs to store milk and cream might be perfectly fine with a compact 5-7 cubic foot unit. But a busy sandwich prep station could easily require 12+ cubic feet to hold pans of ingredients.
My advice? It's always better to slightly overestimate your needs. This gives you room to grow and prevents bottlenecks when business picks up. Also, think about the shape of what you store—make sure the interior layout can actually accommodate the pans and containers you use every day.
At The Restaurant Warehouse, we offer a wide selection of commercial undercounter refrigerators to fit any kitchen's needs. Explore our collection and find the perfect fit for your space today!
About The Author

Sean Kearney
Sean Kearney used to work at Amazon.com and started The Restaurant Warehouse. He has more than 10 years of experience in restaurant equipment and supplies. He graduated from the University of Washington in 1993. He earned a BA in business and marketing. He also played linebacker for the Huskies football team. He helps restaurants find equipment at a fair price and offers financing options. You can connect with Sean on LinkedIn or Facebook.
Leave a comment