


Your Guide to the Perfect Sandwich Refrigerated Prep Table
Think of a sandwich refrigerated prep table as the central nervous system of a busy kitchen line. It’s an all-in-one workstation that brilliantly combines a refrigerated base, a top rail for holding chilled food pans, and a cutting board surface. This setup is designed to keep every single one of your sandwich and salad ingredients perfectly cold and just inches away, which massively speeds up your assembly time and locks in food safety.
Why a Prep Table Is Your Kitchen’s Command Center
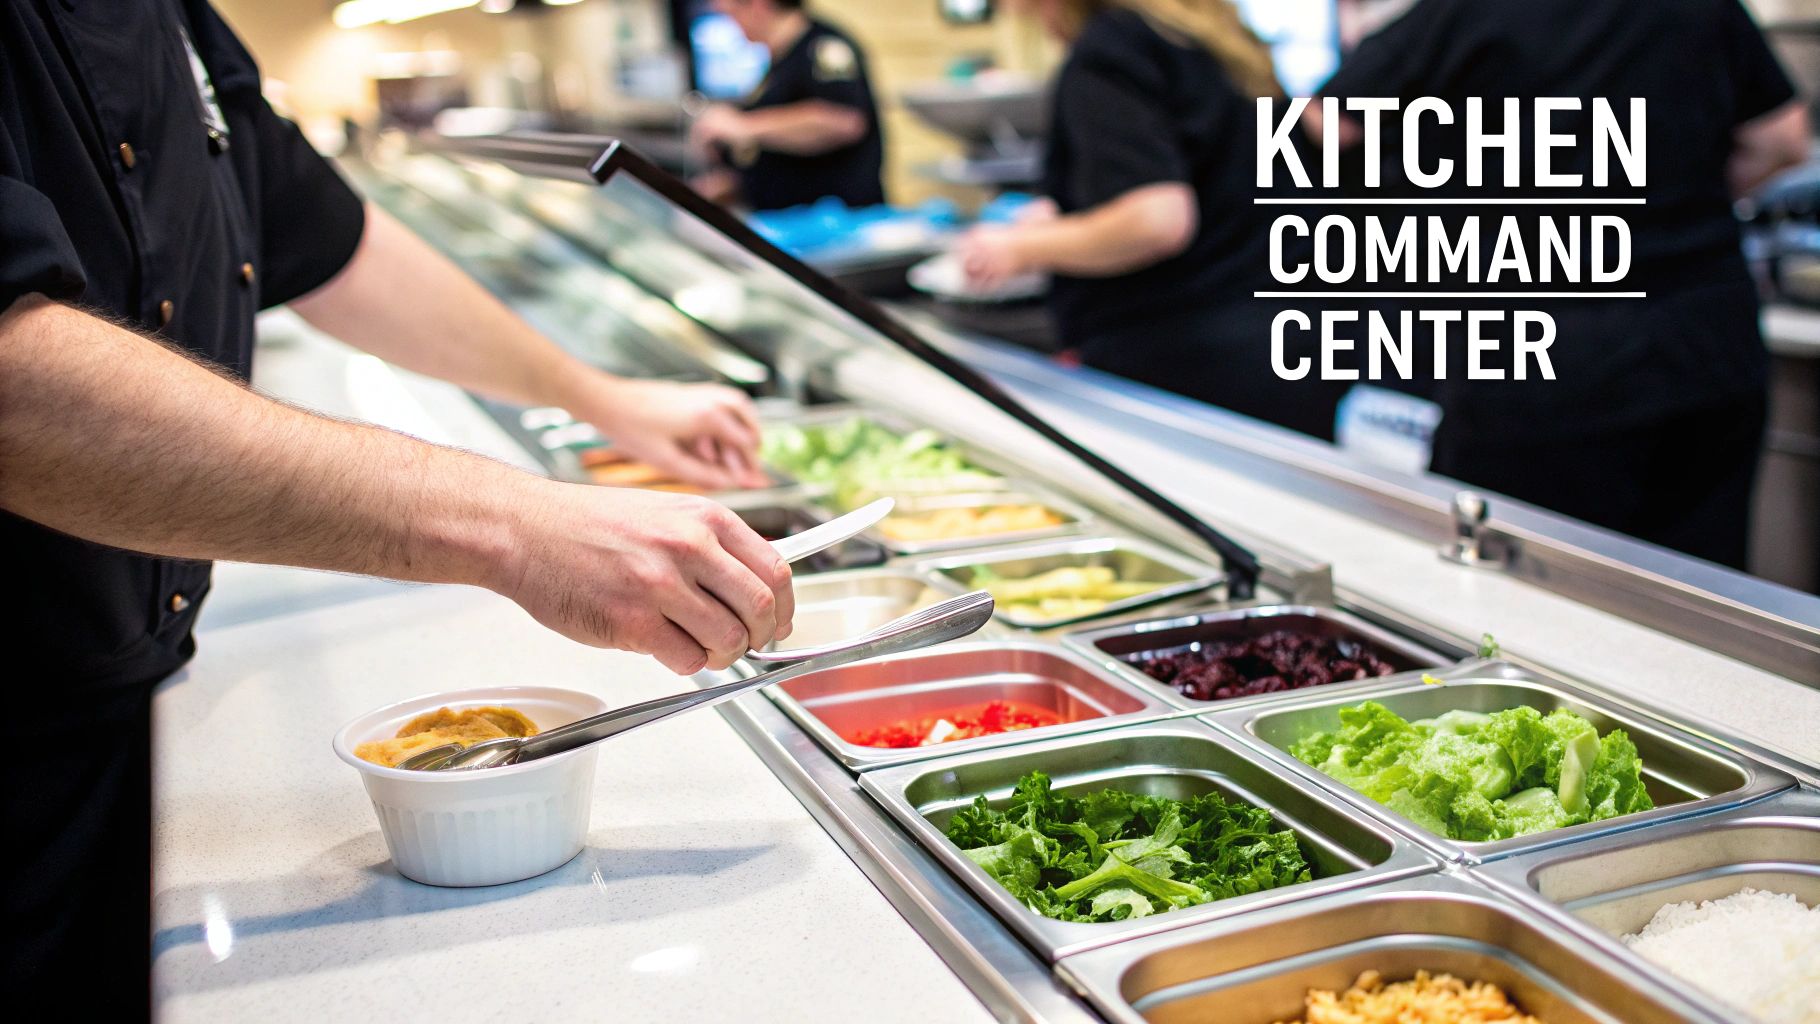
Picture your kitchen in the middle of a chaotic lunch rush. A sandwich refrigerated prep table isn't just another slab of stainless steel; it's the command center for your entire operation. It's like a chef's cockpit, where every chilled ingredient, from crisp lettuce to cured meats, is perfectly organized and ready for action.
This strategic layout completely streamlines the food prep process, empowering your team to work faster and more efficiently. Instead of making trips between a separate refrigerator and a prep counter, everything they need is consolidated into one ergonomic unit.
Boosting Efficiency and Upholding Safety
The real magic of this integrated design is how much it cuts down on ticket times. With ingredients held at the perfect temperature right in the top rail, your staff can build orders without ever breaking their rhythm. This doesn't just make customers happier; it actually increases your kitchen's total output.
But it’s not all about speed. These units are absolutely critical for food safety. By keeping perishable items in a consistent cold chain from storage to the final sandwich, you drastically reduce the risk of foodborne illness. This is non-negotiable for meeting health codes and protecting your customers.
Here’s a quick rundown of the advantages:
- Streamlined Workflow: It merges refrigeration, ingredient storage, and prep space into a single, efficient station.
- Reduced Ticket Times: Allows your team to assemble orders much faster during those hectic peak hours.
- Enhanced Food Safety: Maintains a steady cold chain, keeping ingredients well below the temperature danger zone.
- Minimized Food Waste: Proper refrigeration extends the life of all your perishable toppings and fillings.
A well-organized prep table does more than just save time—it acts as the first line of defense in food safety, ensuring every sandwich or salad you serve is as safe as it is delicious. It’s an investment that pays dividends in operational smoothness and customer trust.
For any foodservice business—from bustling delis and cafes to nimble food trucks and catering operations—the right prep table is a true game-changer. It's a foundational piece of equipment that directly impacts your efficiency, safety standards, and ultimately, your bottom line.
What Makes a Sandwich Prep Table Tick?
To really get why a sandwich refrigerated prep table is such a game-changer, you have to look at it as more than just a single appliance. It’s a complete, multi-part workstation where every single piece is designed to boost your efficiency and keep your food safe. Let's pull back the curtain on the four main components that work together to make the magic happen.
The Refrigerated Rail: Your Ingredient Command Center
The top section of the table is the refrigerated rail, and it's the heart of your whole operation. This is where all your chilled food pans live, keeping every topping—from crisp lettuce and sliced tomatoes to deli meats and cheeses—at a perfectly safe and consistent temperature.
Think of it as your command center, putting every ingredient you need within immediate reach. The whole setup is built around maintaining the "cold chain," which is just a food safety term for keeping perishable food below 40°F from the moment it leaves the walk-in to the moment it hits the plate. This instant access is exactly what lets your team fly through orders during a lunch rush.
The Cutting Board: Your Creative Workspace
Sitting directly in front of that rail is the cutting board, your dedicated space to build and create. This is where all those perfectly chilled ingredients come together and orders spring to life. These boards are almost always made from high-density polyethylene (HDPE)—a tough, non-porous material that’s a breeze to clean and won’t dull your knives.
The depth of the cutting board is a bigger deal than you might think. A deeper board, maybe 10 to 12 inches, gives you plenty of elbow room to assemble massive subs or complex salads without ingredients spilling everywhere. It acts as the perfect bridge between your cold rail and the finished product, creating a natural, ergonomic flow. For a closer look at materials and how to care for them, our guide on stainless steel prep tables has some great tips for keeping your workspace in top shape.
The Refrigerated Base: Your Backup Supply
Underneath the workspace, you’ll find the refrigerated base. This is your backup supply depot, the spot where you store bulk ingredients, extra pans, and anything else that needs to stay chilled and ready for a quick restock. This enclosed cabinet is the workhorse that keeps the high-speed action on top from ever slowing down.
This base comes in two main styles, and the one you choose can really affect your kitchen’s rhythm:
- Doors: This setup offers flexible, open-shelf storage that’s perfect for bulky or awkwardly shaped items like big tubs of lettuce, meat chubs, or buckets of sauce. The shelves are usually adjustable, so you can customize the space.
- Drawers: This option gives you highly organized storage for extra food pans. Each drawer is usually sized to hold specific pans, making it incredibly fast to swap out an empty pan on the rail for a fresh, full one.
The choice between doors and drawers really comes down to how your team works during a rush, making it a critical decision when you’re picking out a unit.
A sandwich refrigerated prep table is a complete system, not just a cooler. The top rail provides instant access, the cutting board is for assembly, and the refrigerated base makes sure you're always stocked. Every part is there to cut out wasted steps.
The Compressor: The Heart of the Unit
Finally, we have the compressor—the unsung hero of the whole operation. It’s the powerful heart that pumps refrigerant through the unit, pulling heat out of both the top rail and the storage base to keep everything cold. Where this component is located makes a huge difference.
Rear-breathing compressors are pretty common, but they need a few inches of clearance behind the unit to get proper airflow. On the other hand, front-breathing compressors pull and push air from the front, which means you can install the table flush against a wall. For kitchens where every inch of space counts, like in a food truck or a tiny café, this is a game-changing feature that maximizes your usable floor space. Knowing your kitchen’s layout is key to picking the right compressor style.
Key Features to Compare Before You Buy
Picking the right sandwich refrigerated prep table is one of the most critical equipment decisions you'll make for your kitchen. It’s not just about finding a unit that fits in your space; it’s about investing in a workstation that can handle the daily grind of a busy service while actually making your workflow smoother and protecting your valuable inventory.
Think of it like buying a car. You wouldn't just pick one based on the color. You’d pop the hood, check the cargo space, and think about fuel efficiency. It's the same deal here. Diving into the specs is what separates a smart investment from a future headache. The market for these tables is huge—some reports value it as high as $3.48 billion—which tells you just how central they are to modern kitchens.
This section is your detailed buyer's guide. We'll break down the crucial features that determine a prep table's performance, durability, and whether it’s the right fit for your specific operation.
This little workflow chart shows you exactly how a well-designed prep table keeps things moving, from chilled ingredients in the top rail to the cutting board and finally into the refrigerated base for backup storage.
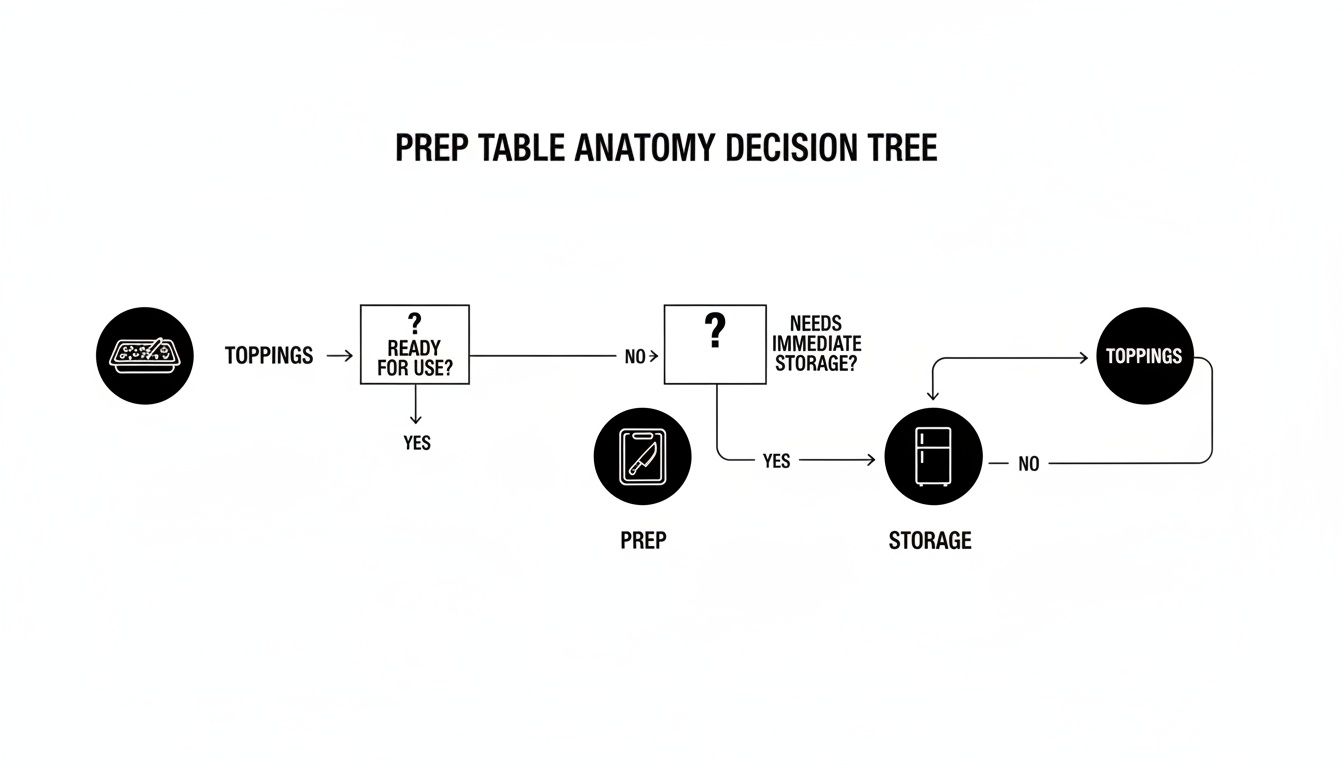
As you can see, having everything in one integrated station—toppings, a prep surface, and storage—is the secret sauce to faster service and less chaos during those peak hours.
Size and Capacity
First things first: you have to pick the right size. Prep tables are measured by their width, with common sizes ranging from a compact 27 inches to a massive 93 inches or even larger. The perfect size for you comes down to two simple things: your available space and your expected customer volume.
A small café or a food truck squeezed for square footage will probably find a 27-inch or 36-inch model to be a perfect fit. These smaller units give you all the core benefits without hogging the entire kitchen.
On the other hand, a high-volume deli churning out hundreds of sandwiches during the lunch rush needs a much bigger station, likely in the 60-inch to 93-inch range. A wider table doesn't just give you more refrigerated storage below; it also supports a larger top rail, letting you hold more ingredients at once.
Key Takeaway: Measure your space carefully, but don't forget to think about your menu's complexity. A wider table isn’t just about more storage; it’s about having more unique ingredients ready to go, which is a must for a diverse menu.
Pan Capacity and Rail Configuration
Directly connected to the unit's width is its pan capacity—that's the number of food pans the refrigerated top rail can hold. This is where your menu really dictates your equipment choice. A simple menu with a few core ingredients might only need a unit that holds eight 1/6-size pans.
But a gourmet sandwich shop with dozens of meats, cheeses, veggies, and spreads will need a table that can handle 16, 24, or even more pans. Always check the manufacturer's specs for the pan setup. Most units are designed for standard 1/6-size pans, but some offer flexibility for 1/3-size or 1/9-size pans.
Think of your pan rail as your artist's palette. The more colors (ingredients) you have ready, the more creative and efficient you can be. Running out of a key ingredient mid-rush because your rail is too small is a complete workflow killer.
The Great Debate: Doors vs. Drawers
The refrigerated base of your prep table is your immediate backup supply, and how you get to it can make a huge difference in your kitchen's rhythm. You've got two main options: doors or drawers. Each has its own clear advantages, and the right choice really depends on what you’re storing and how your team works.
Doors vs Drawers: Which Base Is Right for You?
| Feature | Door Base | Drawer Base |
|---|---|---|
| Best For | Storing bulky, odd-shaped items like large lettuce bins, sauce bottles, or blocks of cheese. | Holding pre-portioned ingredients in standard-sized food pans for quick restocking. |
| Flexibility | High. Adjustable shelves allow you to customize the storage space for a variety of items. | Low. Designed specifically for food pans, offering less flexibility for non-standard containers. |
| Organization | Good. Shelves provide structure, but items can get pushed to the back. | Excellent. Pans keep everything neat, visible, and easy to grab. |
| Workflow | Good for general storage and accessing a wide range of different ingredients. | Ideal for high-speed, repetitive tasks. Perfect for a grab-and-go system to restock the top rail. |
Ultimately, the choice comes down to your menu. If you need flexible storage for all sorts of items, doors are your best bet. If your operation is all about speed and neatly organized pans, drawers will make your life much easier. For a closer look at how different brands handle this, check out some of the top-rated refrigerated prep tables to see these configurations in action.
Refrigeration System and Compressor Location
The heart of your sandwich refrigerated prep table is its refrigeration system. Modern units use forced-air technology to blow cold air over the food pans in the top rail, making sure every ingredient stays safely within the 33°F to 41°F zone.
A critical detail to consider is where the compressor is located. As we touched on earlier, this determines where the unit "breathes" from.
- Rear-Breathing: These are the most common and are often more affordable. They need a few inches of clearance between the back of the unit and the wall for proper airflow.
- Front-Breathing: These units pull in and vent air from the front, which means you can install them completely flush against a wall. This is a game-changer in tight spaces like food trucks or small galley kitchens.
Also, pay attention to the type of refrigerant used. Newer models are increasingly using eco-friendly refrigerants like R290 (propane). These have a much lower environmental impact and are often more energy-efficient than older types.
Materials and Durability
Commercial kitchens are tough on equipment, so the construction of your prep table matters—a lot. The industry standard for the exterior and work surfaces is stainless steel, but not all stainless steel is created equal.
Look for units made from 300-series stainless steel, especially for the exterior and top. This grade has chromium and nickel, which gives it fantastic resistance to rust and corrosion. A cheaper 400-series stainless steel might be used for back panels, but it's more likely to rust over time.
The cutting board is another key component. Most are made from high-density polyethylene (HDPE), a durable, non-porous material that’s easy to clean and won't dull your knives. The depth of the cutting board is also important—a deeper board (10 inches or more) gives you a more generous workspace for putting together big or complicated orders.
Finally, keep an eye out for the small details that signal a quality build:
- Welded Corners: They're smoother and way easier to clean than sharp, folded corners.
- Heavy-Duty Casters: Make sure the unit is easy to move for cleaning and has locking brakes for stability.
- Self-Closing Doors: This feature saves energy and keeps temperatures stable if a door is accidentally left open.
Making a smart decision on these key features will ensure your new sandwich refrigerated prep table becomes a reliable and efficient command center for your kitchen for years to come. It’s an investment in speed, safety, and operational sanity.
Choosing the Right Prep Table for Your Business
Picking out a sandwich refrigerated prep table isn't a one-size-fits-all deal. The powerhouse unit that keeps a slammed downtown deli running smoothly would be total overkill for a small, cozy café. To get it right, you have to match the machine's muscle directly to what your business actually does day in and day out.
Think of it like this: you wouldn't hire a massive freight truck to run a local pizza delivery. In the same way, lining up your prep table's size, features, and layout with your business model means you’re investing in a tool that actually makes you faster, not one that just gets in the way or eats up space.
The High-Volume Deli Profile
For a high-volume deli, it all comes down to speed and capacity. When that lunch rush hits, your team needs to move like a well-oiled machine, and the prep table is the engine driving the whole operation. The name of the game is maximizing access to ingredients and giving your team enough elbow room to handle a complex menu and a non-stop ticket rail.
Here's what you should be looking for:
- Maximum Pan Capacity: A bigger unit, usually 60 inches or wider, is non-negotiable. This gives you room for 16 to 24 (or even more) 1/6-size pans, which means every topping, meat, and cheese is right there, ready to go, without someone having to constantly run to the back for refills.
- Oversized Cutting Board: A deep, sturdy cutting board—at least 10-12 inches deep—provides the real estate needed to build big sandwiches or even tackle multiple orders at once. A cramped workspace is a guaranteed way to slow down the line.
- Drawer Base: A refrigerated base with drawers is a massive workflow win here. You can stock each drawer with backup pans, making the switch from an empty pan to a full one a lightning-fast, sub-10-second task that keeps everything moving.
The Small Café or Coffee Shop Profile
In a smaller café or coffee shop, every square inch of floor space is gold. The goal here is to find a compact, efficient sandwich refrigerated prep table that gives you all the functionality you need without completely taking over the kitchen. The focus shifts from pure volume to smart, space-saving design and energy efficiency.
Your priorities should be:
- Compact Footprint: A 27-inch or 36-inch model is often the perfect fit. These units give you plenty of prep space and ingredient storage for a more focused menu of sandwiches, salads, and wraps without a massive footprint.
- Energy Efficiency: Keep an eye out for ENERGY STAR certified models. In a smaller operation, every dollar you save on utilities really counts, and these units can make a serious dent in your long-term operating costs.
- Door Base: A base with doors and adjustable shelving offers more flexibility for storing a mix of items. This is perfect for cafés with diverse menus that might need to store everything from bulk produce to bottles of sauce.
Picking the right model is all about understanding your market. While these units are essential everywhere, North America and Europe have historically been the biggest buyers. In fact, refrigerated prep tables are the top seller in the broader market, which really shows how critical they are for restaurants and chains. You can find more insights about the sandwich preparation refrigerators market from industry reports.
The Food Truck Profile
Running a food truck is a whole different ballgame where every inch of space has to be used to its full potential. The equipment needs to be tough enough to handle life on the road and designed to work in a seriously tight spot. When it comes to a food truck, the location of the compressor is the single most important feature.
- Front-Breathing Compressor: This is a deal-breaker. A front-breathing unit can be pushed right up against a wall, saving you precious inches of depth and maximizing the narrow workspace you find in most food trucks.
- Durable Casters: You'll want heavy-duty, locking casters. They give you the mobility you need for cleaning and repositioning but also ensure the unit stays locked down and secure during service.
- Compact but Mighty: A 27-inch or 48-inch table usually hits that sweet spot, giving you enough prep area and pan capacity without eating up your entire kitchen line.
The Catering Business Profile
Caterers need gear that’s mobile, flexible, and ready for anything. One day you might be serving salads at an outdoor wedding, and the next you’re building sandwiches for a corporate lunch. A prep table for a catering business has to be adaptable.
- Mobility is Key: The unit absolutely must have robust, smooth-rolling casters that can handle being moved around frequently. Durability is everything when your equipment is constantly being transported.
- Flexible Pan Configuration: The ability to easily swap out different pan sizes is a huge plus. This lets you customize the ingredient rail for each specific event menu on the fly.
- Easy to Clean: Since your table will be used in all sorts of locations, solid stainless steel construction (like the 300-series) is vital for quick and effective sanitation between events.
To help you visualize these recommendations, we've put together a simple table that summarizes the key priorities for each business type.
Prep Table Configuration by Business Type
| Business Type | Recommended Size | Key Feature Priority | Best Base Type |
|---|---|---|---|
| High-Volume Deli | 60 inches or wider | Max pan capacity, deep cutting board | Drawers |
| Small Café | 27 or 36 inches | Energy efficiency, compact footprint | Doors |
| Food Truck | 27 or 48 inches | Front-breathing compressor, durability | Doors or Drawers |
| Catering Business | 48 or 60 inches | Mobility, flexible pan setup | Doors |
Ultimately, this table is a starting point. The best choice always comes down to a deep understanding of your daily grind—your menu, your volume, and your space. Matching the equipment to your reality is the secret to a smarter, more efficient kitchen.
Installation and Maintenance Best Practices
Your new sandwich refrigerated prep table isn't just another piece of equipment; it's a serious investment and the command center of your production line. Making sure this asset has a long, productive life is all about giving it the right start and consistent care. Proper installation and a solid maintenance routine are your best defense against unexpected breakdowns and food safety issues.
Think of it like a high-performance car. You wouldn't just drive it off the lot and never check the oil or rotate the tires. The same logic applies here. A little proactive attention will keep your kitchen's workhorse humming along for years.
Setting Up for Success
The journey to peak performance starts the moment your new unit rolls through the door. A good installation is more than just plugging it in—it’s about creating the perfect environment for that refrigeration system to do its job without breaking a sweat.
First, give it room to breathe. Airflow is everything. If you have a rear-breathing model, you absolutely must leave a few inches of clear space between the back of the unit and the wall. This lets the compressor pull in cool air and push out heat. Blocking that airflow is like making a marathon runner breathe through a straw; the system will overwork itself into an early grave.
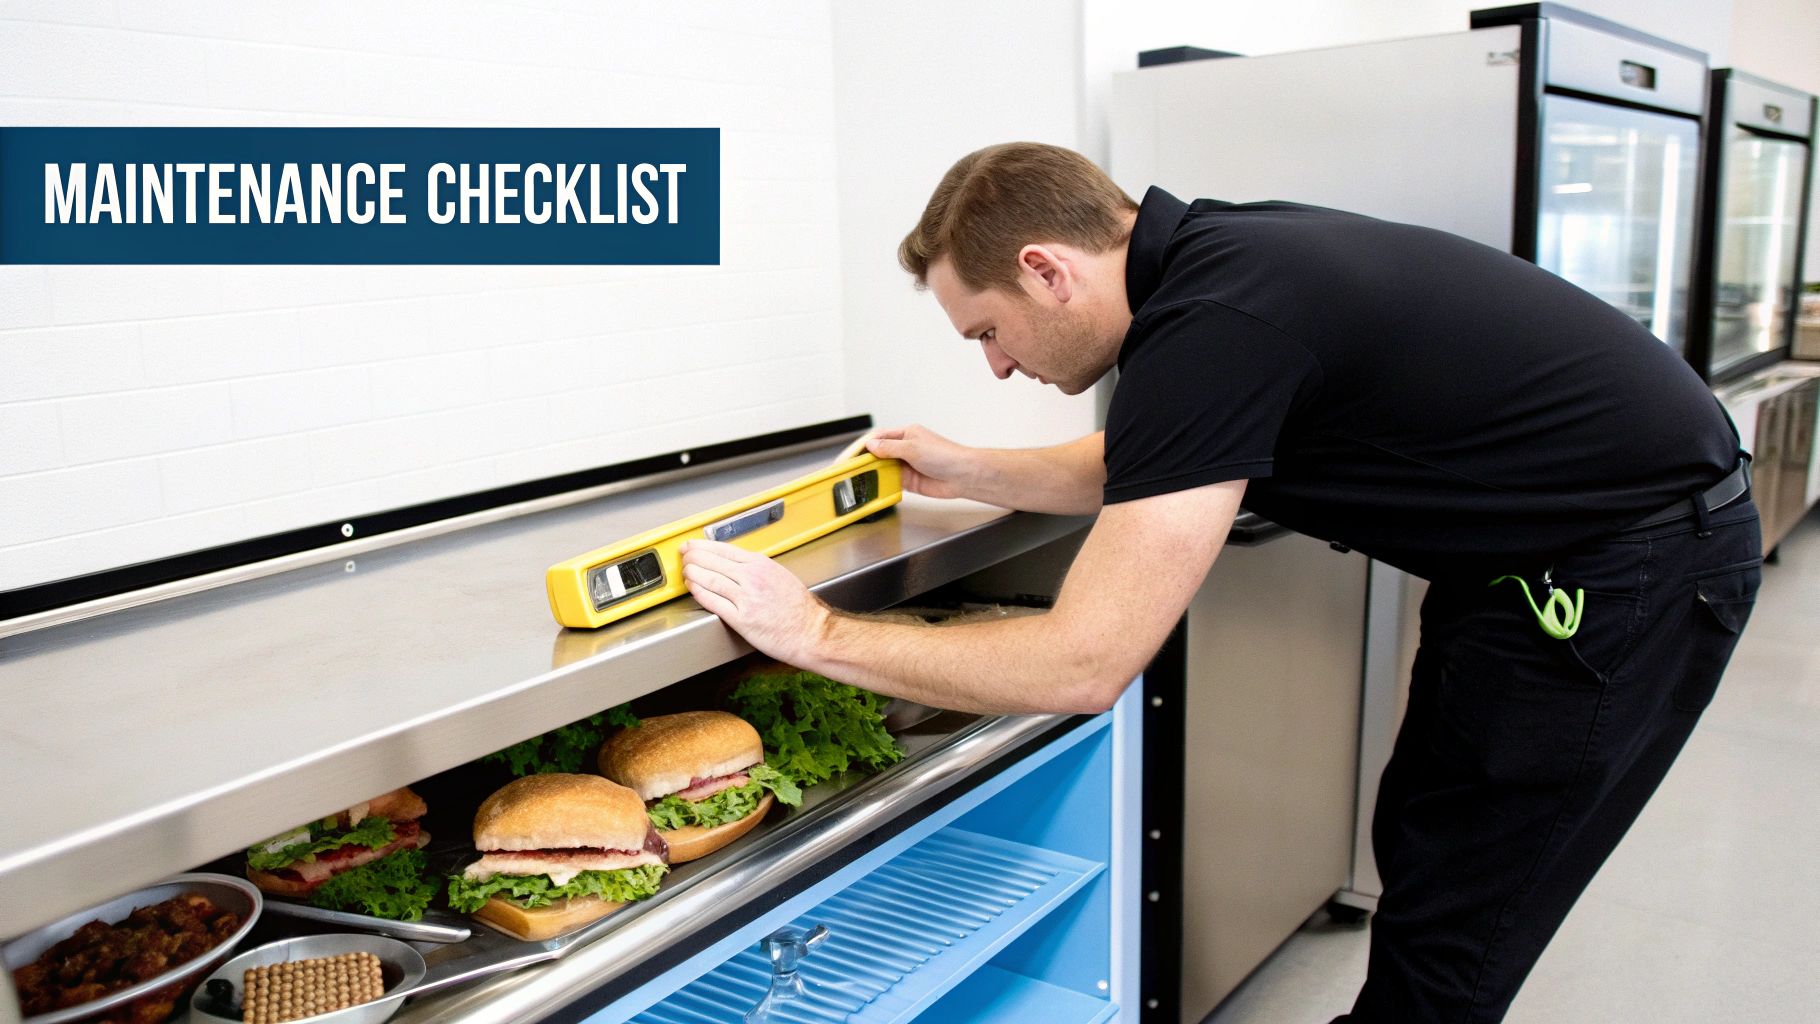
Next, get it perfectly level. Grab a level tool, place it on the work surface, and adjust the casters or legs until that bubble is dead center. An unlevel table can prevent doors from sealing tightly, causing cold air to leak out and forcing the compressor to run constantly. It also stops liquids from pooling on your cutting board.
Finally, mind the electricity. Most of these units need their own dedicated circuit to handle the power they draw, usually 115V. Plugging a powerful commercial appliance into an already loaded circuit is just asking for tripped breakers and potential damage to your new investment.
Your Proactive Maintenance Schedule
Consistent maintenance is the single most effective way to get the most life out of your prep table. A simple, repeatable schedule helps you spot small problems before they morph into big, service-killing emergencies. Breaking down the tasks makes it easy to keep your unit in prime condition without overwhelming your crew.
For a deeper dive, our guide to sandwich prep table maintenance offers detailed checklists and more pro tips.
Here’s a simple schedule to get you started:
Daily Tasks
- Wipe Down All Surfaces: Use a food-safe sanitizer on the cutting board, interior, and exterior.
- Empty and Clean Food Pans: Pull all pans from the rail, then wash and sanitize them thoroughly.
- Check Temperatures: Make sure both the top rail and the storage base are holding steady, typically between 33°F and 41°F.
Weekly Tasks
- Inspect Door Gaskets: Look over the rubber seals around the doors or drawers. Any cracks or tears mean cold air is escaping and you're wasting energy.
- Deep Clean the Interior: Take out all the shelving and give the inside of the storage base a full cleaning and sanitizing.
Monthly Tasks
- Clean the Condenser Coils: These coils get caked with dust and grease, forcing the compressor to work harder. Gently brush or vacuum them clean.
- Calibrate Thermometers: Double-check that your thermometers are giving you accurate readings to ensure food is always held safely.
A well-maintained sandwich refrigerated prep table is more than just an efficient tool; it's a commitment to food safety. Regular cleaning and upkeep are non-negotiable for preventing cross-contamination and upholding health code standards.
Your Sandwich Prep Table Questions Answered
Once your new sandwich refrigerated prep table is installed and humming along, you'll find that real-world questions start to bubble up. This is where the rubber meets the road. I've gathered some of the most common queries I hear from operators to give you clear, straightforward answers that will help you solve minor hiccups before they turn into major headaches.
Think of this as the user manual's greatest hits—just the practical, actionable advice you need for daily operations.
How Do I Manage Condensation on My Prep Table?
Seeing a little "sweat" on your unit, especially on those hot, humid summer days, is totally normal. Your prep table is in a constant battle with the warm, moist air of your kitchen. But if you're seeing excessive moisture or pooling water, it’s a sign that something needs a quick check.
Here are a few things to look at right away:
- Check Your Gaskets: The rubber seals around the doors and drawers are your first line of defense. Make sure they're clean and creating a tight seal. Any cracks or gaps are like an open invitation for warm air, causing condensation and forcing your compressor to work overtime.
- Keep the Lid Closed: That insulated lid covering the top rail isn't just for show. Whenever the table isn't in active use, close it. This simple step is huge—it traps the cold air where it belongs and keeps humid kitchen air out.
- Give It Room to Breathe: Make sure nothing is blocking the compressor's vents. Good airflow is the lifeblood of an efficient refrigeration cycle, and that cycle is what helps manage moisture in the first place.
What Is the Ideal Temperature Setting?
The FDA food code is crystal clear on this one: all cold foods must be held at 41°F or below to keep bacteria from growing. To meet that standard, most prep tables are engineered to maintain a temperature range between 33°F and 41°F.
Pro Tip: I always recommend setting your unit's thermostat to hold ingredients somewhere between 36°F and 38°F. This gives you a safe buffer. Even with staff opening and closing doors and drawers during a busy rush, your ingredients will stay safely below that 41°F danger zone.
Can I Use This for More Than Just Sandwiches?
Absolutely! Don't let the name fool you. While it's called a "sandwich" prep table, its design is one of the most versatile setups in any commercial kitchen. Any time you need to assemble dishes with a variety of cold ingredients, this workstation is your best friend.
Think beyond the deli counter:
- Salad Bars: The top rail is a dream for holding chopped veggies, proteins, cheeses, and dressings.
- Taco and Burrito Stations: Imagine all your pans filled with salsa, guacamole, sour cream, cheese, and different fillings, all perfectly chilled and ready to go.
- Pizza Prep: While dedicated pizza prep tables have wider cutting boards for large pies, a sandwich table is fantastic for smaller operations or for prepping sides, salads, and appetizers.
The core function—keeping a bunch of different ingredients chilled, organized, and right at your fingertips—translates perfectly to a huge range of menu items. It’s what makes this piece of equipment a true kitchen MVP.
At The Restaurant Warehouse, we're here to provide the durable, efficient equipment you need to build a successful operation. Explore our complete collection of commercial prep tables and find the perfect command center for your kitchen today.
About The Author

Sean Kearney
Sean Kearney used to work at Amazon.com and started The Restaurant Warehouse. He has more than 10 years of experience in restaurant equipment and supplies. He graduated from the University of Washington in 1993. He earned a BA in business and marketing. He also played linebacker for the Huskies football team. He helps restaurants find equipment at a fair price and offers financing options. You can connect with Sean on LinkedIn or Facebook.
Leave a comment