

Your Guide to the Best Restaurant Prep Table
Every great restaurant I've ever been in runs on precision and speed, and believe me, the restaurant prep table is the silent workhorse that makes it all happen. It's so much more than just a surface. It's the command hub where your menu goes from raw ingredients to beautifully finished dishes. A good prep table isn't just about having a durable, hygienic workspace; it's about the integrated refrigerated storage below that directly impacts your workflow, food safety, and ultimately, the quality of every single plate you send out.
The Unsung Hero of Your Commercial Kitchen
Think of your prep table as the physical intersection of storage and production. It’s where your culinary team's vision actually takes shape. That’s why choosing the right one is a critical business decision that ripples through everything from service speed to staff morale. I’ve seen it firsthand: a cheap or poorly designed table creates bottlenecks, compromises food safety, and leads to pure frustration during a busy rush.
But the right table? It empowers your team. It gives them an organized, clean surface and keeps all their essential ingredients perfectly chilled and right at their fingertips. That seamless access is what separates a chaotic kitchen from a well-oiled machine.
More Than Just a Counter
A commercial prep table is engineered for the tough reality of a professional kitchen. It’s not like a residential kitchen island; it’s built to withstand constant use, harsh cleaning, and the relentless pace of service. Its real benefits boil down to a few key things:
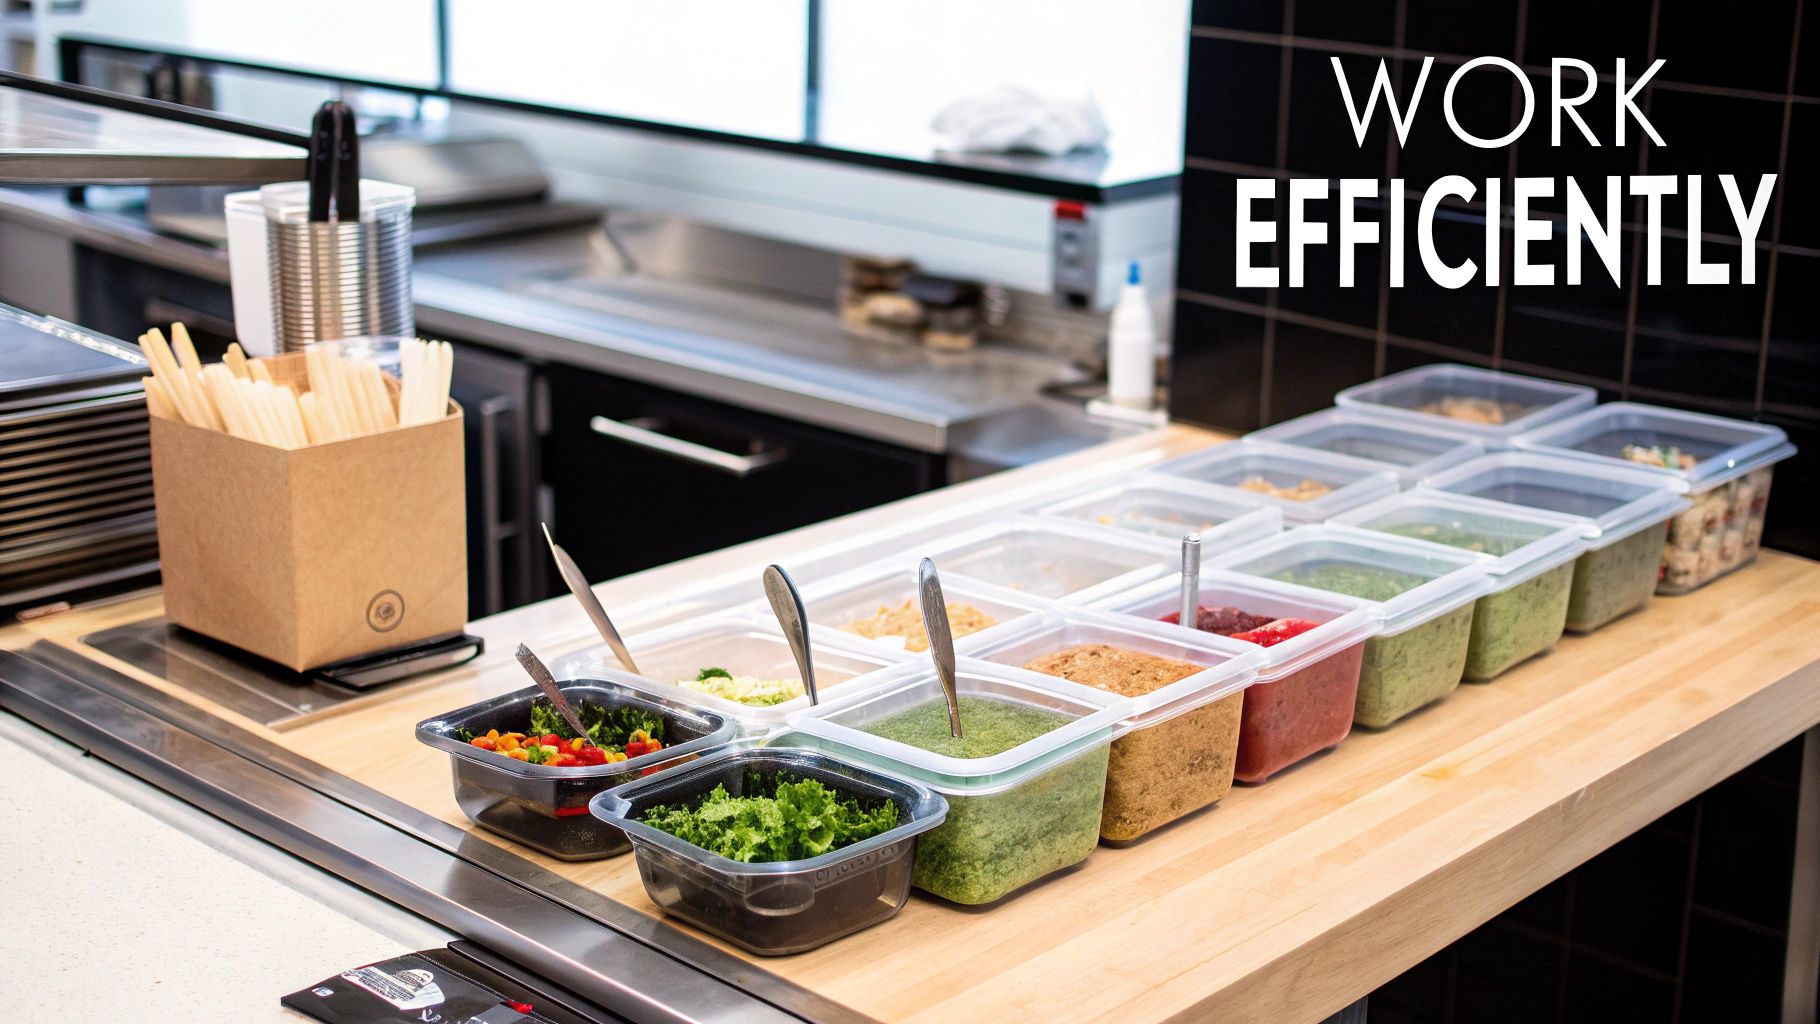
- A Smoother Workflow: By putting prep space and cold storage together, you cut down on the unnecessary steps chefs have to take. Those saved seconds add up on every single order.
- Better Food Safety: That built-in refrigeration means your ingredients are always held at safe temperatures, which seriously reduces the risk of spoilage and foodborne illness.
- Making the Most of Your Space: Kitchens are often tight on space. These multi-functional units make every square foot count.
The demand for this kind of essential equipment just keeps growing, which tells you how important it is. The global market for food prep tables hit about USD 1.18 billion in 2023 and is only expected to get bigger. This isn't just a number; it shows a real industry-wide shift toward smarter, more hygienic, and multi-functional kitchen setups.
Choosing the right prep table isn't just an equipment purchase; it's an investment in your kitchen's core operational efficiency and the consistency of your final product. It’s one of the most important decisions you’ll make for your back-of-house operations.
As you start looking at your options, it’s vital to understand the different features and figure out how they line up with what your kitchen actually needs. Our comprehensive prep table kitchen guide is the perfect next step, offering deeper insights to help you navigate the whole selection process. It's designed to make sure your kitchen is truly equipped for success.
Matching the Prep Table to Your Menu and Workflow
Choosing the right restaurant prep table isn’t about grabbing the biggest or most expensive model you can find. Let's be real—the perfect table for a high-volume pizzeria would be a complete disaster in a small café that just needs a spot for baked goods. Your menu, the flow of your ingredients, and the actual footprint of your kitchen are what should be guiding this decision.
Think about a fast-casual salad bar. Their entire model is built on speed and variety. For them, a mega-top refrigerated unit is a game-changer. These tables have three or more rows of pans, giving chefs access to dozens of fresh, chilled toppings without having to take a single step. That design is tailor-made for a "build-your-own" setup where every second counts.
On the other hand, a fine-dining spot focused on intricate plating might find more value in a simple, expansive stainless steel worktable. In that scenario, open surface area is king, giving chefs the elbow room they need for delicate, detailed work.
Analyzing Your Kitchen's Reality
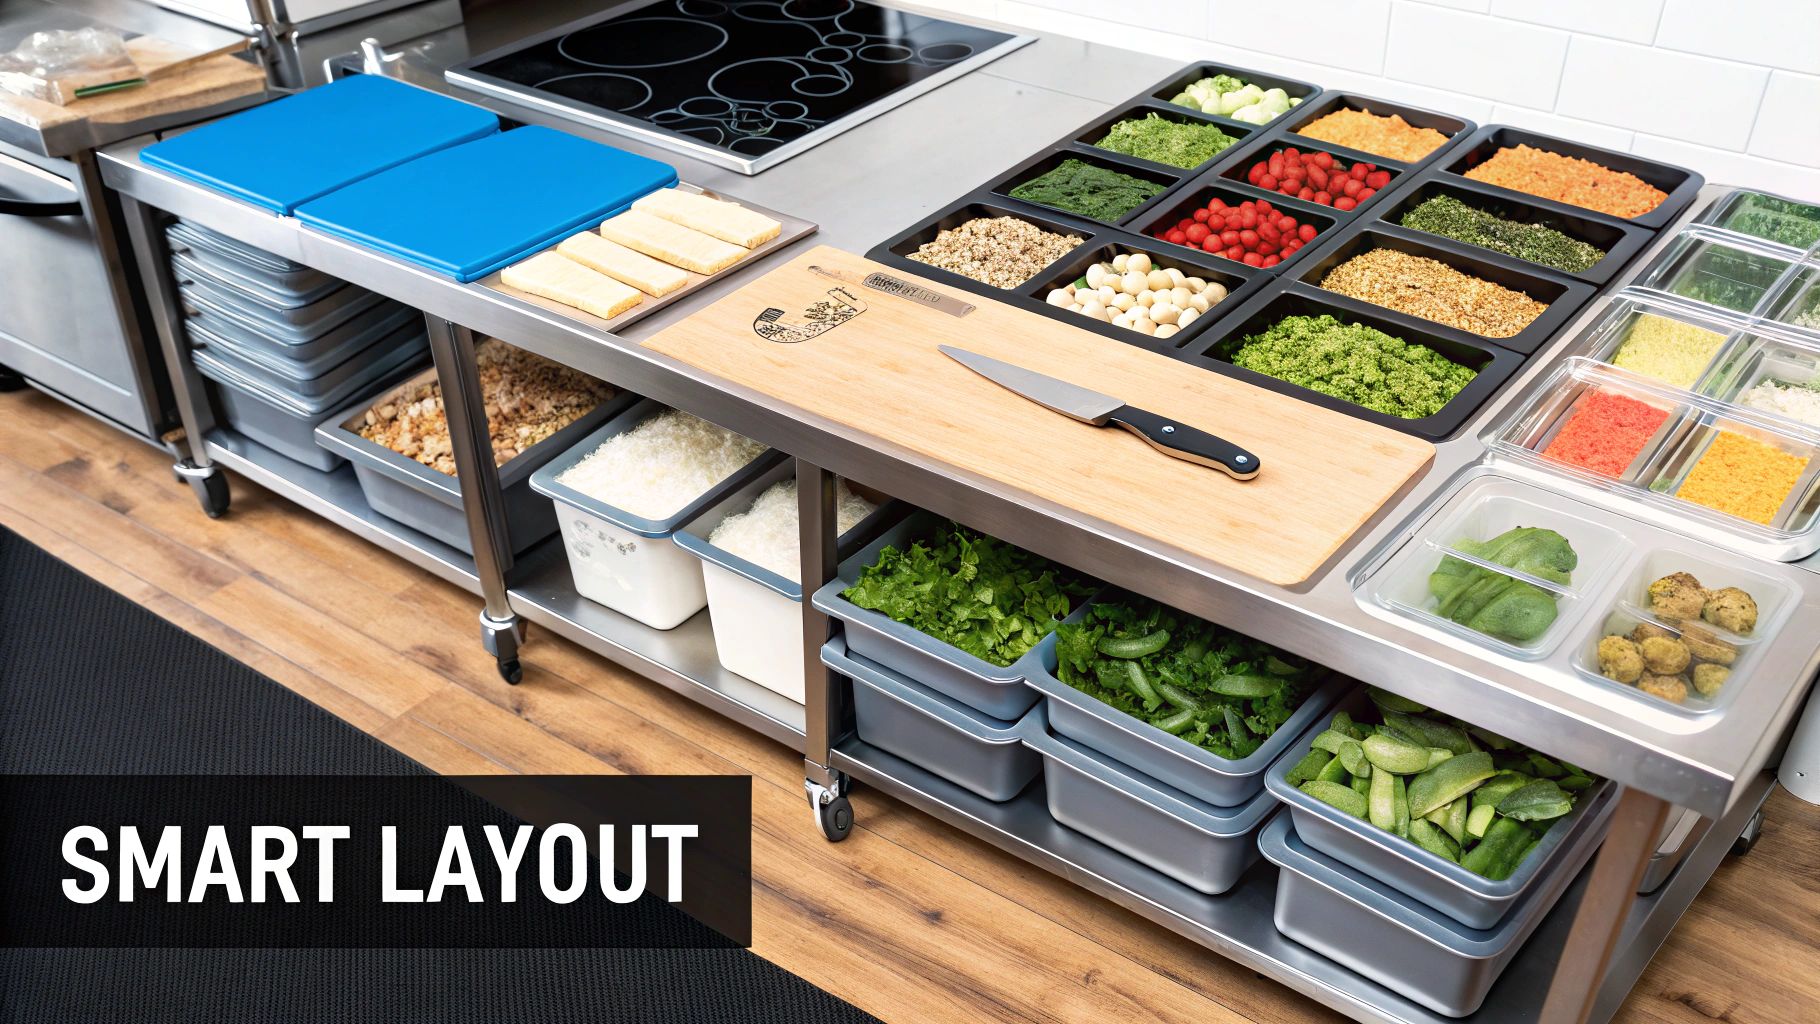
Before you even start browsing models, take a hard look at your kitchen's workflow. Where do raw ingredients enter the line? Where does the finished dish exit? Your prep table needs to be the bridge between those points, not an obstacle. Get out the tape measure and map your available space, making sure to leave enough room for staff to move around and for opening any doors or drawers on refrigerated units.
When you're figuring out how the prep table fits into your kitchen's layout, it can be useful to think about how other central work surfaces are set up. There are some great guides for assembling kitchen islands that dive into optimizing a central workspace, and that same logic applies directly to placing your prep table for maximum efficiency.
Don't overlook the depth of the cutting board, either. This is a detail that can make or break your flow. A standard 10-inch board works just fine for making simple sandwiches, but a pizzeria that needs to stretch dough will need a much deeper surface—often 19 inches or more. Getting this wrong can create a major bottleneck right in the middle of a busy service.
A prep table should solve problems, not create them. If your team is constantly reaching over each other or walking to a separate cooler for basic ingredients, your setup is hurting your bottom line.
Choosing the Right Features for Your Menu
Let your menu be your guide to the features you actually need. For example, the material of the work surface itself is a huge decision driven by your daily grind.
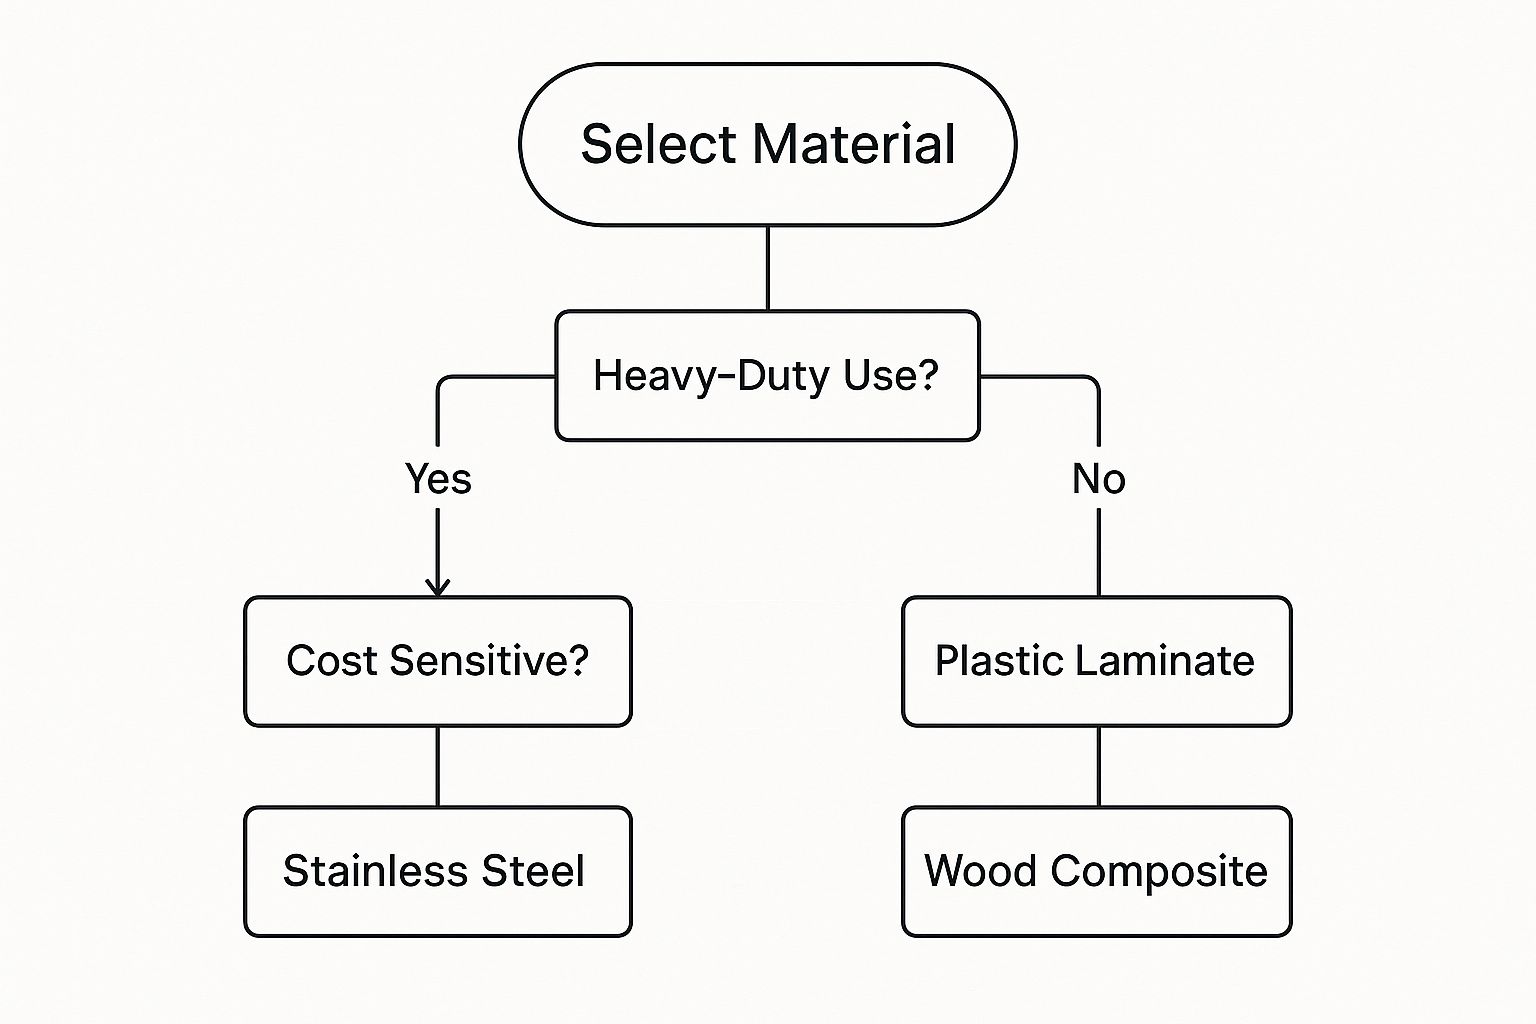
This visual guide breaks it down nicely: heavy-duty kitchens that take a beating need stainless steel, no question. But operations that are less demanding or more budget-conscious might find other materials do the job just fine. It all comes back to what you're cooking.
To make this even clearer, I've put together a table that matches different prep table types to the kitchens they serve best. This should help you narrow down your options based on real-world use cases.
Prep Table Types for Different Kitchen Operations
This table compares common restaurant prep table models with the kitchen environments and menu types they are best suited for, helping you make a more informed choice.
| Prep Table Type | Primary Use Case | Ideal For | Key Feature |
|---|---|---|---|
| Standard Refrigerated | Assembling cold items | Sandwich & Sub Shops, Delis | Two rows of pans with under-counter cold storage. |
| Pizza Prep Table | Dough preparation & topping | Pizzerias, Italian Restaurants | Deep cutting board and a refrigerated, raised rail for toppings. |
| Mega-Top Refrigerated | High-volume "build-your-own" concepts | Salad Bars, Burrito Shops | Three or more rows of pans for maximum ingredient access. |
| Stainless Steel Worktable | General prep & plating | Fine Dining, Bakeries, Catering | Large, open surface area for detailed work; often has casters for mobility. |
Matching your restaurant prep table directly to your menu isn't just a smart move; it's an investment in the speed, safety, and efficiency that form the backbone of any successful kitchen.
What’s It Made Of? A Deep Dive into Materials and Build Quality
Let's be real—the long-term value of a prep table comes down to two things: what it's made of and how it’s put together. I've seen too many kitchens buy a cheap table only to watch it dent from a dropped stockpot or become a cleaning nightmare because of poorly sealed seams. That's not just an annoyance; it's a potential food safety violation waiting to happen.
To avoid that headache, you need to understand the nuts and bolts of materials and construction. This is how you pick a true workhorse that will last for years.
The material you’ll see most often is stainless steel, but you can't just assume all stainless is the same. The grade tells you everything you need to know about its durability and ability to resist corrosion.
-
304 Stainless Steel: This is the gold standard for food-grade surfaces, and for good reason. It has a higher percentage of chromium and nickel, which gives it incredible resistance to rust and corrosion from salts, acids, and harsh cleaning chemicals. For any surface that will have direct contact with food, 304 grade is what you want.
-
430 Stainless Steel: You'll often find this more budget-friendly option used for a table's legs, sides, and undershelves. It’s still durable, but it's much more likely to rust or pit over time, especially in humid kitchens or high-spill areas. I've seen it countless times: the tabletop looks perfect, but the legs and shelf are starting to degrade.
Of course, sometimes you need something specialized. A gorgeous slab of granite offers a perfectly cold surface that’s a dream for pastry and chocolate work, though it’s heavy and needs careful maintenance. You might also see high-density polyethylene—the same stuff cutting boards are made from—which provides a durable, knife-friendly surface for direct chopping.
Look Beyond the Tabletop, Because Construction Matters
Once you look past the work surface, you'll find other clues to a table's quality. How it's assembled has a massive impact on its stability and how it holds up under the daily stress of a busy kitchen.
One of the biggest differentiators is how the legs are attached. Welded legs create a single, rigid unit that is far more stable and durable than legs that are bolted on. Tables with bolted legs will almost always start to wobble over time, which is not only disruptive to prep work but can quickly become a safety hazard.
Another feature I always recommend is an integrated backsplash. This raised lip at the back of the table is a game-changer. It stops ingredients, liquids, and utensils from falling into that hard-to-clean gap behind the unit, making cleanup faster and keeping your walls much more sanitary.
Thinking of moving the table for deep cleaning or to rearrange your line? Casters (wheels) are non-negotiable. Don't cheap out here—look for heavy-duty, locking casters that can handle the table’s full weight and stay firmly in place when you need them to.
Ultimately, investing in better materials and solid construction from day one will save you a ton of money and frustration down the road. A well-built prep table isn't just another piece of equipment; it's a foundational part of your kitchen that pays for itself in durability, safety, and sheer efficiency.
The Critical Role of Refrigeration
 In any professional kitchen, a refrigerated prep table isn't just a luxury—it's an absolute necessity for keeping your food safe and your service lightning-fast. This single piece of equipment is often your main line of defense against foodborne illness, making sure your ingredients stay well out of the temperature "danger zone" (40°F to 140°F) right where your cooks need them.
This fusion of chilling and workspace directly slashes your ticket times. When your line cooks have every single chilled ingredient within arm's reach, they can assemble dishes with incredible speed. It completely cuts out the constant trips to and from a separate walk-in cooler, shaving precious seconds off every order that goes out.
The market numbers back this up, too. Refrigerated prep tables are a massive segment of the commercial kitchen equipment world, valued at around USD 7.67 billion in 2024 and showing steady growth. This huge demand, which you can read more about at Persistence Market Research, proves that more and more kitchens are looking for integrated solutions that boost both speed and quality.
What to Look For in a Refrigeration System
When you're sizing up a refrigerated prep table, you have to look past the shiny stainless steel and get serious about the cooling system itself. The real goal is consistent, reliable temperature control that you can count on, even during the most chaotic dinner rush.
A huge part of that is the compressor. Its location and how it breathes are critical. A front-breathing unit is great because you can push it right up against a wall, saving valuable floor space. A rear-breathing model, on the other hand, needs a few inches of clearance to avoid overheating and failing. Trust me, ignoring this simple detail can lead to some very expensive repair bills and a lot of spoiled food.
Another thing I always check is how easy it is to get to the condenser coils. These coils are like magnets for kitchen grease, dust, and flour. If they aren't cleaned regularly, the unit's efficiency plummets. I always look for a model with a removable front or side panel that makes this crucial maintenance task a whole lot simpler.
A well-designed refrigerated prep table should maintain a consistent temperature not just in the cabinet below, but also in the top rail where your pans sit. Look for models with dedicated airflow to the rail to ensure every ingredient stays safely chilled, even when the lid is open.
Optimizing Your Refrigerated Unit for Peak Performance
Once you've got your table in the kitchen, a few simple best practices can make a world of difference in its performance and how long it lasts. These small habits can cut down on food waste, lower your energy bills, and ensure you're always serving the safest product possible.
Here are a few actionable tips from my own experience:
- Mind the Lid: Keep that insulated lid closed whenever possible. Every time it's propped open, cold air rushes out, and the compressor has to work overtime to get the temperature back down.
- Don't Overload: Avoid stuffing the cabinet or the pans so full that air can't circulate. Proper airflow around your ingredients is absolutely essential for even and effective cooling.
- Check Gaskets Regularly: The rubber seals around the doors and drawers are what keep the cold air locked in. If you notice they're cracked, brittle, or torn, they need to be replaced immediately.
For anyone who wants to get deeper into the mechanics and proper care, our complete commercial refrigeration guide is packed with expert advice that will help you protect your investment.
Optimizing Setup and Daily Maintenance
A brand-new prep table sitting on your kitchen floor is full of potential. But its real value—whether it becomes a reliable workhorse or a constant headache—comes down to how you set it up and care for it every single day. Getting this right from the start is what separates a smart investment from a future money pit of repair bills. It’s not just about plugging it in; it’s about making it a seamless, safe, and durable part of your kitchen.
Your first move is deciding on placement. This is more critical than you might think. You need to position the table to match your kitchen’s natural flow, creating a smooth path from storage to prep and onto the cooking line. For refrigerated models, this is also about giving the unit room to breathe. A rear-breathing table shoved tight against a wall is a recipe for an overheated, strained compressor and eventual failure. Always give it at least 4-6 inches of clearance for proper airflow.
Nailing the Initial Setup
Once you’ve found the perfect spot, leveling the unit is an absolute must. An uneven table isn’t just annoying to work on; it puts uneven stress on door hinges and drawer slides and can cause water to pool inside refrigerated compartments. Grab a level and adjust the feet or casters until it’s perfectly flat. This small step now prevents much bigger mechanical problems down the line.
If your prep table has integrated sinks or needs specific drainage lines, don't try to wing it. Seriously consider hiring a commercial plumber to handle the connections. A small upfront cost for professional help can save you from the catastrophic water damage and operational shutdown a bad leak can cause.
A correctly leveled and strategically placed prep table doesn't just work better—it makes the entire kitchen flow more smoothly. It’s the foundational step that all future efficiency is built upon.
Your setup isn’t truly done until you’ve locked in a solid maintenance routine. This is what protects your investment and keeps your food safe day in and day out.
Your Daily and Weekly Maintenance Checklist
A simple, consistent cleaning schedule is the secret to a long-lasting prep table. It stops grime from building up, keeps the unit running efficiently, and ensures you’re always ready for a surprise health inspection. A little effort each day saves you from massive headaches later.
Here’s a practical checklist that actually works in a busy kitchen:
-
Daily Tasks (End of Shift):
- Wipe down all stainless steel surfaces with a soft cloth and a mild, food-safe detergent.
- Remove, wash, and sanitize every food pan and the cutting board. This is non-negotiable for preventing cross-contamination.
- Clean the door and drawer gaskets with warm water. Food debris can get stuck in there and prevent a proper seal, making your compressor work overtime.
-
Weekly Tasks:
- If your unit is on casters, pull it out and clean the floor underneath. You’d be surprised what builds up back there.
- Give the gaskets a thorough inspection. Look for any cracks or tears and get replacements on order if you see any damage.
- Check and clear any drain lines to prevent clogs and nasty backups.
For any refrigerated prep table, the most important chore is cleaning the condenser coils. In a kitchen environment, these coils are magnets for grease and dust. Clogged coils choke the unit, forcing the compressor to work harder, which wastes energy and leads to burnout. Check them monthly, and give them a good cleaning at least every 90 days.
If you're working with a specific model, like the kind you see in delis and sub shops, our detailed sandwich prep table guide has more targeted tips to help you master its unique maintenance needs. This kind of proactive care is what keeps your table in peak condition, saving you a fortune on energy and repairs.
Your Top Prep Table Questions, Answered
Even after you've narrowed down your options, a few specific questions always seem to pop up when you're about to pull the trigger on a new prep table. Getting clear, no-nonsense answers can help you dodge common mistakes and feel totally confident in your choice. I’ve rounded up some of the most frequent questions I hear from chefs and owners to give you the practical insights you need.
One of the most common points of confusion is the difference between a standard top and a mega top unit. It all boils down to pan capacity and how quickly your team can access ingredients.
- A standard top table is what you’ll see in most kitchens, typically featuring two neat rows for food pans. It’s a solid, reliable choice for most sandwich shops or small delis where the list of toppings is straightforward and manageable.
- A mega top unit, on the other hand, adds a third row, boosting your ingredient capacity by about 50%. This is an absolute game-changer for businesses with extensive menus, like build-your-own salad bars or pizzerias juggling a ton of different topping options.
This choice directly impacts your line's efficiency. Matching the top style to your menu's complexity is one of the most important calls you can make for a smooth, frustration-free service.
Navigating Heat and Cleaning
Another question I get all the time is about using stainless steel work tables for hot equipment. While stainless steel is definitely heat-resistant, you should never place extremely hot items like a running griddle or charbroiler directly on the surface.
Intense, prolonged heat can cause the metal to warp or discolor over time, permanently damaging your investment. The safest bet is to always use a dedicated equipment stand designed specifically for that purpose. It’s built to handle the heat and keep your kitchen safe.
Then there’s the all-important maintenance question: how often should you clean the condenser coils on a refrigerated prep table? For most commercial kitchens, cleaning the coils every 90 days is a reliable schedule.
However, kitchens with high levels of airborne grease or flour—think bakeries or pizzerias—need to be more vigilant. In those environments, checking and cleaning the coils every 30 days is a much safer practice to prevent compressor strain and failure.
This simple chore keeps your unit running efficiently, saving you a bundle on energy bills and helping you avoid expensive emergency repairs.
Understanding Market Differences
It's also worth noting that the "ideal" prep table can change depending on where you operate. Regional dynamics play a big role, reflecting different culinary styles and even regulatory demands.
In North America, for instance, the incredibly diverse foodservice landscape drives demand for versatile tables with advanced refrigeration and sanitation features. In contrast, many European kitchens prioritize customization and sustainability, aligning with the region's focus on strict environmental standards. You can explore more about these global trends to see how they might influence future designs and the features available to you.
Ultimately, the best restaurant prep table is the one that fits seamlessly into your kitchen's unique rhythm. By asking the right questions and understanding these key distinctions, you can choose a unit that will serve as a reliable foundation for your culinary operations for years to come.
Ready to find the perfect workhorse for your kitchen? The Restaurant Warehouse offers a massive selection of commercial-grade prep tables, from refrigerated units to stainless steel workbenches, all at unbeatable prices. Equip your kitchen for success and explore our inventory today.
About The Author

Sean Kearney
Sean Kearney is the Founder of The Restaurant Warehouse, with 15 years of experience in the restaurant equipment industry and more than 30 years in ecommerce, beginning with Amazon.com. As an equipment distributor and supplier, Sean helps restaurant owners make confident purchasing decisions through clear pricing, practical guidance, and a more transparent online buying experience.
Connect with Sean on LinkedIn, Instagram, YouTube, or Facebook.