

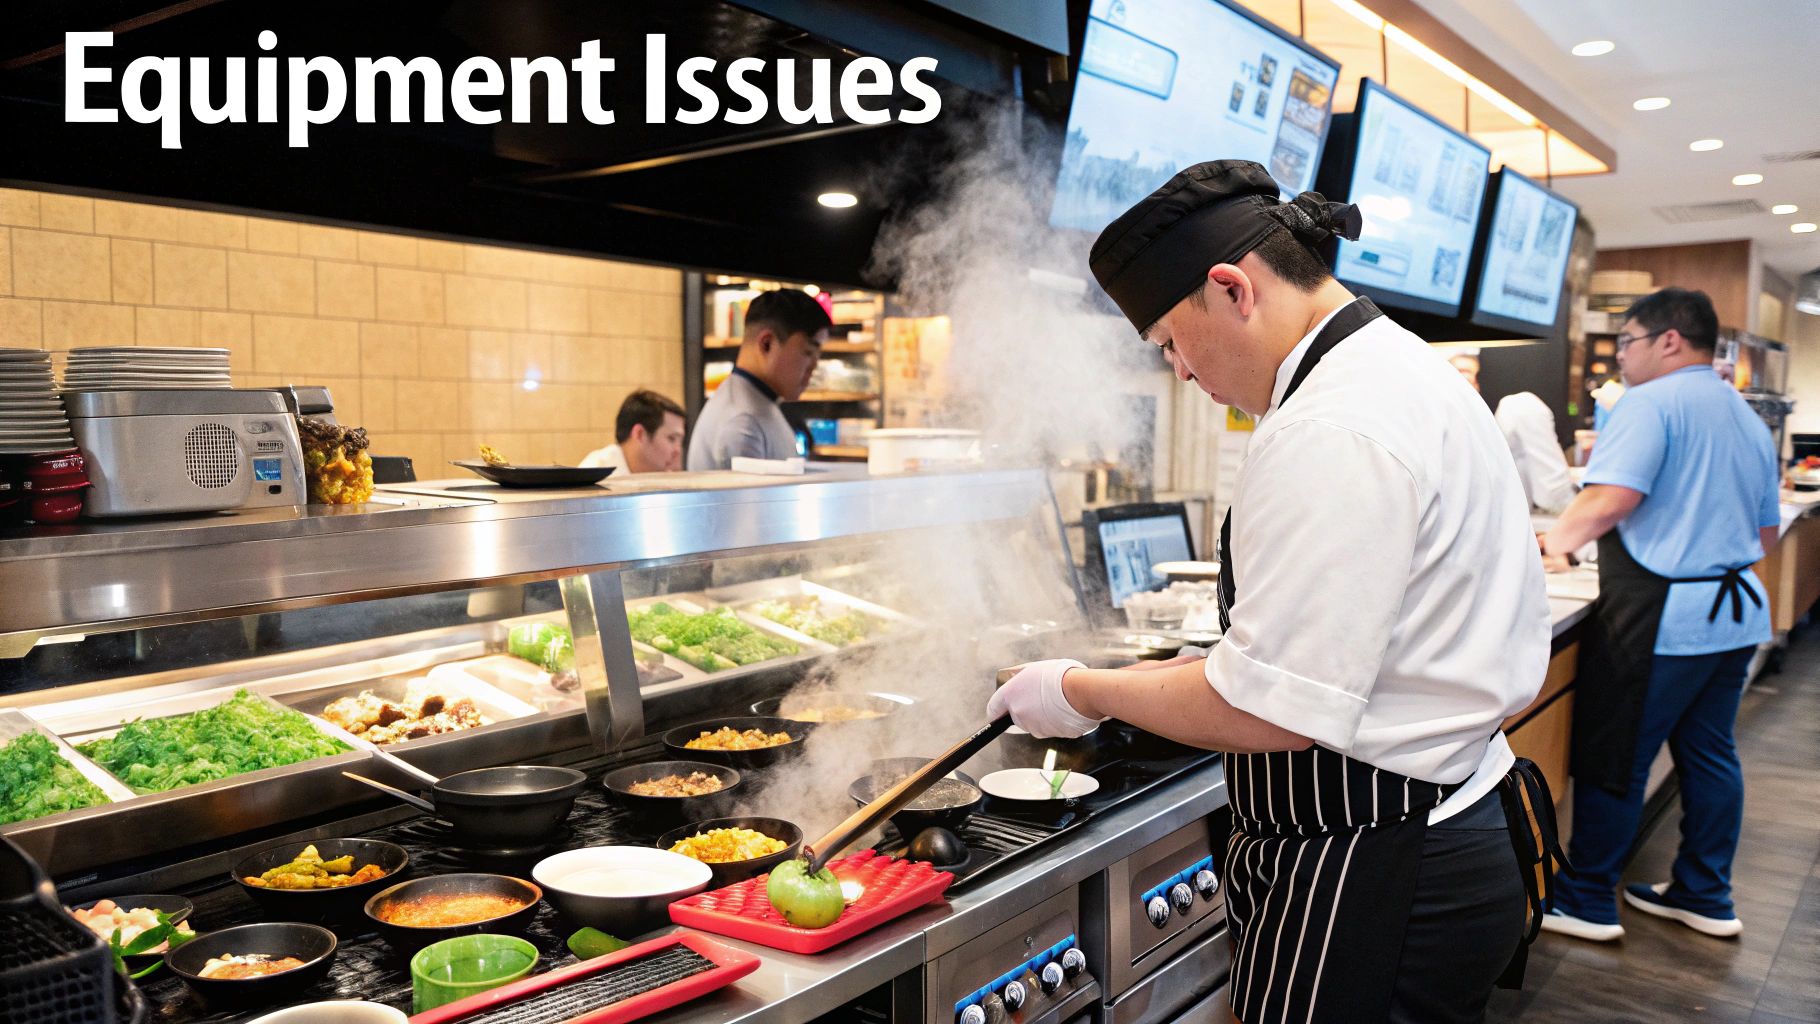
Restaurant Equipment Repair Master Guide
Restaurant equipment breaking down is just a part of life in the foodservice business. But how you handle it can make the difference between a minor hiccup and a full-blown crisis. The real key is moving from panicked, last-minute fixes to having a smart, proactive game plan.
It all comes down to knowing when a simple fix is safe to tackle yourself and when you need to get a professional on the phone immediately. Trust me, taking a proactive approach will always be easier on your budget—and your stress levels—than dealing with an emergency service call on a busy Friday night.
Your Proactive Guide To Kitchen Equipment Health
In any kitchen that's humming along, equipment downtime isn't just an annoyance—it's a direct hit to your bottom line. A single busted appliance can set off a disastrous chain reaction. You're looking at lost sales during peak hours, perfectly good inventory going to waste, and a reputation hit from service delays.
This guide is all about changing how you think about restaurant equipment repair. We’re shifting it from a frantic, reactive chore into a core part of your operational playbook.
The first step is simply getting to know your equipment. When you understand the difference between a small issue your team can handle and a major failure that demands an expert, you save money, cut down on stress, and keep your kitchen firing on all cylinders.
The Immediate Cost Of Equipment Failure
It’s easy to underestimate the financial ripple effect of a machine going down. It’s never just about the repair bill. Think about what really happens when your main walk-in cooler dies on a Friday afternoon:
- Lost Revenue: You can’t prepare or sell half your menu.
- Food Spoilage: Thousands of dollars in inventory can become unsafe in just a few hours.
- Labor Costs: Your staff is on the clock but can’t do their jobs.
- Reputation Damage: Unhappy customers leave negative online reviews.
- Emergency Fees: After-hours and weekend service calls come with a hefty premium.
A proactive maintenance culture is your best defense against these compounding losses. It’s an investment in operational stability that pays for itself by preventing the most common and costly equipment emergencies.
A Framework For Smart Decisions
To help your team make the right call under pressure, you need a simple, clear framework for that initial triage. This is what stops a small issue from snowballing into a catastrophe. Before anyone starts messing with complex parts, your team should have a go-to process for assessing the situation.
This quick-reference table is a great starting point for that initial triage. It helps your staff make a smart call, balancing safety, cost, and the impact on service. This simple process empowers your team, protects your equipment, and keeps your kitchen running smoothly.
Initial Triage When Kitchen Equipment Fails
| Symptom | Immediate Action and DIY Check | When to Call a Professional Immediately |
|---|---|---|
| Appliance won't turn on | Check if it's plugged in. Inspect the circuit breaker. Ensure the power switch is in the "ON" position. | If you smell burning plastic, see sparks, or the breaker repeatedly trips after being reset. |
| Gas oven/range won't light | Verify the gas valve to the appliance is open. Check if the pilot light is lit (if applicable). | If you smell gas. Do not attempt to relight; turn off the gas supply and ventilate the area. |
| Fryer not reaching temperature | Confirm the thermostat is set correctly. Check and reset the high-limit switch if needed. | Any error codes on a digital display that are not covered in the manual, or if the oil is overheating. |
| Walk-in cooler is warm | Ensure doors are fully closed and seals are intact. Check for ice buildup on evaporator coils. Clean any clogged condenser coils. | If you hear loud, unusual mechanical noises (grinding, squealing) or see signs of a refrigerant leak (oily residue). |
Having this kind of clear, simple guidance posted in the kitchen can be a game-changer. It gives your team the confidence to handle minor issues safely while ensuring they don't hesitate to call for backup when a situation is clearly out of their hands.
DIY Troubleshooting for Common Kitchen Failures
Before you grab the phone to authorize an expensive service call, just take a breath. I’ve seen it a hundred times: a kitchen in full-blown meltdown over an issue that doesn't need a technician. A surprising number of common equipment failures trace back to simple, overlooked problems your own team can safely fix in minutes.
This first round of troubleshooting for restaurant equipment repair isn't just about saving a few bucks—it can save you hundreds in service fees and prevent the gut-wrenching stress of unnecessary downtime. Let's walk through some real-world scenarios you’ve almost certainly faced. These are the front-line checks that should become second nature for your crew whenever an appliance starts acting up.
The Refrigerator That Refuses to Chill
A walk-in or reach-in that isn't holding temp is a code-red situation. It’s a direct threat to food safety and can lead to thousands in spoiled inventory. But before you assume the compressor is shot, work through this quick checklist.
- Check the Obvious Power Sources: Is it plugged in securely? It sounds almost silly to ask, but you’d be shocked how often a unit gets unplugged during a deep clean and never plugged back in all the way. Also, take a quick trip to your breaker box to see if a circuit has tripped.
- Inspect the Door Gaskets: Run your hand along the door seals. Can you feel cold air leaking out? Torn, cracked, or grimy gaskets are a massive source of temperature loss. A simple wipe-down or a new gasket can often solve the problem completely.
- Examine Airflow: Is the unit crammed so full of boxes that the vents are blocked? Commercial refrigerators need room for air to circulate properly. Take a look outside the unit, too. The condenser needs to pull in air to work, so make sure nothing is pushed up against it.
A clogged condenser coil is another frequent culprit. These coils, usually found at the top or bottom of the unit, get caked in dust, grease, and grime. When they can't breathe, the refrigerator can't cool efficiently, perfectly mimicking the symptoms of a much more serious mechanical failure.
The Oven With Inconsistent Heat
When your signature dishes come out burnt on one side and raw on the other, it throws the whole kitchen into chaos. Inconsistent heat in a convection or deck oven often points to issues far less dramatic than a fried heating element.
First, check if the oven is sitting on a level surface. If it's tilted, the convection fans can't distribute air properly. Next, look for obstructions inside. A misplaced sheet pan or a rogue piece of aluminum foil covering the deck can drastically alter airflow and create hot spots.
Pro Tip: Never underestimate the power of recalibration. Over time, oven thermostats can drift. Many commercial ovens have a simple calibration process detailed in the owner’s manual. All you need is an external oven thermometer to re-sync the dial temperature with the actual internal temperature.
This simple adjustment can completely resolve issues of under- or overcooking, bringing consistency back to your line without a single new part.
The Fryer That Struggles With Temperature
A deep fryer that can’t keep its oil hot slows down ticket times and churns out greasy, unappetizing food. When your fryer starts lagging, the fix is often related to the thermostat or a safety switch.
Most commercial fryers have a red reset button for the high-limit thermostat. This is a safety feature that trips if the oil gets dangerously hot, but sometimes it can trip by mistake. Once the unit has cooled down, safely locate and press this button to see if it restores power.
If you have a gas fryer, a weak or flickering pilot light could also be the problem. Check the thermocouple—that's the small metal probe that the pilot flame heats up. If it's dirty or has been knocked out of position, it can't signal the gas valve to stay open, leading to frustrating temperature drops.
This infographic outlines a simple, repeatable process for DIY maintenance checks.
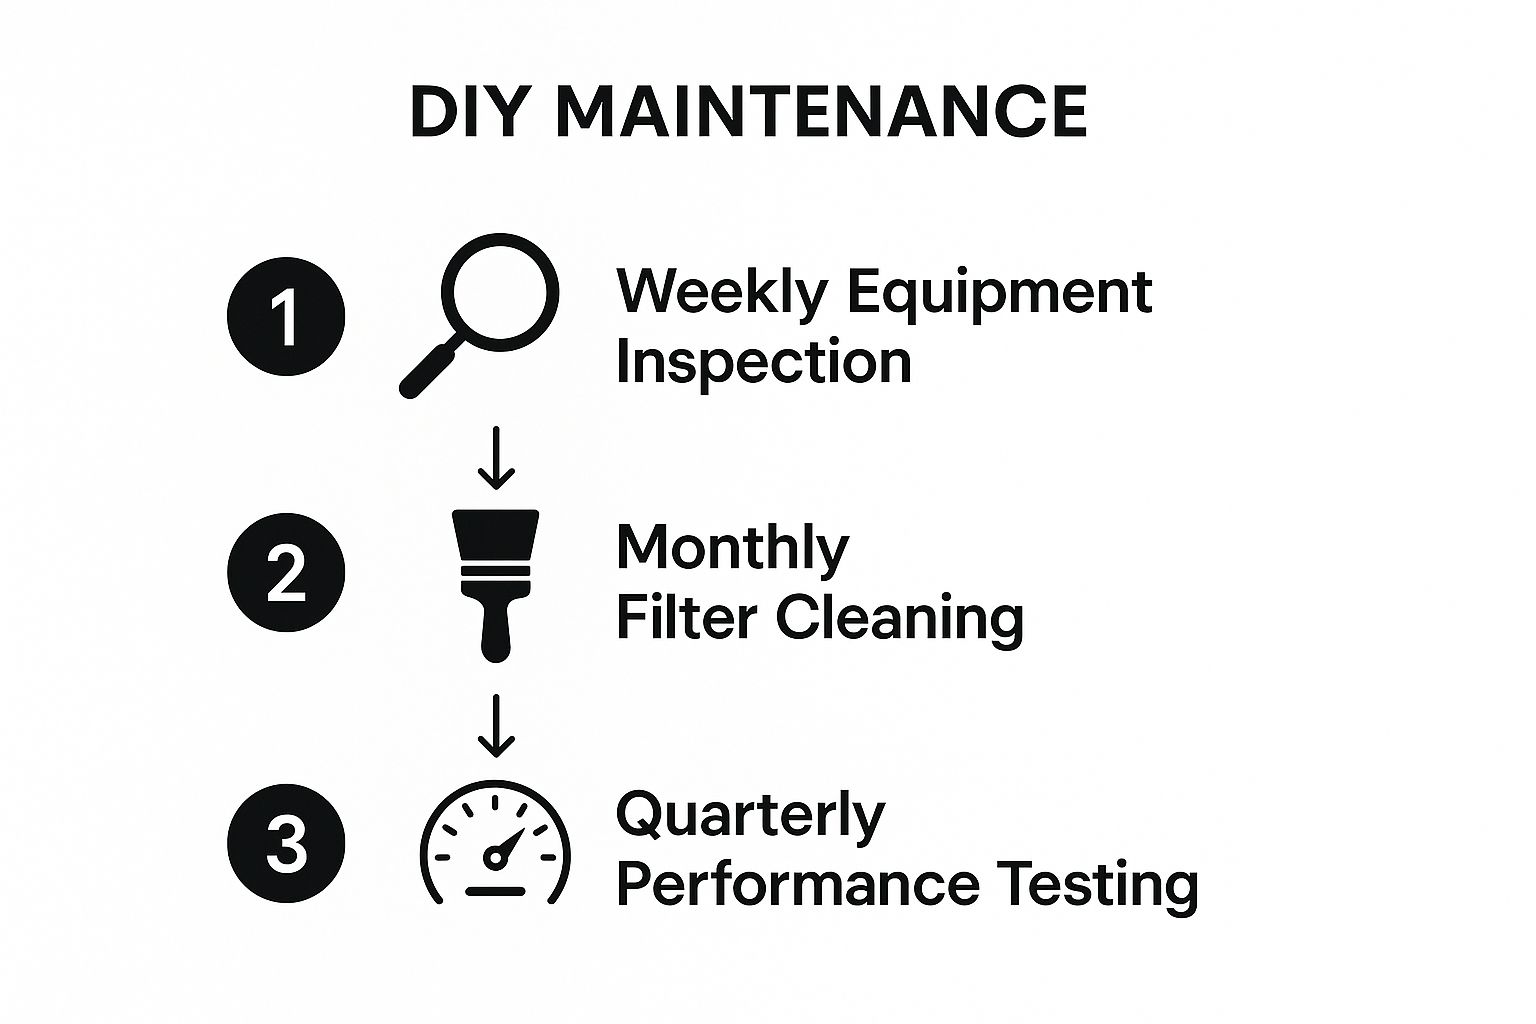
This visual guide breaks down routine maintenance into manageable weekly, monthly, and quarterly tasks, turning a daunting process into a simple habit.
By empowering your staff with the knowledge to handle these first-line checks, you build a more resilient and self-sufficient operation. You stop paying for service calls that end with a technician plugging a cord back in or pressing a reset button. This approach to restaurant equipment repair not only saves money but also minimizes the stress and operational chaos that comes with unexpected equipment failures. It’s about solving the small problems before they have a chance to become big ones.
Building Your Preventive-Maintenance Playbook
Here's a truth I've learned from years in this business: the best restaurant equipment repair is the one you never have to make. Getting ahead of breakdowns means shifting from a reactive "fix-it-when-it's-broken" mindset to a proactive one. That all starts with building a solid preventive maintenance playbook.
This isn't just another checklist to get lost on a clipboard. Think of it as a living document that empowers your team, protects your expensive equipment, and keeps the whole kitchen humming along smoothly.
A well-kept maintenance log does more than just help your appliances last longer. It creates a priceless history of care for each machine. When you do have to call a technician, you can hand them a detailed record, which can slash diagnostic time. It’s also your best friend when it comes to warranty claims, proving you’ve done your part.
The Foundation: A Schedule That Actually Works
Your maintenance playbook has to be dead simple, visual, and tied to specific roles. Vague notes like "clean the fryer" are completely useless in a busy kitchen. You need to get specific: detail the exact steps, what tools are needed, and how often it needs to be done.
Laminate these checklists and stick them directly on or near the equipment. This makes the tasks easy to see and even harder to ignore.
Accountability is everything. A simple sign-off sheet where employees initial completed tasks turns abstract goals into concrete actions. It builds a culture of ownership and makes maintenance a natural part of the kitchen’s daily, weekly, and monthly rhythm.
The global foodservice equipment market is booming, expected to hit $7.3 billion by 2035, largely because hotels and QSRs need more efficient and tougher machines. This just highlights how crucial it is to take care of the equipment you already have, making it last as long as possible before a costly replacement is necessary. You can dig deeper into these foodservice equipment trends to see where the industry is heading.
Your Kitchen Lifeline: Refrigeration
Your fridges and freezers run 24/7, making them the most critical items on your maintenance list. A failure here is an absolute catastrophe, leading to instant food spoilage and a huge hit to your revenue.
Daily Must-Dos:
- Wipe Down Gaskets: Use a damp cloth to clean food debris off every door seal. It’s a small task that ensures a tight seal, keeping the cold air in and your energy bills down.
- Check and Log Temps: Verify every unit is holding the correct temperature. Logging these readings helps you spot a gradual warming trend before it becomes a full-blown crisis.
Weekly Checks:
- Inspect Door Seals: Go beyond a quick wipe. Really look for any rips, cracks, or spots where the gasket is pulling away from the door. A cheap gasket replacement is much better than a new compressor.
- Clear the Area: Make sure there’s at least six inches of clear space around all refrigeration units. The condenser needs good airflow to work properly.
Monthly Tasks:
- Clean Condenser Coils: Grab a stiff brush and a vacuum to clear away the dust and grease buildup. This is single-handedly one of the most effective ways to prevent a catastrophic breakdown.
- Clear Drain Lines: Pour a simple mix of warm water and vinegar down the condensate drain lines. This prevents clogs that can cause water to back up and pool on your floor.
A walk-in cooler with clean coils and tight gaskets uses far less energy than a neglected one. Think of this maintenance not just as reliability insurance, but as a direct path to lower utility bills every month.
The Heart of the Operation: Cooking Equipment
Your cooking line—from ranges to grills—takes an absolute beating every single service. The constant assault of grease, carbon, and high heat is a recipe for failure if you don't stay on top of it.
- Daily Burner & Grate Cleaning: At the end of every night, pull the grates and burners. A good soak and scrub will remove all that burnt-on gunk. Clogged burner ports lead to weak, uneven flames and wasted gas.
- Weekly Ignition Checks: For your gas equipment, take a close look at the pilot lights and igniters. You want to see a steady, crisp blue flame—not a lazy yellow or orange one. Gently wipe down thermocouples so they can properly sense the flame.
- Monthly Calibration: Use a reliable oven thermometer to see if your thermostats are telling the truth. If the dial says 350°F but your thermometer reads 325°F, it's time to recalibrate it based on the manufacturer’s guide.
Keeping up with the latest in kitchen machinery is also vital; you can learn more by checking out our guide on restaurant equipment trends.
The Unsung Hero: Warewashing
Your dishwasher is the final gatekeeper for food safety and a clean presentation. If it goes down, service can grind to a halt as dirty dishes pile up.
- Daily Spray Arm Cleaning: Unscrew and check the spray arms every day. Use a paperclip or a small tool to poke out any food bits stuck in the nozzles. This ensures you get full water pressure for a proper clean.
- Check and Fill Chemicals: Before service, always verify that your detergent, rinse aid, and sanitizer levels are topped off and ready for the shift.
- Monthly Deliming: Depending on how hard your water is, you should run a deliming cycle every month. This gets rid of mineral buildup that clogs internal parts and tanks your cleaning effectiveness.
Sample Preventive Maintenance Schedule
Creating a schedule can feel daunting, so here’s a simple template to get you started. Adapt it to your specific equipment and kitchen rhythm to ensure nothing falls through the cracks.
| Equipment Category | Daily Task | Weekly Task | Monthly Task |
|---|---|---|---|
| Refrigeration | Check & log temps; wipe door gaskets. | Inspect gaskets for damage; clear debris around units for airflow. | Clean condenser coils; flush drain lines. |
| Cooking Line | Clean burners, grates, and fry pots; wipe down surfaces. | Check pilot lights and igniters on gas equipment; boil out fryers. | Calibrate oven thermostats; inspect gas hoses for cracks. |
| Warewashing | Clean spray arms and filter screens; check chemical levels. | Inspect door seals; ensure rinse aid and detergent lines are clear. | Delime the machine to remove mineral buildup. |
| Ice Machines | Wipe down exterior; check water filter status if visible. | Sanitize the bin and scoop. | Run a full cleaning/sanitizing cycle; check and clean air filters. |
| Exhaust Hoods | Visually inspect for heavy grease buildup. | Clean grease traps/filters according to manufacturer/service company guidelines. | Schedule professional hood cleaning (frequency varies). |
This table is just a starting point. The real power comes from making it your own, assigning these tasks, and holding your team accountable.
Building this playbook takes a bit of effort upfront, but the payoff is huge. You’ll shift from panicked, reactive scrambles to proactive control, saving yourself thousands in emergency restaurant equipment repair bills, lost product, and killer downtime.
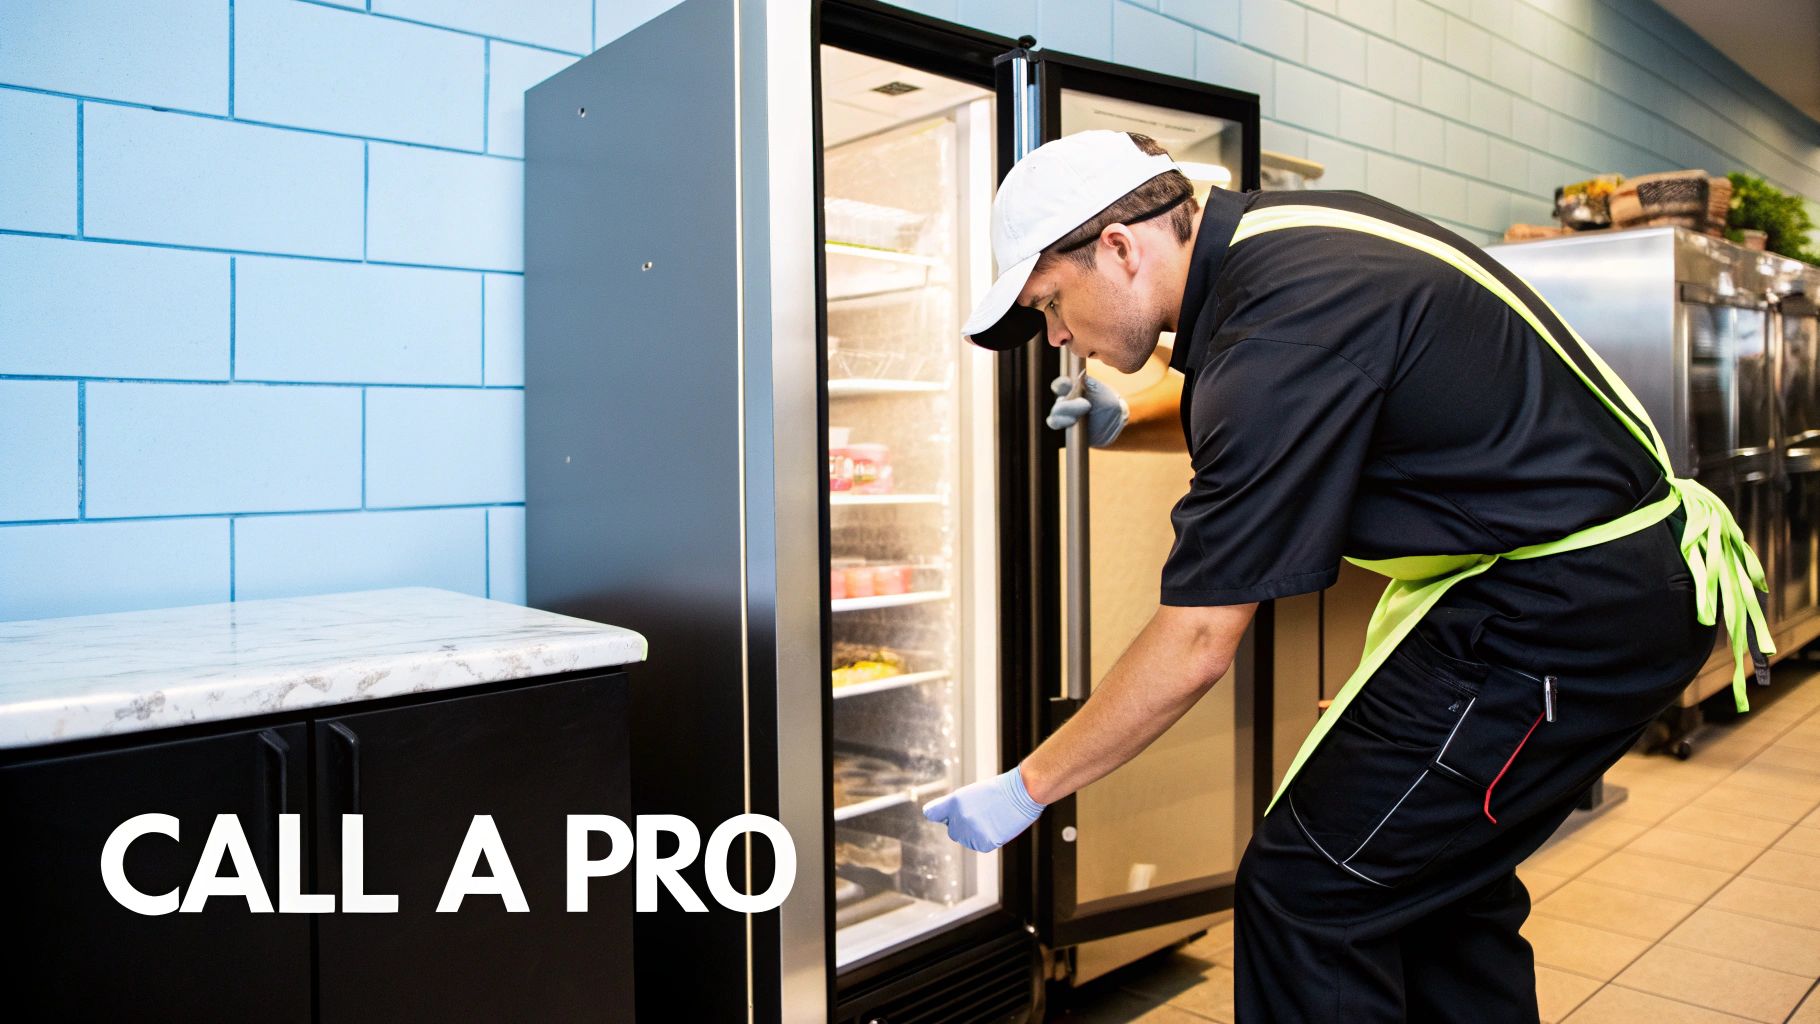
Knowing when to throw in the towel and call a professional technician is just as important as knowing how to tackle a basic fix yourself. While a little DIY troubleshooting can definitely save you from a needless service charge, some situations carry risks that far outweigh any potential savings.
Making the wrong call here can lead to catastrophic equipment damage, voided warranties, or, most critically, serious safety hazards for you and your staff.
Recognizing the clear red flags that demand professional restaurant equipment repair isn't a sign of weakness; it’s the mark of a smart, responsible operator. This is about protecting your assets, your people, and your business.
Recognizing Dangerous Situations
Some equipment failures aren't just inconvenient; they are genuine emergencies. If you run into any of these scenarios, your first and only move should be to secure the area and get a certified technician on the phone. Do not try to diagnose or fix these issues yourself.
The most urgent red flags involve your electrical and gas systems:
- Sparks or Arcing: If you see sparks coming from any appliance, unplug it immediately if it's safe to do so. If not, shut off the corresponding circuit breaker. This points to a severe electrical short that needs an expert.
- Burning Smells: That distinct, acrid smell of burning plastic, rubber, or wiring is a serious sign of overheating components that could easily lead to a fire. Power it down and call for help.
- Gas Odors: If you smell gas near any of your cooking equipment, this is a code-red alert. Immediately turn off the main gas supply to that appliance, ventilate the kitchen as much as possible, and call for professional service.
These situations are completely non-negotiable. The risk of fire, electrocution, or even an explosion is simply too high for anyone but a trained and certified professional to handle.
I once saw a manager try to "fix" a sparking outlet on a prep table. Not only did he get a nasty shock, but he also fried the table's entire electrical system, turning a simple repair into a full replacement. Your safety and your team's safety always come first.
When the Problem Is Complex and Specialized
Beyond the immediate dangers, some equipment failures require specialized tools, knowledge, and certifications that you just won't have in-house. Trust me, attempting these repairs often causes way more harm than good.
Take the intricate world of commercial refrigeration. If you hear a distinct hissing sound or spot an oily residue near a cooler or freezer, you've likely got a refrigerant leak. Handling these chemicals is strictly regulated by the EPA, and only certified technicians are legally allowed to work on these sealed systems. For a more detailed breakdown, our commercial refrigeration guide offers excellent insights into their complexity.
The same logic applies to the sophisticated digital guts of modern equipment. Trying to service the digital controller on a new combi oven or the motherboard of a high-tech fryer is a recipe for disaster. You could easily cause irreversible damage, turning a repairable issue into a total loss.
The Warranty and Cost-Benefit Analysis
Before you even think about cracking open an appliance, you have to consider the warranty. If a piece of equipment is still under its manufacturer's warranty, performing any unauthorized restaurant equipment repair yourself will almost certainly void it. That means you could get stuck with a massive bill that would have otherwise been completely covered.
Use this simple framework to make a smart decision every time:
- Safety First: Is there any risk of fire, shock, or a gas leak? If the answer is yes, the decision is already made. Call a pro.
- Complexity Check: Does the repair involve sealed systems (like in refrigeration), gas lines, or complex digital circuit boards? If yes, it’s beyond the scope of DIY.
- Warranty Status: Is the equipment still under warranty? If it is, check the terms before you so much as touch a screwdriver. A quick call to the manufacturer can clarify what you are and are not allowed to do.
By honestly assessing the situation against these three points, you can avoid costly and dangerous mistakes. Calling a professional isn't an admission of defeat; it's a strategic business decision that ensures the job gets done safely, correctly, and efficiently, getting your kitchen back online with minimal disruption.
How to Choose the Right Repair Service
When a critical piece of your kitchen equipment dies mid-service, the technician you call can be the difference between a quick, affordable fix and a prolonged, costly nightmare. Finding the right partner for restaurant equipment repair isn't something you want to be doing in a panic with a full dining room. The best time to vet a service company is before you actually need one.
Let's be honest, not all repair companies are created equal. The market is packed with everyone from highly certified specialists to one-person operations working out of a truck. Your job is to find a reliable pro who can get your kitchen back online with minimal disruption.
Essential Credentials and Experience
Before you let anyone start tinkering with your expensive machinery, you absolutely need to check their qualifications. This is non-negotiable. It protects you from shoddy work, potential liability, and bigger repair bills down the road.
You're looking for a company that invests in its people and its processes. Here are the key things to look for:
- CFESA Certification: The Commercial Food Equipment Service Association (CFESA) sets the gold standard for technicians. A CFESA-certified tech has passed rigorous exams, proving their expertise in electrical, gas, steam, and refrigeration systems. It's a big deal.
- Proper Insurance: Always, and I mean always, ask for proof of general liability and workers' compensation insurance. If an uninsured tech gets hurt on your property or accidentally fries your combi oven, you could be left holding a massive bill.
- Brand-Specific Experience: Does the company work on your kitchen's brands, like Atosa or True, all the time? A technician who is deeply familiar with your specific models will diagnose problems faster and is more likely to have the right parts on hand.
A technician who has to spend the first hour with their nose buried in a manual is a technician learning on your dime. Find someone who already knows your equipment inside and out.
Deconstructing the Service Call Cost
Understanding how repair services bill you is crucial for avoiding that sticker shock moment when the invoice arrives. Any reputable company will be completely transparent about its pricing. If they get cagey when you ask about costs, that’s a major red flag.
Typically, the final bill breaks down into three main parts:
- Trip Charge: This is a flat fee just for showing up at your door. It covers the technician's travel time, fuel, and vehicle expenses.
- Hourly Rate: This is the labor cost, which is usually billed in 15 or 30-minute increments after the first hour. Be aware that this rate can jump significantly for after-hours or weekend emergencies.
- Parts Markup: This covers the cost of any replacement parts needed for the repair, plus a percentage on top. This is standard practice, but the markup shouldn't be outrageous.
Ask about these charges upfront. Getting a clear picture of the potential cost before you commit to a service call helps you compare providers and keep your budget in check.
Manufacturer Authorized vs. Independent Technicians
You generally have two main choices for repairs: a service company that's officially authorized by the equipment manufacturer, or an independent technician. Each path has its own distinct pros and cons.
| Service Type | Pros | Cons |
|---|---|---|
| Manufacturer Authorized | Access to proprietary parts, specialized training, and can perform warranty work. | Can be more expensive and may have a longer wait time for service. |
| Independent Technician | Often more affordable hourly rates, greater scheduling flexibility, and can service a wider variety of brands. | May not have access to certain OEM parts, and experience can vary widely. |
So, which should you choose? It often comes down to the equipment itself. For that new, complex, and still-under-warranty combi oven, using a manufacturer-authorized servicer is the smart play. But for an older, out-of-warranty griddle that’s been a workhorse for years, a trusted independent tech might be the more cost-effective choice.
This decision is happening in a market that's only getting bigger. The global restaurant equipment sector is projected to hit $5.72 billion by 2029, fueled by the demand for more efficient and specialized kitchens. More equipment means a greater need for qualified technicians to keep it all running. You can read the full research on the booming restaurant equipment market to see where the industry is heading. Choosing the right repair partner ensures your investment is well-maintained for its entire lifespan.
The Smart Decision: Repair, Refurbish, or Replace?
When a mission-critical appliance like your walk-in cooler or convection oven suddenly dies, you're at a serious financial crossroads. The immediate pressure to get the kitchen running again can lead to rushed decisions that cost you dearly in the long run. Making the right call between a major restaurant equipment repair, finding a refurbished unit, or buying new requires a cool head and some quick math.
This decision-making process is a balancing act. You need to weigh the age and history of the equipment against the cost and complexity of the proposed repair. A simple rule of thumb many operators use is the 50% rule: if a repair costs more than half the price of a brand-new, equivalent unit, it’s almost always smarter to replace it. This prevents you from pouring good money into an old machine that's likely to fail again soon.
Running the Numbers on Repair vs. Replace
Let's imagine a real-world scenario: the compressor on your 10-year-old walk-in cooler fails. A technician quotes you $2,500 for the repair, including parts and labor. A brand-new, more energy-efficient walk-in system might cost $6,000.
At first glance, the repair seems cheaper. But you have to consider the hidden costs. The old unit is out of warranty and has a history of minor issues. Plus, a new model could save you $50-$100 a month on your energy bill. Over a year, that's up to $1,200 in savings, which drastically changes the long-term financial picture of the replacement option.
It's a practical evaluation of assets and future costs. In fact, you can see how similar principles of repair and refurbishment apply to other assets, such as real estate investment properties.
The Growing Appeal of Refurbished Equipment
There is a third path that offers a compelling middle ground: buying used or professionally refurbished equipment. This option is especially attractive for new restaurants trying to manage startup costs or for replacing non-critical items.
The used restaurant equipment market is not just a niche; it's a booming industry. It grew to $6.84 billion in 2023 and is expected to hit $9.14 billion by 2029. This growth is driven by cost-conscious operators and a greater focus on sustainability. You can explore more data on the rapid expansion of the used equipment market.
Reputable dealers will often offer certified pre-owned equipment that has been thoroughly inspected, repaired, and even comes with a limited warranty. This allows you to get high-end brands at a fraction of the cost, making it a savvy move for maximizing your capital investment without sacrificing quality.
Of course, here is the rewritten section, formatted in markdown and adhering to your specific style and formatting requirements.
Common Questions About Restaurant Equipment Repair
Even with the best maintenance plan in place, things eventually break. It’s just a reality in a busy kitchen. When that happens, questions are bound to pop up. Here are some quick, practical answers to a couple of the most common concerns I hear from restaurant owners.
How Much Should I Budget for Repairs?
This is a big one. A good rule of thumb is to set aside 1-2% of your restaurant's total annual revenue specifically for maintenance and repairs.
If your kitchen is full of brand-new, under-warranty equipment, you can probably lean toward the lower end of that range. But if you’re running a kitchen with seasoned, aging workhorses, budgeting closer to 3% is a much safer, more realistic bet. The best data will always come from your own books, so tracking your spending for a full year is the smartest move you can make.
Always have a good look at your warranty documents. Routine cleaning tasks outlined in the manual, like wiping down gaskets or cleaning filters, typically won't void your warranty. But trying to tackle complex fixes yourself or opening up sealed components almost certainly will.
What Equipment Breaks Down Most Often?
From what I’ve seen time and time again, ice machines and refrigeration units are the top offenders. They generate the most service calls, hands down.
It makes sense when you think about it. These units run constantly and involve a complex mix of water lines, compressors, and electrical parts, making them highly susceptible to failure. This is exactly why putting their preventive maintenance at the top of your list is one of the smartest things you can do. The first step is just knowing what you have—a complete restaurant kitchen equipment checklist is the perfect way to get organized.
Whether you're repairing, refurbishing, or replacing, The Restaurant Warehouse provides the high-quality, durable equipment you need to keep your kitchen running smoothly. Shop our full catalog of commercial cooking and refrigeration solutions today.
About The Author

Sean Kearney
Sean Kearney is the Founder of The Restaurant Warehouse, with 15 years of experience in the restaurant equipment industry and more than 30 years in ecommerce, beginning with Amazon.com. As an equipment distributor and supplier, Sean helps restaurant owners make confident purchasing decisions through clear pricing, practical guidance, and a more transparent online buying experience.
Connect with Sean on LinkedIn, Instagram, YouTube, or Facebook.