

natural gas to propane conversion kits for stoves - A Guide
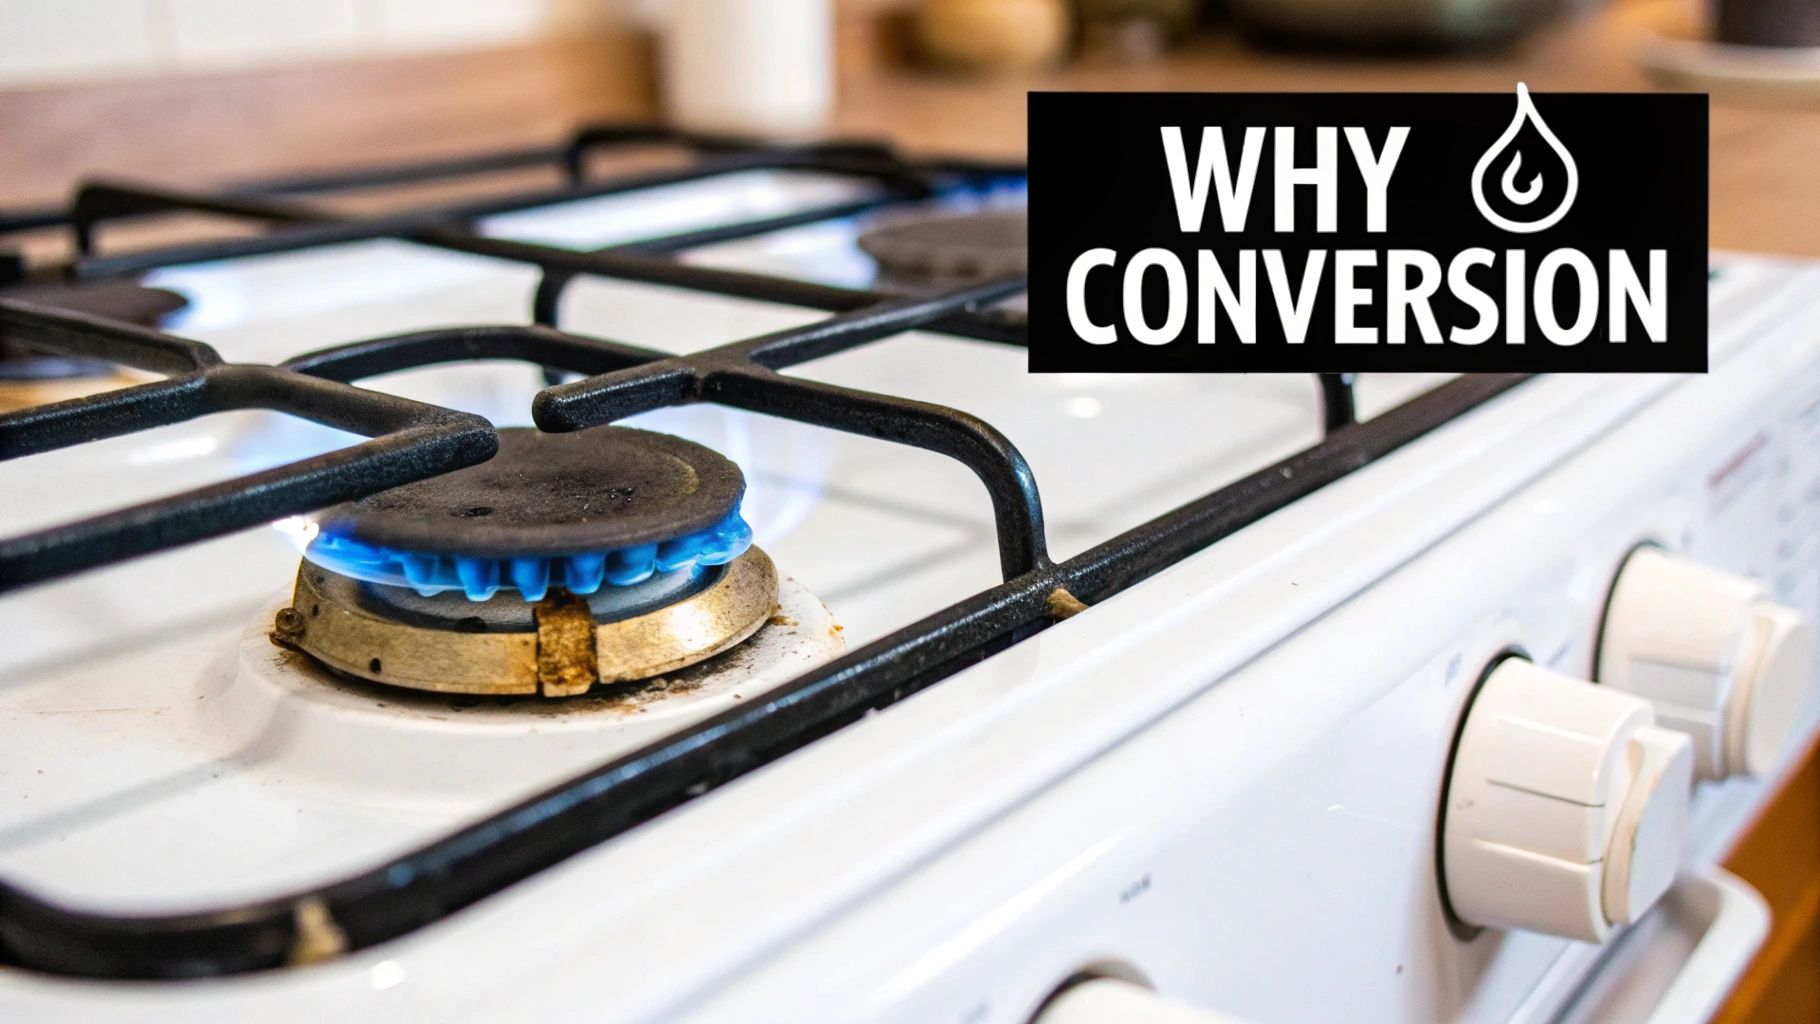
Thinking about switching your stove from natural gas to propane? It's a common move, especially for food trucks or kitchens in areas without natural gas lines. But it's not as simple as just swapping out the fuel hose. You absolutely need a specific natural gas to propane conversion kit, and skipping this step is a huge safety risk.
Let me explain why this is so critical. These two fuels might seem similar, but they behave very differently in terms of energy and pressure. Hooking up propane directly to a stove built for natural gas is like trying to use a fire hose to water a delicate houseplant—it's dangerously overpowered.
Why You Need a Conversion Kit for Your Stove
Simply connecting a propane tank to a natural gas stove is a recipe for disaster. The stove's original parts are calibrated for one specific fuel, and the differences between propane and natural gas are far too significant to ignore.
This isn't just about minor tweaks. The reason a proper conversion is non-negotiable comes down to two core factors: energy density and delivery pressure. These aren't just technical details; they're the science that dictates how your stove works safely and efficiently.
Understanding Pressure and Energy Differences
The most critical difference here is pressure. Propane is delivered to your stove at a much higher pressure—around 10 to 11 inches of water column (W.C.). In contrast, natural gas flows at a gentle 3 to 4 inches W.C. Every component inside your stove was designed for that much lower pressure.
Compounding this is the energy content. Propane is a much more potent fuel, packing about 2,516 British Thermal Units (BTUs) per cubic foot. That's more than double the energy of natural gas, which sits around 1,030 BTUs per cubic foot. This means propane delivers a far bigger punch for the same volume.
When you combine high pressure with high energy, you can see why the original hardware just won't work.
The stove's original parts—specifically the orifices, which are small brass fittings with a tiny hole drilled through them—are sized for the lower pressure of natural gas. Hooking up high-pressure propane would blast way too much fuel through them, creating huge, out-of-control flames and a serious safety risk.
The Dangers of an Improper Hookup
So, what happens if you force that high-pressure, energy-dense propane through the larger orifices meant for natural gas? It leads to several dangerous outcomes.
- Dangerously High Flames: This is the most immediate risk. You'll get excessively large, uncontrollable flames that can easily start a fire.
- Soot Production: The flames will burn yellow and produce a ton of soot. This is a clear sign of incomplete combustion, and it will coat your cookware and kitchen surfaces in black gunk.
- Carbon Monoxide Risk: Incomplete combustion isn't just messy; it's a serious health hazard. It produces carbon monoxide (CO), a colorless, odorless gas that is toxic and can be fatal in an enclosed space.
A proper natural gas to propane conversion kit for stoves solves this by providing new, smaller orifices that are precisely drilled for propane. This smaller opening restricts the fuel flow, perfectly balancing the higher pressure to give you the safe, efficient, and controllable blue flame your stove was designed for.
Natural Gas vs Propane Quick Comparison for Stoves
To really see why a kit is so essential, a quick side-by-side comparison makes the differences crystal clear. The properties of each gas are what dictate the hardware needed for safe operation.
| Characteristic | Natural Gas | Propane (LPG) |
|---|---|---|
| Energy Density (BTU/cu ft) | ~1,030 BTU | ~2,516 BTU |
| Delivery Pressure (W.C.) | 3–4 inches | 10–11 inches |
| Density Compared to Air | Lighter than air | Heavier than air |
| Required Orifice Size | Larger | Smaller |
Looking at the table, it becomes obvious why a direct hookup is impossible and why the conversion process is so important for reliable and safe cooking.
For a deeper dive into the specifics, check out our guide on the https://therestaurantwarehouse.com/blogs/restaurant-equipment/natural-gas-vs-propane.
Choosing the Right Kit and Gathering Your Tools
Getting a stove conversion right is all about the prep work. Honestly, before you even think about turning a single screw, having the correct natural gas to propane conversion kit and all your tools laid out can make the difference between a frustrating afternoon and a smooth, successful project. This isn't a job where you can just guess or "make it work"—precision is everything for both safety and performance.
The first thing you need to lock down is the conversion kit itself. This is not the time to grab a generic, "one-size-fits-all" solution from the big box store. For the safety of your kitchen and the long life of your appliance, you absolutely have to use the OEM (Original Equipment Manufacturer) kit made specifically for your stove's model.
Find Your Stove's Model and Serial Number
To get your hands on that OEM kit, you'll need your stove's model and serial number. This info is usually printed on a small metal plate or sticker, tucked away somewhere on the appliance.
You can typically find this little plate in a few common spots:
- Inside the oven door frame: This is almost always the first place I check.
- On the side or back of the bottom storage drawer: You might have to pull the drawer completely out to spot it.
- On the back of the stove: Usually down near where the gas line connects.
Once you find it, do yourself a favor and just snap a clear picture with your phone. It's a simple trick that saves you from jotting it down wrong and ensures you order the exact parts you need. It makes searching online or talking to a parts supplier so much easier.
A huge mistake I see people make is ordering a kit based only on the stove's brand. A single manufacturer makes dozens of different models, each with unique BTU ratings and burner designs that need precisely drilled orifices. Using the wrong kit is a serious safety gamble that can lead to dangerously high flames or even carbon monoxide production.
Here's something interesting: the global energy market plays a role here, too. Roughly 62% of the world's LPG (propane) is a byproduct of processing natural gas. This connection means that any shifts in natural gas production can affect the availability and price of propane, which trickles all the way down to the market for these specialized conversion kits.
Your Essential Tool Checklist
With the right kit on its way, it’s time to round up your tools. You probably have most of these lying around, but a couple of specific items are non-negotiable if you want to do this job correctly without wrecking any of the components. An adjustable wrench might seem like a good idea, but it's notorious for rounding off the soft brass fittings used on gas appliances.
Here's what you'll need to have ready:
- Nut Driver Set: You will absolutely need a 1/4-inch and 9/32-inch nut driver. A ratchet with deep sockets in these sizes will also work perfectly. This is the right tool for removing and installing orifices without stripping them.
- Open-End Wrenches: A 1/2-inch and 5/8-inch wrench are essential for dealing with the pressure regulator and the bell-shaped oven orifice. Using the correct size is key to avoiding damage.
- Pipe Thread Sealant: Make sure you grab sealant that's specifically rated for both propane and natural gas. It's typically yellow, which sets it apart from the standard white Teflon tape used for water pipes.
- Screwdrivers: Just a basic set with both Phillips and flat-head drivers will be needed for taking off panels and making small adjustments.
- Work Gloves and a Flashlight: Protect your hands from sharp metal edges inside the stove, and use a flashlight to get a clear view of the tiny parts you're working with.
Laying everything out before you start makes the whole process safer and way more efficient. And speaking of safety, making sure your gas connections are solid is the most important part of the job. For a deeper dive on that, check out our comprehensive gas hose guide, which covers best practices for secure connections. This prep work sets you up for a successful conversion, helping you dodge common mistakes and ensuring your stove runs safely for years.
Your Guide to a Safe Stove Conversion
Alright, this is where the real work begins—the hands-on part of the conversion. We're going to break the entire process down into clear, manageable stages. The absolute priority here is safety and precision, so we'll approach this methodically, starting with the most critical shutdown procedures.
Before you even think about picking up a tool, make sure you have the right kit in hand and your workspace is prepped. That means you've already identified your stove's model, have the correct OEM kit, and gathered all the necessary tools.
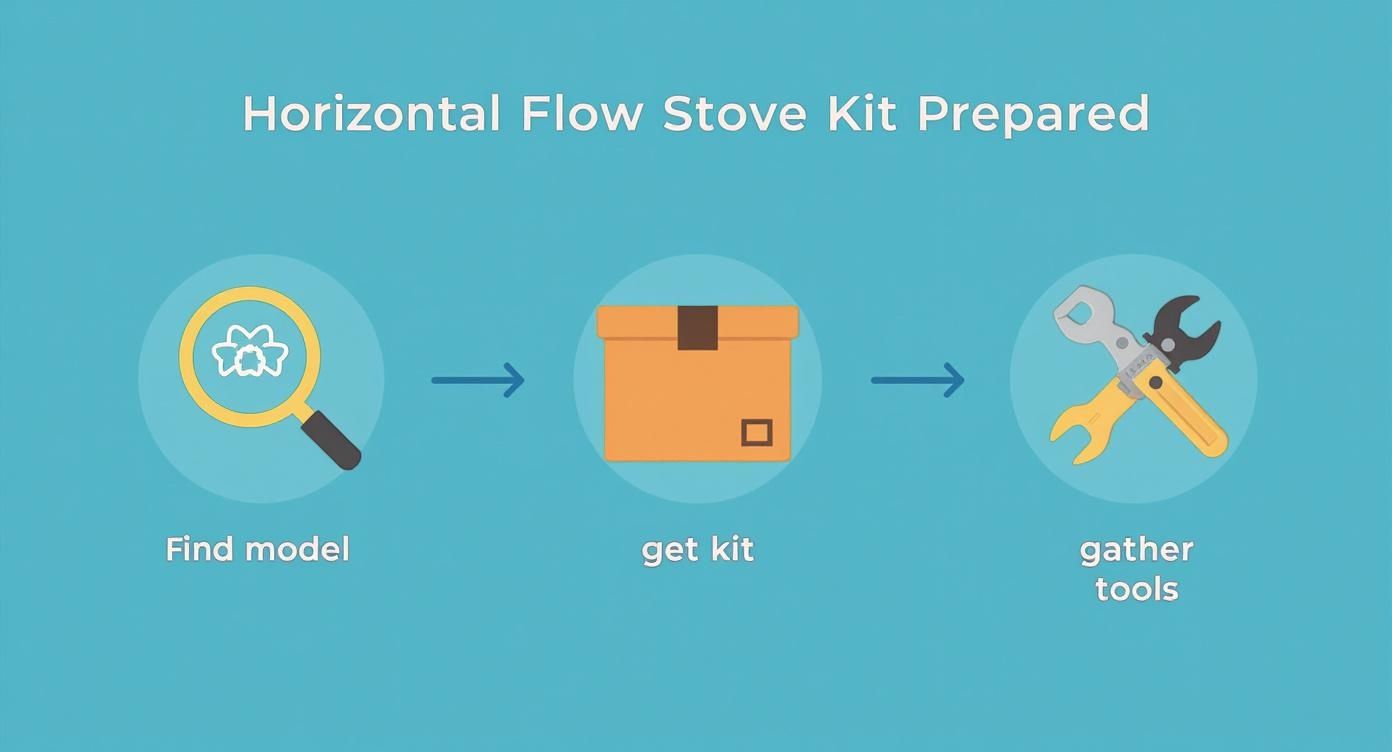
This simple flow is your foundation. Getting the model identification right from the start is what sets you up for a safe and successful conversion.
The Essential Safety Shutdown
Safety is not a step you can afford to rush. Before a single screw is turned, you must completely isolate the stove from both its fuel and power sources.
First, find the gas shut-off valve on the wall behind your stove and turn it to the OFF position. It's usually a quarter-turn valve, meaning the handle should be perpendicular to the pipe when it's fully closed. Next, unplug the stove from the electrical outlet. This simple action eliminates any risk of a stray spark igniting residual gas or causing an electrical shock while you work.
I always recommend that crews implement a 'Take 5 for Safety' approach before touching any gas lines. Just pause for a few seconds to assess the immediate risks. It's a small habit that can prevent major accidents.
Replacing the Cooktop Burner Orifices
With the stove safely disconnected, the core task begins: swapping out the cooktop orifices. These are the small, thimble-shaped brass fittings that meter the gas flow to each burner.
To get to them, you'll need to disassemble the cooktop surface.
- Start by removing the heavy cast iron burner grates.
- Lift off the ceramic or metal burner caps.
- Pull the burner heads straight up and off their bases.
This will expose the natural gas orifices sitting at the bottom of each burner base. Using a 9/32-inch nut driver, carefully unscrew each one by turning it counter-clockwise.
Pro Tip from the Field: Stick a tiny piece of masking tape inside the socket of your nut driver. This creates just enough friction to hold onto the small orifice, preventing it from falling into the stove's interior—a mishap that can be incredibly frustrating to fix.
Once the old ones are out, you can install the new propane orifices from your kit. You'll notice their drilled holes are significantly smaller; this is the key to restricting the higher-pressure propane. Gently thread each new orifice by hand first to avoid cross-threading, then tighten it with your nut driver until it’s snug. There’s no need to crank on it with excessive force.
Handling the Oven and Broiler Conversion
Next up are the oven and broiler. This part can feel a bit more involved, but the process is basically the same. You'll need to remove the oven door, racks, and the bottom panel to get to the burner assembly. This usually involves removing a few screws, often with a 1/4-inch nut driver.
Once you have access, you'll locate the oven burner's orifice, which is typically a larger, bell-shaped fitting. Using a 1/2-inch open-end wrench, you will tighten this orifice down. In most designs, one full clockwise turn is all it takes to close an internal bypass opening, which effectively adjusts the fuel flow for propane.
If your stove has a separate broiler, you'll repeat this exact same tightening procedure for its burner orifice. A magnetic parts tray is a lifesaver at this stage, keeping all those small screws organized and preventing them from getting lost inside the appliance.
Adjusting the Gas Pressure Regulator
The gas pressure regulator is another critical component that needs a simple but vital adjustment. You'll find it right where the main gas line connects to the back of the stove. Look for a metal cap that you can typically remove with a 5/8-inch wrench.
Unscrew this cap. Underneath, you’ll find a small plastic or metal pin, sometimes called a plunger.
- For Natural Gas: The pin is usually set with its longer end facing up.
- For Propane: You need to flip it over so the pin now faces down into the regulator body.
This simple reversal adjusts the internal spring tension, calibrating the regulator to properly handle the higher pressure of propane. After flipping the pin, screw the cap back on securely.
This adjustment, combined with the smaller orifices, is the heart of what a natural gas to propane conversion kit for stoves accomplishes. It ensures the appliance gets the correct volume and pressure of fuel for safe operation.
The final step before testing is to make sure all your connections are secure and leak-free. Proper installation of gas lines is paramount to kitchen safety. For a deeper dive into this crucial topic, our guide on gas hose safety offers detailed guidance and best practices. With the mechanical work done, it's time for the final fine-tuning and safety checks.
Fine-Tuning Your Stove for Perfect Flames
You’ve done the heavy lifting—the orifices are swapped out and the regulator is adjusted. But hold on, the job isn't quite done. These next few steps are arguably the most critical for making sure your stove runs safely and efficiently. This is where you go from having a collection of new parts to a perfectly calibrated cooking machine.
It all starts with an absolutely essential safety check before you even think about lighting a burner.
The Essential Soap and Water Leak Test
Do not skip this. Ever. When you're working with gas lines, there's a zero-tolerance policy for leaks. The good news is, you don't need any fancy equipment to check your work. A simple spray bottle with a mix of dish soap and water is your best friend here.
After you've double-checked that all your fittings are snug, it’s time to slowly turn the gas supply back on at the main shut-off valve. Now, methodically spray down every single connection you touched. I'm talking about the main gas line fitting, both sides of the pressure regulator, and each of the new orifice connections right at the base of the burners.
What you're looking for is simple: bubbles.
- Small, slowly forming bubbles tell you there's a minor leak that needs to be fixed immediately.
- Rapid, frothy bubbling means you have a significant leak.
If you see any bubbles at all, shut the gas off right away. Grab your wrench and give the leaking connection a slight tighten—usually, a quarter-turn is all it takes. Then, turn the gas back on and test it again. Do not move on until every connection is completely bubble-free.
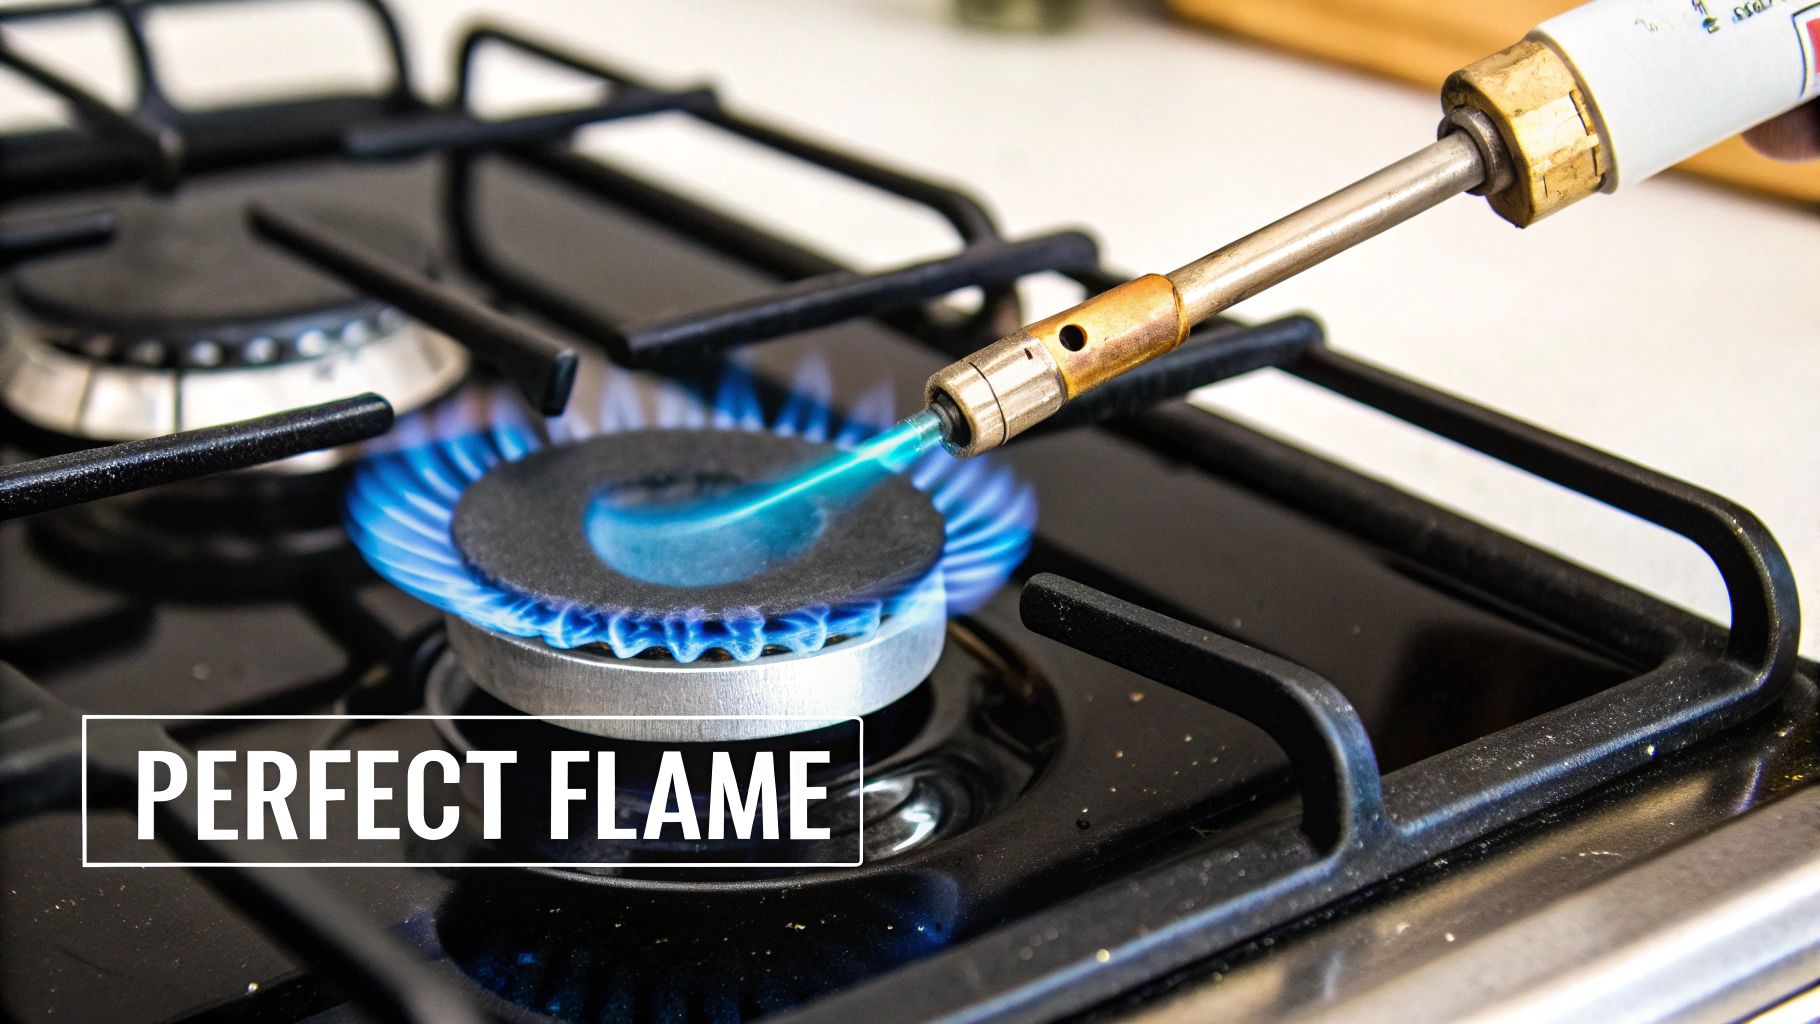
Reading and Adjusting the Flame
Once you are 100% confident there are no leaks, it's time to see your handiwork in action. Go ahead and light one of the cooktop burners and just watch the flame. Its color and behavior will tell you everything you need to know about the air-to-fuel mixture.
A poorly adjusted flame isn't just inefficient; it can produce dangerous levels of carbon monoxide.
The ideal propane flame is a thing of beauty. It should be stable, quiet, and burn a crisp, vibrant blue with just the faintest touch of yellow at the very tips. This indicates complete and efficient combustion.
If your flame doesn't look like that, you’ll need to make a few small adjustments. Here’s what the flame is telling you:
- Lazy, Yellow, or Sooty Flame: This is a classic sign of an air-starved flame. It's not getting enough oxygen to mix with the propane, which leads to incomplete combustion. This is the messy flame that will leave black soot all over your pots and pans.
- Loud, Lifting, or "Floating" Flame: This flame looks like it’s jumping or lifting off the burner head and often makes a roaring or hissing sound. This is the opposite problem—it’s getting way too much air.
Achieving that perfect blue flame is the goal after a conversion. If you're seeing orange, this guide explains in more detail how to fix an orange flame on a gas stove.
How to Adjust the Air Shutters
The fix for an off-color flame is usually a simple mechanical adjustment. Each burner tube has an air shutter, which is just a small collar or plate with an opening you can make larger or smaller.
To adjust it, you'll probably need to loosen a small set screw on the shutter. With the burner on, slowly rotate the shutter to either open or close the air gap while you watch the flame.
If your flame was yellow, you'll want to open the shutter a bit to let more air into the mix. You’ll see the flame turn from yellow to blue as you find that sweet spot. If the flame was lifting and loud, close the shutter slightly to reduce the air supply until the flame settles down and burns quietly.
Once you have that perfect blue flame, tighten the set screw and move on to the next burner. Taking a few minutes to dial in each flame ensures your stove is not just working, but truly optimized for safe, clean cooking.
Working Out the Kinks: Troubleshooting Your Stove Conversion
So you’ve followed all the steps, double-checked your work, and… something’s still not quite right. Maybe a burner sputters and refuses to light, or the flame looks more like a weak candle than a roaring jet. Don’t sweat it. Even the most careful conversion can hit a small snag, and most of the time, the fix is surprisingly simple.
The trick is to play detective. Is it just one burner giving you grief, or are all of them on the fritz? Did the problem show up the second you turned it on, or did it develop later? Pinpointing the symptom is the first step to getting things running perfectly.
Burners That Will Not Light
This is probably the most common headache after a conversion. You hear the click-click-click of the igniter and maybe catch a faint whiff of gas, but the burner just won't catch. Before you start thinking the worst, run through the easy stuff first.
Nine times out of ten, the burner cap or head just isn't seated quite right after reassembly.
- Check the Alignment: Make sure the burner head is sitting perfectly flat and centered on its base. Even a slight wobble can throw things off.
- Clear the Igniter: Take a look at that little white ceramic igniter spike. Is there any moisture or gunk on it from the conversion process? A quick wipe with a dry cloth is often all it needs.
- Inspect the Orifice: On rare occasions, a tiny speck of debris or a stray bit of pipe sealant can clog the new orifice. You might have to remove it again to make sure the opening is completely clear.
Flames Are Too High or Too Low
If your flames are shooting for the ceiling or are barely flickering even on the highest setting, you’re almost certainly looking at a pressure or orifice issue. A flame that’s too high is a major fire hazard, and one that’s too low won’t give you the heat you need to cook properly.
It’s worth remembering just how common propane is. Back in 2013, the residential sector used nearly 46% of the world's 267 million tonnes of LPG, largely because it's available where natural gas isn't. You can dig into the details on the global use of LPG for household energy on worldliquidgas.org. With so many systems out there, troubleshooting them has become a pretty refined science.
If all the flames are misbehaving in the same way, I’d bet you forgot to flip the pin in the gas pressure regulator. It’s a super common oversight and the first thing to double-check for any system-wide flame problems.
Popping Sounds and Yellow Flames
Hearing a constant popping or sputtering from a burner, especially if the flame is a lazy, yellow color, is a dead giveaway for an air-to-fuel mixture problem. This means you have incomplete combustion, which wastes fuel and can create soot and even carbon monoxide.
Luckily, the fix is usually just a quick tweak of the air shutter. Head back to the fine-tuning steps and carefully adjust the shutter for the burner that's acting up. A small turn to open it up and let more air mix with the gas will almost always get rid of the yellow flame and stop the popping, leaving you with a steady, beautiful blue flame.
If you’ve tried these quick fixes and the problem persists, it’s time to stop what you’re doing. A lingering gas smell that you can't trace is an absolute red flag. If that happens, shut off the gas at the main valve immediately, open some windows to ventilate, and get a licensed gas technician on the phone. Safety always, always comes first.
Common Conversion Problems and Solutions
When you hit a bump in the road during your stove conversion, it can be frustrating. This table is a quick cheat sheet to help you diagnose what's going on and figure out the best way to fix it.
| Symptom | Potential Cause | Recommended Action |
|---|---|---|
| No gas flow to any burner | Main gas valve is closed or the pressure regulator is installed backward. | Check that the main shutoff valve is fully open. Verify the arrow on the regulator is pointing in the direction of gas flow. |
| Burner flame is too high/roaring | Incorrect orifice size (too large) or pressure regulator not converted for propane. | Confirm you installed the correct propane orifices. Double-check that the regulator pin/cap has been flipped to the "LP" setting. |
| Burner flame is too low/weak | Incorrect orifice size (too small) or a partial clog in the gas line or orifice. | Ensure the correct orifices are installed for your stove model. Remove the orifice and check for debris. |
| Lazy, yellow, sooty flames | Improper air/fuel mixture; not enough air. | Adjust the air shutter on the affected burner, opening it slightly to allow more air into the mix until the flame is blue. |
| Flame lifts off the burner/pops out | Improper air/fuel mixture; too much air. | Adjust the air shutter on the affected burner, closing it slightly to reduce the amount of air in the mixture. |
| Smell of gas when stove is off | A leak in the gas line, fittings, or at the regulator. | Immediately shut off the gas supply. Ventilate the area. Perform a leak test with soapy water on all connections and call a professional. |
Remember, this table covers the most common issues. If you try these solutions and the problem isn't resolved, or if you're ever unsure, the safest move is to turn off the gas and call in a licensed professional.
Common Questions About Stove Conversions
When you’re talking about swapping gas types on a commercial stove, a few questions always pop up. That's a good thing. Getting clear answers before you start is the best way to make sure the project goes smoothly and, most importantly, safely.
Let’s dig into some of the practical concerns that kitchen managers and chefs run into when thinking about a stove conversion.
Can I Convert Any Natural Gas Stove to Propane?
This is the big one, and the short answer is a definite no. You absolutely cannot convert every natural gas stove out there. Before you even start looking at natural gas to propane conversion kits for stoves, you have to confirm your appliance can actually handle the switch.
Your first stop should be the owner's manual. It will state, in no uncertain terms, if the model is convertible. Can't find the manual? Look for a data plate or label on the unit itself—check the back panel or inside the oven door. It should explicitly say it's approved for conversion to LP (liquefied petroleum) gas.
Trying to force a conversion on a stove not designed for it is a recipe for disaster. The internal parts, especially the valves, likely aren't rated for propane's higher pressure. This creates a serious risk of leaks, fire, and even explosions. If you have any doubt, just call the manufacturer with your model number.
Will This Conversion Void My Stove's Warranty?
This is another huge consideration, and honestly, the answer is usually yes, it could. Most manufacturers are very clear in their warranty policies: any modifications to the gas system must be done by a licensed, certified technician.
Going the DIY route might save you a few bucks on the service call, but it could cost you big time down the road. If something else goes wrong with the stove later, you could be on the hook for repair costs that the warranty would have otherwise covered. It’s a trade-off you need to weigh carefully. Always take five minutes to read your warranty before you pick up a wrench.
What Is the Difference Between a Universal Kit and an OEM Kit?
You'll come across both when you're shopping, but they are worlds apart. An OEM (Original Equipment Manufacturer) kit is made by your stove's brand for your specific model. Every single part is engineered for a perfect, safe fit. No guesswork involved.
A universal kit is exactly what it sounds like—a one-size-fits-most solution. They’re often cheaper, but that comes at a cost. The orifices might not be drilled to the precise diameter your burners need for their specific BTU ratings. This can lead to lousy performance, incomplete combustion, and serious safety issues. For total peace of mind, always choose the OEM kit. It’s the only way to guarantee compatibility.
Why Is My Converted Stove's Flame Yellow and Sooty?
If you see a lazy, yellow flame that's leaving soot behind, that’s a red flag. It means the propane isn't burning cleanly and efficiently, which is a problem you need to fix right away because it can produce dangerous carbon monoxide.
Nine times out of ten, this is an air-to-fuel ratio problem. The very first thing you should check is the air shutter on the burner tube. After a conversion to propane, it almost always needs to be opened up more to let in the right amount of air for a clean, blue flame. If adjusting the shutter doesn’t do the trick, you may have installed the wrong orifice or you're dealing with a bigger pressure problem that needs a pro's touch.
For all your commercial kitchen needs, from cooking equipment to refrigeration, The Restaurant Warehouse has you covered with expert advice and top-tier products. Equip your kitchen for success by visiting us at https://therestaurantwarehouse.com.
About The Author

Sean Kearney
Sean Kearney used to work at Amazon.com and started The Restaurant Warehouse. He has more than 10 years of experience in restaurant equipment and supplies. He graduated from the University of Washington in 1993. He earned a BA in business and marketing. He also played linebacker for the Huskies football team. He helps restaurants find equipment at a fair price and offers financing options. You can connect with Sean on LinkedIn or Facebook.
Leave a comment