

Natural Gas to Propane Conversion Guide for Restaurants
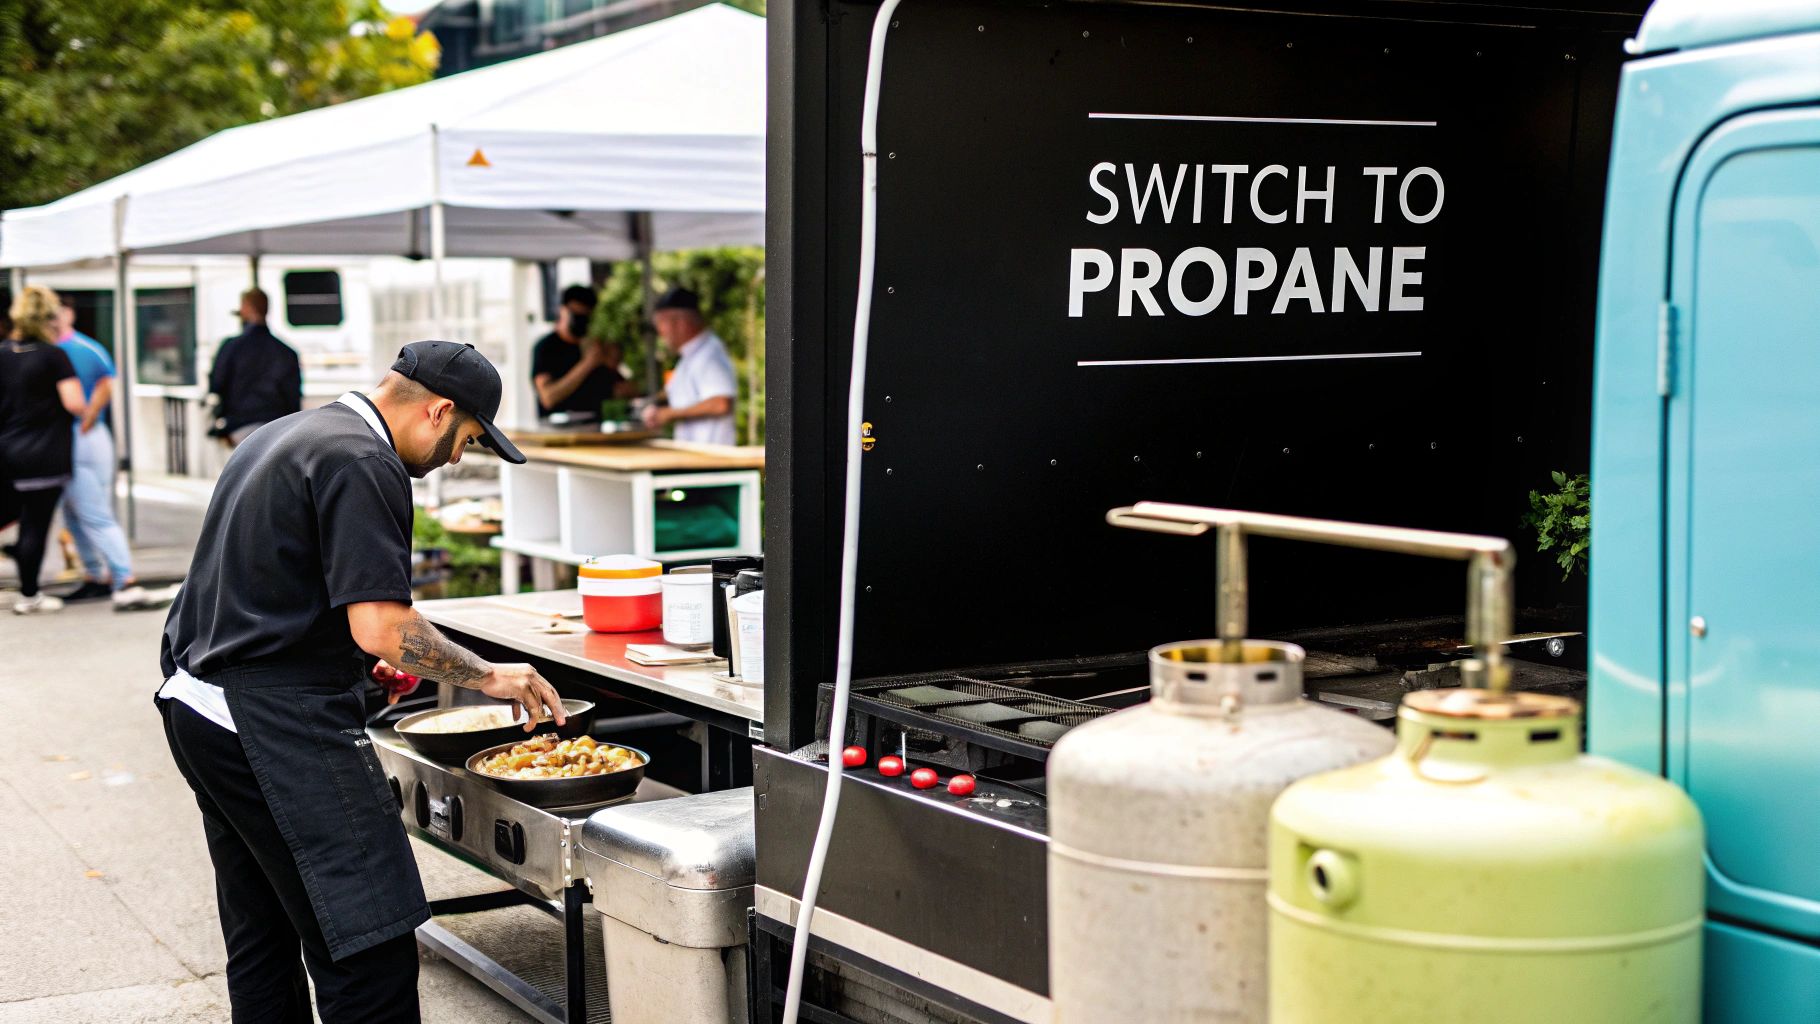
Thinking about switching your kitchen equipment from natural gas to propane? It's a move many operators make, especially if they're running a food truck, a catering business, or setting up shop somewhere off the beaten path without access to natural gas lines.
Put simply, a natural gas to propane conversion means modifying an appliance so it can safely and efficiently burn propane. It's not a simple swap-out. The process involves installing specific parts and making careful adjustments to handle the very different pressure and energy properties of propane.
Why Restaurants Switch to Propane
The decision to convert your commercial kitchen equipment from natural gas to propane is rarely made on a whim. It’s almost always a strategic move driven by operational needs and the pursuit of greater flexibility. For a lot of restaurant owners, this isn't about preference—it's about making their business possible.
Just look at the booming food truck scene or a catering business that sets up at remote festivals and private events. These ventures operate miles away from any municipal gas lines. For them, propane isn't just an alternative; it's the only viable fuel source powerful enough for their commercial-grade griddles, fryers, and ranges.
Understanding the Fuel Differences
At the heart of any conversion are the fundamental differences between natural gas and propane. They might seem similar, but they behave very differently in a high-demand kitchen.
- Energy Density: Propane really packs a punch. It contains more than double the energy of natural gas per cubic foot—we're talking 2,490 BTUs for propane versus 1,030 BTUs for natural gas. You get more heat from less fuel, which is a big win for efficiency.
- Pressure Requirements: Natural gas flows into your equipment at a very low pressure, typically around 4 inches of water column (WC). Propane, on the other hand, is stored as a liquid under high pressure and is delivered to appliances at a much higher pressure, usually around 11 inches WC.
That pressure difference is precisely why you can't just hook up a propane tank to a natural gas appliance. It's dangerous and just won't work. A proper conversion ensures the equipment gets the right volume and pressure of fuel to operate safely and effectively. You can learn more about these characteristics by exploring our detailed guide on the key differences between natural gas and propane.
Propane gives you off-the-grid independence. If a storm knocks out local utilities, a restaurant with its own propane tank can keep the kitchen running, turning a potential crisis into a business opportunity. This kind of resilience is a major draw for operators in areas prone to power outages.
To get a sense of how propane powers so many operations, it's helpful to have a baseline knowledge of understanding LPG heating and how it works. Propane's reliability and efficiency are gaining notice worldwide; the global market was valued at 187.5 million tons in 2024 and is expected to keep growing as more industries make the switch.
For a quick reference, here’s a look at how these two fuels stack up for kitchen use.
Natural Gas vs Propane At a Glance for Kitchens
This table breaks down the key operational differences you'll encounter when using natural gas versus propane for your commercial restaurant equipment.
| Characteristic | Natural Gas | Propane (LP Gas) |
|---|---|---|
| Energy Content | Approx. 1,030 BTUs per cubic foot | Approx. 2,490 BTUs per cubic foot |
| Delivery Method | Through municipal pipelines | Stored in on-site tanks |
| Typical Pressure | Low (around 4" WC) | High (around 11" WC) |
| Portability | Fixed to location | Highly portable |
| Best For | Brick-and-mortar kitchens with utility access | Food trucks, catering, remote locations |
Ultimately, understanding these distinctions is the first step in deciding if a conversion is the right move for your kitchen's unique demands.
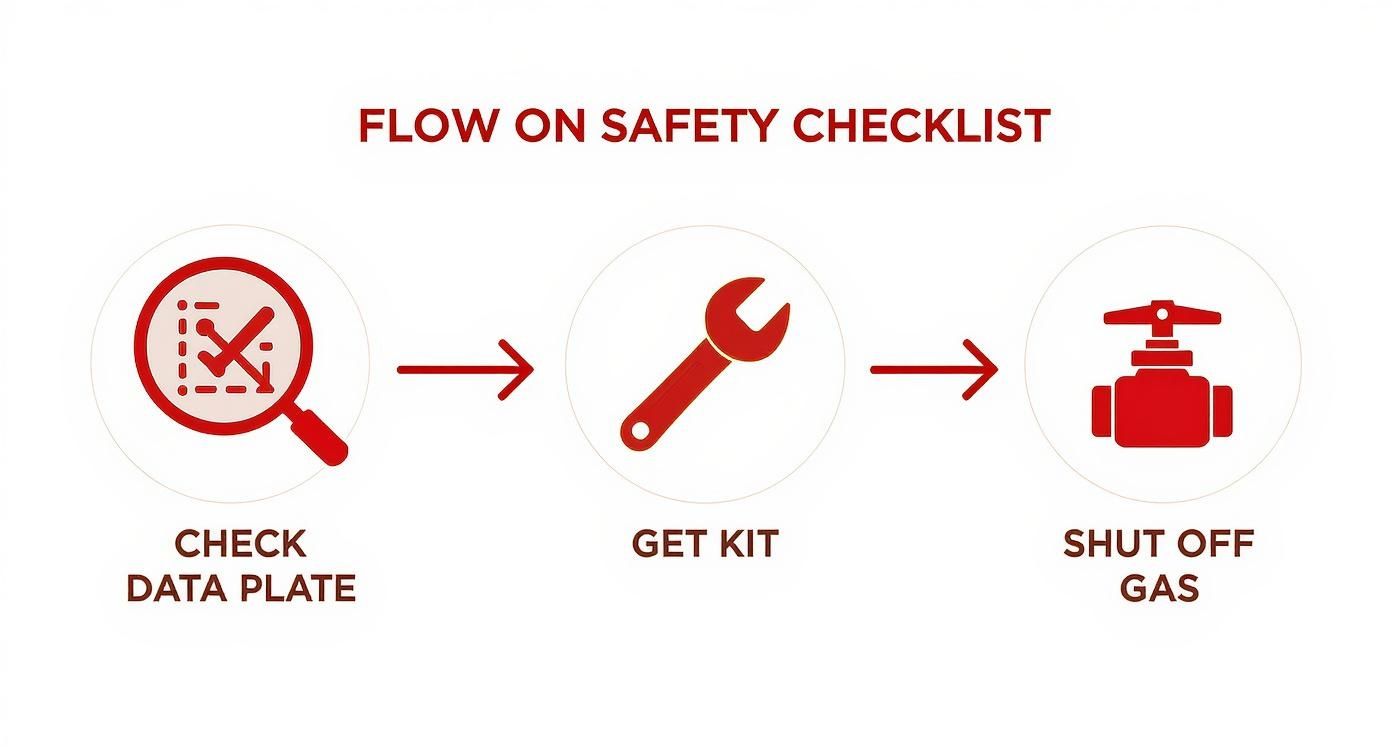
Your Pre-Conversion Safety and Equipment Checklist
Before you even think about picking up a wrench, the real success of a natural gas to propane conversion is decided by what you do beforehand. This is more than just having the right parts on hand; it's a methodical approach to safety and verification that leaves absolutely no room for error. If you jump the gun, you could be looking at damaged equipment, dangerous gas leaks, or a conversion that just flat-out fails.
Think of this part as your mission briefing. Getting the prep work right ensures every step that follows is safe, efficient, and correct. The time you spend here pays off directly in a secure, reliable kitchen once the job is done.
First, Confirm Your Equipment Can Even Be Converted
Not every piece of commercial kitchen equipment is designed to switch fuels. Trying to force a conversion on a unit that isn't built for it is a recipe for disaster. The final word on this is always on the manufacturer's data plate.
This small metal plate, usually tucked away on the back or side of your appliance, is its birth certificate. It has the model number, serial number, and—most importantly for us—the gas type information.
- Look for Conversion Details: The plate will often say something like "Field convertible to LP gas" or list specific kit numbers needed for a propane conversion.
- Check the Model Number: If the plate isn't crystal clear, use the model number to look up the manufacturer's manual online. That document is your ultimate guide.
- Find That Plate: Whether you have a Vulcan V-series range or a Pitco SG14 fryer, you have to find that plate. You might need a flashlight and a rag to clean it off, but this step is non-negotiable.
If you see a clear warning like "Natural Gas Only" with no mention of convertibility, stop right there. That unit absolutely cannot be safely converted to propane.
Understand What’s in Your Conversion Kit
Once you've confirmed your gear is convertible and you have the correct, manufacturer-certified kit, pop it open and get familiar with the parts. It's not just a random bag of brass fittings; every single piece has a critical job to do.
A genuine manufacturer-supplied conversion kit is engineered specifically for your appliance. Using generic or mismatched parts from the hardware store can lead to incorrect gas flow, creating a serious fire hazard and instantly voiding your warranty.
Here's what you'll typically find inside:
- Propane Orifices: These are the most important parts. Notice how the holes are visibly smaller than the natural gas orifices you'll be taking out. This is by design, restricting the flow of the higher-pressure, more energy-dense propane gas.
- Regulator Conversion Parts: This might be a new spring, a cap, or a reversible plunger pin. This little component adjusts the internal pressure regulator to step down the incoming propane pressure to a level the appliance can safely handle (usually 10-11 inches WC).
- Pilot Orifice: Just like the main burners, the pilot light needs its own smaller orifice to work correctly and safely with propane.
- Conversion Labels: These are official stickers you must apply to the appliance after the job is done. They clearly state that the unit now runs on propane, which is crucial for any future service calls and safety inspections.
Set Up a Safe Work Zone
With your equipment verified and your kit ready to go, the final prep step is to secure the area. Commercial kitchens are chaotic, high-traffic places, so creating a controlled workspace is absolutely essential for a safe gas conversion.
First, shut off the gas supply completely. Don't just turn the valve behind the appliance. Go to the main gas shutoff for the entire kitchen or building and turn it off there. Put up a clear, highly visible sign so nobody accidentally turns it back on while you're working. The connection between the appliance and the wall is also critical, so this is a good time to review our complete guide to commercial gas hoses to make sure everything is up to code.
Next, get some serious ventilation going. Open any nearby windows and doors, and crank the kitchen's exhaust hood up to its highest setting. Propane is heavier than air and can pool in low-lying spots, so good airflow is your best friend for dissipating any residual gas.
Finally, get your safety gear together before you start.
- Fire Extinguisher: Have a Class B or ABC fire extinguisher within arm's reach. No exceptions.
- Gas Leak Detector: An electronic "sniffer" is great, but even a simple spray bottle of soapy water solution is a must-have for checking your work later on.
- Proper Tools: Lay out all the tools you'll need—nut drivers, wrenches, screwdrivers—so you aren’t scrambling to find something mid-process.
Getting Your Hands Dirty: The Core Conversion Process
Alright, you've done your homework, completed the safety checks, and have the right conversion kit ready to go. Now comes the hands-on part. This is where we'll physically change the appliance's gas system to run safely and efficiently on propane. Take your time here—working methodically is the key to getting this natural gas to propane conversion done right.
First things first, you need to get to the burner and pilot orifices. On a commercial range, this usually just means lifting off those heavy cast-iron grates and pulling off the burner heads. If you're working on an oven or a fryer, you’ll likely need to remove a side or front panel to access the internal guts.
A little tip from the trenches: keep any screws or fasteners you remove in a magnetic parts tray. It’s a simple trick that prevents them from getting lost in the chaos of a busy kitchen.
Swapping Out the Gas Orifices
Once you’ve got a clear line of sight to the burner assembly, you’ll spot the small, brass-colored orifices where the gas shoots out. These are exactly what we need to replace. The natural gas orifices currently in there have a larger opening because natural gas runs at a lower pressure. Your new propane orifices will have a noticeably smaller hole, which is crucial for restricting the flow of the higher-pressure propane.
Grab a nut driver that fits snugly over the orifice and carefully turn it counter-clockwise to loosen and remove it. They shouldn’t be cranked on there super tight, but years of heat and carbon buildup can sometimes make them a bit stubborn. If one gives you trouble, a tiny bit of penetrating oil can help, but use it sparingly.
Now, take the matching propane orifice from your kit. Thread it in by hand at first to make sure you don’t cross-thread it—that’s a mistake you don’t want to make. Once it’s started, use your nut driver to tighten it until it feels snug and secure.
Pro Tip: Resist the urge to overtighten these fittings. Brass is a relatively soft metal, and you can easily strip or damage the threads, which could create a dangerous leak. You're aiming for a firm, sealed connection, not maximum torque. Applying a small amount of gas-rated pipe dope to the male threads is a great way to ensure a perfect seal without over-cranking.
Don't forget about the pilot light! It has its own tiny orifice that also needs to be swapped for the propane version in your kit. The process is exactly the same, just on a smaller scale.
This simple workflow just reinforces the importance of confirming compatibility and shutting off the gas before you even pick up a tool.
Adjusting the Gas Pressure Regulator
With the new orifices in place, the next critical step is adjusting the appliance's gas pressure regulator. Think of this device as the gatekeeper; it controls the pressure of the gas that actually reaches the burners. It absolutely must be set for propane’s higher pressure, which is typically around 10 to 11 inches of water column (WC).
You'll usually find the regulator where the main gas line connects to the appliance. Look for a component with a cap on it, which might be a screw-off type or a hex nut.
How you convert the regulator depends on the manufacturer, but you'll almost always run into one of two scenarios:
- Flipping the Plunger: After you remove the cap, you might see a plastic or metal pin inside. One end will be marked "NAT" for natural gas, and the other will say "LP" for liquid propane. Just pull it out, flip it over so "LP" is showing, and put it back in before replacing the cap. Easy.
- Replacing the Spring: In other models, your kit will include a new spring. The natural gas spring is lighter, while the propane spring is stiffer to handle the higher pressure. Carefully take out the old spring and pop in the new one from your kit.
Always, and I mean always, check the instructions in your conversion kit to see which method applies to your equipment. Skipping this step is not an option—it will result in dangerously high flames and create a serious safety hazard.
Interestingly, this whole process connects back to the global energy supply chain. The availability of parts for a natural gas to propane conversion can be swayed by major shifts in energy demand. For example, the U.S. has become a massive exporter of propane, with shipments averaging 1.3 million barrels per day in the first half of 2021. This export volume affects the price and availability for everyone, which can sometimes trickle down to the cost of conversion kits. You can dig into more of these global energy trends over at EIA.gov.
Once the regulator is set correctly and all the orifices have been replaced, you’re ready to reassemble any panels or burner parts you removed. Take a final moment to double-check that every connection is tight and every screw is back where it belongs. The main mechanical work is done, which sets the stage for the final—and equally important—phase of testing and fine-tuning.
Post-Conversion Adjustments and Leak Testing
Alright, you've swapped the orifices and dialed in the regulator. That's a huge step, but don't fire up that grill just yet. This final phase of the natural gas to propane conversion is all about meticulous testing and fine-tuning. This is where you ensure your equipment is not just working, but working safely for the daily grind of your kitchen.
Rushing these last checks is a recipe for disaster. It can lead to inefficient cooking, damaged equipment, or even dangerous gas leaks. Taking a few extra minutes here guarantees that every single dish is cooked over a reliable and perfectly calibrated flame.
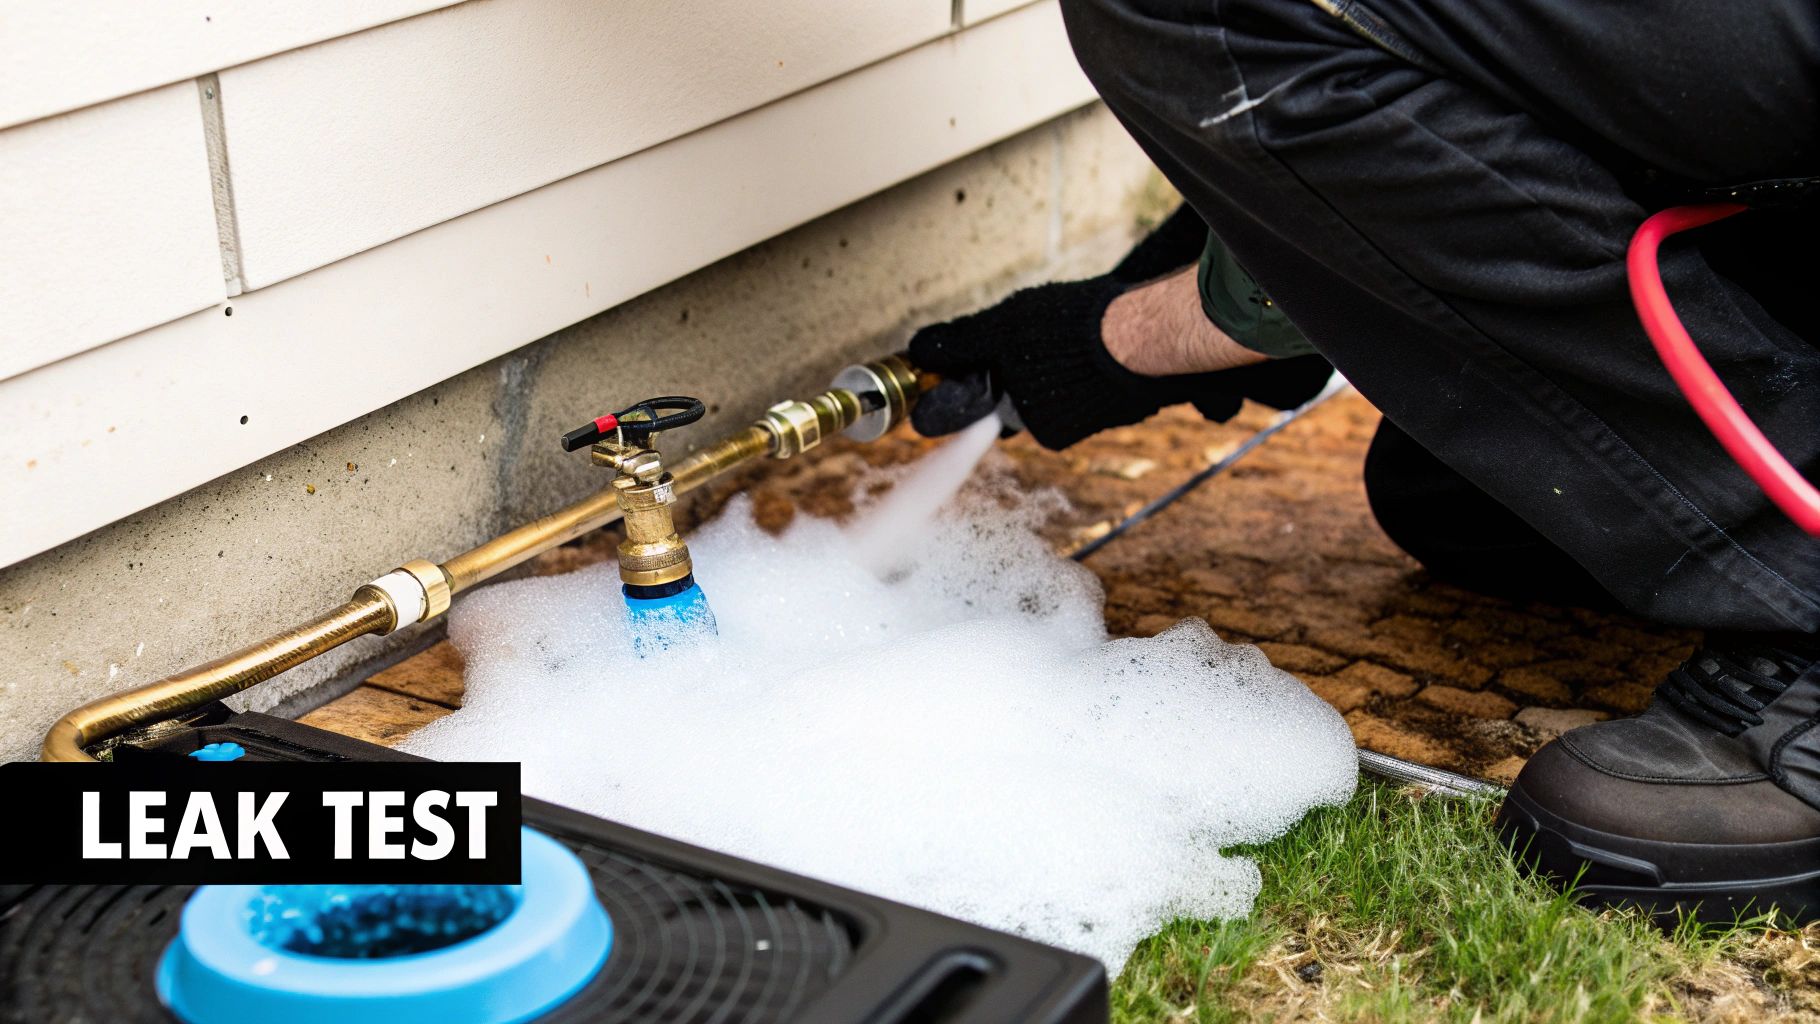
The Essential Leak Test
Before you even think about lighting a burner, your absolute first priority is a thorough leak test. This is a simple but completely non-negotiable safety check to confirm every connection you touched is perfectly sealed.
The best tool for this is just soap and water in a spray bottle. A 50/50 mix of dish soap and water works perfectly. Turn the gas supply back on—at the main valve and at the appliance—and then generously spray the solution on every single connection point you worked on.
This includes places like:
- The main gas hose connection to the appliance.
- The threads around the pressure regulator you just adjusted.
- The area around every new orifice you installed.
Now, watch closely. If you see any new bubbles forming or growing, you have a gas leak. It’s the classic tell-tale sign that gas is escaping. If you spot bubbles, immediately turn off the gas supply, give the leaky connection a slight tighten (a quarter-turn is usually enough), and then test it again. Keep going until you see zero bubbles.
A gas leak, no matter how small, is a serious hazard. Even a tiny, slow leak can allow gas to accumulate, creating a significant risk of fire or explosion. The soapy water test is your first and most important line of defense against this danger.
Fine-Tuning the Perfect Flame
Once you've passed the leak test with flying colors, it's time to adjust the burners for peak performance. Propane needs a different air-to-fuel ratio than natural gas, and you'll dial this in by adjusting the burner's air shutter.
The air shutter is usually a small metal collar at the base of the burner tube. It has an opening you can make larger or smaller to control airflow. Go ahead and light the burner and take a good look at the flame. Your goal is a crisp, steady, and mostly blue flame with a distinct inner cone. A tiny bit of yellow at the very tip is generally okay, but that's it.
Here’s what to look for and how to fix it:
- Too much yellow: If you're seeing a lazy, yellow, or sooty flame, there isn't enough air in the mix. This is incomplete combustion, which wastes fuel and produces dangerous carbon monoxide. To fix this, you need to open the air shutter wider to let more oxygen in.
- Lifting flames: If the flame is "lifting" or jumping off the burner, it's getting too much air. This can cause the burner to go out unexpectedly. To correct it, you'll need to close the shutter slightly to reduce the airflow.
Make small, careful adjustments until you get that perfect blue flame. This calibration is what ensures you're getting maximum heat output and fuel efficiency from your new propane setup.
Troubleshooting Post-Conversion Flame Issues
Even with careful adjustments, you might run into a few common flame issues. This table breaks down what you might see and how to handle it.
| Symptom | Potential Cause | Solution |
|---|---|---|
| Yellow, Sooty Flame | Insufficient air mixing with the propane. | Open the burner's air shutter slightly to increase airflow. Clean any debris from burner ports. |
| Flame Lifting or "Floating" | Too much air in the fuel mixture. | Close the air shutter in small increments until the flame stabilizes on the burner ports. |
| Popping Noise on Ignition/Extinction | Incorrect air/fuel mixture or delayed ignition. | Adjust the air shutter. Ensure the pilot light is positioned correctly and provides a strong enough flame to ignite the main burner instantly. |
| Weak or Low Flame | Low gas pressure or partially clogged orifice. | Confirm the propane regulator is set to the correct pressure (typically 10-11 inches WC). If pressure is good, shut off the gas and check the orifice for blockages. |
| Uneven Flame Pattern | Clogged burner ports. | Turn off the appliance and allow it to cool completely. Use a stiff wire or small drill bit (do not enlarge the holes) to gently clean out any food debris or carbon buildup from the burner ports. |
Remember, the goal is always a stable, predominantly blue flame. Anything else indicates an issue that needs to be addressed for both safety and performance.
Final Calibrations for Ovens and Pilots
Almost there. If you've converted an oven, the thermostat might need to be recalibrated to account for propane's different burning properties. Stick an accurate oven thermometer inside, set the oven to 350°F, and let it fully preheat. If your thermometer is off by more than 15-20 degrees, check the manufacturer's manual for instructions on how to adjust the thermostat.
Finally, check the pilot light. There’s usually a small adjustment screw near the pilot assembly. You want the flame to be just big enough to touch the tip of the thermocouple or flame sensor—a steady, small blue flame is perfect.
These detailed adjustments are crucial. The fuel itself is the result of a massive industrial process, and the U.S. is a major producer. In fact, by 2025, U.S. production of natural gas liquids like propane is projected to hit about 3.0 million barrels per day, a 10% increase from the previous year. You can find more insights into the complex propane market on MordorIntelligence.com. This vast production network is what ensures a steady supply for your newly converted equipment. Once all your adjustments are complete, your conversion is officially done.
Bringing in the Pros: Code Compliance and Final Verification
You’ve done the hands-on work. The new parts are in, you’ve meticulously checked for leaks, and the flame is burning just right. It’s easy to feel like the job is done, but hold on—the most critical step in your natural gas to propane conversion is still ahead. This is where you make sure everything is 100% legal, safe, and officially signed off on.
Trust me, this isn't just about paperwork. It’s about safeguarding your business, your team, and every customer who walks through your door.
Tackling this as a pure DIY project might seem like a way to save a few bucks, but a single mistake in compliance can snowball into failed inspections, steep fines, or—worst-case scenario—your insurance company voiding your policy after an incident. Many local authorities have strict rules that require any work on gas lines to be done or, at the very least, inspected by a licensed professional.
Why You Can’t Skip Professional Verification
Ignoring local building codes is a high-stakes gamble you simply can't afford to take. Fire marshals and building inspectors are experts at spotting uncertified work, and the penalties can be harsh. An improper conversion isn't just a code violation; it's a major safety liability.
This is where a qualified gas fitter or licensed plumber becomes your most valuable player. They’ll do more than just glance at your work. They will verify the conversion was done correctly and ensure it lines up with all local and national safety standards, like those from the National Fire Protection Association (NFPA).
A certified pro's sign-off is way more than a formality. It’s your official, documented proof that the equipment is safe and compliant. This piece of paper is gold for your insurance provider and is often the first thing a health inspector will ask to see.
How to Find and Vet a Qualified Technician
Finding the right person for the job is crucial. You’re not looking for a general handyman. You need an expert with real-world experience in commercial kitchen gas appliances. A great way to start is by asking other restaurant owners in your area for a recommendation or checking with your equipment supplier.
Once you have a name, be ready with a few key questions to make sure they’re the real deal.
- License and Certifications: Ask for their state license number. You can also ask about specific credentials, like if they're a Certified Gas Fitter.
- Commercial Kitchen Experience: Make sure they work on commercial equipment regularly, not just residential furnaces and water heaters. The demands are completely different.
- Proof of Insurance: Always ask for a certificate of liability insurance. This protects you and your property while they’re working in your kitchen.
A true professional will have no problem sharing this information. Their expertise is your peace of mind that the job is truly finished and done right.
The Importance of Documentation and Permits
Getting your paperwork in order is the final piece of the puzzle. Once the technician has inspected and approved the conversion, make sure you get a detailed invoice or service record. It should clearly state what work was performed. File this document with your appliance manuals and maintenance logs.
Also, depending on the scope of the project, you might need to get a permit from your city or county. Before you even start, looking into the local commercial building permit requirements is a crucial step to make sure you’re fully compliant. Any modification to a building’s gas system often requires this kind of official approval.
Finally, remember that a safe kitchen goes beyond a single appliance. Adding a high-pressure propane system makes your overall fire safety plan more important than ever. This is a perfect time to review your safety protocols and learn more about how commercial kitchen fire suppression systems protect your entire operation. By prioritizing a professional sign-off and keeping diligent records, you’re not just protecting your investment—you’re building a culture of safety from the ground up.
Common Questions About Propane Conversion
It's totally normal to have a few questions floating around after walking through a technical job like this. A natural gas to propane conversion is a serious task, and it’s smart to get all your ducks in a row before you or your technician starts turning wrenches. We've pulled together some of the most common questions we hear from restaurant operators to give you clear, straight-up answers.
How Much Does a Professional Conversion Typically Cost?
You can generally expect a professional conversion for a single piece of equipment to run you somewhere between $150 and $400. That range usually covers the certified conversion kit from the manufacturer and the technician's time to do the install, make the right adjustments, and run all the safety checks.
Of course, a few things can nudge that price up or down:
- Appliance Complexity: A simple countertop griddle is going to be on the lower end of that scale. A big, complex convection oven with multiple burners? That'll likely cost more.
- Kit Price: The kit itself can be anywhere from $25 to over $100, all depending on the brand and what model you’re working on.
- Local Labor Rates: A gas fitter's hourly rate is going to vary depending on where you're located.
My advice? Always get a couple of quotes from different licensed gas fitters. It’s the best way to make sure you’re getting a fair price for the job.
Which Appliances Can I Not Convert to Propane?
While a ton of commercial gear is designed to be "field convertible," there are definitely some pieces that can't be switched. The number one rule is to always trust the manufacturer's data plate. If that little metal plate says "Natural Gas Only" or doesn't say anything about propane, then you can't safely convert it. Period.
Trying to force a conversion on a non-convertible appliance is incredibly dangerous. You’re creating a huge risk of fire, carbon monoxide poisoning, and complete equipment failure. It also immediately voids the warranty and can cause major headaches with your insurance company if something goes wrong.
On top of that, you might find that some older or really specialized equipment simply doesn't have a certified conversion kit available anymore, which makes a safe conversion impossible. Always, always verify compatibility before you buy an appliance or start planning a project.
Can I Use the Same Gas Hose for Propane?
This is a great question, and the answer is usually yes—as long as the hose is in good shape and properly sized for your appliance's BTU rating. The materials used in commercial-grade gas hoses are made to handle both natural gas and propane.
The real key, however, is making sure the hose's diameter and length can handle the gas flow your equipment needs. If the hose is too small, it can starve the appliance of fuel, leading to really poor performance. When in doubt, have your technician give the existing hose a good look during the conversion. They can confirm it meets all the safety and performance standards for your new propane setup.
Will My Cooking Times Change After Conversion?
Technically, propane does burn hotter than natural gas—it packs more than twice the BTUs into every cubic foot. But a properly done natural gas to propane conversion is engineered to deliver the exact same amount of heat to the burner as it did before.
The smaller orifices and the newly adjusted regulator work together to make sure the appliance's total BTU output stays the same as its original specs.
So, the short answer is no. If the conversion is done right and the burners are calibrated correctly, you shouldn't notice any difference at all in your cooking times or how your equipment performs. Your recipes and kitchen workflow can stay exactly the same.
At The Restaurant Warehouse, we provide the high-quality, reliable equipment you need to build a successful kitchen. From cooking and refrigeration to prep tables and sinks, we offer top brands at unbeatable prices with fast delivery. Equip your restaurant for success by visiting us at https://therestaurantwarehouse.com.
About The Author

Sean Kearney
Sean Kearney used to work at Amazon.com and started The Restaurant Warehouse. He has more than 10 years of experience in restaurant equipment and supplies. He graduated from the University of Washington in 1993. He earned a BA in business and marketing. He also played linebacker for the Huskies football team. He helps restaurants find equipment at a fair price and offers financing options. You can connect with Sean on LinkedIn or Facebook.
Leave a comment