


Your Manitowoc Ice Machine Troubleshooting Guide
When your Manitow-oc ice machine suddenly quits on you, it’s easy to assume the worst. But before you start picturing a massive repair bill, take a deep breath. More often than not, the culprit is something surprisingly simple in the machine's immediate environment.
Things like a hot kitchen, warm water feeding the machine, or a dirty condenser coil are behind the vast majority of service calls. The good news? You can often fix these yourself without calling a technician.
What to Check First When Your Manitowoc Stops Working
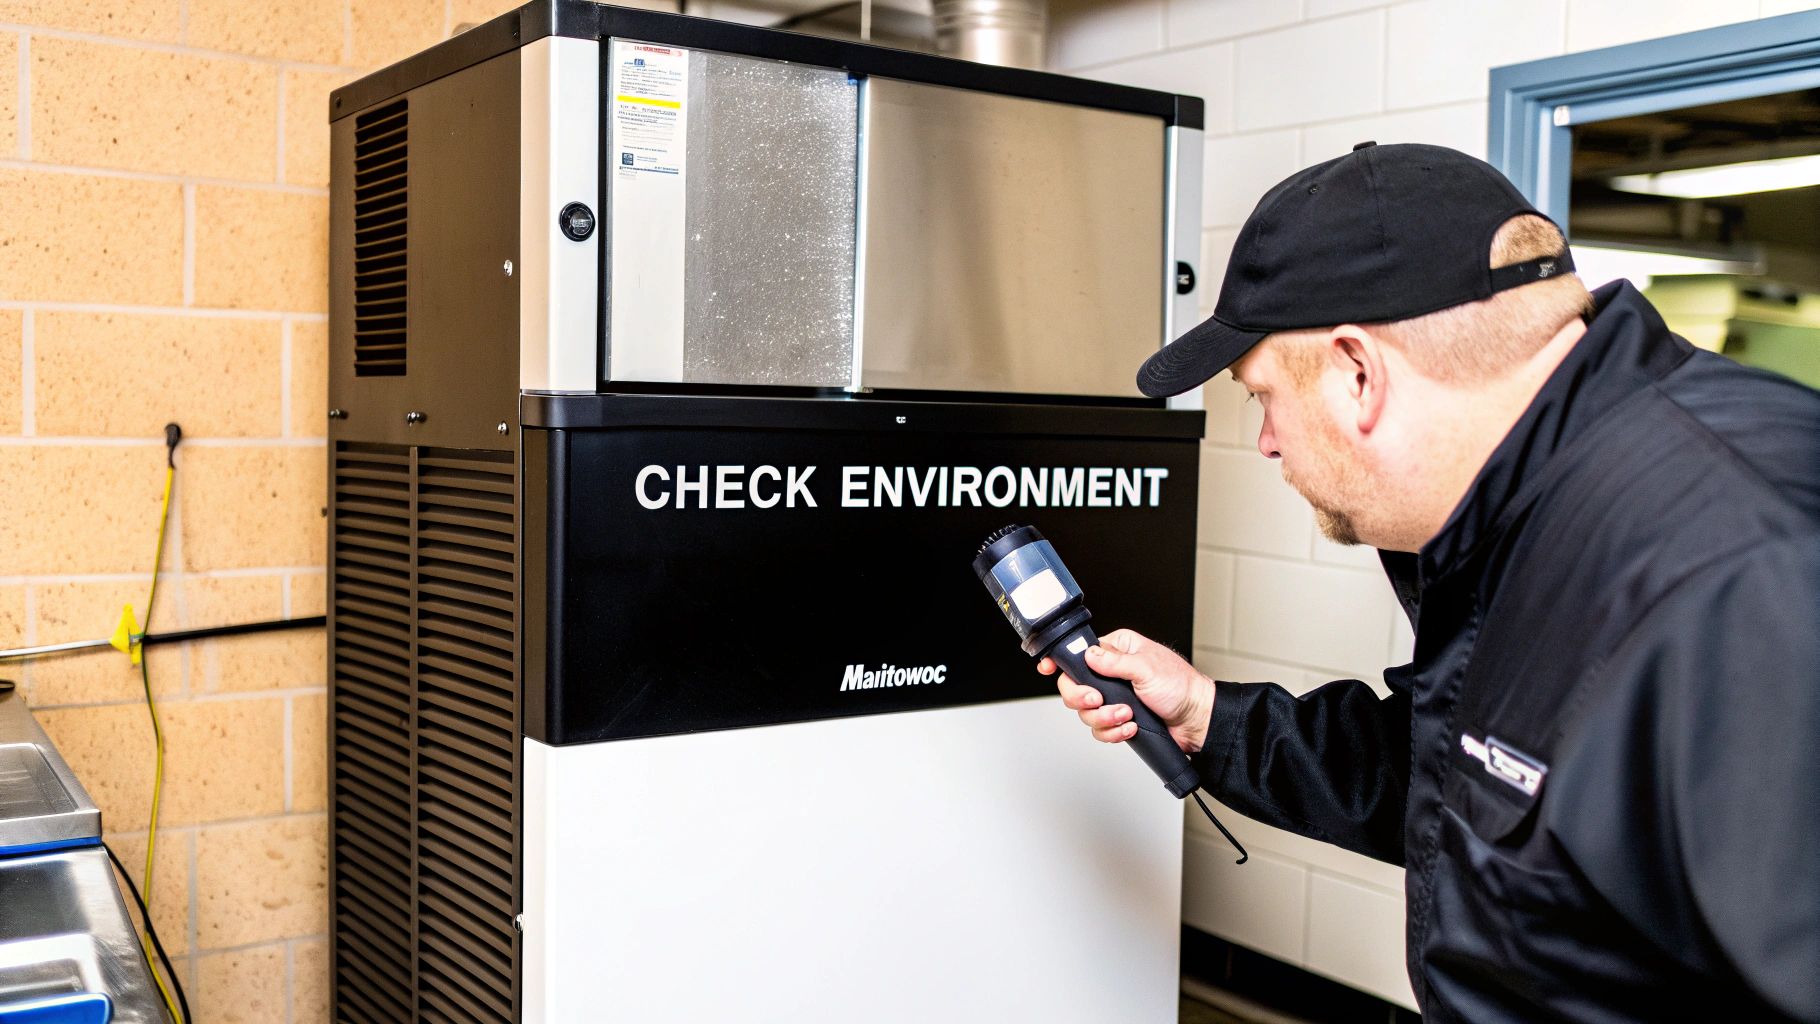
Before you pick up the phone, spend a few minutes checking the basics. These machines are incredibly sensitive to their surroundings, and what looks like a total breakdown can often be traced back to an external factor you can correct in minutes. Think of it as taking the machine's temperature before you dive into major surgery.
Downtime from an ice machine is a quiet but costly killer in the foodservice industry. Field studies from 2018 showed that commercial ice makers were responsible for about 8–10% of all refrigeration service calls. What's really telling is that over 60% of those calls were linked to simple issues like dirty condensers, scale buildup, or poor airflow.
It's a fact: when the air or incoming water gets above 70°F (21°C), ice production can plummet well below its rated capacity, even if every part is working perfectly.
Before calling in a pro, it's always worth running through a few quick checks yourself. These are the three most common environmental issues that can make a perfectly good machine seem broken. This table will help you spot them fast.
Initial Diagnostic Checklist Before Calling a Technician
| Check Area | What to Look For | Immediate Action |
|---|---|---|
| Ambient Temperature | Is the air around the unit hot or stuffy? Is it near an oven or fryer? | Ensure at least 6-12 inches of clearance around all vents. Move any nearby heat sources if possible. |
| Airflow & Vents | Are the vents or air filter visibly dirty, dusty, or greasy? | Clean the air filter with soap and water. Use a soft brush to gently clean the condenser coils. |
| Incoming Water | Does the water line feel warm? Is the water shutoff valve fully open? | Verify the machine is connected to a cold water line. Ensure the valve is fully open and the water filter isn't clogged. |
Running through these three steps can often get your machine back up and running, saving you the cost and wait time of a service call.
Assess the Ambient Temperature and Airflow
First things first, check the air around your machine. Does the room feel hot and stuffy? Is the ice machine crammed next to a fryer or a hot oven? Manitowoc units are designed to work best in a specific temperature window, usually between 50°F and 90°F.
When a kitchen heats up during a busy dinner rush, the ambient temperature can easily soar past that limit. This forces the compressor and condenser to work overtime, which tanks its efficiency and drastically cuts down on ice production.
Here’s your immediate action plan:
- Ensure Proper Clearance: Make sure there are at least 6-12 inches of open space around all the vents, especially on the top and sides. It’s common for staff to shove boxes or other equipment right up against the machine, choking off its airflow.
- Clean the Air Filter and Condenser Coils: A clogged air filter or a condenser coil caked in dust and grease is like making the machine breathe through a straw. Pull the filter out and give it a good wash with warm, soapy water. For the condenser, a soft brush will usually knock most of the gunk loose.
These principles of airflow and cooling apply to almost any refrigeration system. In fact, this ultimate AC troubleshooting guide shares detailed steps that are just as relevant for keeping your Manitowoc running cool.
Evaluate Your Incoming Water Supply
Just like hot air, warm water is a performance killer. Your machine has to work way harder to freeze 80°F water than it does 50°F water. Go feel the water line connected to the back of the unit. If it’s warm to the touch, you’ve likely found a big piece of the puzzle.
Pro Tip: I've seen it happen more than once—the machine gets hooked up to a hot water line by mistake. It's a simple installation error that's surprisingly easy to miss, and it will prevent the machine from making almost any ice. Always double-check your source.
Also, make sure the water supply valve is turned on all the way and that your water filter isn't clogged. Low water flow can create symptoms that look a lot like a major mechanical failure. If you need a refresher on the basics, our guide on connecting an icemaker to a water line is a great place to start.
Decoding Common Manitowoc Error Codes
Let’s be honest, seeing an error code flash on your Manitowoc ice machine can be a little stressful. But modern machines have a huge advantage over the old ones: they actually talk to you. Instead of leaving you to guess what’s wrong, the control board gives you a specific code that acts as a starting point for your diagnosis.
Think of it less as a sign of catastrophic failure and more as a helpful tip from your equipment. That flashing light turns a vague problem like "it's not making ice" into a clear, actionable path. This simple feature can turn any manager or senior staff member into the first line of defense, potentially solving an issue long before you need to call a technician.
The Most Common Alerts and What They Mean
So, let's get into the codes you're most likely to see pop up. These alerts often point to simple issues that a good cleaning or a minor adjustment can fix, saving you a ton of downtime and a hefty service bill. It's a good idea to keep a small log of any errors you see; if you notice a pattern, it can help you pinpoint a recurring problem.
Two of the most frequent culprits are E01 (Long Freeze Cycle) and E02 (Long Harvest Cycle). They sound similar, but they point to two very different parts of the ice-making process.
- E01 (Long Freeze Cycle): This code means the machine is taking way too long to form a full sheet of ice. The problem is almost always related to the refrigeration system struggling to do its job. It could be something as simple as a dirty, clogged condenser coil, high kitchen temperatures, or even low refrigerant.
- E02 (Long Harvest Cycle): When you see this one, it means the machine is having a hard time releasing the finished ice from the evaporator plate. The most common cause? Heavy scale buildup that’s making the ice stick like glue. Other possibilities include a harvest assist probe that’s out of whack or a hot gas valve that isn’t opening properly.
In a surprising number of cases, both an E01 and an E02 can be traced back to the same root cause: the machine just needs to be descaled. Scale acts like an insulator on the evaporator, making it harder for the machine to both freeze the water and then warm up enough to release the ice.
Water and Sensor Faults
Your machine is also constantly monitoring its water system and a handful of critical sensors. When something goes wrong in this department, you'll get a very specific alert that points you right to the source of the trouble. The good news is, these are often easier to fix than you might think.
A perfect example is the E20 (Water System Fault) code. This alert gets triggered when the machine senses a problem with water circulation. Before you start thinking about a pricey new water pump, check the easy stuff first. Is the water filter clogged? Is the pump screen covered in slime? More often than not, a bit of sediment is all that’s standing in the way of proper flow.
Another one to know is E19 (Ice Thickness Probe Fault). That little probe is a vital component that tells the control board when the ice sheet is thick enough to harvest. If it's dirty, coated in scale, or has been knocked out of alignment, the machine can't function correctly. A quick clean of the probe with a nickel-safe solution is often all it takes to clear the error.
Key Takeaway: An error code isn't a final diagnosis—it’s a symptom. An E01 code doesn't automatically mean your compressor is shot. It’s a prompt to check the simple things first, like airflow and condenser cleanliness, which are responsible for the vast majority of long freeze cycles.
Why Reporting Codes to a Technician Matters
Knowing these codes isn’t just for DIY fixes. Being able to give a technician specific information is a game-changer. Think about it: industry data shows that when a manager can report a specific error code instead of just saying "the machine's broken," the on-site diagnostic time for technicians can drop by 20–30%.
That's a huge efficiency boost. The technician can show up with a good idea of what they're walking into and maybe even have the right replacement parts already on the truck. To learn more about how these codes speed up the repair process, check out this excellent Manitowoc ice machine troubleshooting guide from Parts Town.
Ultimately, these error codes empower you. They bring clarity to a stressful situation and let you take immediate, effective action. Whether that means performing a simple cleaning yourself or giving a technician the exact info they need, understanding what your machine is telling you is the most powerful tool in your maintenance arsenal.
Fixing No Ice or Slow Ice Production Issues
When your Manitowouoc ice machine slows to a crawl or just stops dropping ice altogether, it’s more than an inconvenience—it's an operational headache that needs a fast solution. Before you start guessing, it’s best to walk through a systematic check. This isn't about random fixes; it's a logical workflow that follows the machine's own process, starting with the water's journey and ending with the core refrigeration parts.
This structured approach helps you move past the frustrating symptom—no ice—and get straight to the root cause. We'll start with the entire water circuit, because nine times out of ten, that's where you'll find the culprit for a production slowdown.
Inspecting the Complete Water Circuit
For an ice machine to make ice, water has to flow freely and consistently over the evaporator plate. Any hiccup in this path, and production grinds to a halt. The smart way to diagnose this is to start where the water enters and follow its path through each component.
- Water Inlet Valve and Filter: The journey starts right where the water line connects to the machine. First, confirm the water inlet valve is fully open and actually working. These valves can fail or get clogged with sediment, essentially starving the machine of the water it needs. Just downstream from there is the water filter—a very common troublemaker. An old, dirty filter will choke the water flow and is a classic reason for slow ice production.
- Water Pump and Trough: Once inside, water fills a trough before the pump sends it on its way. Check that the trough is full and listen to see if the pump is running. You should hear a faint, steady hum, which is a good sign it’s operational. If the pump is dead silent or the trough is bone dry, you’ve probably found a big piece of the puzzle.
- Distribution Tube: From the trough, the pump pushes water up to the distribution tube. This is just a pipe with a series of small holes designed to cascade water evenly over the evaporator plate. Pull this tube out and hold it up to the light. It is incredibly common for these little holes to get plugged up with scale or slime, which leads to uneven water flow, incomplete ice, or the machine faulting out.
A Real-World Scenario: I once got a call for a machine that was only making ice on one side of the evaporator. The pump was running just fine, so I pulled the distribution tube. Sure enough, mineral buildup had completely blocked half the holes, so water wasn't reaching the entire plate. A simple ten-minute cleaning solved a problem that had the kitchen staff stumped for days.
Checking Key Refrigeration Components
If the water system seems to be in good shape, your next move is to investigate the refrigeration system. This is the part of the machine that actually does the freezing, and any failure here will stop ice production cold. Safety first, though: some of these parts get very hot and involve high-voltage electricity, so be careful.
Listen for the compressor kicking on. It’s a distinct, low hum that should start shortly after the machine enters a freeze cycle. If you just hear a click and then silence, the compressor might be having trouble starting. This often points to a bad start capacitor or, in worse cases, a more serious internal failure.
You'll also want to make sure the fans are spinning.
- Condenser Fan: This fan is crucial. It pulls air across the condenser coils to get rid of heat. If it’s not running, the machine will quickly overheat and shut itself down on a high-pressure safety limit.
- Evaporator Fan (on some models): This fan helps circulate air inside the freezing compartment. If it fails, you'll see inefficient cooling and much slower production.
A quick visual inspection can tell you a lot, too. Is the compressor covered in a layer of frost? That can signal a refrigerant leak or some kind of restriction in the system. Are the condenser coils caked in dust and grease? That’s like forcing the machine to breathe through a straw. It has to run longer and harder, which is a direct cause of slow ice production.
This flowchart gives you a simple decision tree to follow for your first troubleshooting steps, especially if the machine is off or showing an error.
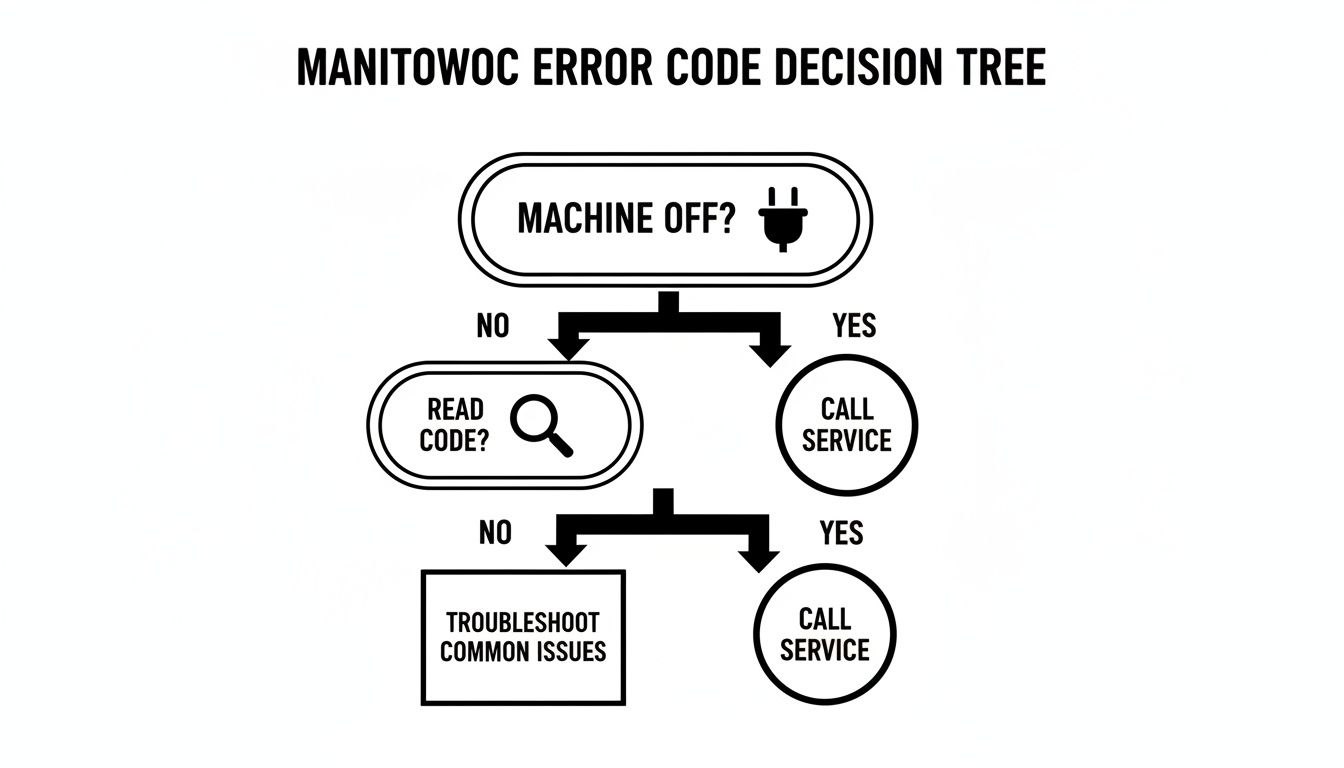
This helps streamline the process, letting you quickly figure out if you're dealing with a simple power problem, an error code you can look up, or something that needs a service call.
By following this logical path—water circuit first, then refrigeration components—you can effectively diagnose most reasons for no ice or slow ice production. This methodical approach from our Manitowoc ice machine troubleshooting guide saves time and helps you make a confident, informed decision on whether to handle a quick fix yourself or call in a professional.
Solving Problems With Ice Quality and Water Leaks
When a customer gets a drink filled with cloudy, soft, or half-formed ice cubes, it's a direct reflection on your establishment. More often than not, these frustrating ice quality issues—along with nagging water leaks—all point back to one place: the machine's water system.
Getting a handle on your Manitowoc's water circuit is a game-changer. When you tackle problems like mineral buildup and small drips, you don’t just improve your ice quality on the spot. You also head off the kind of long-term damage that leads to expensive, service-call-worthy breakdowns.
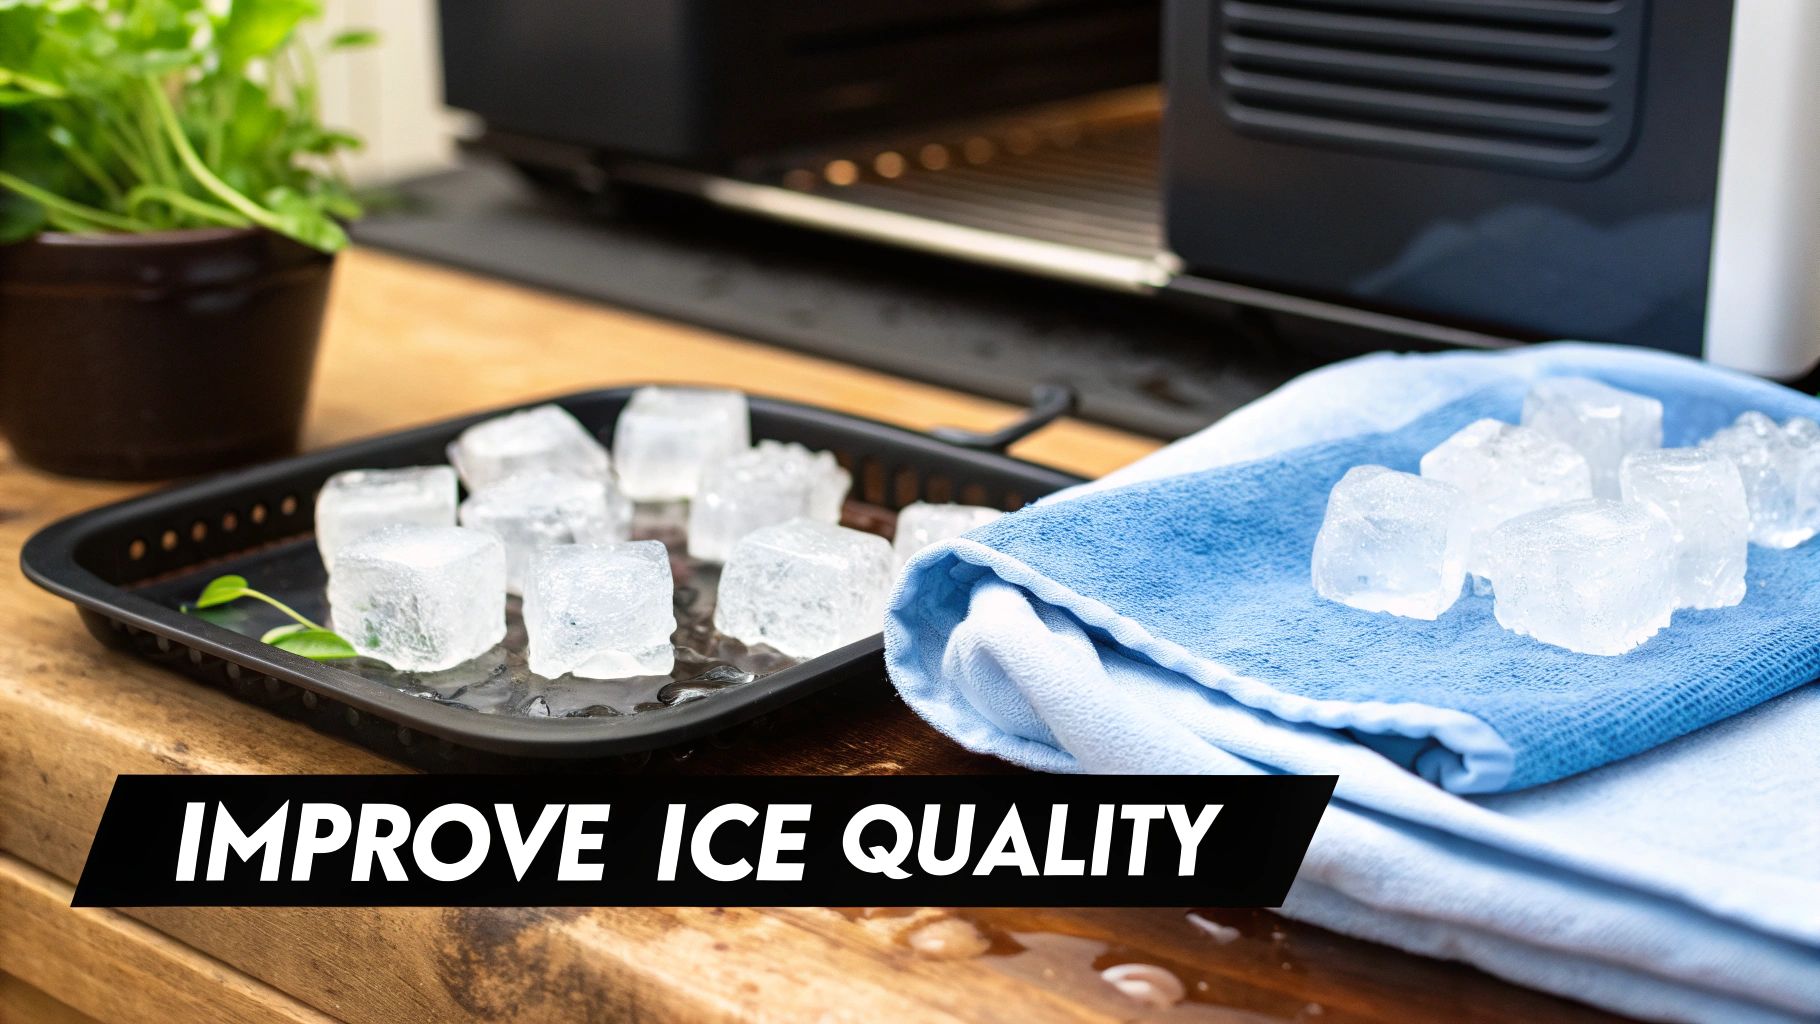
Tackling Poor Ice Quality at the Source
Bad ice isn't just a cosmetic issue; it’s a clear sign of an inefficient machine. The number one culprit is almost always scale buildup on the evaporator plate. This chalky white deposit comes from minerals like calcium and magnesium in your water supply, and it acts like a layer of insulation.
This mineral blanket prevents the evaporator from getting cold enough to freeze water quickly and evenly. The result? You get misshapen, cloudy, or soft cubes that melt way too fast and don't properly cool drinks. Scale also makes the finished sheet of ice stick during the harvest cycle, which can lead to incomplete cubes or even cause damage to the evaporator grid itself.
To get things back on track, a proper descaling is your next move.
- Start by turning the machine off and completely emptying the ice bin.
- Put the machine into its clean cycle, following the instructions for your specific model.
- When the machine prompts you, add the Manitowoc-approved, nickel-safe cleaning solution. Whatever you do, don't use unapproved cleaners like vinegar—they can permanently ruin the evaporator's plating.
- Let the machine run its entire cleaning and rinse cycle without interruption.
Key Insight: The quality of your local water directly dictates your maintenance routine. If you're in an area with hard water, you might need to descale as often as every three months. Businesses with softer water might get away with doing it every six months. If you feel like you're constantly fighting scale, that's your machine telling you it's time for a better water filter.
Proper water filtration for restaurants is a proactive solution, not an afterthought. A high-quality filtration system removes those scale-causing minerals from the get-go, saving you countless hours of cleaning and preventing expensive components from failing prematurely.
Pinpointing and Stopping Water Leaks
There's nothing more annoying than finding a puddle of water spreading out from under your ice machine. It's a slip hazard and a clear sign of a problem that will only get worse, so don't ignore it. Finding the source is usually a simple process of elimination, starting with the most common offenders.
Begin your inspection at the back of the unit where the water supply line and drain hose connect. Vibrations can cause these fittings to loosen up over time, and a quick turn of a wrench might be all you need to fix it.
If the connections are solid, it's time to look inside the machine.
- The Water Trough: This reservoir can crack or get knocked out of alignment, causing water to spill over every time it fills. Look closely for any visible damage or warping.
- The Drain Line: Check for clogs inside the machine's drain pan and in the main drain line itself. Any blockage will cause water to back up and eventually overflow onto your floor.
- The Inlet Valve: This valve is the gatekeeper, controlling water flow into the machine. If its internal seal is worn out, it can cause a slow, steady drip that forms a significant puddle over a few hours.
Here’s a quick table to help you connect the visual symptoms of bad ice to their likely causes.
Diagnosing Common Ice Quality Problems
| Ice Symptom | Most Likely Cause | Recommended Action |
|---|---|---|
| Cloudy or White Ice | High mineral content in the water supply. | Descale the machine thoroughly and upgrade your water filtration system. |
| Thin or Incomplete Cubes | Clogged water distribution tube or low water pressure. | Clean the small holes in the distribution tube and check the water filter for clogs. |
| Soft or Wet Ice | The machine is harvesting too early or the ambient room temperature is too high. | Check the ice thickness probe for dirt or scale; ensure there's proper air circulation around the machine. |
By methodically working through these common checkpoints, you can diagnose and resolve most water-related problems on your own. A consistent cleaning schedule and quick attention to small leaks are the best ways to keep your Manitowoc making perfect ice and prevent minor headaches from turning into major repairs.
Preventive Maintenance to Avoid Future Breakdowns
When it comes to Manitowoc ice machine troubleshooting, the best fix is the one you never have to make. The smartest approach isn’t about scrambling to fix what’s broken—it’s about preventing the breakdown from ever happening. A little preventive maintenance turns a reactive, stressful chore into a proactive, profit-saving strategy.
Getting into a simple routine is the key. It will slash unexpected downtime, make your machine run more efficiently, and add years to its life. This isn't about giving your team another mountain to climb. It's about building small, consistent habits that pay off big time. A few minutes each day or week is far more powerful than a massive, frantic cleaning once a year when a problem has already shut you down.
Your Daily and Weekly Maintenance Checklist
Consistency is your secret weapon against the most common ice machine failures. When you weave these quick tasks into your opening or closing procedures, they become second nature—just like wiping down counters or checking stock levels. Think of these small steps as your front line of defense against the dirt, dust, and grime that can choke your machine.
Your daily routine couldn't be simpler:
- Wipe Down Exterior Surfaces: Grab a food-safe sanitizer and give the machine's exterior, door, and scoop a quick wipe. This simple act stops contaminants from finding their way into your ice supply.
- Check the Ice Bin: Just a quick glance inside the bin is all it takes. You're looking for any foreign debris and making sure the ice looks clean and clear.
The weekly tasks take a few more minutes but are absolutely critical for maintaining good airflow and water quality—two things your machine needs to make ice efficiently.
- Clean the Air Filter: A clogged air filter is one of the biggest culprits behind slow ice production. Just slide the filter out, wash it with warm, soapy water, give it a good rinse, and let it air dry completely before putting it back.
- Inspect the Condenser Coils: Take a peek at the condenser coils. If you spot a layer of dust or grease building up, gently brush it away. Your machine needs to breathe, and clean coils let it do just that.
The Non-Negotiable Monthly Deep Clean
While the daily and weekly checks keep things running day-to-day, the monthly deep clean is where you fight the invisible enemies: scale and slime. Mineral deposits from your water supply build up on the evaporator plate, acting like an insulator. This forces the machine to work much harder to produce less ice. A full cleaning and sanitizing cycle is non-negotiable if you want to protect your investment.
Expert Insight: Skipping a full cleaning cycle is like never changing the oil in your car. Sure, it might run for a while, but you're guaranteeing a catastrophic and expensive failure down the road. A scheduled cleaning is always cheaper than an emergency service call.
During this deep clean, you’ll need to run a full cycle using only Manitowoc-approved, nickel-safe solutions. For a detailed walkthrough, our complete guide on ice machine cleaning provides step-by-step instructions.
As part of your routine, understanding details like how to properly flush your water filter is another key step. Good filtration is your first line of defense, as it removes many of the minerals that cause that nasty scale buildup in the first place, making your cleaning cycles more effective and less frequent.
Knowing When to Call a Professional Technician
Look, as much as this guide is designed to help you tackle common Manitowor problems yourself, it's just as important to know when to put the tools down and pick up the phone. Your safety and the long-term health of your machine are what matter most. Trying to be a hero on a complex repair isn't just risky—it can turn a small issue into a costly disaster and might even void your warranty.
Some signs are an immediate red flag. If you hear a loud, metallic grinding or a high-pitched screeching coming from the compressor area, shut the machine off right away. That’s not a sound you can ignore; it often points to a serious internal mechanical failure that’s way beyond a simple fix.
Another major hands-off situation is a suspected refrigerant leak. You might notice an oily residue around the fittings or hear a distinct hissing sound. Refrigerant is a hazardous material that requires a certified technician with specialized recovery equipment to handle safely and legally.
Recognizing Serious Faults
Don't mess around with complex electrical issues. If there’s a persistent burning smell, you see scorch marks on any of the wiring, or the control board is totally dead even after you've confirmed power is getting to the unit, it’s time to call in a pro. These problems involve high-voltage components that are dangerous to work on without proper training.
Crucial Takeaway: Your safety and the machine's longevity come first. A DIY fix that goes wrong can easily cost more in parts and professional labor than a service call would have from the get-go.
To make that service call as smooth and efficient as possible, do a little prep work. Have this information ready for the technician when they arrive:
- Your machine’s model and serial number. You can usually find this on a sticker right inside the front door.
- A clear, simple description of the problem. Mention any weird noises, leaks, or specific error codes you’ve seen on the display.
- A quick rundown of what you’ve already tried. This saves the tech valuable diagnostic time and gets them pointed in the right direction faster.
This simple preparation helps the technician show up with the right tools and potentially the right parts, getting your ice machine back up and running with minimal downtime. And if it turns out you do need genuine Manitowoc components, you can find a comprehensive selection of replacement parts at The Restaurant Warehouse to get your equipment restored to factory standards.
Got Questions? We've Got Answers
Even the best guides can leave you with a few lingering questions. When your ice machine is acting up, you need answers fast. Here are some of the most common things we hear from restaurant owners about their Manitowoc units.
How Often Should I Really Be Cleaning My Manitowoc Ice Machine?
The official answer you'll see everywhere is to do a full-blown cleaning and sanitizing cycle at least every six months. Think of that as the absolute bare minimum to keep things running and stay on the right side of the health inspector.
But let's be realistic—your kitchen's environment is the real boss here. If you're running a pizzeria, brewery, or bakery with a lot of yeast floating around in the air, you need to be cleaning that machine every three months. Same goes if you're in an area with hard water. Waiting six months is just asking for a massive scale buildup that will choke your machine's performance.
And just to be clear, this deep clean is totally separate from your daily and weekly routine. You should still be wiping down the outside every day and hitting that air filter once a week to keep the air flowing and the unit looking professional.
Why Is My Machine Suddenly Making a Loud Humming or Buzzing Noise?
First off, a quiet, steady hum is perfectly normal. That's just the sound of the compressor and fans earning their keep. The sounds you need to worry about are the ones that are new, louder than usual, or just plain different from what you're used to hearing.
If you're hearing a loud, angry hum or a rattling buzz, it usually points to one of a few culprits:
- A Failing Fan Motor: When the bearings in a motor start to go, they often make a loud, grinding hum that’s hard to ignore.
- A Stressed-Out Compressor: A compressor that's struggling to start or run properly can make a strained buzzing sound that's much louder than its normal hum.
- Loose Panels: You'd be surprised how much noise a vibrating side or top panel can make when it's rattling against the frame. It sounds more serious than it is.
Before you pick up the phone to call a technician, take a quick peek around the machine. See any loose panels you can tighten? Anything obvious blocking the fan blades? If the noise is definitely coming from inside the unit and doesn't stop, it's time to let a pro take a look.
Can I Just Use Vinegar or Another Cleaner I Have on Hand?
Please, don't do it. This is one of those areas where cutting corners will come back to bite you, hard. You must only use a Manitowoc-approved, nickel-safe ice machine cleaner (descaler) and sanitizer. There's a very good reason for this: many Manitowoc evaporators are nickel-plated, and the wrong chemical will eat that coating right off, causing permanent damage.
Household cleaners are a definite no-go. Vinegar is acidic and will corrode sensitive parts, and bleach can wreck plastic components while leaving behind residues you don't want anywhere near your ice. Using unapproved chemicals is a surefire way to void your warranty and set yourself up for a very expensive repair bill. Always, always stick with the products recommended in your user manual. It protects your machine and ensures your ice is safe for customers.
When you need genuine Manitowoc parts to get your machine back in top form, or if you're thinking it might be time for an upgrade, The Restaurant Warehouse is here to help. We have the inventory and expertise to keep your kitchen running without a hitch. Find all the essential restaurant equipment you need on our site today.
About The Author

Sean Kearney
Sean Kearney is the Founder of The Restaurant Warehouse, with 15 years of experience in the restaurant equipment industry and more than 30 years in ecommerce, beginning with Amazon.com. As an equipment distributor and supplier, Sean helps restaurant owners make confident purchasing decisions through clear pricing, practical guidance, and a more transparent online buying experience.
Connect with Sean on LinkedIn, Instagram, YouTube, or Facebook.
Leave a comment