

How to Clean a Grease Trap: A Complete Guide
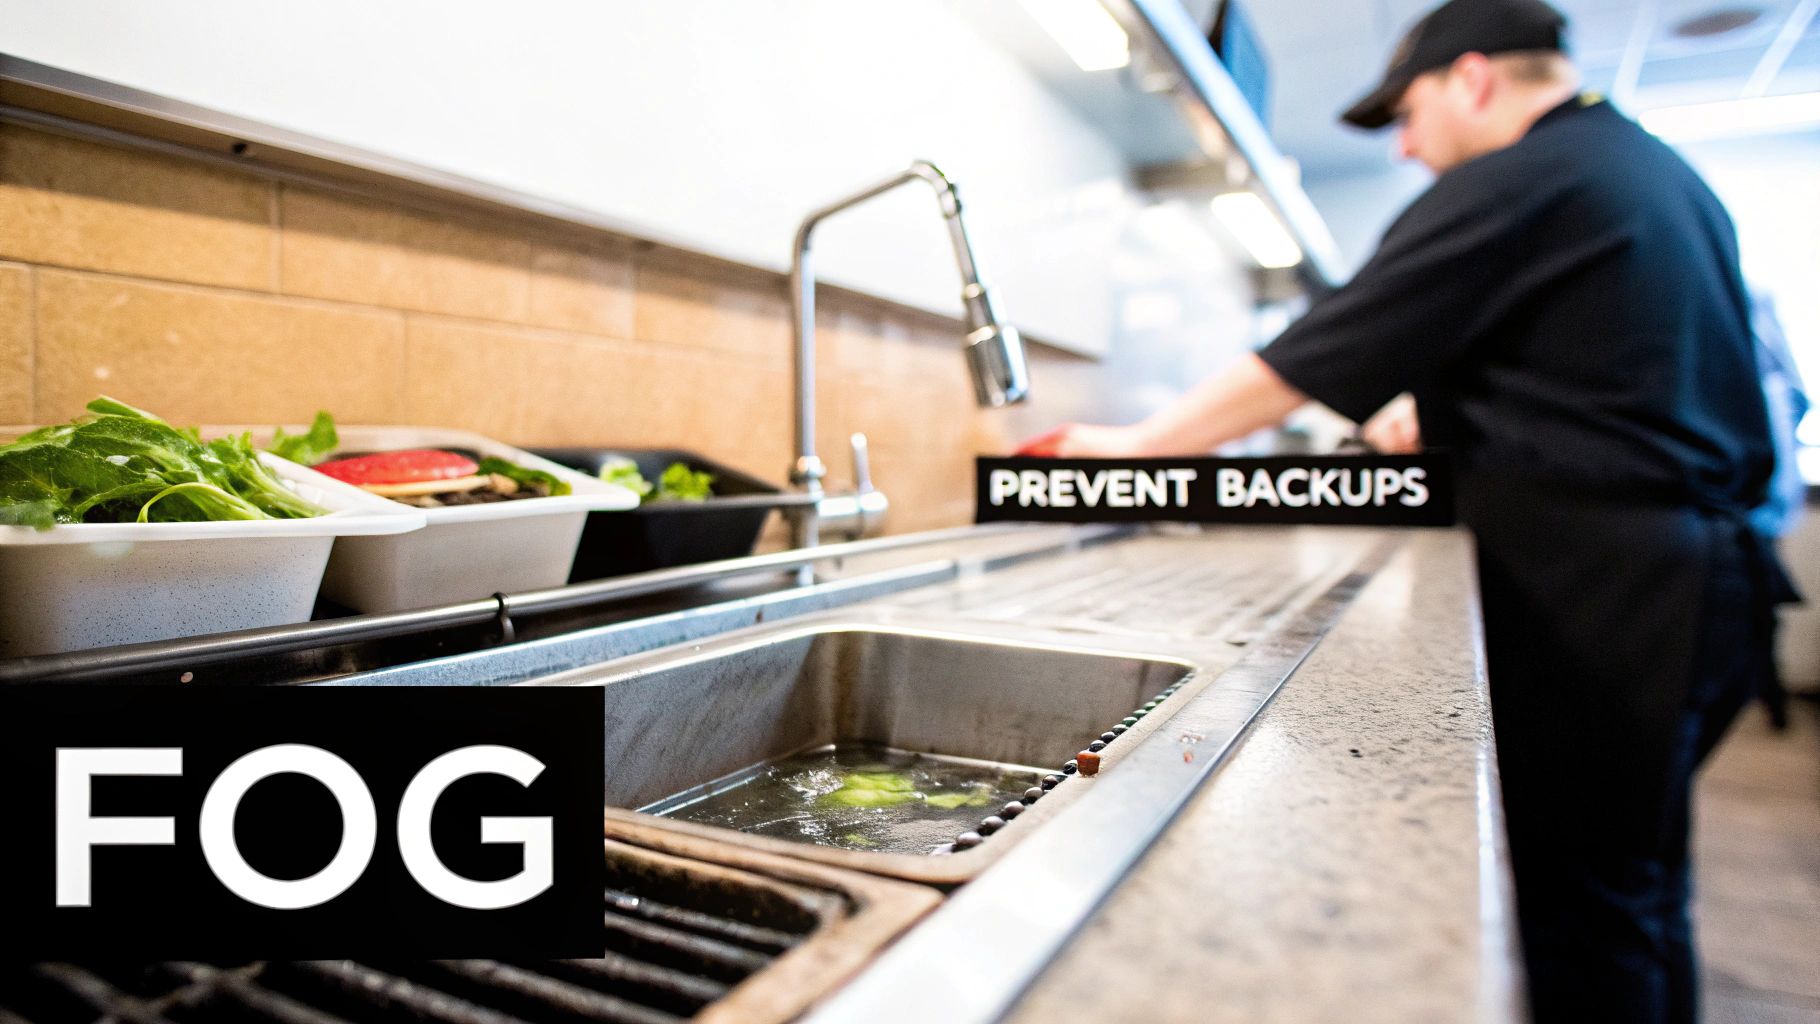
That slow drain in the kitchen. The faint, foul odor you can’t quite place. These are the first signs your grease trap is crying for help. Cleaning a grease trap isn't just another chore; it's a non-negotiable part of running a safe and successful restaurant. This is all about removing the built-up fats, oils, and grease (FOG) before they turn into plumbing disasters, hefty fines, or a complete operational shutdown. We'll show you exactly how to get it done right.
Think of it this way: proper and regular cleaning isn't just maintenance—it's a critical business function.
Why You Can't Ignore Grease Trap Cleaning
Ignoring your kitchen’s grease trap is like playing with fire. It’s a direct risk to your operations and your bottom line, and it goes way beyond just dealing with a few bad smells. Neglect can trigger real-world business disasters that bring a bustling kitchen to a dead stop.
Imagine a total plumbing backup during a packed dinner service. Or picture facing thousands of dollars in municipal fines for non-compliance. These aren't just scare tactics; they're the tangible, frustrating consequences of poor maintenance.
Fats, Oils, and Grease—collectively known as FOG—are the natural byproducts of any busy commercial kitchen. As these substances wash down the drain and cool off, they solidify inside your plumbing, creating a thick, heavy sludge.
Over time, this buildup acts like cholesterol in an artery, constricting water flow until it causes a complete blockage. The result? Greasy, foul-smelling water backing up into your sinks and permeating your entire establishment. In the worst-case scenario, you're looking at a complete operational shutdown for emergency repairs.
Avoiding Fines and Costly Repairs
The risks don't stop at your own four walls. When FOG escapes your plumbing, it enters the municipal sewer system, where it contributes to massive blockages known as "fatbergs." These can cause widespread sewer overflows, serious environmental damage, and require incredibly costly public works projects to fix.
Because of this, local authorities enforce strict regulations on FOG management.
Failing to stay compliant can lead to some serious headaches:
- Hefty Fines: Municipalities can issue significant penalties for any business that causes a sewer blockage.
- Forced Closures: Health inspectors have the power to shut down a kitchen they deem unhygienic or non-compliant.
- Repair Costs: You'll be on the hook for the cost of repairing both your internal plumbing and any damage your FOG causes to public sewer lines.
Simply put, cleaning a grease trap isn't just a dirty job—it’s a critical business function that protects your investment, ensures legal compliance, and maintains a safe, hygienic kitchen.
Neglecting this task can have a domino effect on your business. To put the potential consequences into perspective, here’s a breakdown of the key risks you're taking by not keeping up with regular maintenance.
The Hidden Dangers of a Full Grease Trap
| Risk Category | Specific Consequence | Potential Impact |
|---|---|---|
| Operational | Plumbing backups and clogs | Service interruption, kitchen shutdown, lost revenue |
| Financial | Municipal fines for non-compliance | Penalties ranging from hundreds to thousands of dollars |
| Health & Safety | Foul odors and pest attraction | Negative customer experience, health code violations |
| Legal & Liability | Damage to public sewer systems | Responsibility for expensive municipal repair costs |
| Reputation | Negative reviews and health scores | Long-term damage to your brand and customer trust |
As you can see, the financial and reputational damage can quickly spiral, making proactive maintenance the only sensible path forward.
Your Role in Responsible Grease Management
The importance of this task is even reflected in the market itself. The global grease traps market was valued at USD 1.34 billion and is projected to keep growing, driven by stricter regulations and greater environmental awareness. This trend highlights just how vital these devices are for protecting our public infrastructure.
Understanding the significance of regular maintenance goes hand-in-hand with learning how to effectively reduce your environmental footprint and contribute to a healthier community.
For a deeper dive into how these systems work, be sure to check out our guide on selecting the right grease traps for kitchens. Staying on top of cleaning prevents emergencies and positions your business as a responsible partner in your community.
Understanding Local Regulations and Compliance
Cleaning your grease trap isn't just a suggestion from your plumber; in many places, it's a legal requirement. Local authorities enforce strict regulations on FOG management to prevent sewer blockages and serious environmental damage. Ignoring these rules can lead to some painful consequences for your business, including hefty fines that can range from hundreds to thousands of dollars if your kitchen is found responsible for a blockage. Health inspectors also have the authority to shut down kitchens they deem unhygienic or non-compliant, bringing your entire operation to a halt. Staying on top of these health department regulations is a fundamental part of protecting your business and ensuring you can continue serving customers without interruption.
The Importance of a Cleaning Log
So, how do you prove you're following the rules? It's simpler than you might think: keep a cleaning log. This log is your official record, documenting every time your grease trap is inspected and cleaned. It provides clear proof that you are actively managing your kitchen's FOG output. This isn't just about good record-keeping; it's your first line of defense when a health inspector visits. By maintaining a detailed log, you can easily demonstrate your commitment to compliance and avoid potential fines. Think of it as your compliance diary—a simple tool that shows you're running a safe, responsible kitchen.
Your Essential Grease Trap Cleaning Toolkit
Trying to clean a grease trap without the right gear is a recipe for a frustrating, inefficient, and honestly, pretty hazardous mess. Trust me, having the right tools ready to go before you even think about lifting that lid is the difference between a controlled process and pure chaos. Preparation is everything.
This isn't just about grabbing a bucket and something to scoop with. Each piece of equipment has a specific job, designed to protect you, your staff, and your kitchen. Think of it as gearing up for a messy but necessary surgical procedure on your plumbing.
Safety First: Must-Have Protective Gear
Let's start with the most important thing: your safety. The inside of a grease trap is a nasty cocktail of bacteria and gunk that can cause skin irritation or make you seriously sick. Never, ever start this job without the right protective gear.
Here’s the non-negotiable PPE list:
- Heavy-Duty Waterproof Gloves: Your standard kitchen gloves won't survive this. You need thick, elbow-length nitrile or rubber gloves to keep that muck off your hands and forearms.
- Safety Goggles or a Face Shield: Splashing is going to happen. A single drop of that greasy, bacteria-filled water in your eye can lead to a nasty infection. Goggles are the absolute minimum.
- Waterproof Apron or Coveralls: This is your shield against splashes and spills. It'll protect your uniform and skin, keeping you clean and dry underneath.
- Non-Slip, Steel-Toed Boots: Kitchen floors are already slick, and adding grease trap sludge to the mix is asking for a fall. Steel-toed boots also save your feet from the agony of a dropped lid.
The whole point of cleaning a grease trap is to make your kitchen more hygienic. Don't throw your own health under the bus to get it done. Taking two minutes to put on the right PPE can save you days of misery or a trip to the doctor.
Nose Plugs or Gas Masks
When it comes to cleaning a grease trap, the smell is often the biggest hurdle. But that overwhelming odor isn't just unpleasant—it's a warning sign. The mix of decomposing food, fats, and stagnant water creates a breeding ground for bacteria, which can release harmful gases like hydrogen sulfide. Inhaling these fumes can lead to respiratory irritation, headaches, or dizziness, turning a routine cleaning task into a genuine health risk. That's why protecting your airways is just as critical as protecting your hands and eyes. Equipping yourself with a quality nose plug or, even better, a gas mask is a non-negotiable part of the process.
This isn't just my opinion; it's a standard safety recommendation across the industry. For instance, the experts at Mahoney Environmental list a nose plug or gas mask as essential gear right alongside gloves and scrapers for safely cleaning a grease trap. Similarly, Imperial Dade stresses the importance of wearing a nose plug to protect yourself from the germs and chemicals lurking inside. Think of it this way: investing in proper respiratory protection is a small price to pay to ensure you can do the job thoroughly and safely, without rushing through it just to escape the fumes.
The Right Tools for Scraping and Scooping
Okay, safety gear on? Now it's time to gather the tools you'll need to actually tackle the FOG (that's Fats, Oils, and Grease). Using the right equipment makes the physical labor a whole lot easier and way more effective.
For Removal and Containment:
- Pry Bar or Crowbar: Grease trap lids are heavy and often sealed tight with a gasket. A good pry bar gives you the leverage to pop it open safely without wrecking the lid or the tank itself.
- Durable Scraper: A long-handled metal or heavy-duty plastic scraper is your best friend for this job. It’s perfect for breaking up that solid cap of grease on top and scraping the thick sludge off the sides and bottom.
- Heavy-Duty Buckets or Barrels: You’ll need a few large, sturdy buckets or a dedicated barrel to hold all the FOG you're about to pull out. Make sure they have tight-fitting lids for transport and disposal.
- Wet/Dry Vacuum (Shop-Vac): This is a total game-changer. A powerful wet/dry vac makes sucking out the liquid waste and the last bits of sludge so much faster and cleaner than scooping it all out by hand.
Essential Cleaning and Maintenance Tools
To do this job right, you need more than just determination; you need the right equipment. Having the proper tools on hand before you even lift the lid is what separates a manageable task from a chaotic, hazardous mess. It makes the entire process safer, faster, and far more effective. Here’s the essential gear you’ll want to have ready.
- Pry Bar or Crowbar: Grease trap lids are heavy and can get sealed shut over time. A solid pry bar is crucial for getting the leverage you need to open the lid safely without cracking it or damaging the tank itself.
- Durable Scraper: You’ll need a long-handled scraper, preferably made of metal or heavy-duty plastic. This is your primary tool for breaking up the solid layer of grease that forms on top and for scraping the thick, stubborn sludge from the trap's sides and bottom.
- Heavy-Duty Buckets or Barrels: You need a secure place to put all the waste you remove. Make sure you have sturdy, leak-proof containers with tight-fitting lids to prevent any spills while you transport the FOG for disposal.
- Wet/Dry Vacuum (Shop-Vac): This tool is an absolute game-changer for grease trap cleaning. A powerful wet/dry vac makes sucking out the liquid waste and the last bits of sludge so much faster and cleaner than scooping it all out by hand, a tip often shared by professional cleaning services.
Getting your toolkit in order before you start is non-negotiable. It turns a dreaded chore into a streamlined maintenance task and is fundamental to keeping your kitchen environment hygienic. Remember, when it comes to grease trap maintenance, preparation is everything.
How to Clean a Grease Trap: A Step-by-Step Guide
Alright, you've got your tools laid out and your safety gear on. It's time to face the beast. Cleaning a grease trap isn't glamorous, but approaching it with a clear plan turns a gnarly job into a manageable one. We'll break it down into a few key phases so you can work safely and get it done right.
The first step is often the most physical: getting that lid off. These things are seriously heavy by design and can easily top 50 pounds. Grab a pry bar or crowbar to gently break the seal, and always lift with your legs, not your back. Take your time here—a dropped lid can crack the trap or do some real damage to you.
Once the lid is safely out of the way, you'll see it: the solid, crusty top layer of grease. This is the FOG cap, and your first job is to break it up. With your long-handled scraper, firmly but carefully start fracturing this layer into smaller, more manageable chunks. The key is to avoid any aggressive splashing. That stuff stinks, and it's loaded with bacteria you don't want flying around the kitchen.
This infographic gives you a quick visual on the core actions: suiting up for safety, scraping down the FOG, and properly containing all that waste.
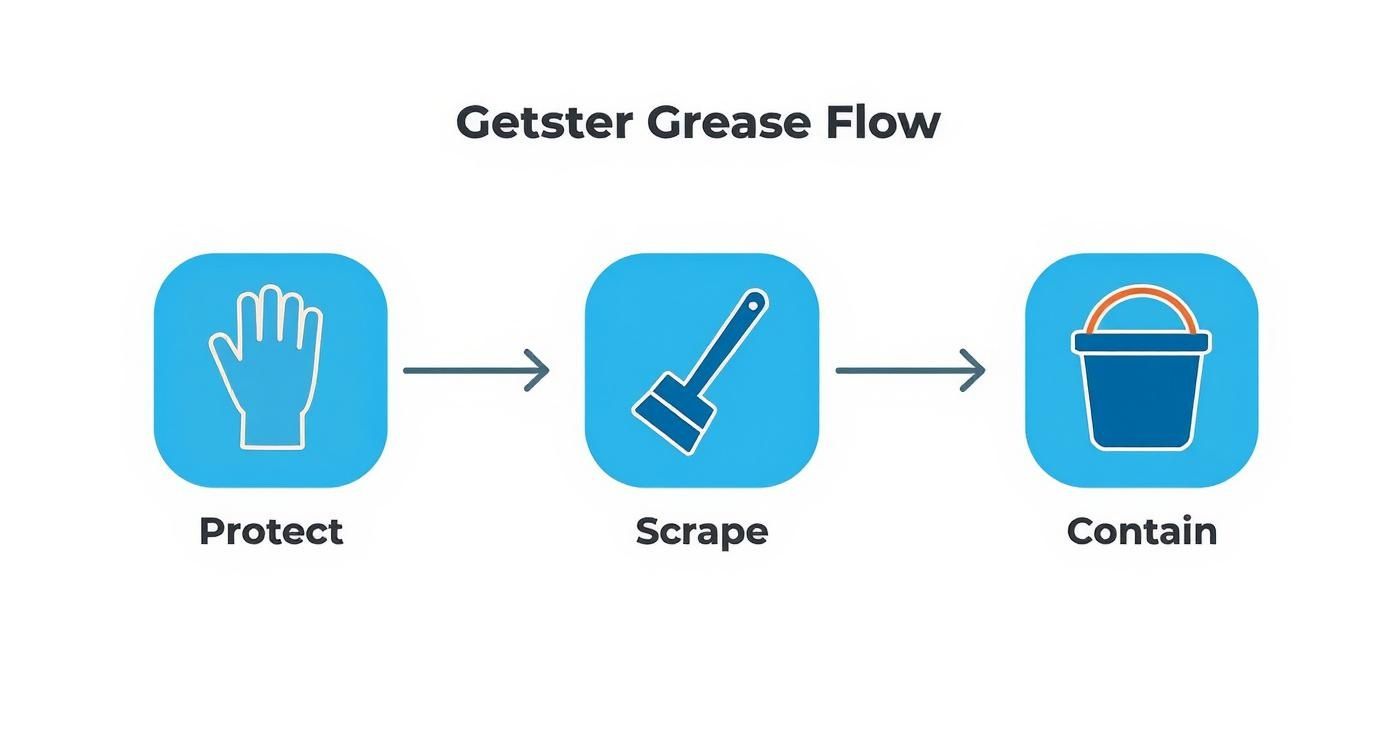
Don't skip that first part. Protecting yourself is priority number one before you even think about touching the trap itself.
First, Locate Your Grease Trap
Before you can get your hands dirty, you have to play detective. Finding the grease trap might sound simple, but they’re often tucked away out of sight. Your first task is to figure out whether you have an indoor unit or a larger outdoor one. Indoor traps are common in smaller establishments or older buildings, while larger, high-volume kitchens often rely on big, in-ground interceptors outside. Knowing which type you have will tell you exactly where to start looking and what kind of job you’re in for. Don’t just assume it’s under the main sink; take a few minutes to confirm its location so you can prepare the right area for the task ahead.
Common Indoor and Outdoor Locations
If you have an indoor trap, start your search in the most logical places. Look directly under the three-compartment sink, in the basement right below the kitchen, or for a metal plate set into the floor near your main prep areas. These units are installed as close as possible to the source of the grease, like dishwashers and sinks connected to equipment like deep fryers. For outdoor traps, you’ll need to head outside and scan the perimeter of your building, usually near the kitchen walls. You’re looking for a manhole cover or a lid similar to a septic tank’s. These are large, buried tanks, so the cover is the only part you’ll see at ground level.
Step 1: Prepare the Area and the Trap
Once you’ve located the trap, don’t just pop the lid off. A little prep work will make the entire process smoother, safer, and a lot less messy. First, clear the immediate area around the trap. Move any boxes, mats, or rolling carts out of the way to give yourself a wide, unobstructed workspace. This isn't just for convenience; it prevents you from tripping while carrying a heavy bucket of sludge and keeps the grease from contaminating other kitchen supplies. Lay down some old towels or a tarp around the trap to catch any splashes or drips. Taking five minutes to set up your station properly can save you thirty minutes of cleanup later.
Cooling the Grease and Stopping Water Flow
This is the most important prep step, and it’s the secret to making the grease easy to remove. The goal is to get the fats, oils, and grease to cool down and solidify. When FOG is warm, it’s a liquid mess, but when it cools, it forms a solid cap that floats on top of the water, allowing you to scoop it out in chunks. To do this, first stop any water from entering the trap. Turn off the dishwasher and make sure no one is using the connected sinks. Wait at least 10-15 minutes after the last blast of hot water to let everything settle. For an even better result, run cool water through the system for a few minutes to help speed up the solidification process.
Step 1: Scoop Out the Grease and Solids
With the solid cap broken into pieces, you can start clearing out the contents. If you have a wet/dry vacuum, this is where it becomes your best friend. Start by vacuuming out the liquid. This exposes all the layers of grease and sludge underneath and makes the manual scooping way easier and a lot less messy.
Working by hand? Use a sturdy bucket or a scoop to pull out the solid chunks of grease first. Dump them directly into your lidded disposal container. Once the big solids are gone, scoop out the greasy water. Finally, you’ll get to the sludgy layer of food solids at the very bottom. This stuff is dense and heavy, so take small scoops to avoid straining yourself.
Pro Tip: Go easy around the baffles inside the trap. Those are the internal walls that separate the chambers, and they are critical for the trap to work correctly. Scraping too hard can damage them, and that’s a repair you don't want to pay for.
Separating Grease, Gray Water, and Solids
Think of your grease trap as having three distinct layers, kind of like a seven-layer dip you definitely don't want to eat. At the top, you have the solidified fats, oils, and grease (FOG). Below that is the gray water, and at the very bottom sits a thick sludge of settled food solids. The secret to a clean trap is tackling these layers one by one. Before you start, stop running hot water down the drain for at least a couple of hours. This lets the FOG cool and solidify, making that top layer much easier to scoop out in solid chunks instead of dealing with a greasy, liquid mess. This simple prep step makes the entire job less chaotic and more efficient from the start.
Once the FOG has firmed up, grab your scraper and scoop. Your first target is that top layer of solid grease. Break it into manageable pieces and lift them out, placing them directly into a heavy-duty, sealable container for disposal. As you work, be extra careful around the baffles—those are the internal walls that separate the trap's chambers. They are essential for the trap's function, and hitting them too hard with a scraper can cause damage that leads to expensive repairs. Work methodically, clearing the top layer completely before moving on to the liquid waste below. This systematic approach prevents the layers from mixing back together and creating a bigger mess.
After the solid grease is gone, it's time to deal with the gray water and the sludge at the bottom. This is where a wet/dry vacuum proves its worth, sucking out the remaining liquid quickly and cleanly. If you're working manually, scoop out the water before tackling the final layer of solids. Use your scraper to dislodge all the gunk stuck to the sides and bottom of the trap, ensuring you get every last bit. A thorough cleaning prevents odors and extends the time between maintenance cycles. Properly handling these FOG discharges isn't just about keeping your kitchen clean; it's a critical part of environmental compliance.
Step 2: Scrape the Walls and Inspect for Damage
Getting the bulk of the FOG out is just half the job. A proper cleaning means getting the inside of that trap scraped completely clean.
Use your scraper to meticulously get every bit of grease and sludge off the walls, the baffles, and the lid. Any gunk you leave behind will just speed up the next buildup. Pay extra attention to the corners and around the inlet and outlet pipes—that's where the buildup is usually the thickest.
This kind of thorough work is exactly why the professional grease trap cleaning service market is booming. Globally, this market is projected to hit about USD 1,277.9 million by 2033. More and more businesses are realizing that doing it right prevents costly plumbing emergencies and keeps them compliant with local health codes.
Once everything is scraped down, do one last vacuum or scoop to get any remaining bits out. Now is the perfect time for a quick inspection. Look for:
- Cracks or damage to the tank's walls.
- Signs of corrosion or wear on the baffles.
- Any blockages in the inlet or outlet pipes.
Catching these problems early can save you from a complete failure down the road. This deep clean is just one part of keeping a sanitary kitchen; for a wider view, check out our guide on best practices for cleaning restaurant equipment.
Thoroughly Scrubbing the Interior
Once you've cleared out the bulk of the FOG, it's time for the detail work. This is the step that separates a quick fix from a proper, long-lasting clean. With a durable, long-handled scraper, you need to meticulously remove every last bit of residue from the trap's walls, baffles, and the underside of the lid. The goal here is a completely clean surface. Any gunk you leave behind just acts as a magnet for new buildup, shortening the time until you have to do this all over again. Make sure to focus on the corners and the areas around the inlet and outlet pipes, since that’s where the thickest sludge loves to hide.
As you scrape, be firm but also careful, especially around the baffles. These internal walls are critical to how the trap functions, and damaging them can lead to some seriously expensive repairs. After you've scraped everything down, do one last scoop or use your wet/dry vac to get any remaining particles. This is also the perfect moment to give the trap's interior a quick inspection. Look for any cracks, corrosion, or other signs of wear. Catching these issues early is a huge part of maintaining all your kitchen equipment and stopping a small problem from becoming a kitchen-closing disaster.
Step 3: Reassemble and Run a Final Test
Before you put that heavy lid back on, do a quick double-check. Make sure the baffles and any flow-control fittings are securely in place. If your trap uses a rubber gasket, see that it’s clean and seated correctly to create a tight seal. This is what keeps those nasty odors from escaping into your kitchen.
Carefully place the lid back onto the trap, making sure it sits flush. If your model has bolts or fasteners, secure them now. The very last step is to run hot water down the sinks that drain into the trap. Let it run for a couple of minutes and check for any leaks around the lid. This also confirms that water is flowing freely through your freshly cleaned trap.
Finally, log the cleaning date and anything you noticed during the inspection in your maintenance records. This documentation is gold for health inspections and helps you stay on a consistent cleaning schedule.
Testing for Proper Drainage
Don’t just slam the lid back on and call it a day. This final step is your quality control check, confirming that all your hard work actually solved the problem. Once the trap is fully reassembled, head to the sinks that drain into it and run hot water for several minutes. This does two critical things: it helps flush out any small, remaining bits of grease and, more importantly, it tests the system under normal operating conditions. Keep a close eye on the lid’s seal for any signs of water seeping out. A leak, no matter how small, means the gasket isn't seated correctly and will allow foul odors to escape into your kitchen. At the same time, watch how the water drains from the sink. If it flows freely without backing up or making gurgling sounds, you’ve successfully cleared the lines. If the test reveals a bigger problem, like a crack in the trap body itself, it's a sign that a simple cleaning won't cut it. At that point, you're looking at a repair or replacement to avoid bigger disasters. A smooth operation depends on reliable restaurant equipment that won't fail you during a busy service.
What to Do With Grease Waste (The Legal Way)
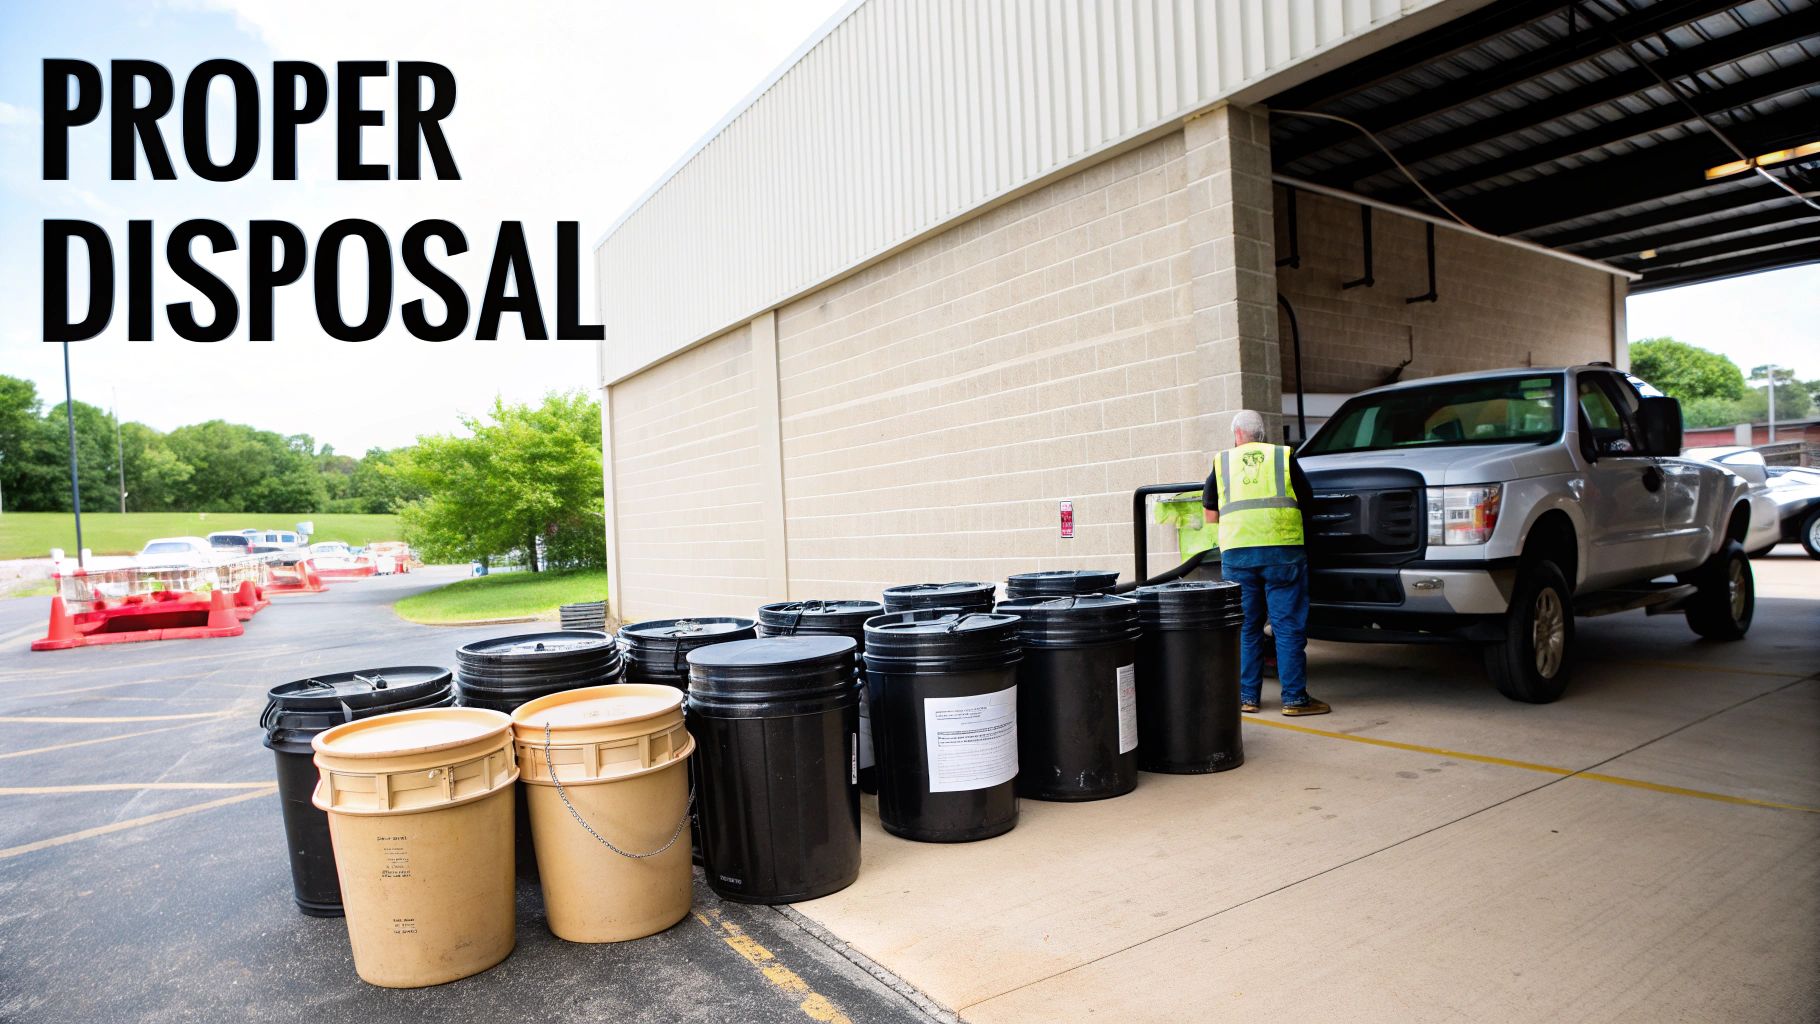
You’ve done the hard part and cleaned out the grease trap. Now you're staring at a few buckets of sludgy, foul-smelling waste. So, what’s next? This part is just as critical as the cleaning itself, because getting rid of this stuff the wrong way can land your business in some serious legal and environmental hot water.
Simply bagging this waste and tossing it in your regular dumpster is a huge mistake. This material is often classified as hazardous or special waste. Why? Because of its high concentration of pollutants and its potential to wreck landfills and sewer systems. Illegally dumping FOG can lead to fines reaching thousands of dollars and immediate, unwanted attention from health and environmental inspectors.
Safely Containing and Transporting Grease
First things first, you need to contain it properly. The collected FOG waste has to go into durable, leak-proof containers with tight-fitting lids. This keeps spills, pests, and odors under control. We’re talking heavy-duty plastic drums or barrels, not flimsy buckets from the hardware store.
Once it's sealed up, you can't just drive this waste to the local dump. It has to be transported to a licensed facility that’s equipped to process this specific type of material. For any restaurant or commercial kitchen, the only truly reliable and compliant way to handle this is by partnering with a professional waste rendering or grease hauling company.
These companies run specialized trucks and are certified to handle and transport FOG waste according to strict regulations. There's a reason the grease trap cleaning truck market is valued at around USD 1.47 billion—these pros use advanced vacuum systems for safe removal and transport, taking the liability off your shoulders.
Disposing of Small Amounts of Grease
So, we've covered the major clean-out, but what about the day-to-day grease? I'm talking about the used cooking oil from your deep fryers or the grease skimmed off a stockpot. While it's not the same volume as a full trap, you still can't just pour it down the drain. Treating even small amounts of FOG with care is a crucial habit for preventing slow buildups and keeping your plumbing healthy between major cleanings. It’s all part of a responsible kitchen management strategy that protects your equipment and your pipes from unnecessary strain.
For these smaller quantities, the process is much simpler. First, let the grease cool down completely. Then, pour it into a sturdy, sealable container. To make it more solid and less likely to leak, you can mix it with an absorbent material like kitty litter or used coffee grounds. Once it's solidified, seal the container, place it in a double-lined garbage bag, and then you can toss it in your regular dumpster. This method ensures the grease is contained and won't create a leaky, smelly mess that attracts pests or violates local waste ordinances.
How to Find a Certified Disposal Company
So, how do you find a legitimate disposal service? A quick search for "grease trap cleaning services" or "used cooking oil rendering" in your area is the best place to start. These are the professionals equipped to pump out your trap and manage the entire disposal process legally.
When you're vetting a company, always ask for proof of their licenses and certifications. A reputable provider will have no problem showing you their credentials. This is your guarantee that the waste ends up at a proper processing facility where it can be recycled into things like biofuel, rather than ending up somewhere it can harm the environment.
Key Takeaway: The responsibility for the grease waste remains with you until it is legally transferred to a licensed hauler. Keep detailed records of every pickup, including manifests or receipts, as proof of compliance for health inspectors.
It's absolutely crucial to be aware of the UK hazardous waste disposal regulations or your local equivalent to ensure your grease waste is handled legally and safely. Never assume your general waste contractor is permitted to handle FOG. Partnering with a specialist is the only way to protect your business and stay on the right side of the law.
Comparing Your Grease Disposal Options
When it comes to getting rid of the collected FOGs, you have a few paths you can take—some legal, some definitely not. It's vital to understand the differences to protect your business. This table breaks down the common methods.
| Disposal Method | Legality/Compliance | Pros | Cons |
|---|---|---|---|
| Professional Rendering/Hauling Service | Fully Legal and Compliant | Handles all legal paperwork; ensures proper recycling/disposal; reduces business liability. | Requires a service contract and associated costs. |
| DIY Transport to a Licensed Facility | Legal, but complex | Potentially lower cost if you have the right equipment and licenses. | Requires licensed transport, special containers, and detailed record-keeping; high risk of non-compliance. |
| Pouring Down the Drain | Highly Illegal | Absolutely none. | Causes severe plumbing blockages ("fatbergs"); leads to massive fines and potential business closure. |
| Mixing with General Waste/Trash | Illegal in most jurisdictions | None, as it's easily discovered. | Can lead to fines for improper waste disposal; harms landfills and attracts pests. |
Ultimately, while hiring a professional service comes with a cost, it's the only method that guarantees compliance and protects you from the significant financial and legal risks of improper disposal. It’s a necessary operational expense for any food service business.
Common Mistakes to Avoid When Cleaning a Grease Trap
You can follow every step of the cleaning process perfectly, but a few common mistakes can undo all your hard work or, even worse, create a much bigger problem down the line. It’s easy to fall into these traps because some of them feel like logical solutions. Knowing what not to do is just as important as knowing what to do. Avoiding these pitfalls will save you from future plumbing nightmares and ensure your grease trap functions exactly as it should. Think of it as learning the unwritten rules of grease management—the ones that separate the pros from those who are about to call an emergency plumber.
Never Use Hot Water to Flush the Trap
This is the number one mistake kitchens make, and it’s completely understandable why. It seems logical that hot water would help break down and wash away grease. In reality, it does the exact opposite of what you want. Pouring a large volume of hot water down the drain only liquefies the fats, oils, and grease temporarily. This allows the liquid FOG to flow right through the trap and travel further down your pipes. Once it cools off again in the main sewer line, it solidifies, creating a hard blockage that is far more difficult and expensive to fix. You’re not solving the problem; you’re just moving it out of sight and creating a future disaster.
Preventive Measures to Reduce Grease Buildup
The best way to manage your grease trap is to send as little FOG down the drain as possible. While a trap is essential, its job becomes much easier when you actively work to reduce its load. Implementing simple, preventive measures in your daily kitchen routine can dramatically decrease the frequency and intensity of cleanings. This proactive approach isn't just about making a dirty job easier; it's about creating a more efficient and cost-effective operation. It’s a classic case of working smarter, not harder, to keep your plumbing clear and your kitchen running smoothly.
Kitchen Best Practices
Integrating grease management into your team's daily habits is the most effective long-term strategy. These aren't complicated procedures; they're small actions that make a huge impact. Train your staff to always scrape plates, pans, and utensils into the trash before washing. The less food and grease that enters the sink, the better. This includes wiping down greasy surfaces with paper towels before cleaning. These simple physical barriers are your first line of defense, stopping FOG at the source and keeping your drains and grease trap much cleaner.
Using Drain Covers and Container Liners
Two of the cheapest and most effective tools in your grease-fighting arsenal are mesh drain covers and container liners. Place fine mesh screens over all sink drains to catch solid food particles before they can be washed down. For greasy food containers, like tubs of cream cheese, use plastic liners. When the container is empty, you can simply pull out the liner and throw the greasy residue directly into the trash instead of washing it out. These low-cost habits prevent a surprising amount of solids and grease from ever entering your plumbing system.
Alternative Odor Management Strategies
Even with regular cleaning, odors can be an issue. To keep smells at bay between cleanings, adopt a few maintenance strategies. Some kitchen managers find success by pouring hot water down floor drains at night, followed by an enzyme-based septic tank treatment. These bio-enzymatic cleaners break down organic matter and can be used in all drains a couple of times a week. These methods help manage odors without compromising your trap's function, ensuring your entire kitchen, from your deep fryers to your dish pit, stays fresh.
Maintaining Your Trap: DIY vs. Calling a Pro
Let's be honest: effective grease management is far more about prevention than reaction. While knowing how to clean your grease trap is essential, the smarter, long-term strategy is to stop as much FOG as possible from ever going down your drains in the first place. This proactive mindset will save you a ton of time, money, and some seriously unpleasant work.
Simple tweaks to your kitchen's daily workflow can make a world of difference. The single most effective habit you can build is a strict plate scraping policy. Before a single dish, pot, or pan hits the three-compartment sink, every last bit of food solids and greasy sauce should be scraped directly into the trash. It sounds basic, but this one step can dramatically reduce the load on your grease trap.
Creating a Regular Cleaning Schedule
Once you've cut down the FOG heading for your drains, the next move is to get on a consistent cleaning schedule. This isn't a one-size-fits-all timeline; it's entirely dependent on your kitchen's output and your trap's capacity. The go-to industry guideline is the "25% rule," which says a trap should be cleaned once it's one-quarter full of FOG.
- High-Volume Kitchens: Restaurants with a battery of fryers or a menu heavy on fried foods might hit that 25% mark every single week.
- Moderate-Volume Kitchens: A typical diner or busy cafe will likely find a monthly or bimonthly schedule works just fine.
- Low-Volume Kitchens: Smaller spots like cafes or sandwich shops might only need to clean their trap quarterly.
To figure out your sweet spot, check the FOG level weekly for the first month to get a baseline. Nailing this schedule also means you have the right-sized equipment for your output. You can learn more about that in our guide to grease trap sizing.
Signs It's Time to Call a Professional
The DIY approach to cleaning a grease trap can work well for many of those smaller, under-sink units. But there are some very clear signals that it's time to put down the scraper, step back, and call in a professional service. Trying to push through these signs can lead to much bigger, and much more expensive, problems down the road.
A DIY cleaning might save a few dollars upfront, but a professional service saves you from potential plumbing disasters, health code violations, and the liability of improper waste disposal. It’s an investment in operational peace of mind.
Keep an eye out for these red flags:
- Persistent Foul Odors: If a strong, sewage-like smell hangs around your kitchen even after you've cleaned the trap, it's often a sign of a deeper issue or that the job wasn't as thorough as it needed to be.
- Slow Drains Across the Kitchen: When multiple sinks and floor drains start backing up at the same time, the problem is likely bigger than a simple clog. This usually points to a full or failing trap that needs expert attention.
- The Task is Just Too Much: Let's be real. If your trap is large, located outdoors, or the sheer amount of FOG is overwhelming for your team to handle safely and dispose of correctly, it's time to call the experts.
When Trap Size Dictates a Professional Cleaning
The decision between DIY and professional cleaning often comes down to simple math: the size of your trap. As a general rule, smaller, indoor grease interceptors—typically those under 50 gallons—can often be managed by well-trained kitchen staff. However, once you get into the territory of large, outdoor grease traps, which can hold anywhere from 500 to over 2,000 gallons, the game changes completely. These larger units require specialized equipment, like powerful vacuum trucks, to pump out the massive volume of waste safely and efficiently. Trying to tackle a large-capacity trap with buckets and a scraper isn't just impractical; it's a recipe for an environmental spill and a major compliance headache.
Troubleshooting Lingering Odors
If you’ve done a thorough cleaning and a foul, sewage-like odor is still hanging in the air, don't ignore it. This is a clear sign that something is wrong beyond just a simple buildup of FOG. The persistent smell could indicate that the trap wasn't cleaned completely, leaving behind residue that continues to rot. More seriously, it could point to a blockage further down the line or a problem with the trap itself, like a broken baffle that's allowing solids to escape and clog your plumbing. When odors persist or you notice multiple drains backing up, it's time to call a professional plumber or a grease management service. They have the tools to diagnose these deeper issues and prevent a minor problem from turning into a full-blown plumbing emergency.
Common Questions About Cleaning a Grease Trap
Even with the best plan, you're going to have questions when it comes to a job as messy as cleaning a grease trap. Getting straight answers helps you solve problems on the spot and, more importantly, keeps your kitchen compliant and running without a hitch. We’ve pulled together the most common questions we hear from kitchen managers and owners just like you.
How Often Should I Clean My Commercial Grease Trap?
The old rule of thumb is the "25% rule": you clean the trap once it's about a quarter full of fats, oils, and grease (FOG). For a lot of kitchens, this works out to a cleaning every 1-3 months.
But let's be realistic—this isn't a one-size-fits-all schedule. A high-volume spot with a bank of fryers and a grease-heavy menu might need service every single week. On the other hand, a small café that mostly does coffee and pastries might only need a cleaning every quarter.
To find your kitchen’s unique rhythm, check the FOG level weekly for the first month. This will give you a solid baseline of your output. From there, you can lock in a reliable, recurring schedule. And always—always—keep a cleaning log. It's the first thing a health inspector will ask to see to prove you're on top of it.
Why Fullness is a Better Indicator Than Smell
It’s tempting to use your nose as the main guide for grease trap cleaning, but waiting for that foul odor is a classic rookie mistake. By the time you smell it, the problem is already in full swing. That signature stench means the collected FOG has started to decompose, releasing nasty gases and creating a perfect environment for bacteria to thrive. Relying on smell is a reactive approach that means you're already behind on maintenance. Instead, the industry standard is to follow the "25% rule." This simple guideline states that a trap should be cleaned once it's one-quarter full of grease and solids. This proactive method stops odors and plumbing emergencies before they can start, turning maintenance from a chaotic reaction into a predictable, scheduled task that keeps your kitchen running smoothly.
Can I Use Chemicals or Enzymes to Clean My Grease Trap?
Using harsh chemicals to clear out a grease trap is almost always a terrible idea. Not only can they eat away at your plumbing and damage the trap itself, but they also wreak havoc on municipal water treatment systems. In most jurisdictions, pouring those kinds of chemicals down the drain is flat-out illegal and comes with some seriously steep fines.
Biological treatments, like enzymes or bacteria, are a much safer alternative, but they absolutely are not a replacement for physically cleaning out the trap.
These additives can help keep odors down and break down small amounts of grease between cleanings, but they can't touch the accumulated solids packed at the bottom of the trap. Relying on them too much can just push grease further down the line, where it solidifies and creates even worse blockages.
What Are the Warning Signs of a Full Grease Trap?
Your kitchen will give you several loud-and-clear warnings that a cleaning is overdue. Paying attention to these signs can help you head off a complete backup and an operational emergency.
Here are the most common red flags:
- Foul Odors: A strong, sour, or sewage-like smell wafting up from your floor drains or sinks is the number one sign. This is the lovely aroma of decomposing food particles and rancid grease.
- Slow Draining: If your sinks and floor drains are taking way longer than usual to clear, it’s a pretty sure bet the trap is nearing capacity and choking off the water flow.
- Grease Backups: Seeing greasy, nasty water backing up into your three-compartment sink or other low-lying drains is a critical warning. This means the trap is already overflowing, and you need to take action immediately.
Ready to equip your kitchen for success without the stress? The Restaurant Warehouse offers everything from essential cleaning supplies to top-tier cooking equipment, all with fast delivery and flexible financing. Check out our full catalog at https://therestaurantwarehouse.com and get what you need to keep your operation running smoothly.
Key Takeaways
- Clean by the 25% Rule, Not by Smell: Waiting for a bad odor means you're already behind. The industry standard is to clean your trap once it's one-quarter full of grease and solids to prevent backups, fines, and shutdowns before they happen.
- Scrape It Out, Don't Wash It Down: The only effective way to clean a grease trap is to physically remove the waste with the right tools and safety gear. Using hot water or chemicals is a common mistake that just sends the problem downstream, creating bigger, more expensive blockages later.
- Stop Grease at the Source and Dispose of It Legally: The easiest way to manage your trap is to send less grease down the drain—make scraping plates a mandatory habit. When it's time to empty the trap, always use a certified hauler to dispose of the waste to avoid serious legal and financial risks.
Related Articles
About The Author

Sean Kearney
Sean Kearney used to work at Amazon.com and started The Restaurant Warehouse. He has more than 10 years of experience in restaurant equipment and supplies. He graduated from the University of Washington in 1993. He earned a BA in business and marketing. He also played linebacker for the Huskies football team. He helps restaurants find equipment at a fair price and offers financing options. You can connect with Sean on LinkedIn or Facebook.
Leave a comment