

How to Clean a Gas Stove Like a Pro Chef
That thick, carbonized mess on your stovetop isn't just ugly; it's killing your stove's performance. The secret to a powerful flame and fast cook times isn't complicated—it’s all about a consistent routine. To properly clean a gas stove, you need a daily wipe-down and a regular deep clean. For fresh spills, keep a non-abrasive scraper handy. After service, a thorough wipe with a degreaser and microfiber cloth is essential. This simple discipline is what separates a high-performing kitchen from one bogged down by a cleaning nightmare.
Why Bother With a Deep Stove Clean?
In the chaos of a dinner rush, cleaning the stove is understandably low on the priority list. But what if maintaining your commercial gas stovetop was directly linked to faster service, lower utility bills, and fewer costly repair calls? Moving beyond basic hygiene, a meticulously cleaned stove is a performance-enhancing business strategy. A clean stove isn't just about appearances; it's about optimizing one of your kitchen's most critical assets.

This connection between cleanliness and performance becomes crystal clear in high-pressure environments. In a commercial kitchen where a single gas stove might handle over 500 meals a day, proper cleaning slashes downtime and boosts longevity.
In fact, uncleaned stoves can lead to 15% more frequent repairs, costing independent restaurants an average of $1,200 annually per unit. A survey of foodservice pros also revealed that 72% credited routine cleaning for reducing dangerous flare-ups by 60%.
The Hidden Dangers of a Dirty Stove
Picture this: it's a busy Saturday night, and your lead line cook is fighting a stove that won't heat evenly. One burner has a weak, sputtering yellow flame while another takes twice as long to bring a pot to a boil. This isn't just equipment failure—it's a cleaning failure. Clogged burner ports and a thick layer of carbonized grease are robbing your stove of its power.
This translates directly to operational headaches:
- Slower Cook Times: Inconsistent heat means longer ticket times, frustrating both your chefs and your customers.
- Wasted Energy: A stove working harder to push heat through layers of grime consumes more gas, subtly inflating your utility bills month after month.
- Food Quality Issues: Uneven heating can lead to poorly executed dishes, which can seriously impact your restaurant's reputation.
By reframing stove maintenance as a core operational task, you shift from a reactive "fix-it-when-it-breaks" mentality to a proactive strategy that protects your investment and ensures peak performance when you need it most.
How a Clean Stove Improves Your Cooking
A clean stove sets the tone for the entire kitchen. It’s a clear sign of a well-run operation and contributes to a safer, more professional environment for your team.
To truly get a handle on the importance of a hygienic cooking space, it helps to explore comprehensive guidance on restaurant cleanliness standards. This guide will lay out the practical, step-by-step methods to transform stove cleaning from a dreaded chore into an empowering routine that supports your kitchen’s success.
Safety and Preparation First
Before you grab a sponge, let's set the stage for a safe and effective clean. These initial steps are non-negotiable, protecting you, your team, and the equipment you rely on daily. Taking a few minutes to prepare properly prevents accidents and ensures you don't damage the sensitive components of your commercial stovetop. Think of it as a pre-shift meeting for cleaning—it gets everyone on the same page. This prep work is the foundation for a deep clean that restores performance, rather than causing new problems.
Consult the Owner's Manual
I know, who actually keeps the owner's manual? In a busy kitchen, these booklets often disappear. But if you can find it, that manual is your best friend. It provides specific instructions tailored to your stove's model, including which cleaning agents are safe and which parts should never be submerged. If the physical copy is gone, a quick search for your stove’s model number online will usually pull up a digital version. Following the manufacturer's advice is the surest way to deep clean your equipment without voiding the warranty or causing unintentional damage.
Turn Off the Gas and Let the Stove Cool
This might seem obvious, but it’s the most critical safety step. Before you do anything, make sure the gas supply to the stove is off and the pilot light is out. Next, give the stovetop ample time to cool down completely. Cleaning a hot surface is a recipe for burns and can cause cleaning chemicals to evaporate instantly, leaving a sticky residue. A cool surface allows your degreaser to work as intended, breaking down grease and grime effectively. Patience here is key; a cool stove is a safe stove.
Protect Electrical Parts from Moisture
Your gas stovetop has electrical components, like the igniters, that are sensitive to moisture. Getting these parts wet can lead to a malfunctioning ignition system or costly repairs. To avoid this, never spray cleaner directly onto the stovetop. Instead, apply your cleaning solution to a microfiber cloth and then wipe the surface. If you remove burner heads for soaking, make sure they are 100% dry before you put them back. Protecting these electrical parts is crucial for the longevity of your kitchen equipment.
Your Stove Cleaning Toolkit: What You'll Need
Getting the best clean on a commercial gas stove top doesn't start when you spray the first drop of cleaner. It starts with having the right tools on hand. Using the wrong gear is more than just ineffective—it can permanently damage stainless steel surfaces or strip the essential seasoning right off your cast iron grates. A pro’s toolkit is really two kits in one: the daily maintenance gear and the deep-cleaning powerhouses.
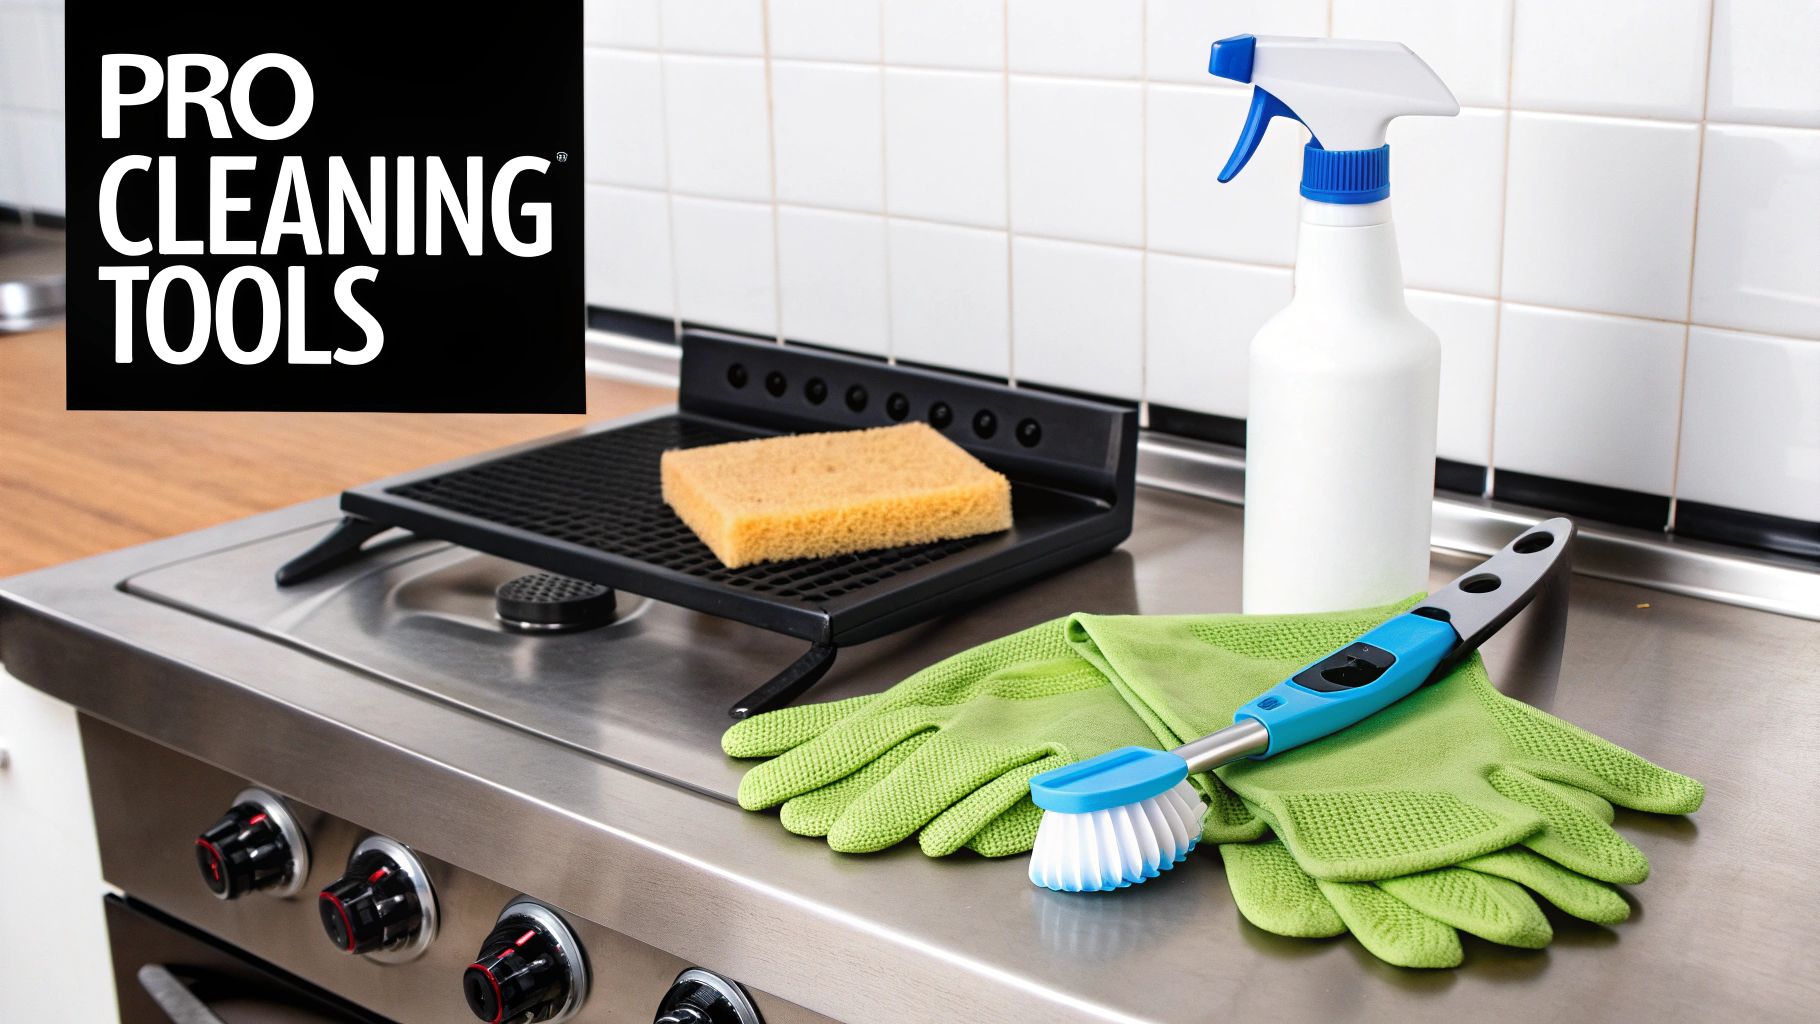
For the daily wipe-down, your focus should always be on gentle but effective tools. Think non-abrasive. These are what your team will grab at the end of every service to handle fresh spills before they have a chance to turn into carbonized nightmares.
Your daily kit should include things like:
- Microfiber Cloths: These are your best friend for trapping grease and food bits without leaving lint behind like paper towels do.
- Plastic or Silicone Scrapers: Perfect for getting under fresh boil-overs or splatters without scratching the cooktop.
- A Bench Scraper: While it's usually for dough, a good stainless steel bench scraper is fantastic for clearing larger spills off the flat surfaces between the grates.
Tools for Tackling the Toughest Grime
When it's time for that weekly or bi-weekly deep clean, you need to bring out the more specialized equipment. This is for cutting through the polymerized, baked-on grease that daily cleaning can't touch. You can be a bit more aggressive here, but you still need to be smart about it.
For these tougher jobs, your arsenal grows:
- Grill Bricks or Pumice Stones: These are incredibly effective on cast iron grates for scouring away that stubborn carbon buildup. A critical note: never use these on stainless steel or enameled surfaces.
- Stiff-Bristled Brushes: Grab some nylon or even brass-bristled brushes. They're essential for getting into the tight corners of the stove and really scrubbing the burner heads.
- Paper Clips or Port Cleaners: This is the only safe way to clear out clogged burner ports and get that efficient blue flame back. Avoid wooden toothpicks at all costs—they can snap off inside and create a much bigger problem.
Picking the Right Cleaner for the Job
The chemicals you use are just as important as the tools. The science here is pretty straightforward: you need a powerful alkaline degreaser to break the chemical bonds of that tough, cooked-on grease.
The most effective commercial degreasers are alkaline-based (with a high pH) because they excel at saponification—the chemical process that converts hardened fats and oils into a soap-like substance that can be easily wiped away.
While heavy-duty commercial degreasers are the top choice for serious grime, don't forget about simpler solutions. A spray bottle with a 50/50 mix of white vinegar and water is great for daily wipe-downs and cutting through mineral deposits from boil-overs. You can also add specialized products to your lineup, like a non-soapy citrus cleaning solution, which is known for its ability to cut grease without leaving behind any residue.
Here’s a quick-reference table to help match the right tool to the right job.
Sponges, Scrapers, and Other Essentials
| Tool/Agent | Best For | Pro Tip |
|---|---|---|
| Microfiber Cloths | Daily wipedowns, polishing stainless steel. | Designate different colored cloths for different tasks to prevent cross-contamination. |
| Stiff Nylon Brush | Scrubbing burner heads and tight corners. | Use with a degreasing solution for maximum effect. |
| Grill Brick/Pumice Stone | Removing carbon buildup from cast iron grates. | Always use on a cool grate and apply gentle, even pressure. |
| Plastic Scraper | Lifting fresh spills and food debris. | A flexible edge works best to avoid scratching the stovetop surface. |
| Paper Clip | Clearing clogged gas burner ports. | Unfold it to gently poke out debris; never force it. |
| Alkaline Degreaser | Deep cleaning baked-on grease and carbon. | Follow the manufacturer's dilution instructions for safety and effectiveness. |
| Vinegar & Water Solution | Daily cleaning, cutting mineral deposits. | Excellent for a streak-free shine on stainless steel after degreasing. |
Having this table handy can be a great training tool for new kitchen staff, ensuring everyone uses the right supplies and protects your valuable equipment.
Safety First: Gear You Shouldn't Skip
Safety is everything, especially when you're working with commercial-grade degreasers and potentially hot stove components. Making sure every single team member has and uses the proper Personal Protective Equipment (PPE) is not optional. It's a requirement.
Every stove cleaning station must have:
- Heat-Resistant Gloves: Absolutely essential for handling grates and burners that might still be warm.
- Safety Goggles: Protects eyes from chemical splashes and any airborne gunk you scrub loose.
- Proper Ventilation: Always, always make sure the kitchen's exhaust fans are running on high. This pulls chemical fumes and any potential gas vapors out of the workspace.
When you equip your kitchen with this complete arsenal, stove cleaning stops being a dreaded chore and becomes a proactive system. It empowers your team to work safely, protect the equipment, and achieve a professional-level clean every single time.
Your 5-Minute Daily Cleaning Routine
A chaotic end-of-service shutdown is a recipe for a brutal deep-cleaning day down the line. The smartest way to clean a gas stove top in a commercial kitchen isn't a once-a-week marathon; it's a quick, efficient 15-minute routine tacked onto the end of every single shift.
This daily habit is your best defense against that tough, polymerized grease that usually requires heavy-duty chemicals and a whole lot of elbow grease to remove. Think of it as preventative maintenance. By tackling fresh spills and splatters before they have a chance to carbonize overnight under the pilot light's constant heat, you make your weekly deep cleans infinitely easier. It's a simple approach that keeps your equipment in peak condition, ensuring it’s ready to fire up for the next service without a hitch.
Step 1: Cool Down and Scrape
Your first move after turning off the burners is to simply wait. Never, ever douse a piping hot stove top with cold water or cleaner—the thermal shock can warp the metal over time, and trust me, that's an expensive problem to have.
You need to let the surface cool down. The sweet spot is when it's still warm enough that grease and food residue are soft and pliable, but cool enough to touch safely with heat-resistant gloves. This is when you'll get the most grime off with the least amount of effort.
Once the stove is at the right temperature, your bench scraper is your best friend.
- Action: Use a firm, flat-edged bench scraper to quickly lift off any solid food debris, congealed sauces, or fresh boil-overs from the flat surfaces of the stove.
- Reasoning: Physically removing the gunk is far more effective than trying to dissolve large messes with a degreaser alone. You're getting the bulk of the problem out of the way immediately.
This initial scrape only takes a minute or two, but it makes a massive difference in preventing that debris from essentially baking onto the surface overnight.
Step 2: Wipe Down Grates and Knobs
With the major debris gone, it's time to break it down. Carefully lift off the cast iron grates and the burner heads, placing them on a designated heat-safe surface or directly in a nearby sink. This gives you wide-open access to the cooktop itself.
Now, grab a microfiber cloth and give it a light spray of mild degreaser or your 50/50 vinegar-water solution. Thoroughly wipe down the entire stovetop surface. Pay extra attention to the areas around the burner bases, as that's where grease loves to pool. The stove's residual warmth will help the cleaner break down any remaining oily film, making it a breeze to wipe away.
Pro Tip: For a streak-free finish on stainless steel, do a final wipe-down with a clean, dry microfiber cloth after degreasing. This simple step polishes off any cleaner residue and brings back that professional shine to your equipment.
Step 3: A Final Wipe for a Clean Finish
The daily routine for your grates and burners doesn't need to be some intensive scrub session. The goal here is just to stop overnight buildup in its tracks.
- Scrape the Grates: While the grates are still warm, use a grill brush or scraper to quickly knock off any food bits that are stuck to the cast iron.
- Wipe Them Down: A damp cloth is usually all you need for this daily task. Wipe down the grates and burner heads to remove any surface grease.
- Check Burner Ports: Give the burner heads a quick visual check. If you spot any obvious blockages in the ports, use a paperclip to clear them out now. This ensures a strong, even flame when you fire up for the morning service.
This entire process is built on speed and consistency. Once it's ingrained in your kitchen's closing procedures, it becomes second nature. To see how this small task fits into a larger end-of-day workflow, check out our complete restaurant kitchen cleaning checklist for more expert tips.
By investing these 15 minutes at the end of each day, you're doing more than just cleaning; you're protecting a valuable asset. You'll ensure faster heat-up times, more efficient gas usage, and a much less intimidating deep-cleaning day for your team. This daily shutdown is the foundation of a perfectly maintained commercial gas stove.
How to Deep Clean Your Gas Stove: A Step-by-Step Guide
When the daily wipe-down just isn't cutting it anymore, it’s time to bring in the heavy artillery for a deep clean. This is the process that truly restores your commercial gas stove, cutting through those stubborn, baked-on layers of grime that a quick daily scrub simply can't handle. The best way to clean a gas stove top like a pro involves a smart, methodical disassembly and a few techniques that let the tools and cleaners do the hard work for you.
The whole process boils down to a few key stages: taking the stove apart, scraping away the worst of the gunk, and then thoroughly cleaning the core surfaces.
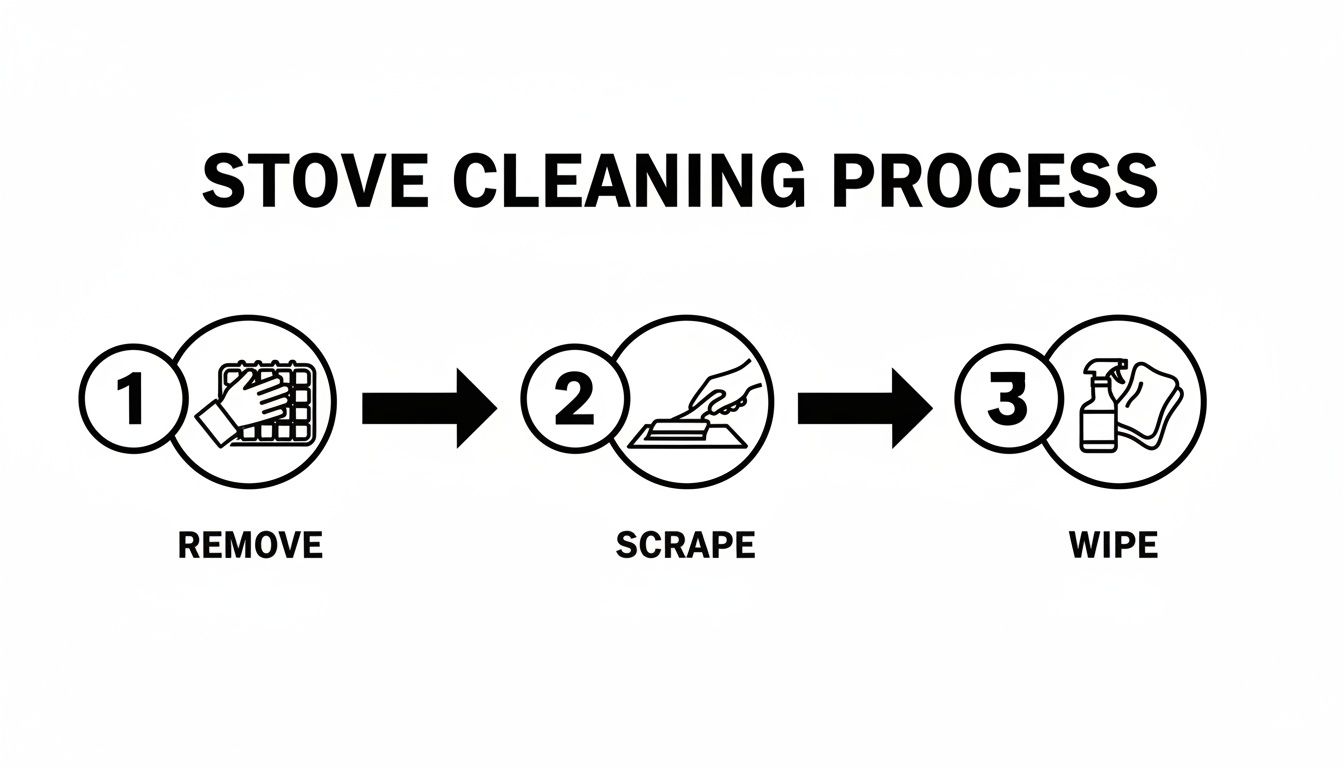
This visual breaks it down nicely, showing that even a serious deep clean follows a logical path. By systematically removing parts and tackling the grime layer by layer, you make the job manageable and ensure no spot gets missed.
A Quick Prep: Wipe Up Loose Debris
Before you even think about spraying a degreaser, your first move is to clear the field. Grab a dry microfiber cloth and give the entire cooktop a thorough wipe-down to get rid of any loose crumbs, ash, or other debris that hasn't been cooked on. Physically removing this surface-level gunk is far more effective than trying to dissolve it with a chemical cleaner. This simple step allows your degreaser to focus its power on the stubborn, polymerized grease it was designed for, making the entire deep-cleaning process faster and more efficient. This initial sweep is a crucial part of maintaining any piece of high-quality restaurant equipment, ensuring you get the best performance from your tools and your cleaning supplies.
Step 1: Take It Apart and Give It a Soak
First things first: completely break down the stovetop. Make sure the gas is shut off and the unit is totally cool to the touch. Then, carefully lift off all the cast iron grates, burner heads, and any removable drip trays. This gives you wide-open access to every nook and cranny where grease loves to hide.
With the parts off, soaking becomes your secret weapon. Fill a three-compartment sink or a large utility basin with hot water and a heavy-duty commercial degreaser—just be sure to follow the manufacturer's dilution ratio. Submerge the burner heads and drip trays, and just let them sit while you get to work on the rest. This passive cleaning time is gold; it gives the degreaser a chance to break down the chemical bonds in the grease, which means way less scrubbing for your team later on.
Pro Tip: The No-Scrub Ammonia Bag Method
For cast iron grates caked in that tough, black, carbonized buildup, sometimes even a long degreaser soak isn't enough. This is where a game-changing, low-effort technique comes in: the ammonia bag method. It's a trick of the trade that dissolves the gnarliest grime overnight with almost zero scrubbing.
Here’s how it works:
- Bag It Up: Grab a heavy-duty, non-leaking trash bag for each grate. You need something tough that won't puncture.
- Add the Ammonia: Place one grate inside a bag. Pour in about 1/2 cup of household ammonia, then seal the bag up tight with a twist tie.
- Let the Fumes Work: Set the sealed bags outside or in a very well-ventilated area, away from any foot traffic. The magic isn't the liquid—it's the ammonia fumes trapped in the bag that break down all that baked-on carbon.
- Wait Overnight: Let the grates sit for at least 12 hours. For really grimy grates, you can even go up to 24 hours.
The next day, when you open the bags (always do this outdoors while wearing gloves and goggles!), the carbonized gunk should be soft enough to wipe or rinse right off. This method is incredibly effective and is hands-down the best way to clean gas stove top grates that look like they’re beyond saving.
Step 2: Cut Through Grease on the Stovetop
While your smaller parts are soaking or fuming, you can turn your attention to the main stovetop unit. I always start by using a plastic putty knife or scraper to gently lift off any thick, chunky grease deposits. This physical removal step is key because it means you'll use less chemical degreaser to finish the job.
Next, spray your commercial degreaser liberally over the entire surface. Let it sit for a good 10-15 minutes to really penetrate the grime. Use a stiff nylon brush to get into the corners and around the burner bases where grease tends to collect. If you’re working on stainless steel, always scrub with the grain to avoid leaving fine scratches. Once the grease is loosened, wipe everything away with damp microfiber cloths, rinsing them often in clean, hot water.
One of the biggest mistakes I see is letting the degreaser dry on the surface. It can leave a nasty residue that’s a pain to remove. If you're working on a big six-burner range, tackle it in sections to make sure you wipe the cleaner away while it's still wet.
Step 3: Clear Burner Ports for an Even Flame
A clean burner is the heart of an efficient gas stove. If you see a weak, sputtering, or yellow-orange flame, that’s a dead giveaway that your burner ports—the little holes where the gas comes out—are clogged with food bits or carbon. Cleaning them is a non-negotiable step in any deep clean.
After the burner heads have soaked and been scrubbed, take a close look at each port. The best tool for this job is something simple, like an unfolded paperclip or a specialized port cleaning tool.
- Gently insert the paperclip into each port, wiggling it a bit to dislodge any debris.
- Don't use wooden toothpicks. They can easily snap off inside the port and create an even bigger problem.
- After clearing the ports, tap the burner head upside down on a hard surface to shake out any loose particles.
This simple step ensures an even gas flow, bringing back that powerful, efficient blue flame your chefs depend on. It has a direct impact on cook times and energy use. For more tips on keeping your kitchen’s equipment in prime condition, check out our guides on cleaning restaurant equipment.
Finally, once every single component is clean and completely dry (moisture and pilot lights do not mix), you can put the stove back together. Performing this deep clean regularly doesn't just make your kitchen look better—it protects your investment, guarantees consistent cooking, and keeps your kitchen a safer place to work.
Step 4: Add a Final Polish
Once you've done the heavy lifting of the deep clean, the final polish is what separates a clean stove from a professionally maintained one. This step is all about bringing back that brand-new gleam and adding a layer of protection. For any stainless steel surfaces on your stove, grab a clean, dry microfiber cloth and wipe everything down thoroughly. This simple action is surprisingly effective; it buffs away any leftover cleaner residue and eliminates streaks, leaving a perfect, reflective finish. It’s a small detail that signals a high standard of care for your restaurant equipment and sets a professional tone for the entire kitchen.
To take it a step further, apply a specialized stainless steel polish. This does more than just add shine; it leaves behind a thin, protective barrier that helps repel grease and makes your daily wipe-downs much easier. Think of it as an investment in future-proofing your clean. This final touch reinforces that your equipment is a valuable asset, not just a tool. When your stove gleams under the kitchen lights, it’s a clear reflection of the pride and professionalism you and your team bring to the job every single day, ensuring your kitchen is always ready for service.
Solving Common Stove Cleaning Problems
Even with a solid daily routine, commercial kitchens throw curveballs. Spills happen during the dinner rush, burners are firing for hours on end, and intense heat can bake a small mess into a serious cleaning project. This is your field guide for the most common and frustrating cleaning challenges that even seasoned pros run into.
You know the kind of grease I'm talking about—the stuff that seems to have fused itself to the metal. Your daily degreaser just beads up, and scrubbing feels like a waste of time. This is polymerized grease, a result of high heat chemically altering the oil into a plastic-like coating. It's tough, but not impossible to beat.
How to Remove That Stubborn, Baked-On Gunk
For those impossibly stubborn, blackened spots that laugh at your efforts, one of the best way to clean gas stove top surfaces is with a simple paste you probably already have in dry storage.
Grab some baking soda and mix it with a little water until you have a thick paste, something like the consistency of toothpaste. Slather this directly onto the burnt-on areas, making sure they're completely covered. Now, walk away. Let it sit for at least 20-30 minutes. If you're dealing with a real monster of a mess, an hour won't hurt. The gentle alkaline nature of the baking soda goes to work, softening and lifting that carbonized grime.
Once it's had time to dwell, grab a non-abrasive scrub pad or a stiff nylon brush and work the area in small circles. You'll feel the paste breaking up the mess. Wipe it all away with a damp microfiber cloth, and you'll be amazed at the difference. The worst spots might need a second round, but this method is incredibly effective and won't damage your stovetop surfaces.
How to Clean Cast Iron Grates Without Damage
Your cast iron grates are the workhorses of your stovetop, but they require a specific approach. The goal isn't just to get them clean; it's to do it without stripping away that essential, non-stick seasoning. For tough, physical scrubbing, a grill brick is your best tool. These are incredibly effective for scouring away carbon buildup on cast iron. Just remember, they are for cast iron only—never use them on stainless steel or enameled surfaces, as they will cause permanent scratches and damage.
For grates that seem beyond saving, the ammonia bag method is a game-changer. Place each grate in its own heavy-duty trash bag with about a half-cup of household ammonia, then seal it tightly. Set the bags outside or in a well-ventilated area for at least 12 hours. It’s the fumes, not the liquid, that do the work, breaking down the carbonized gunk. The next day—wearing gloves and goggles—open the bags outside. The grime should be soft enough to simply wipe or rinse away, restoring your grates with almost no effort.
Found Rust on Your Grates? Here's the Fix
Rust is the archenemy of cast iron. It pops up when grates are left damp after cleaning or when that protective layer of seasoning has worn thin. Seeing those orange spots can be frustrating, but the fix is straightforward if you're thorough.
First, you have to get rid of every bit of existing rust.
- Scrub It All Away: Use steel wool or a wire brush to scrub off all the visible rust. It's going to take some elbow grease, but getting down to the bare metal is non-negotiable.
- Wash and Dry Immediately: Clean the grates with a little mild soap and hot water to remove any rust particles. This next part is critical: dry them immediately and completely. Use a lint-free towel, then pop them in a warm oven for about 15 minutes to make sure every last drop of moisture is gone.
Once the rust is gone and the grate is bone-dry, you must re-season it immediately. This isn't optional. It's the only way to protect the bare metal and stop the rust from coming right back.
To re-season, apply a paper-thin, even layer of a high-smoke-point oil (like canola or vegetable oil) over the entire grate. Wipe off any excess with a clean cloth—you're aiming for a micro-thin coating, not a greasy mess. Place the grates in a hot oven (400-450°F) for about an hour. This process polymerizes the oil, creating a new, tough, non-stick surface that will resist rust.
Why Is My Gas Stove Flame Yellow? (And How to Fix It)
The color of your flame is a direct report card on your stove's health. A strong, steady blue flame is what you want—it means you have the perfect mix of gas and air and your burner ports are clear. If you’re seeing a weak, sputtering, or yellow-orange flame, that’s a red flag. It’s wasting gas, slowing down your cooking, and needs to be fixed.
If you want to dive deeper into how these components work, check out our complete guide on commercial gas stoves.
The number one cause of a bad flame is clogged burner ports. Throughout service, tiny bits of food, grease, and boil-overs can fall into the burner head and block the small holes where the gas comes out. This chokes the gas flow, leading to that lazy, inefficient yellow flame.
The solution is simple and brings us right back to our deep cleaning steps. After the burner head has cooled down and you've removed it, take an unfolded paperclip or a port cleaning tool and gently poke out each little hole. This quick action clears the debris, opens up the gas flow, and brings back that powerful blue flame your kitchen depends on.
Preventative Measures to Keep Your Stove Clean
The absolute best way to clean a gas stove top is to stop it from getting dirty in the first place. Shifting your kitchen's mindset from reactive cleaning to proactive prevention is the ultimate efficiency hack. It saves an incredible amount of time and labor that would otherwise be spent scrubbing away at baked-on messes. By implementing a few simple habits and using the right tools, you can protect your equipment, reduce the need for harsh chemicals, and make your end-of-day cleanup routine significantly faster and easier. It’s about working smarter, not harder, to maintain one of your kitchen's most critical assets.
Use Protective Covers to Catch Spills
One of the most direct ways to protect your stovetop is to create a physical barrier against spills. While you might see them more in home kitchens, you can consider special stove liners that are designed to sit under your grates and catch any drips or boil-overs. These liners, often made from non-stick, heat-resistant material, can be a lifesaver. Instead of spending time scraping burnt sugar or carbonized sauce off the steel surface, your team can simply remove the liner, wipe it clean, or replace it. This simple addition drastically reduces the direct contact between food and the stovetop, preventing the kind of grime that requires a deep clean to remove.
Adjust Your Serving Routine
Sometimes the biggest improvements come from small changes in your workflow. A simple but highly effective habit is to avoid serving food directly from the stove. Instead of plating dishes right over the burners, move your pots and pans to a designated cutting board or counter space first. This small step contains all the potential drips, splashes, and spills to one easy-to-clean area, keeping your stovetop out of the line of fire. By reframing stove maintenance as a core operational task, you can shift from a reactive "fix-it-when-it-breaks" mentality to a proactive strategy that protects your investment and ensures peak performance when you need it most.
Your Gas Stove Cleaning Questions Answered
Even with a step-by-step guide, questions always come up in the heat of a busy service. I've been there. Getting quick, reliable answers is the key to keeping your equipment in peak condition and avoiding those costly mistakes that can shut down a line. Here are some of the most common questions I hear from chefs and kitchen managers.
How Often Should You Deep Clean Your Stove?
For any high-volume restaurant pumping out food all day, a weekly deep clean is the gold standard. You just can't beat it for performance and safety. Sticking to that schedule stops grease from polymerizing—that's when it turns into that carbonized, rock-hard nightmare that’s nearly impossible to scrub off.
If you’re running a smaller café, a food truck, or a kitchen that sees less action, you can probably stretch that to a bi-weekly schedule. But don't just go by the calendar. Your stove will absolutely tell you when it needs help.
Keep an eye out for these tell-tale signs:
- Uneven or yellow flames: This is the classic symptom of clogged burner ports. It's a cry for help.
- Lingering burnt smells: That’s the smell of old, caked-on food and grease.
- Visible, sticky buildup: If your daily wipe-down is leaving behind a tacky film, it's deep-clean time.
Trust me, a proactive schedule is always better than reacting to a problem that’s already hurting your service.
Can I Use Oven Cleaner on the Stove Top?
Let's clear this up right now: please don't. This is hands-down one of the most common—and most damaging—mistakes I see in kitchens. Most of those aerosol oven cleaners are packed with incredibly harsh chemicals like sodium hydroxide, formulated specifically for the baked-on enamel inside an oven.
Using oven cleaner on your stovetop can permanently ruin stainless steel finishes, strip the crucial protective seasoning off your cast iron grates, and even eat away at softer aluminum burner parts. The risk of expensive damage just isn't worth it.
Stick with the dedicated commercial degreasers or the time-tested baking soda and ammonia methods we've covered. That’s the best way to clean gas stove top surfaces without causing harm you can't undo.
What Is the Safest Way to Unclog Burner Ports?
Clear burner ports are everything for an efficient, hot, blue flame. The safest way to clean them is also the easiest. First, make absolutely sure the burner heads are completely cool and you've taken them off the stove.
Grab a stiff metal tool—an unfolded paperclip is perfect, but a specialty port cleaning tool works great too. Gently poke the end of the tool into each individual port and give it a little wiggle to knock out any carbon bits or food debris. Whatever you do, don't use wooden toothpicks. They can snap off inside the port and create a much bigger headache.
Why Does My Pilot Light Go Out After Cleaning?
Nine times out of ten, the culprit here is moisture. It’s a simple problem with a simple fix. If even a tiny bit of water gets into the burner assembly or around the pilot light's orifice during cleaning, it can be enough to stop the pilot from staying lit.
The solution is just a little patience. Make sure every single component is bone-dry before you put the stove back together. Let the parts air dry completely on a wire rack, or meticulously wipe them down with a dry, lint-free cloth. If you want to be extra sure, a quick blast from a can of compressed air can clear out any hidden moisture from the pilot assembly.
Ready to equip your kitchen with reliable, top-tier equipment? The Restaurant Warehouse offers a massive selection of commercial stoves, refrigeration, and everything your operation needs to succeed. Find durable, energy-efficient products at unbeatable prices and get them delivered fast.
Explore our inventory and discover flexible financing options at https://therestaurantwarehouse.com.
Should I Use the Self-Cleaning Feature?
That 'self-clean' button can look pretty tempting, especially after a long service. The idea of locking the door and letting the oven incinerate grime into a fine ash is a dream for any busy kitchen. It's designed to be a huge time-saver and can help you avoid harsh chemical cleaners. However, many experienced technicians consider it an 'unnecessary evil.' The extremely high temperatures put a massive strain on the stove's internal components, risking blown fuses or fried control boards—the last thing you need during a dinner rush. While it's a matter of personal preference, in a commercial setting where reliability is everything, the potential for a service call often outweighs the convenience. The manual cleaning methods we've covered are safer for your equipment and give you more control.
Key Takeaways
- Adopt a two-part cleaning routine: A quick wipe-down after every service is your best defense against tough grime, making the essential weekly deep clean much faster and more manageable.
- Use the right tools for each surface: Protect your equipment by using non-abrasive tools like a paperclip for burner ports and a grill brick for cast iron, and always avoid harsh oven cleaners that can cause permanent damage.
- Treat cleaning as a performance fix: Address common issues like a weak, yellow flame by clearing clogged burner ports, which directly restores cooking efficiency, ensures even heat, and improves kitchen safety.
Related Articles
About The Author

Sean Kearney
Sean Kearney is the Founder of The Restaurant Warehouse, with 15 years of experience in the restaurant equipment industry and more than 30 years in ecommerce, beginning with Amazon.com. As an equipment distributor and supplier, Sean helps restaurant owners make confident purchasing decisions through clear pricing, practical guidance, and a more transparent online buying experience.
Connect with Sean on LinkedIn, Instagram, YouTube, or Facebook.