

How to Clean a Manitowoc Ice Maker for Peak Performance
Keeping your Manitowoc ice maker clean is about more than just checking a box on a maintenance list. It's a fundamental part of running a smart, safe, and profitable business. The whole process really boils down to two key jobs: descaling to break down mineral buildup and sanitizing to get rid of any microbes. Making this full cleaning cycle a regular habit is non-negotiable—it keeps you on the right side of the health department, trims your energy bills, and helps your machine last for years to come.
Why Consistent Cleaning Is Key for Your Business
Honestly, viewing ice machine cleaning as a simple chore is a big mistake. It's a core business practice that directly impacts your customer safety, operational costs, and even your reputation. Let this task slide, and you'll kick off a domino effect of problems that can disrupt your entire operation.
The most urgent issue with a dirty machine is the health risk. Inside an ice maker, the cool, damp environment is a perfect breeding ground for bacteria, mold, and biofilm—that nasty pink or black slime you might see. This gunk gets right into the ice you serve to customers, creating a serious risk of foodborne illness.
A contaminated ice machine isn't just a cleaning oversight; it's a direct threat to public health and a major violation of food safety standards. Health inspectors are trained to spot the signs of microbial growth, and a failed inspection can lead to hefty fines, forced closures, and a reputation that’s hard to repair.
Beyond the critical health and safety concerns, a neglected machine will absolutely hit your wallet.
The Financial Cost of a Dirty Machine
Mineral scale is the silent enemy of your ice maker's efficiency. These deposits, mostly calcium and magnesium from your water supply, build up on the evaporator plates and other internal parts. As this limescale accumulates, it acts like an insulator.
This forces your machine’s refrigeration system to work much harder and run much longer just to produce the same amount of ice. That extra strain creates a cascade of expensive problems:
- Higher Energy Bills: A struggling compressor and condenser use a lot more electricity, which you’ll definitely notice on your utility bill.
- Increased Mechanical Stress: The constant overwork puts a ton of strain on key components like the compressor, motors, and control boards.
- Preventable Breakdowns: All that stress eventually leads to premature equipment failure, resulting in pricey emergency service calls and potentially the cost of a whole new machine.
A single major repair can easily cost more than several years' worth of routine cleaning supplies.
Preserving Ice Quality and Customer Trust
The quality of your ice says something about your business. It's a subtle detail, but customers definitely notice when ice is cloudy, has a weird taste, or smells funky. These are all classic signs of a machine that’s overdue for a deep clean.
Regular cleaning ensures your machine churns out crystal-clear, tasteless, and odorless ice—the kind that makes a drink better, not worse. For any restaurant, bar, or café, serving pristine ice is one of those small things that reinforces customer trust and shows you’re committed to quality in every part of your service. It's a simple way to protect your brand and keep people coming back.
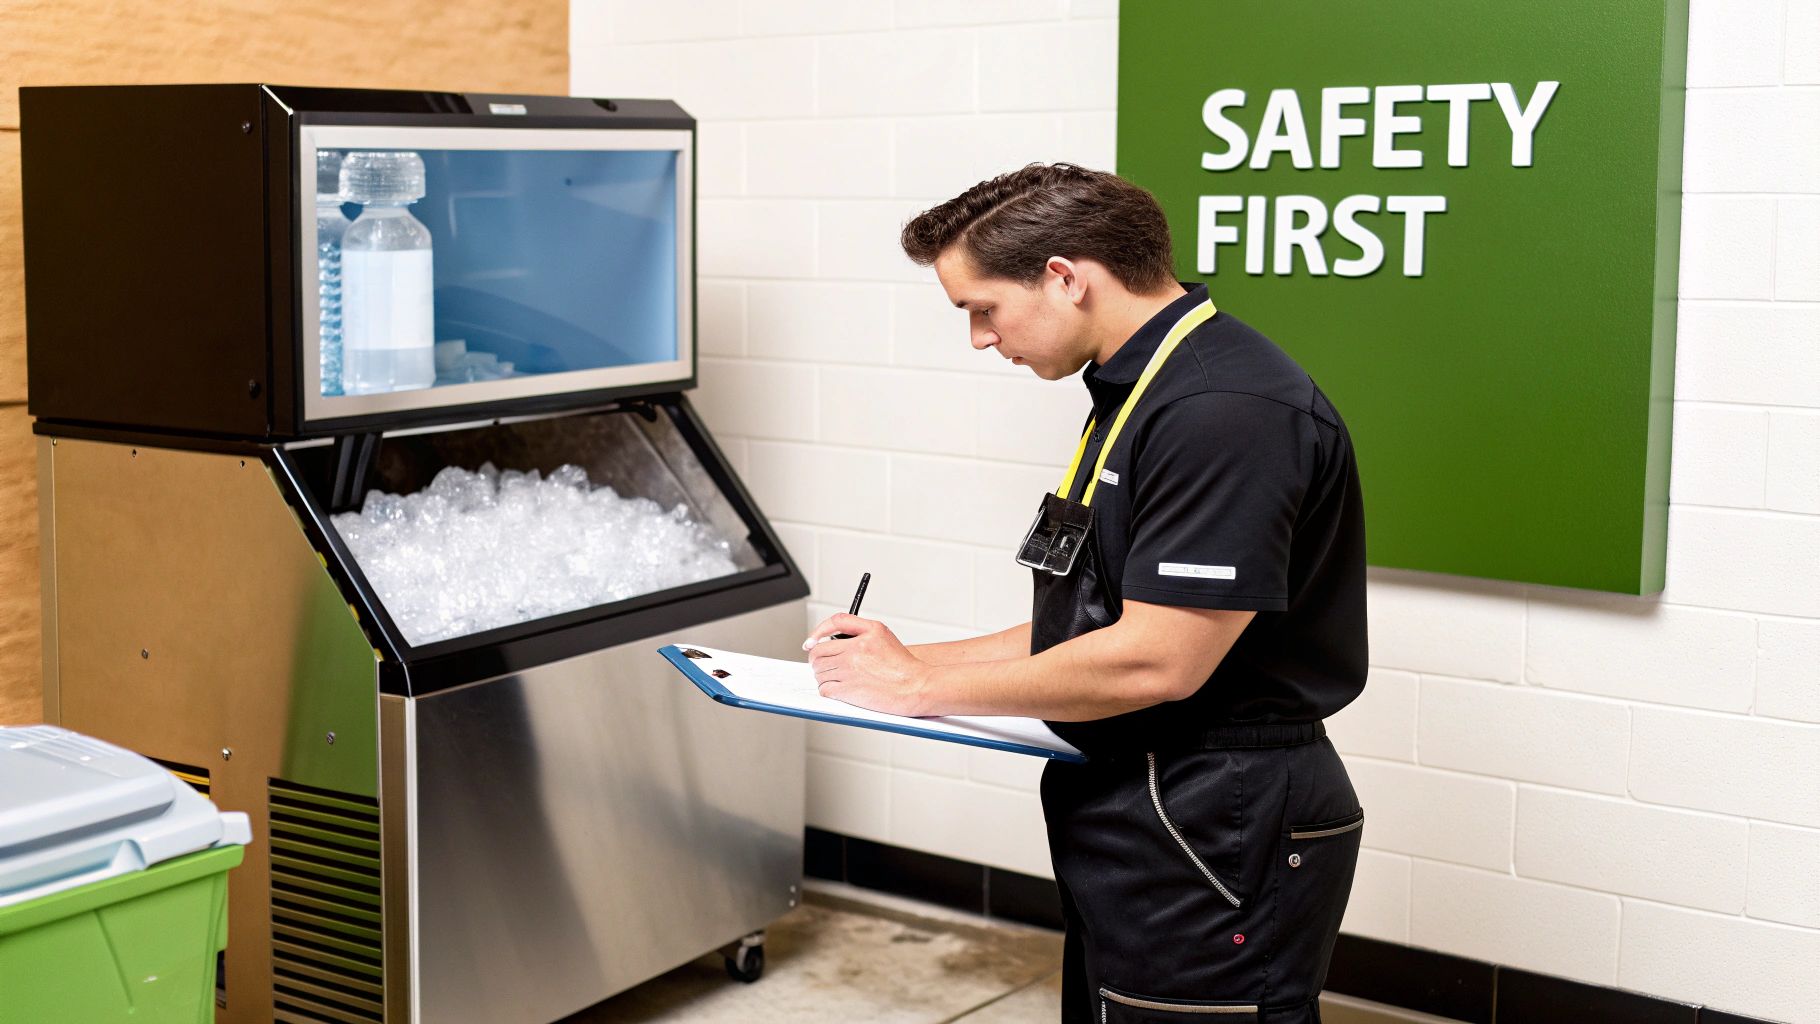
Assembling Your Cleaning and Safety Toolkit
Before you even touch that "clean" button, let's talk about getting your gear in order. Success in cleaning your Manitowoc ice maker really comes down to having the right tools on hand before you start. Trust me, a little prep work saves a ton of headaches and makes the entire process smoother, faster, and—most importantly—safer for your staff. Trying to wing it without the proper supplies is a recipe for a half-done job or, even worse, putting your team at risk.
The most critical items you'll need are the chemical solutions. You'll need two very different types, and they absolutely cannot be used interchangeably: a Manitowoc-approved descaler to break down that stubborn mineral buildup and a Manitowoc-approved sanitizer to kill off harmful microbes like bacteria and slime. Using anything other than brand-approved, nickel-safe formulas is a bad idea—it can seriously damage sensitive internal components and could even void your machine's warranty.
Getting the Right Supplies on Deck
Besides the essential chemicals, a handful of basic tools will make the manual scrubbing parts of the job a lot easier. Having these ready to go means you won't have to scramble mid-process to find what you need.
Let’s quickly run through the must-haves for a thorough cleaning cycle.
| Essential Cleaning Supplies Checklist | ||
|---|---|---|
| Item Category | Specific Item | Purpose |
| Cleaning Agents | Manitowoc-Approved Descaler | Dissolves mineral scale and lime buildup. |
| Sanitizing Agents | Manitowoc-Approved Sanitizer | Eliminates bacteria, mold, and slime. |
| Manual Tools | Soft-Bristle Brushes | Gently scrubs components without scratching surfaces. |
| Manual Tools | Spray Bottles (x2) | Ensures even application of cleaner and sanitizer. |
| Manual Tools | Clean, Lint-Free Cloths | Wipes down internal and external parts. |
| Mixing & Handling | Food-Grade Pail or Bucket | Mixes solutions according to manufacturer directions. |
| Personal Safety | Chemical-Resistant Gloves | Protects hands from direct chemical contact. |
| Personal Safety | Safety Goggles or Glasses | Shields eyes from accidental splashes. |
Having this simple kit assembled and ready will make the cleaning process feel less like a chore and more like a routine part of your kitchen's maintenance.
Don't Skip the Safety Gear
Working with commercial-grade cleaners and sanitizers demands respect. These are powerful chemicals that can cause skin and eye irritation if you're not careful. This means Personal Protective Equipment (PPE) isn't just a suggestion; it’s a non-negotiable part of the process.
Safety First: Always, always have your staff wear chemical-resistant rubber gloves and safety goggles. It’s a simple step that prevents accidental splashes from turning into a serious injury. Proper ventilation is also key—crack open a door or use a fan to keep the air moving and prevent anyone from inhaling fumes.
Since you're handling specialized chemicals, it’s a good practice to consult a practical guide to chemical risk assessment to ensure every safety measure is in place before you begin. Knowing what you're working with is the first step toward a safe and effective cleaning routine.
Okay, with your toolkit ready and safety gear on, you're all set to tackle the machine itself.
A Practical Walkthrough of the Deep Cleaning Process
Alright, let's get into the nitty-gritty of the deep cleaning process. This isn’t a simple wipe-down; we’re talking about a full two-stage cycle designed to first obliterate stubborn mineral scale and then completely sanitize the machine’s guts. If you approach this systematically, the whole task feels way less intimidating for you or any team member.
Before you even touch a button, find the right time to do this. The full cycle, from start to finish with all the rinse times, can take a few hours. Scheduling it during off-peak hours or even overnight is a smart move that won’t disrupt your service.
This flowchart breaks down the essential tools for the job, showing the distinct roles of the descaler, the sanitizer, and your safety gear.
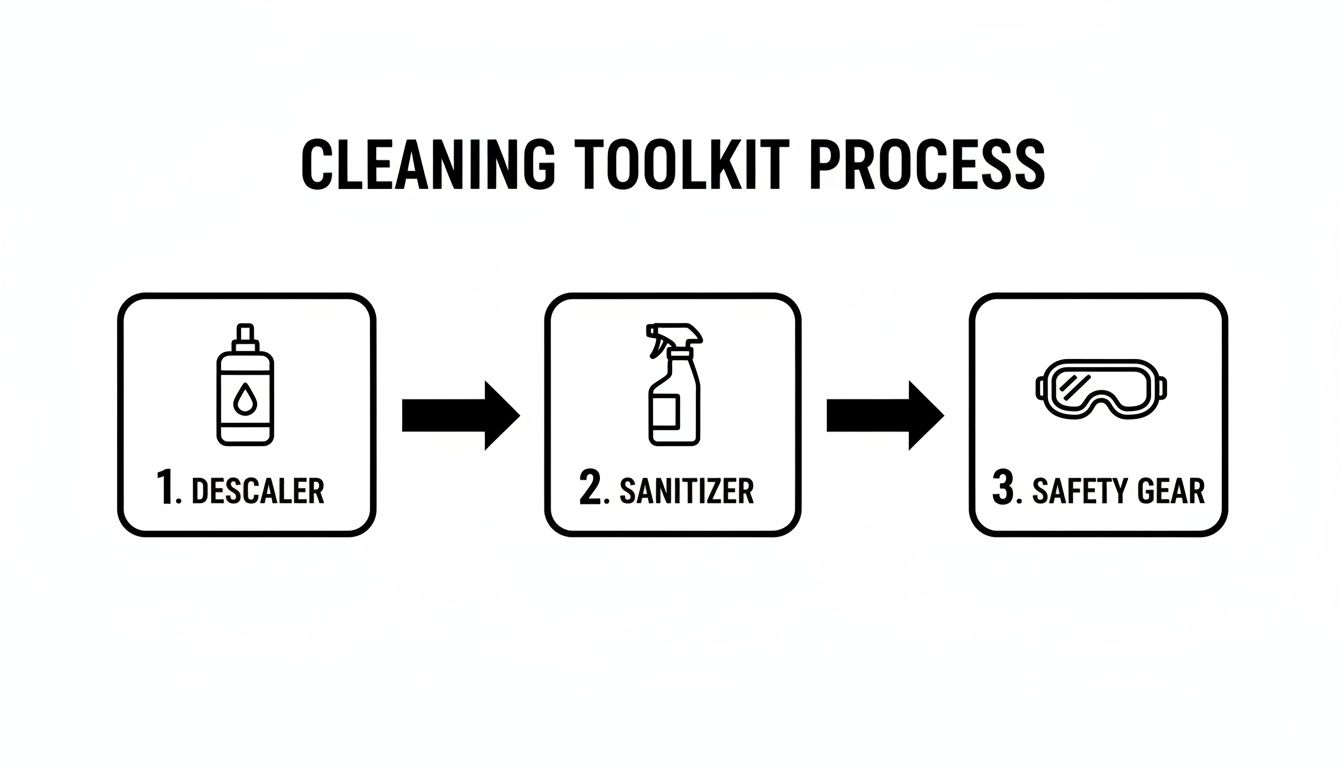
Think of it as a quick reminder: first, you attack the mineral buildup with a chemical descaler, then you kill the microbial threats with a sanitizer—all while keeping yourself safe.
Beginning the Cleaning Cycle
First things first, let's prep the machine. Flip the power switch to the "OFF" position and get every last cube of ice out of the storage bin. You can either store it in a clean, separate container or just toss it. The last thing you want is old ice mixing with the fresh batch you’ll make after cleaning.
With the bin completely empty, it's time to kick off the automated cleaning cycle. Find the control panel and press the "CLEAN" or "WASH" button. On most Manitowoc models, this will start a pre-rinse, where the machine drains all the leftover water from its trough and internal lines, getting it ready for the cleaning solution.
The Descaling Phase: Removing Mineral Buildup
Once the machine has drained, it'll signal you to add the cleaner. This is where your Manitowoc-approved descaler comes in. Be sure to measure the exact amount specified in your machine's manual—the volume you need usually depends on your model's production capacity.
Pour the descaler right into the water trough when prompted. After you’ve added the solution, the automated wash cycle will take over. This phase usually lasts about 20-30 minutes, circulating the descaling solution through the entire water system. It works its way over the evaporator plates, through the water pump, and into all those hidden spots where limescale loves to build up.
Pro Tip from the Field: Don't just stand around while the machine does its thing. Use this time to manually clean any removable components. Parts like the water distribution tube, ice thickness probe, and water curtain can usually be removed without any tools. Give them a good scrub with a soft-bristle brush and a bit of the descaling solution.
Manually scrubbing these parts is your best bet for breaking down the most stubborn scale deposits. Pay extra attention to the tiny holes in the distribution tube; if those get clogged, you'll end up with uneven ice. Once scrubbed, rinse them thoroughly with fresh water before putting them back in the machine.
The Sanitizing Phase: Eliminating Microbes
After the descaling cycle wraps up, the machine will run through a series of rinse cycles to flush out every bit of the descaler. This step is critical; you don’t want any of those chemicals ending up in your ice. The control panel will let you know when the rinse is done and it’s time to add the sanitizer.
Now, you’ll basically repeat the process with the Manitowoc-approved sanitizer. Just like before, measure the correct amount based on your manual and pour it into the water trough when the machine tells you to.
The sanitizing cycle is usually shorter than the descaling one, but it's just as vital. This solution is formulated to wipe out any bacteria, mold, slime, or biofilm that could be growing inside the machine. A proper sanitization is non-negotiable for passing health inspections and keeping your customers safe. For a broader look at different cleaning methods, our guide on general ice machine cleaning offers some great complementary insights.
Final Steps and Resuming Ice Production
Once the sanitizing cycle and the final rinses are complete, the "CLEAN" light on the control panel will turn off. That's your signal that the deep clean is done. Before you switch it back to ice-making mode, do a quick visual check inside the machine to make sure no residue or debris is left behind.
When everything looks good, securely close all the access panels and flip the switch back to the "ICE" position. The machine will then fire up its normal ice-making process.
As a final precaution, it's standard practice to discard the first full batch of ice made after cleaning. This just ensures any trace amounts of cleaning solution are completely flushed out of the system, guaranteeing the ice you serve is pure and has no off-taste.
Cleaning the Condenser and Other Key Components
While the automated cycle does a fantastic job on the machine's internal water system, a truly thorough cleaning goes a bit further. The condenser is the heart of your ice machine's refrigeration system, and if you ignore it, you’re asking for trouble. A clogged condenser forces the machine to work overtime, which means higher energy bills and, eventually, a costly breakdown.
It’s not just the condenser, either. Other parts like the air filter, the ice bin, and the machine's outer panels need some love, too. Tackling these areas regularly ensures your entire unit runs like a top and looks professional in your kitchen.
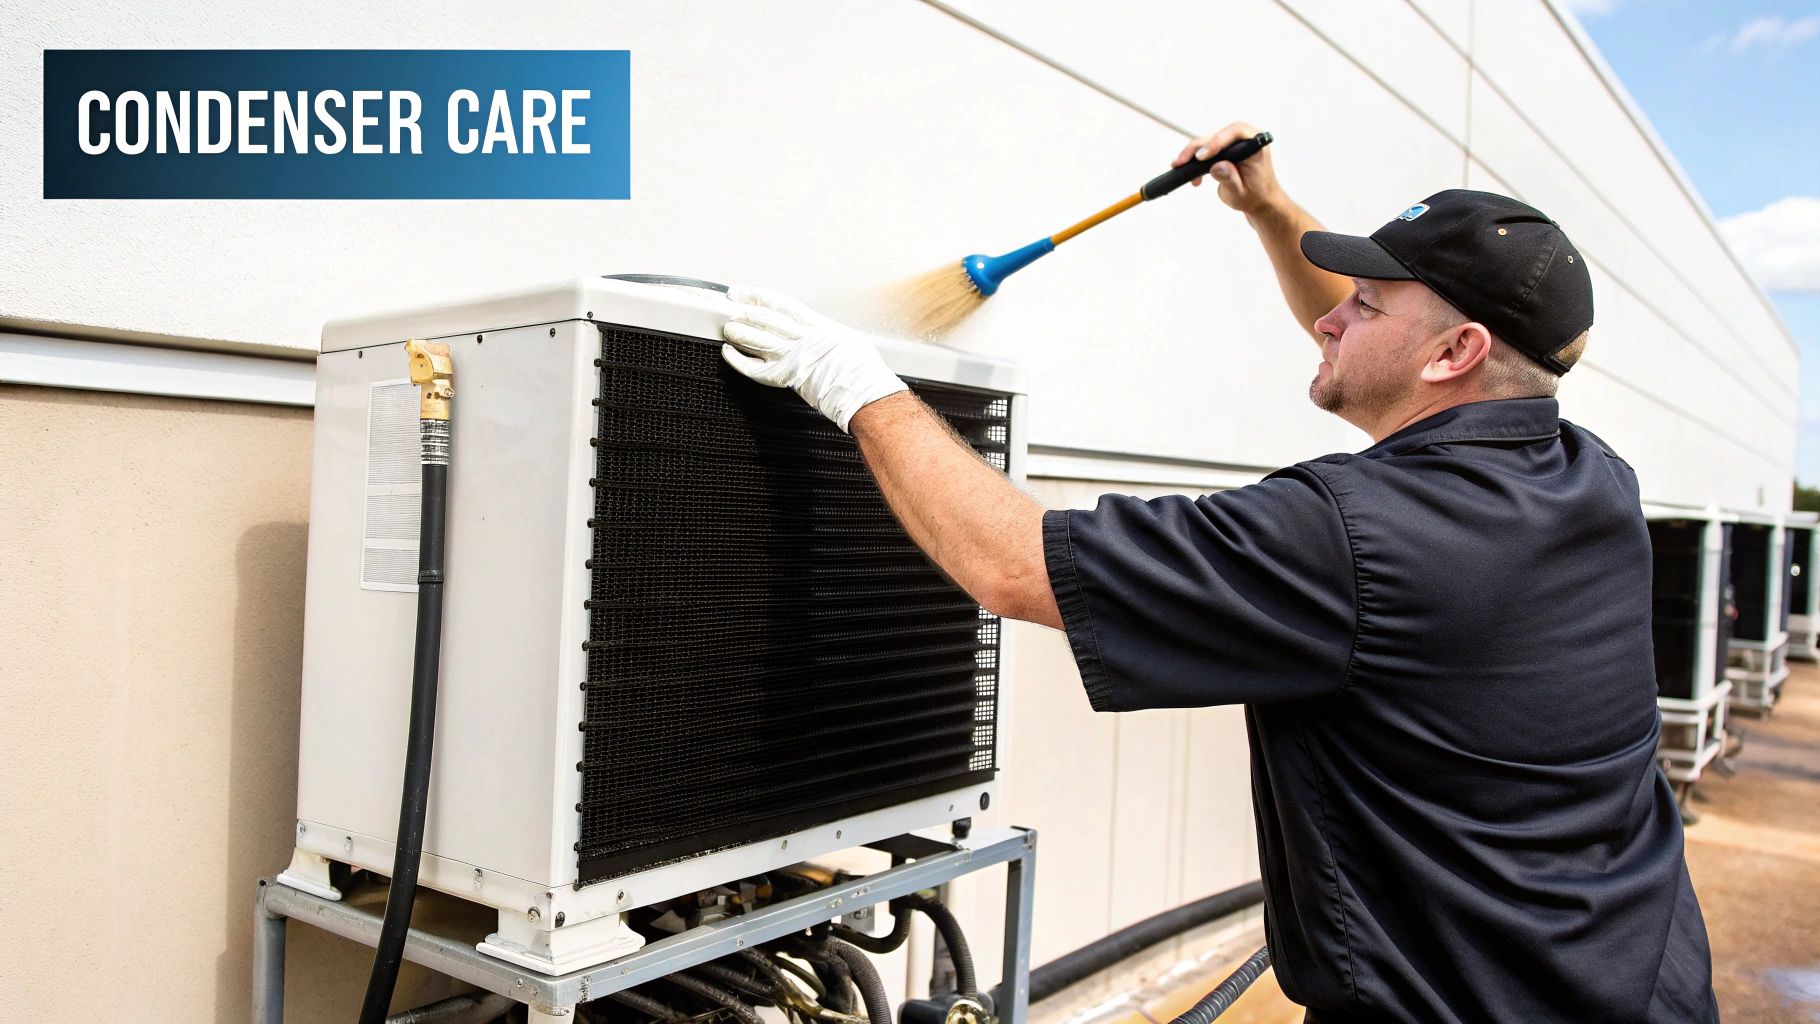
Taking Care of Your Air-Cooled Condenser
Most Manitowoc models you'll find in kitchens are air-cooled. This means they have a fan that pulls air across a set of coils to get rid of heat. Think of these coils as a magnet for all the dust, grease, and grime floating around in a busy kitchen.
When that gunk builds up, the coils can’t release heat properly, and your machine starts to struggle. To get them clean, you'll just need a soft-bristle brush and a vacuum with a brush attachment.
- First thing's first: power off and unplug the machine. Safety is never optional.
- Carefully take off the front or side panels to get to the condenser fins.
- Gently brush the fins in the direction they run (usually up and down) to knock loose all that caked-on dust and grease.
- Use your vacuum's brush attachment to suck away the debris. Be careful here—those little aluminum fins are delicate and can bend easily.
If your machine lives in a high-grease environment, like right next to a fryer, you might need something stronger. A commercial-grade, non-corrosive coil cleaner spray can work wonders. Just spray it on, let it do its thing for a few minutes, and then gently wipe it clean.
What About Water-Cooled Models?
If you happen to have a water-cooled Manitowoc, you can skip this part. These machines don't have air filters or fins to clean. Instead, they use a continuous flow of water to cool things down. For these units, maintenance is more about making sure the water lines are clear of scale, which is handled during the internal descaling cycle.
Don't Forget the Air Filter and Exterior
The air filter is your condenser's best friend. It’s the first line of defense, stopping a ton of dust and grease from ever reaching the coils. Most Manitowoc filters are reusable and couldn't be easier to maintain.
Simply pop the filter out—it usually slides right out from the front or side of the unit. Wash it with some warm, soapy water, give it a good rinse, and let it air dry completely before putting it back. A damp filter is a recipe for mold, and nobody wants that.
As for the exterior, especially if it’s stainless steel, a quick daily wipe-down with a soft cloth keeps it looking pristine. It’s a simple habit that removes fingerprints and spills, making sure your expensive equipment always looks professional.
Cleaning the Ice Storage Bin
The ice bin is a food-contact zone, plain and simple. It needs to be treated with the same level of care as the inside of the machine. Once you've emptied all the ice during the main cleaning cycle, it's time to sanitize the bin.
Mix your food-safe sanitizer according to the directions and use a clean cloth or spray bottle to cover all the interior surfaces. Let it air dry completely before the machine starts dropping ice again. A critical note here: never use a descaler inside the storage bin. That stuff isn't meant for food-contact surfaces.
Keeping up with condenser maintenance isn't just a good idea; it's a must for efficient operation. In fact, the condenser needs attention far more often than the full deep-clean cycle. Manitowoc recommends cleaning the condenser on self-contained air-cooled models every six months because they collect grease and dust so quickly. Ignoring this chore is one of the top reasons for unnecessary service calls, low ice production, and a shorter lifespan for your machine. You can find more details on Manitowoc cleaning schedules at Katom.com.
How to Build a Proactive Maintenance Schedule
Reactive maintenance is a restaurant owner’s worst nightmare. Waiting until your ice machine starts acting up—spitting out cloudy ice, making strange noises, or worse, shutting down completely—means you're already in trouble. This is a fast track to health code violations, angry customers, and expensive emergency repair bills.
A proactive maintenance schedule flips the script. It turns cleaning from a disruptive, urgent crisis into a simple, manageable routine. This isn't about adding more work to your team's plate; it's about distributing it smartly across the week and month. Creating a clear log for daily, weekly, and semi-annual tasks is the single best way to extend your machine’s lifespan, guarantee top-notch ice quality, and dodge the kind of downtime that can cripple a busy service.
Setting Up Your Cleaning Log
The heart of any good proactive plan is a simple, visible log sheet posted right near the machine. This document should spell out each task, how often it needs to be done, and have a spot for the responsible staff member to sign off. This creates immediate accountability and makes it incredibly easy to track who did what, and when.
A well-structured schedule breaks down the big, intimidating process of cleaning a Manitowoc ice maker into small, repeatable steps that anyone on your team can handle.
- Daily Checks: These are quick, 60-second tasks that can be easily rolled into opening or closing duties.
- Weekly Tasks: These involve a bit more hands-on attention but are crucial for stopping slime and scale buildup in key areas.
- Semi-Annual Deep Cleans: This is the full-blown descaling and sanitizing cycle. You'll want to schedule this well in advance during a slower period.
A maintenance log is more than just a checklist; it's documented proof of your commitment to food safety. During a health inspection, a detailed and consistently updated log demonstrates due diligence and can make a huge difference in your final report.
Sample Manitowoc Ice Machine Maintenance Schedule
Every kitchen runs differently, so feel free to tweak this template to fit your operational flow and the specific Manitowoc model you're running. The goal is to create a system that actually works for your team and becomes second nature.
This kind of proactive care for your ice maker is a great habit that can extend to all your critical systems. For a broader perspective on operational longevity, it's worth understanding the importance of regular plumbing maintenance for your entire facility.
| Frequency | Task | Completed By |
|---|---|---|
| Daily | Wipe down the machine's exterior and sanitize the ice scoop. | |
| Daily | Check the ice bin for any unusual odors or visible debris. | |
| Weekly | Remove and clean the air filter with warm, soapy water (air-cooled units). | |
| Weekly | Clean and sanitize the interior of the ice storage bin. | |
| Semi-Annually | Perform a full descaling and sanitizing cycle using Manitowoc-approved solutions. | |
| Semi-Annually | Check and replace the water filter cartridge to protect the machine. |
This structured approach brings your water supply into sharp focus. If you’re dealing with hard water, you'll see mineral scale build up much faster, forcing you to do those deep cleans more often than you’d like. Investing in proper filtration not only gives you clearer, better-tasting ice but also significantly cuts down on the maintenance grind. To dive deeper, check out our guide on effective water filtration for restaurants.
By managing these small tasks consistently, you ensure your Manitowoc ice maker remains a reliable asset, not a recurring problem.
Common Questions About Cleaning Your Manitowotc Ice Maker
Even with a step-by-step guide in hand, questions always come up when it’s time to get your hands dirty. Knowing the answers to these common “what ifs” is what separates a smooth, routine cleaning from a stressful ordeal. We put this section together to tackle the real-world scenarios we hear about from operators every day.
Our goal is to give you the confidence to handle the job right and, just as importantly, to know when it’s time to call for backup.
What Happens If I Use the Wrong Cleaning Solution?
This is easily one of the most critical questions we get, and the answer is simple: using unapproved cleaners is a fast track to expensive, irreversible damage. Your Manitowoc ice maker is a finely tuned piece of equipment, and its internal components, especially the nickel-plated evaporators, are very sensitive to the wrong chemicals.
Using something like household bleach or a generic, overly acidic descaler can lead to some serious headaches:
- Corrosion of Key Components: The wrong chemicals will literally eat away at the nickel plating on the evaporator—the single most expensive part of your machine. Once that plating is gone, rust and permanent damage aren't far behind.
- Voiding Your Warranty: Manitowoc is crystal clear on this. Any damage caused by unapproved chemicals is not covered under warranty. That simple cleaning mistake could leave you footing a multi-thousand-dollar repair bill.
- Creating a Food Safety Hazard: Household cleaners are absolutely not food-safe. They can leave toxic residues that contaminate your ice, creating a massive health risk for your customers and a major liability for your business.
Always, always stick to the Manitowoc-branded, nickel-safe descaler and sanitizer. They were formulated specifically for these machines—tough on scale and slime, but gentle on the delicate internal parts.
How Do I Know If My Machine Needs Cleaning Ahead of Schedule?
The standard six-month cleaning interval is a great baseline, but that’s all it is. Your local water quality and kitchen environment are the real bosses here. Don't just set a calendar reminder and forget it; learn to let the machine tell you what it needs.
Your ice maker will give you some pretty obvious clues when it's overdue for a good cleaning. Keep an eye out for these telltale signs:
- Cloudy or Opaque Ice: Crystal clear ice comes from pure water freezing in perfect layers. When mineral buildup gets in the way, it disrupts that process, leaving you with cloudy, soft, or incomplete cubes.
- Funky Tastes or Odors: If your ice has a musty smell or tastes "off," that’s a huge red flag for microbial growth like bacteria or mold hiding inside the machine.
- Visible Slime or Mold: Take a peek inside. Check the water trough, distribution tube, and the inside of the bin for any pink or black slime. This stuff is called biofilm, and it's a serious health code violation that demands immediate sanitization.
- Slowed Ice Production: Is the machine running longer than usual? Is the bin not filling up as quickly as it used to? Scale buildup is likely insulating the evaporator plates, making it much harder for the machine to do its job.
If you spot any of these signs, don't wait for the next scheduled cleaning. A proactive cleaning is always cheaper and less disruptive than an emergency shutdown during a dinner rush.
When Should I Call a Professional Instead of Doing It Myself?
While this guide gives you the know-how to handle routine cleaning and descaling, some problems are best left to a certified technician. Trying to diagnose and fix complex mechanical or electrical issues on your own can easily lead to more damage and create serious safety risks.
It's time to pick up the phone and call a pro if you run into any of these situations:
- Persistent Error Codes: If your machine's display is flashing error codes that don't go away after a reset or a full cleaning cycle, it's pointing to a deeper issue with a sensor, valve, or the main control board.
- Poor Ice Production After Cleaning: You’ve done everything right—a full descaling and sanitizing cycle—but the machine is still struggling to make ice. This could signal a problem with the refrigeration system, the compressor, or the water pump, none of which are DIY fixes.
- Loud or Unusual Noises: Grinding, squealing, or clanking sounds are never good. These often mean you have a failing motor, a bad bearing, or another mechanical part on its last legs that requires an expert diagnosis.
If you find yourself in one of these spots, our guide on ice machine troubleshooting can help you get a better idea of the potential cause before you make the call. That way, you can give the technician more specific info, which often leads to a faster, more efficient repair.
At The Restaurant Warehouse, we provide the high-quality, durable equipment you need to keep your kitchen running smoothly. From top-tier ice makers to essential cooking and refrigeration units, we have everything to support your business's success. Explore our extensive catalog and find the perfect equipment at https://therestaurantwarehouse.com.
About The Author

Sean Kearney
Sean Kearney used to work at Amazon.com and started The Restaurant Warehouse. He has more than 10 years of experience in restaurant equipment and supplies. He graduated from the University of Washington in 1993. He earned a BA in business and marketing. He also played linebacker for the Huskies football team. He helps restaurants find equipment at a fair price and offers financing options. You can connect with Sean on LinkedIn or Facebook.
Leave a comment