


How to Clean a Ice Maker the Right Way for Your Restaurant
To really understand how to clean an ice maker, you first have to appreciate why it's so critical. It’s not just about wiping things down. The process is a two-part system: descaling to get rid of mineral buildup and sanitizing to kill bacteria. Skip this, and you’re looking at health code violations, expensive repair bills, and ice that just plain tastes bad.
Proper, consistent cleaning is hands-down the single most important maintenance task for your restaurant’s ice machine.
Why a Clean Ice Machine Is Your Restaurant's Unsung Hero

Before we jump into the step-by-step, let's be honest about what’s at stake here. A commercial ice maker isn't just another appliance; it’s a food production machine. The FDA considers the ice it makes to be food, and when neglected, that machine becomes a perfect breeding ground for biofilm, mold, and scale—all contaminants that can get your business shut down.
The hidden costs of ignoring routine cleaning are steep. I’ve seen it happen time and again: a high-volume bar starts getting complaints about cloudy, foul-tasting ice in their signature cocktails. The culprit is almost always scale buildup on the evaporator plate, a problem that a simple descaling cycle would have prevented. Now, the business is dealing with damaged customer trust and a flurry of negative online reviews.
The Real Risks of Neglect
That familiar pink slime you might find in a neglected machine isn't just gross; it's a biofilm of airborne bacteria and yeast having a party in a damp environment. It's a massive red flag for health inspectors and a direct threat to your customers' health. Shockingly, some studies have shown a staggering 90% of commercial ice machines aren't cleaned properly, creating a haven for dangerous bacteria.
But this isn't just about passing inspections. Consistent cleaning directly impacts your bottom line and the lifespan of your expensive equipment, whether it’s a Hoshizaki, Manitowoc, or Scotsman.
- Equipment Longevity: Scale forces your machine's compressor and condenser to work harder, leading to premature component failure. You'll be facing emergency repair bills that can easily top $500.
- Operational Efficiency: A clean machine produces ice faster and uses less water and electricity. A dirty one leads to higher utility bills.
- Product Quality: Clean, clear, odorless ice improves the taste and presentation of everything from fountain sodas to craft cocktails.
The standard six-month cleaning schedule recommended by most manuals? Honestly, it's often not enough for a busy restaurant. High-yeast environments, like those near breweries or bakeries, and kitchens with lots of airborne grease demand more frequent attention—often quarterly or even monthly.
Proper ice machine care is a critical part of the bigger picture of food safety and operational excellence. This is covered well in this essential guide to cleaning commercial kitchens, which details how to maintain spotless, compliant spaces.
Let's take a quick look at how the costs and benefits stack up.
Costs of Neglect vs. Benefits of Regular Cleaning
Ignoring your ice machine feels like saving time, but the reality is that proactive maintenance saves you a world of headaches and money. Here’s a side-by-side comparison of the real-world impact.
| Impact Area | Neglected Machine (The Risks) | Maintained Machine (The Rewards) |
|---|---|---|
| Health & Safety | Risk of foodborne illness, health code violations, and potential shutdowns. | Safe, clean ice that protects customers and passes inspections easily. |
| Equipment Lifespan | Premature failure of key components, leading to emergency repairs costing $500+. | Extended equipment life, reducing the need for costly replacements. |
| Operational Costs | Higher utility bills from an inefficient machine working overtime. | Lower water and electricity usage, saving money every month. |
| Product Quality | Cloudy, foul-tasting ice that ruins drinks and customer experience. | Clear, odorless ice that improves beverage quality and presentation. |
| Reputation | Negative reviews and damaged customer trust from poor-quality products. | A reputation for quality and cleanliness that keeps customers coming back. |
Ultimately, proactive maintenance isn't just another chore on the list; it's a core business strategy. It protects your reputation, your customers, and the significant investment you made in your equipment.
Your Pre-Cleaning Toolkit and Safety Checklist
Stepping into an ice machine cleaning without the right gear is like a chef starting service with dull knives—it's inefficient, frustrating, and honestly, a little dangerous. Taking just a few minutes to get your toolkit ready beforehand is the secret to a professional-grade clean that’s both effective and quick. This little bit of prep work prevents you from having to stop mid-job to hunt down a brush or, worse, realizing you’ve got the wrong chemical solution.
A well-prepped toolkit isn't about being fancy; it's about being effective. You’ll need some basics that are probably already floating around your kitchen, but a few specific items are non-negotiable if you want a truly thorough clean.
Gathering Your Essential Gear
Your setup doesn't need to be complicated, but it does need to be specific to the job. Generic sponges just won’t cut it when you’re trying to get into the tight corners of an ice machine. Here’s what you should have ready to go:
- Personal Protective Equipment (PPE): At a minimum, this means safety glasses and chemical-resistant gloves. Trust me, splashing descaler or sanitizer into your eyes or onto your skin is a serious hazard you want to avoid.
- Soft-Bristle Brushes: Grab a few nylon brushes in different sizes. You'll need them for scrubbing components and reaching into crevices without scratching up any sensitive surfaces. Never, ever use steel wool or abrasive pads.
- Spray Bottles and Buckets: Dedicate two clearly labeled spray bottles—one for your cleaning solution and another for your sanitizer. You’ll also want a bucket for mixing solutions and a separate one for clean rinse water.
- Lint-Free Cloths: Microfiber cloths are perfect here. They’re great for wiping down components without leaving behind tiny fibers that could end up clogging the system.
Getting your tools in order first transforms this task from a chore into a methodical, professional process. The principle of assembling the right tools applies to all kitchen tasks, a topic we explore further in our guide on cleaning restaurant equipment.
Cleaner vs. Sanitizer: Understanding the Critical Difference
This is where so many well-intentioned cleaning efforts go completely sideways. Using "cleaner" and "sanitizer" interchangeably is a costly mistake that can damage your machine and put food safety at risk. They do two totally different, equally vital jobs.
Key Takeaway: Cleaning removes the gunk you can see (like scale and grime), while sanitizing kills the germs you can't (like bacteria and mold). You must always clean first, rinse it all away, and then sanitize. You can't properly sanitize a dirty surface.
An ice machine cleaner is an acidic solution, often called a descaler. Its only job is to dissolve and strip away mineral buildup (limescale) from parts like the evaporator plate. On the other hand, an ice machine sanitizer is a chemical agent designed to kill microorganisms like bacteria, slime, and mold.
Always use products that are specifically formulated for ice machines. Look for solutions that are EPA-approved and, crucially, nickel-safe. Many commercial ice makers have nickel-plated parts that can be permanently ruined by the wrong chemicals, leading to some seriously expensive repairs. Never use bleach or vinegar—they are not approved and can corrode your equipment.
Finally, the most important safety step of all: unplug the ice machine and shut off its water supply line before you even think about starting. This is non-negotiable. It eliminates the risk of electrical shock and stops the machine from accidentally cycling on while your hands are inside.
Taking on a Professional-Grade Deep Clean
This is where the real work happens. We're going way beyond a simple wipe-down. This is a methodical deep clean that attacks the hidden scale and biofilm that ruin ice quality and can seriously damage your machine. A professional-grade clean isn't about speed; it's about being precise and following the right sequence to make sure every single component is handled correctly.
The whole process breaks down into two distinct, equally critical phases: first descaling to get rid of mineral buildup, and then sanitizing to kill off all the microbiological gunk. You absolutely have to do them in this order. Trying to sanitize a surface that’s still caked in scale is like painting a dirty wall—the sanitizer can't get to the surface where the bacteria are actually hiding.
Phase One: Descaling and Mineral Removal
Our first enemy in the fight for clean ice is limescale. This chalky, white buildup comes from minerals in your water and basically acts like a suit of armor for bacteria. Worse, it insulates the evaporator plate, forcing your machine to work much harder to make ice. That drives up your utility bills and leads to equipment breaking down way too soon.
This flowchart gives you a quick visual rundown of the prep work you need to do before you even think about starting the cleaning cycle.
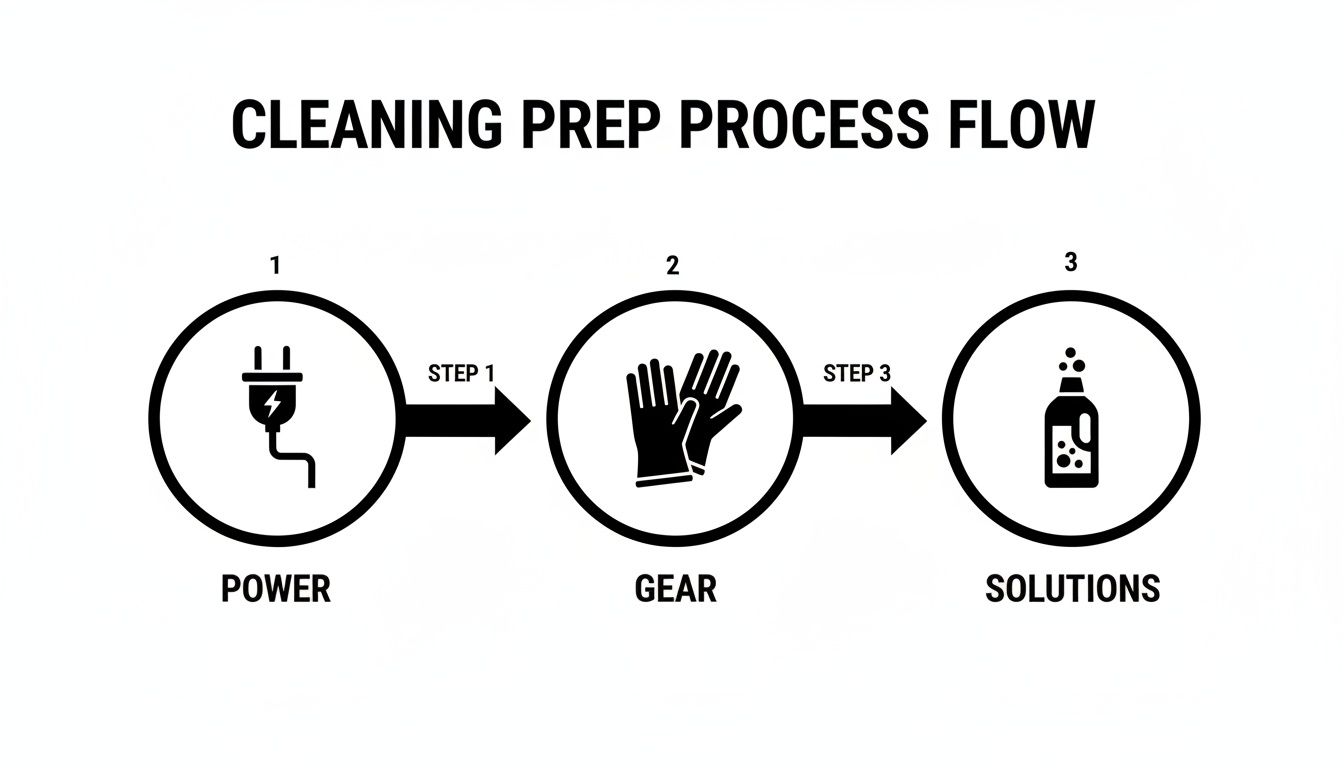
It’s a great reminder of the non-negotiable safety steps: cut the power, wear your protective gear, and have your solutions mixed and ready before you even open up the machine.
Getting Hands-On: Disassembling Key Components
Before you push that "clean" button, you need to get in there and manually remove the parts that handle water and ice formation. These are always the grimiest spots. Always check your machine's manual, but you'll typically be pulling out parts like these:
- The Water Curtain or Baffle: This is usually a plastic shield that guides water and senses when the ice bin is full. It’s a prime spot for slime to take hold.
- The Distribution Tube: Water flows through this tube’s small holes to run evenly over the evaporator plate. When scale clogs these holes, you get ugly, misshapen, or hollow ice cubes.
- The Ice Thickness Sensor: Sometimes called the ice bridge sensor, this little probe tells the machine when the ice sheet is thick enough to harvest. Scale buildup here can fool the machine, leading to ice that’s either too thick or paper-thin.
Gently take these parts out following your manual’s guide. Get a bucket and mix up a solution of your nickel-safe ice machine cleaner and warm water. Soaking these components while the machine runs its cleaning cycle is a huge time-saver and lets the descaler really go to work on those stubborn deposits.
Kicking Off the Descaling Cycle
With those key parts soaking, it's time to deal with the machine's guts. Make sure every last cube of ice is out of the bin.
Now, you’ll start the machine’s “Clean” or “Wash” cycle. Most modern commercial ice makers, like the ones from Manitowoc or Hoshizaki, have a dedicated button for this. Once the cycle kicks in, the machine will drain its water trough. When it prompts you, pour the correct amount of descaling solution directly into that trough.
The machine will then start circulating the acidic cleaner through all its internal water lines, pumps, and over the evaporator grid. This is what melts away the scale you can't possibly reach by hand. Let the cycle run its course, which usually takes about 20-30 minutes.
Expert Tip: Don't just stand there while the machine is doing its thing! Use this time to manually scrub the parts you have soaking. A soft-bristle nylon brush is perfect for getting into every nook and cranny of the distribution tube and water curtain. Pay extra attention to the inside of the tube and its little water jets, as that’s where clogs love to form.
Phase Two: Sanitizing and Eliminating Biofilm
Once the cleaning cycle is done and you’ve scrubbed and rinsed the removable parts, the machine is physically clean—but it isn't food-safe yet. The sanitizing phase is what wipes out the invisible threats: bacteria, mold, and that gross pink slime.
Remember, you can't sanitize a dirty surface. The descaling you just did has stripped away the scale, exposing all the surfaces so the sanitizer can actually do its job.
Running the Sanitizing Cycle and Final Rinse
First things first: rinse away every trace of that descaling solution. Run a rinse cycle if your machine has one, or manually flush the system with clean water as directed by the manufacturer. You have to get all the acidic cleaner out before you introduce the sanitizer.
Next, mix your EPA-approved, food-grade sanitizer according to the label's dilution instructions. Mixing it stronger won't make it work better and can leave a chemical taste on your ice.
Just like before, start the “Clean” or “Wash” cycle again. When the machine tells you to, add your mixed sanitizer solution to the water trough. The machine will circulate it through all the same pathways, killing any microbes left behind. This cycle is usually shorter, often around 10-15 minutes. For a deeper dive, our complete guide to ice machine cleaning offers more pro tips and brand-specific advice.
The Final Reassembly and Wipe Down
While the sanitizing cycle is running, you can sanitize the parts you cleaned earlier. Either spray them down with your sanitizer or give them a quick soak. Pay attention to the sanitizer's required contact time—this is the "dwell time" the solution needs to sit on the surface to be effective, which is usually a few minutes. Do not rinse the sanitizer off unless the product label specifically tells you to. Most food-grade sanitizers are made to air dry.
Once the machine finishes its cycle and the parts are sanitized, you can put everything back together.
- Reinstall the ice thickness sensor.
- Put the water distribution tube back in its place.
- Reattach the water curtain.
With the machine reassembled, give the inside of the storage bin and the ice scoop a final wipe-down with your sanitizer solution. Close the door, turn the water back on, and switch the machine back to "Ice" mode.
Now for the last critical step: throw away the first one or two batches of ice. This is non-negotiable. It ensures any leftover traces of chemicals are completely flushed out of the system before that ice goes anywhere near a customer's drink. Your professional-grade deep clean is officially complete.
Building Your Routine Maintenance Schedule

A professional deep clean is a great reset, but it’s the consistent, day-in-day-out upkeep that truly protects your ice machine. This is how you prevent those emergency deep cleans from becoming a monthly crisis.
Creating a routine schedule turns reactive problem-solving into proactive care. It’s the secret to dodging an unexpected breakdown during a Saturday night dinner rush and keeping health inspectors happy. The key is to build a simple, repeatable plan that doesn't overwhelm your team. Not every task is a daily one. By breaking down maintenance into manageable daily, weekly, and monthly jobs, you create a system that actually works.
Daily Habits For Lasting Performance
Simple actions, performed every single day, have the biggest long-term impact on your machine’s hygiene and longevity. These tasks take less than five minutes but stop the slow buildup of grime that invites bigger problems down the road.
- Wipe Down the Exterior: Grab a clean, damp cloth and wipe the machine's door, handle, and any surrounding surfaces. This gets rid of spills and surface bacteria before they have a chance to settle in.
- Sanitize the Ice Scoop and Holder: The ice scoop is a high-touch item, period. At the end of every day, it needs to be thoroughly washed and sanitized, then stored in its designated clean holder—never, ever in the ice bin itself.
These small habits create a culture of cleanliness and are your first line of defense in keeping your ice supply sanitary.
Weekly Checks To Stay Ahead of Issues
Once a week, you'll want to do a few quick inspections. Think of this as a quick health check-up for your machine. These checks help you spot developing problems like restricted airflow or a failing water filter before they start messing with your ice production.
To make sure these checks are actually happening, a structured approach is your best friend. Using a weekly cleaning schedule template ensures no task gets forgotten and builds accountability among your staff.
Your weekly checklist should include:
- Inspect the Air Filter: If your machine is air-cooled, check that filter for dust and grease. A clogged filter is like trying to breathe with a pillow over your face—it suffocates the machine, forcing it to work harder and killing its efficiency. Clean or replace it as needed.
- Check Water Filters: Take a look at your external water filtration system. If it has a pressure gauge, a drop in pressure is a dead giveaway of a clog. Note the date of the last filter change and get a replacement scheduled if it’s getting close.
- Quick Bin Inspection: Pop open the bin and just look. Do a quick visual check for any early signs of discoloration or slime trying to form in the corners. Catching it now makes the big monthly clean so much easier.
Monthly and Quarterly Deep Cleaning
While the daily and weekly tasks maintain the machine, a full deep clean is a non-negotiable event. For most businesses, doing the full descaling and sanitizing cycle every three months is sufficient.
However, your environment dictates your schedule. A machine near a bakery or a brewery with airborne yeast, or in a hot, humid kitchen with airborne grease, must be sanitized monthly. This isn't just a suggestion; it’s a food safety necessity to prevent rapid slime and mold growth.
This is where you perform the full descaling and sanitizing cycles we detailed earlier. Ever wonder why preventive maintenance every 6 months slashes emergency ice maker repairs by 80% in restaurants? It's a game-changer for operators who rely on a steady supply of clean ice. The data shows that machines in humid climates demand extra attention, with high-volume spots needing more frequent sanitization to pass those health checks.
By sticking to this tiered schedule, you move from putting out fires to actively preventing them. This documented routine isn't just great for your equipment; it’s solid proof of due diligence for any health inspector who walks through your doors.
Troubleshooting Common Ice Maker Issues
Even the most meticulously maintained commercial ice maker can have an off day. Before you reach for the phone to schedule an expensive service call, take a moment to play detective. Many of the most common problems—from a sluggish ice harvest to sad-looking cubes—are often just signs that your machine is overdue for a very specific kind of cleaning.
Learning to diagnose these symptoms can save you hundreds in repair costs. Often, a simple cleaning cycle or a targeted manual scrub is all it takes to get your machine back in the game. This is your first-response guide for connecting the problem you're seeing with the maintenance task that will fix it.
Diagnosing Low Ice Production
Is your machine suddenly struggling to keep up with the dinner rush? Before you start worrying about a failing compressor, check the simple stuff first. Low ice production is very often a breathing problem. An air-cooled machine needs a steady, clear flow of air over its condenser coils to effectively shed heat.
If the air filter looks like it's wearing a thick, fuzzy sweater of dust and grease, the machine can't cool itself properly. The compressor will run constantly, burning up electricity without actually producing much ice. The fix? It's often as straightforward as pulling out the filter and giving it a good cleaning or just swapping it for a new one.
Scale buildup on the evaporator plate is another frequent offender. When scale forms, it acts like an insulator, making it much harder for water to freeze into a solid sheet of ice. Your machine ends up working overtime, your energy bills creep up, and your ice bin remains stubbornly half-empty. This is a telltale sign that a full descaling cycle is long overdue.
Slime in ice machines plagues nearly every restaurant, with food-laden air spawning it from tiny contaminants during normal operation—yet annual cleanings fail 90% of the time to control it. Restaurants beware: this pink or brown menace taints beverages, sickens patrons, and triggers inspection shutdowns. Learn more about how this contamination happens from Biozone Scientific's findings.
Decoding Poor Ice Quality
The way your ice looks tells a story. If your normally crystal-clear cubes are suddenly coming out cloudy, hollow, or misshapen, your machine is sending out an SOS about its internal health.
-
Hollow or "Shell" Cubes: When you see ice that's thin or looks more like a hollow shell, the problem is almost always water flow. The water distribution tube at the top of the machine is perforated with tiny holes that get clogged with scale over time. When that happens, water can't cascade evenly over the evaporator plate, resulting in weak, incomplete cubes. The solution is to manually scrub this component clean during your next maintenance session.
-
Cloudy Ice: While a little bit of cloudiness from trapped air is normal, a sudden shift toward opaque ice often points to a failing water filter. Your external filter is the first line of defense against dissolved minerals. Once it’s exhausted, more of those minerals make their way into the machine, creating cloudy cubes and speeding up scale buildup.
-
Off-Tastes or Smells: If a customer complains about funky-tasting ice, you've likely got a biofilm problem on your hands. Slime and mold hiding in the machine’s dark, damp corners will absolutely impart an unpleasant, musty flavor to the ice. This is a major red flag that you need to run a full sanitizing cycle immediately. For more detailed guidance, check out our complete guide on ice machine troubleshooting.
By learning to read these signs, you can tackle minor issues with a targeted cleaning before they snowball into major mechanical failures.
Got Ice Machine Questions? We've Got Answers
Once you get the deep clean down and lock in a routine, you’re bound to have more questions. It’s totally normal. Trying to remember the specific dos and don'ts for ice machine care can be tough, especially when you’ve got a million other things to worry about in the kitchen. We’ve pulled together the most common questions we hear from restaurant owners just like you to give you clear, straight-up answers.
Getting these details right is what takes your cleaning from just “good enough” to a professional, food-safe maintenance program. It’s all about knowing the why behind every step.
How Often Should I Clean My Commercial Ice Maker?
The official FDA Food Code says you have to clean your machine at least every six months. Honestly, you should think of that as the absolute bare minimum for survival, not success. For any kitchen that’s even moderately busy, a full deep clean and sanitization every three to four months is the real professional standard. This keeps your ice safe and your machine running at its best.
But here’s the thing: your kitchen’s specific environment is what matters most.
- High-Yeast Environments: Is your machine anywhere near a bakery, brewery, or even your pizza prep station? It's breathing in airborne yeast all day.
- Greasy Air: Kitchens with active fryers or charbroilers fill the air with tiny grease particles that get sucked right into your machine's intake.
- Humid Climates: If you're in a humid area, you're creating the perfect damp breeding ground for mold and slime.
If any of these sound like your kitchen, you absolutely must sanitize the machine monthly. I'm not kidding—this isn't optional. It’s a critical step to stop the rapid growth of biofilm that can contaminate a fresh batch of ice in just a few weeks.
Can I Use Bleach or Vinegar to Clean the Machine?
Absolutely not. Please, don't do this. It’s one of the most destructive and dangerous mistakes you can make with your commercial ice maker. Using unapproved chemicals like bleach or vinegar will cause serious, often irreversible damage and won't actually sanitize the unit properly.
Bleach is extremely corrosive to the nickel-plated components inside most commercial ice machines. It causes the metal to flake off, leading to an incredibly expensive evaporator plate replacement. And while vinegar is a decent household cleaner, it is not an EPA-registered sanitizer that can eliminate dangerous biofilms like Listeria or Salmonella.
Always, always stick to the chemicals specifically made for the job. You'll need two separate products: a nickel-safe ice machine cleaner (which is a descaler) to dissolve mineral scale, and a separate EPA-registered, food-safe sanitizer to kill the germs. Using the right stuff protects your equipment, your warranty, and most importantly, your customers.
What Is the Difference Between Cleaning and Sanitizing?
This is the cornerstone of food safety, and it’s something every kitchen manager needs to get right. People often use "cleaning" and "sanitizing" interchangeably, but in a professional kitchen, they are two totally separate steps that have to be done in the right order.
Cleaning is the physical act of removing the gunk you can see. For an ice machine, this means using a descaling solution to dissolve and scrub away mineral scale, grime, and other buildup. Cleaning gets the surface ready for the next, critical step.
Sanitizing, on the other hand, is the chemical process of killing the germs you can't see. This step reduces dangerous bacteria, viruses, and mold down to a safe level. Here’s the key: you can’t effectively sanitize a dirty surface. The grime literally acts as a shield, protecting the germs from the sanitizer.
So, the proper sequence is always:
- Clean the machine first to get rid of all the scale and soil.
- Rinse away every trace of the cleaning solution.
- Sanitize the now-clean surfaces to wipe out any leftover microbes.
If you skip or reverse these steps, you’re leaving your ice vulnerable to contamination and basically defeating the whole purpose of your maintenance efforts.
At The Restaurant Warehouse, we understand that having reliable, efficient equipment is the backbone of your business. From high-capacity ice makers to the right cleaning solutions, we provide the tools and expertise you need to run a safe and successful kitchen. Explore our extensive catalog of commercial equipment and supplies at https://therestaurantwarehouse.com.
About The Author

Sean Kearney
Sean Kearney used to work at Amazon.com and started The Restaurant Warehouse. He has more than 10 years of experience in restaurant equipment and supplies. He graduated from the University of Washington in 1993. He earned a BA in business and marketing. He also played linebacker for the Huskies football team. He helps restaurants find equipment at a fair price and offers financing options. You can connect with Sean on LinkedIn or Facebook.
Leave a comment