

Restaurant Kitchen Floor Plan: A Practical Guide
Your restaurant's success hinges on more than just amazing food—it's built in the kitchen. A poorly designed kitchen floor plan is one of the most expensive mistakes you can make, creating daily chaos, slowing down your team, and even leading to safety violations. Think of your layout as the blueprint for your entire operation's efficiency and workflow. Getting this right from the start is crucial. This guide will help you design a space that supports your staff and sets the foundation for a truly profitable business from day one.
How to Create a Profitable Kitchen Floor Plan
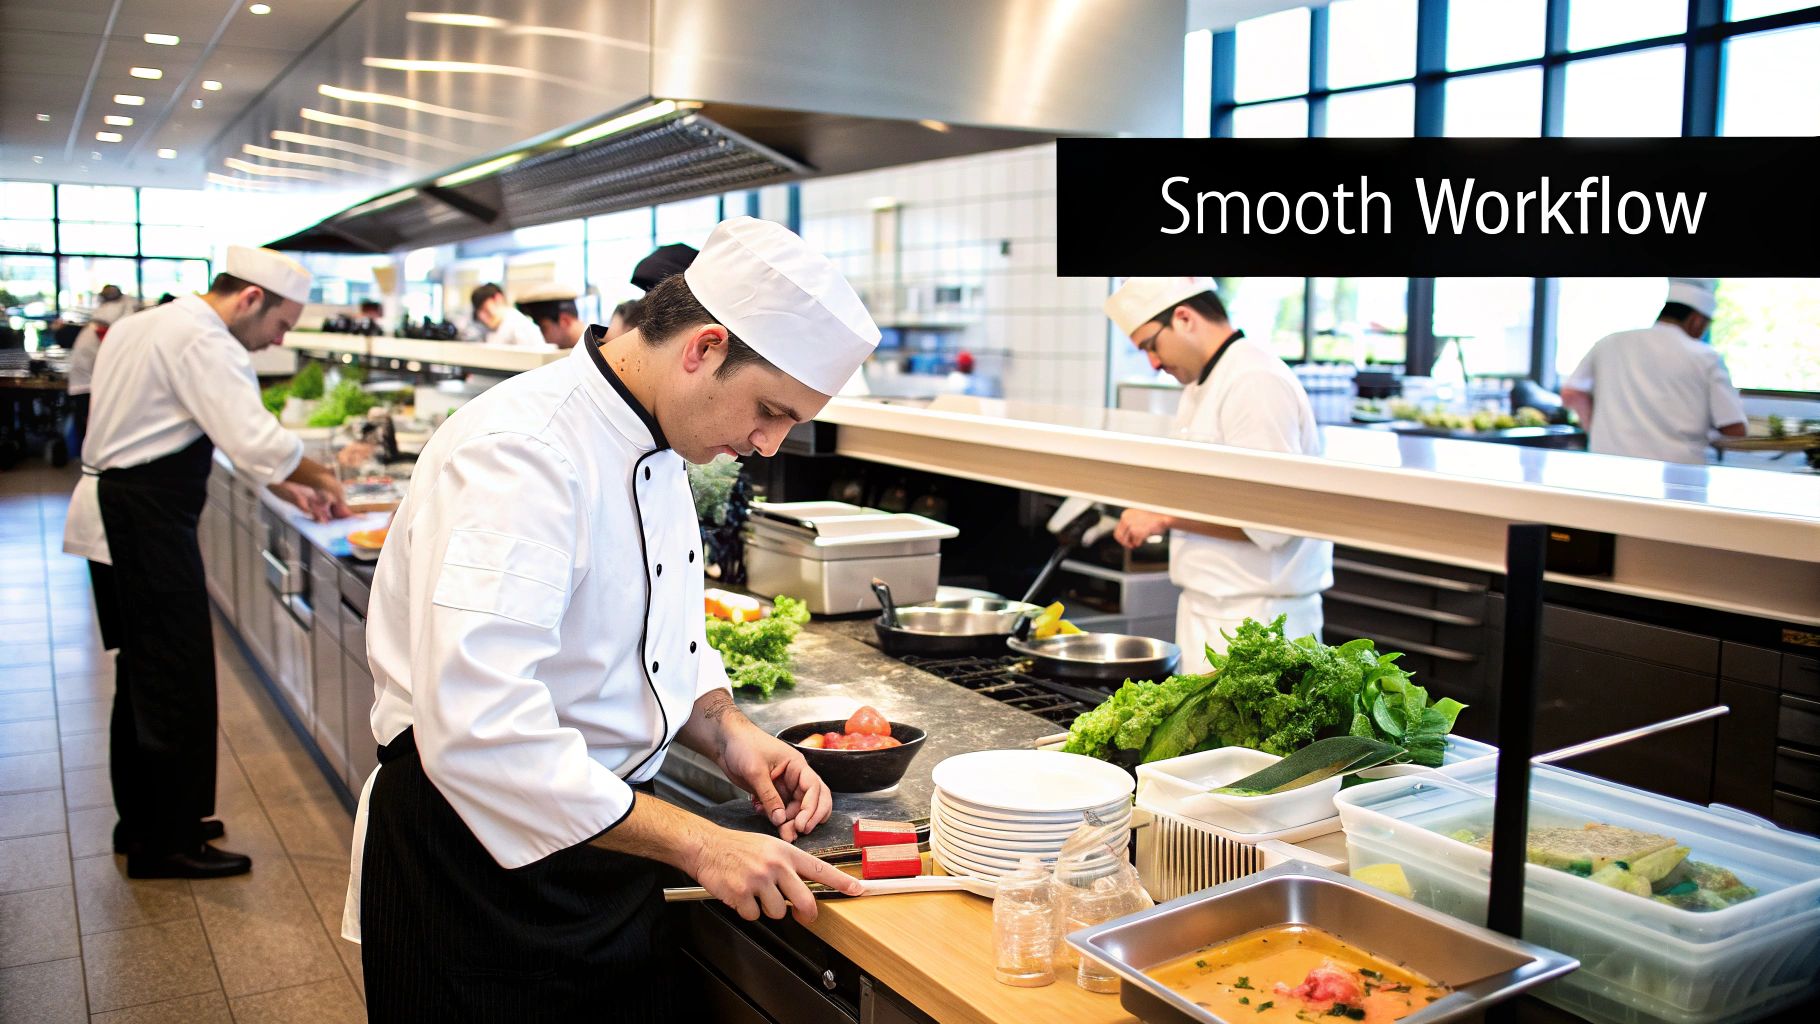 The magic of a memorable dining experience often feels effortless to guests, but behind the scenes, it’s all about meticulous planning. A superior kitchen floor plan is the silent partner in your success—that invisible force ensuring orders fly out smoothly, staff move without colliding, and safety standards are easily met.
A truly intelligent floor plan nails several critical goals at once:
- It establishes a logical flow for both people and products.
- It allocates enough room for staff to work safely and comfortably.
- It thoughtfully arranges every necessary element, from sinks to storage.
- It places critical work zones in the most effective locations.
- It builds in compliance with health and safety codes right from the start.
When these elements work in concert, the entire restaurant operates better. No one is fighting for space, and every square foot of your kitchen is engineered for peak performance.
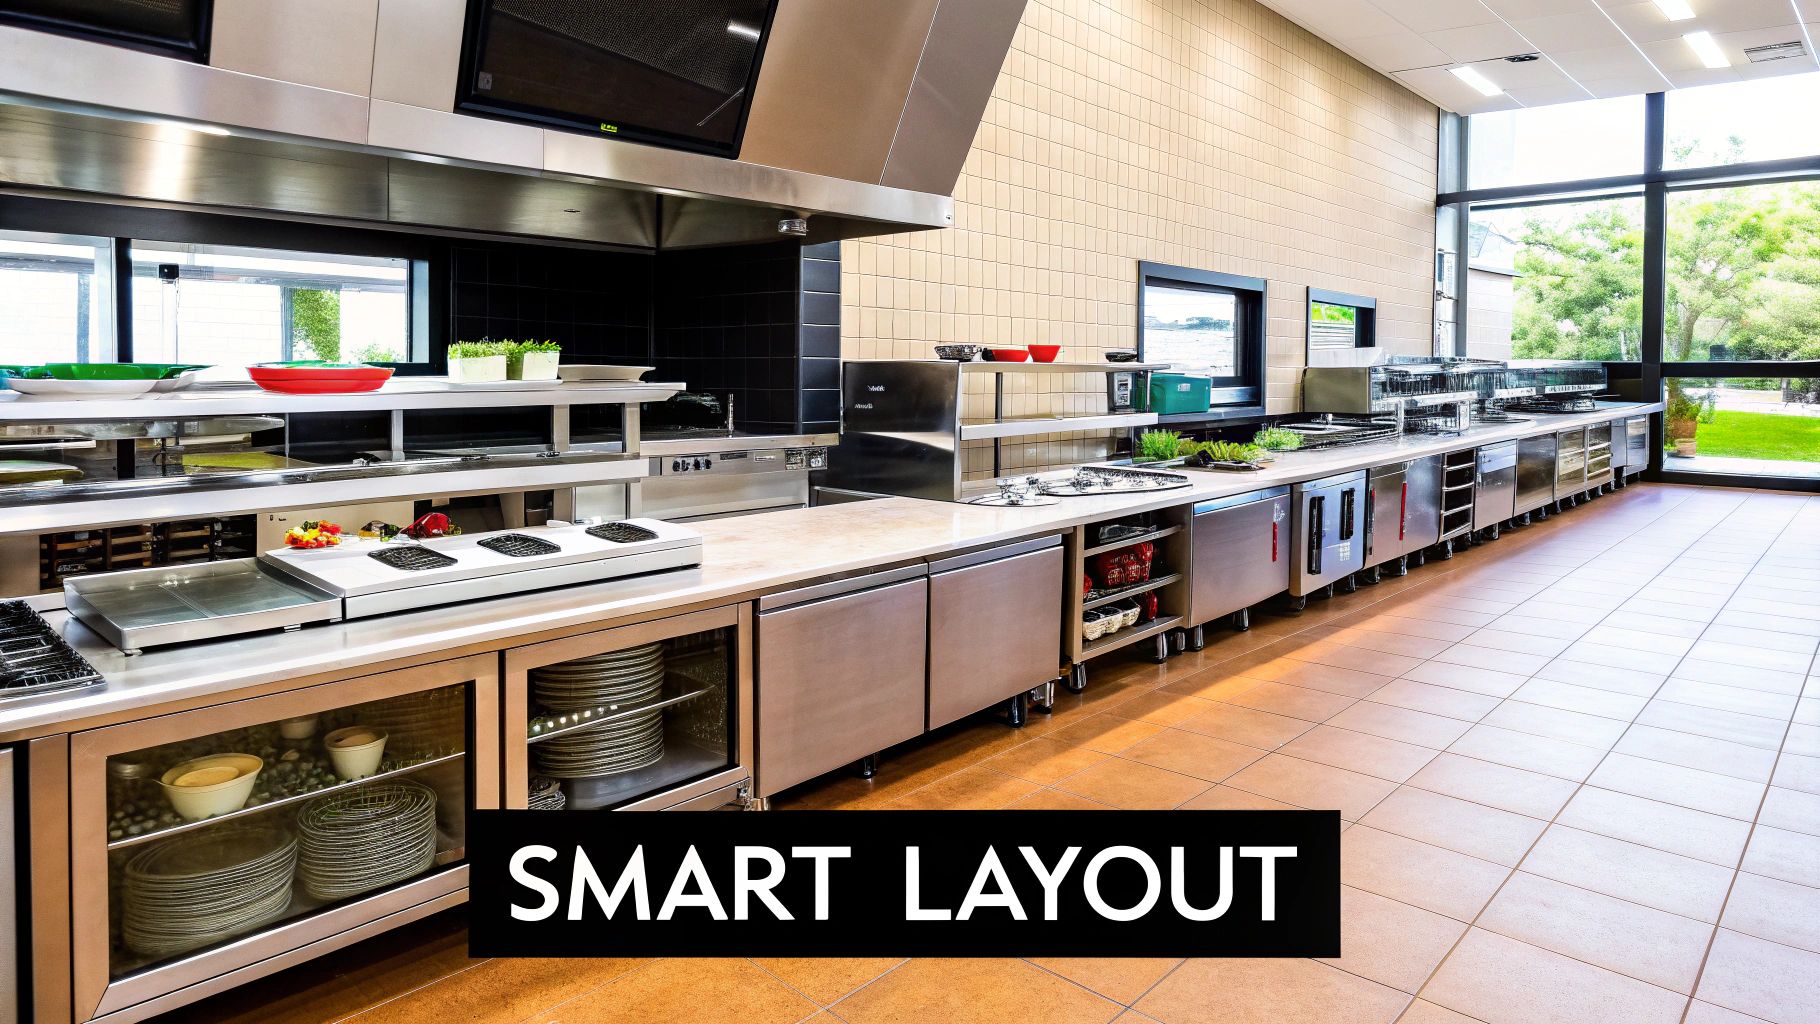
Core Kitchen Design Principles
Before you start placing equipment, it’s helpful to understand a few core design principles that professionals use to create efficient and safe kitchens. These aren't strict rules but rather time-tested guidelines that form the backbone of a smart layout. By incorporating these ideas from the start, you create a space that supports your staff and streamlines your entire operation. A logical design reduces physical strain on your team, minimizes the risk of accidents, and helps maintain a smooth service flow, even during the busiest rushes. These principles are all about working smarter, not harder, and setting your kitchen up for long-term success and profitability.
The Work Triangle: The Foundation of Efficiency
A well-designed kitchen layout often starts with the "work triangle." This classic principle connects the three most-used stations: the sink, the stove, and the refrigerator. The idea is to position these key areas in a triangular shape to minimize the steps a chef needs to take between them, keeping the path clear of major traffic. This simple geometric layout reduces unnecessary movement, making the workflow much more efficient and preventing staff from bumping into each other during peak hours. When your team isn't wasting time and energy walking back and forth across the kitchen, they can focus on what they do best—prepping, cooking, and plating beautiful food quickly. It’s a foundational concept that ensures the heart of your kitchen beats with a steady, productive rhythm.
Understanding Modular Kitchens
Think of a modular kitchen as building with high-quality, pre-made blocks. This design approach uses standardized, independent units that are assembled on-site to form a complete, functional kitchen. The beauty of this system is its incredible flexibility and efficiency. You can mix and match modules to perfectly suit your space and operational needs, maximizing every square foot for storage and workflow. This makes it much easier to shop for restaurant equipment, as you can select pieces that fit neatly into your planned layout. Because the components are pre-built, installation is faster and often more affordable, allowing you to get your kitchen up and running sooner without compromising on a custom feel or breaking the bank.
Finding the Right Kitchen-to-Dining Room Ratio
One of the first big decisions you'll make is how to divvy up your real estate. How much of your total square footage should be dedicated to the back-of-house versus the front-of-house? This balance is critical. Too little kitchen space will cripple your service capacity, but too much eats into your revenue-generating seating area.
A widely accepted industry guideline suggests a 60:40 ratio—about 60% of the total space goes to the dining area and 40% to the kitchen and support areas. This is a solid starting point for many restaurant concepts, ensuring the operational engine has enough room to function without sacrificing too much customer-facing space.
Of course, this isn't a rigid rule. The ideal ratio can shift quite a bit based on your specific business model.
Matching Your Kitchen Size to Your Restaurant Concept
The needs of a quick-service restaurant are worlds apart from those of a fine-dining establishment. Your menu, service style, and even how much you rely on delivery and takeout will all influence your spatial needs. For instance, a ghost kitchen might dedicate nearly 100% of its space to production, while a small cafe may only need 30%.
A common and costly mistake is underestimating storage and sanitation needs. I've seen many operators fixate on the cooking line but forget that disorganized storage and a cramped dish pit can bring the entire operation to a grinding halt.
Beyond just commercial layouts, understanding effective kitchen design principles is key for any functional space, and you can even draw inspiration from luxury designs.
The table below offers a general guide for allocating kitchen space based on your restaurant's concept. It’s a great starting point for figuring out just how much room your kitchen will realistically need to thrive.
Sizing Your Kitchen for Your Menu and Service Style
| Restaurant Type | Recommended Kitchen Space (% of Total Area) | Primary Consideration |
|---|---|---|
| Fine Dining | 35-40% | A complex menu requires more prep space and specialized equipment stations. |
| Casual Dining | 30-35% | This is a balanced approach for varied menus and moderate-to-high volume service. |
| Quick Service (QSR) | 25-30% | The focus is on linear workflow and speed; less complex prep is required. |
| Ghost/Delivery Kitchen | 70-90% | Operations are entirely production-focused with no dining area. |
By carefully considering your concept's unique demands, you can create a commercial kitchen floor plan that not only looks good on paper but truly thrives under the pressure of daily service.
A great kitchen runs like a well-choreographed dance, not a mosh pit. When I walk into a new client's space, the first thing I look at isn't the shiny equipment—it's the flow. A top-tier commercial kitchen floor plan is built around a seamless workflow, guiding everything from raw ingredients to the finished plate with the least amount of friction possible.
The secret? Think like a flowchart. You want to create a one-way street for production. Ingredients come in the back, move through a logical sequence of stations, and leave as a finished dish ready for the dining room. This linear path is your best defense against backtracking, a massive time-waster and a huge source of stress for your team. It also dramatically cuts down the risk of cross-contamination by keeping raw and cooked foods on totally separate journeys.
I’ve consulted on kitchen redesigns where the only major change we made was reorganizing the workflow. The result? Ticket times dropped by an average of 15-20%. The staff felt less frazzled during the dinner rush simply because they weren't constantly bumping into each other.
Mapping this flow means every station is placed to shave off unnecessary steps and prevent those frustrating traffic jams. It’s how you turn a potentially chaotic space into a high-performance machine.
The 5 Zones Every Commercial Kitchen Needs
A truly functional commercial kitchen floor plan is broken down into distinct zones, each with a clear purpose. Arranging these zones in the right order is the bedrock of an efficient kitchen. While every restaurant is unique, you'll almost always find these five core areas.
Receiving Zone: This is where it all begins. Your receiving area needs to be right near the back door, making life easy for delivery drivers and keeping them away from customer areas. You'll need enough space here for your team to properly inspect, weigh, and check-in deliveries before anything gets put away.
Storage Zone: This should be right next to the receiving area. It's typically split into three crucial parts: dry storage for canned goods and non-perishables, cold storage (your walk-in and reach-in refrigerators), and frozen storage (your freezers). Placing storage here means staff can unload deliveries in minutes, not by trekking across the entire kitchen.
Food Preparation (Prep) Zone: Here’s where the initial work gets done—all the washing, chopping, mixing, and portioning. It’s smart to divide this zone into separate stations, like one for raw meats and another for vegetables, to stay on the right side of health codes and prevent cross-contamination. Logically, this area sits right between your storage and the main cooking line.
Cooking Line (Hot Line): This is the heart and soul of your kitchen—the place where the magic happens. Your ovens, ranges, fryers, and grills are all lined up here for the final cooking and assembly. It needs to be positioned for a quick hand-off from the prep areas and have a clear, direct path to the service station.
Sanitation and Dishwashing Zone: This is the end of the line, where dirty dishes from the dining room and pots from the line come to be cleaned. It should be close to the dining room entrance for easy drop-off but ideally isolated a bit to keep the noise and mess away from where clean food is being prepared.
This infographic gives a simple but powerful visual of how these zones should flow from one to the next.
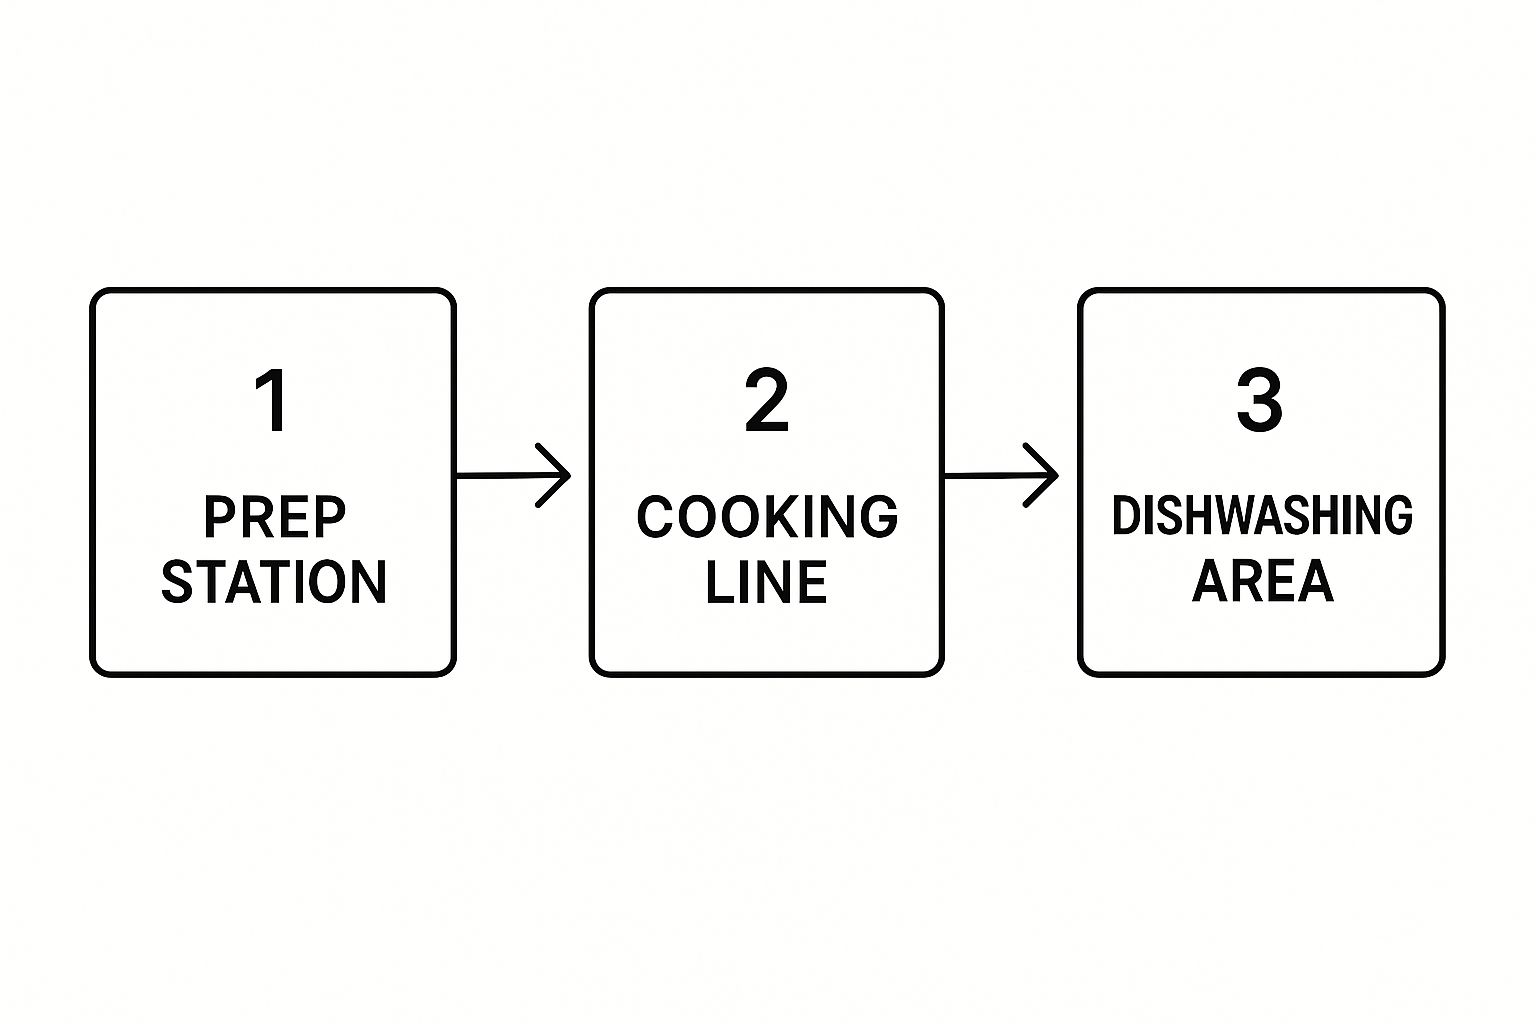
As you can see, it’s all about a straight line. Food and staff move logically from prep to cooking and then cleaning without needlessly crossing paths.
Creating an Efficient Kitchen Workflow
Once you've defined your zones, it's time to get granular and visualize the actual movements. Pick one of your most popular menu items and trace its entire journey, from raw ingredients to the pass.
Let’s use a classic burger joint as an example. The workflow might look something like this:
- Ground beef comes from the walk-in cooler to the meat prep station.
- Staff portion and form patties at that dedicated table.
- Patties head over to the grill station on the cooking line.
- At the same time, buns are getting toasted and veggies are being prepped at a separate station nearby.
- The cooked patty, toasted bun, and fresh toppings all come together at the assembly station.
- The finished burger is plated and lands on the pass for a server to grab.
Every single step should flow intuitively to the next. If the person prepping burgers has to walk past the fry station to get to the grill, you’ve created a bottleneck. If the dish pit is located between the walk-in cooler and the prep station, you’ve got a serious cross-contamination risk waiting to happen.
By mapping out these "micro-workflows" for your key dishes, you can spot and fix inefficient movements before you ever build a wall or buy a single piece of equipment. This proactive approach is what separates an average kitchen from a truly great one.
Understanding Common Kitchen Layouts
Once you’ve mapped out your five essential zones, the next step is to arrange them into a cohesive shape that fits your available space. Every kitchen is different, but most successful commercial floor plans are based on a few tried-and-true layouts. Choosing the right one is about balancing the physical constraints of your building with the specific demands of your menu and service style. Think of these layouts as the foundational templates you can adapt to create your perfect workflow, ensuring every piece of equipment has a logical home and your team has room to excel.
The L-Shaped Kitchen
The L-shaped kitchen is a classic for a reason. This layout uses two adjacent walls, forming a natural and efficient work triangle between your key stations. It’s an incredibly versatile setup that makes great use of corner space, which can often become dead space in other configurations. This design keeps the kitchen open, which can help prevent staff from feeling too crowded and can easily accommodate a central prep island if you have the room. An L-shaped layout provides a clear path for movement, reducing collisions during busy service hours and making it a solid choice for many small to medium-sized restaurants looking for an efficient, open-concept flow.
The U-Shaped Kitchen
If you have a larger space and your top priority is maximizing counter and storage area, the U-shaped kitchen is a fantastic option. This layout utilizes three walls, creating an enclosed and highly efficient workspace. The U-shape allows you to surround your chefs with everything they need, keeping refrigerators, prep tables, and cooking equipment just a few steps away. This setup is ideal for high-volume kitchens because it can comfortably support multiple cooks working at the same time without getting in each other's way. The ample surface area means you can dedicate space for specialized equipment, like multiple deep fryers or a large griddle, without sacrificing essential prep zones.
The One-Wall Kitchen
For operations where space is at a premium, like a small café, food truck, or quick-service counter, the one-wall kitchen is the ultimate space-saver. As the name suggests, all your equipment and workstations are arranged along a single wall. While this layout is compact, it demands smart planning to be effective. The workflow is completely linear, so the placement of each zone is critical. You’ll want your storage at one end, followed by prep, cooking, and then the service area. Success with this layout often comes down to choosing the right equipment, such as under-counter freezers and multi-functional cooking stations, to make the most of every inch.
The G-Shaped (Peninsula) Kitchen
The G-shaped kitchen, sometimes called a peninsula kitchen, is an evolution of the L-shaped layout. It includes the same two walls but adds a peninsula—a third, shorter section of counter space that juts out into the room. This extra arm provides more prep area, additional storage, or can even function as a pass-through counter for servers or a breakfast bar in an open-concept setting. While it offers plenty of workspace, it’s important to ensure the entrance to the main "U" section is wide enough to prevent bottlenecks. This layout is less common in high-intensity commercial kitchens but can be a creative solution for certain concepts.
Average Dimensions for Common Layouts
Getting the layout right also means paying close attention to dimensions. Even the best-designed shape will fail if your staff can't move freely. For a U-shaped kitchen, you should aim for at least 5 to 6 feet of clearance in the center to allow for easy movement and for appliance doors to open without blocking the walkway. For an L-shaped kitchen, each leg should ideally be at least 10 to 12 feet long to comfortably fit your primary workstations. When you shop for restaurant equipment, always check the product dimensions and factor them into your plan to ensure everything fits perfectly from day one.
Choosing the Best Kitchen Layout for Your Restaurant
 Alright, you’ve mapped out your work zones and know what needs to happen where. Now comes the fun part: arranging those zones into a layout that actually works in the real world. Your commercial kitchen floor plan isn't just about Tetris-ing equipment into your space; it’s about choosing a design that reflects the very soul of your restaurant's operation.
A layout that’s perfect for a high-volume burger joint would be pure chaos in a fine-dining spot. There’s no single "best" layout—just the one that’s best for you. This decision hinges on your menu's complexity, the size of your crew, how fast you need to serve, and the physical shape of your building. Let’s break down the most common layouts to see which one feels right for your vision.
Assembly Line Layout: For High-Volume Kitchens
Think of a classic fast-food chain or a bustling sandwich shop, and you're picturing an assembly line. This layout arranges equipment and stations in a straight, logical line that follows the path of food production. It’s the undisputed champion of speed and consistency.
- Best For: Quick Service Restaurants (QSRs), pizza places, or any concept with a limited, highly repetitive menu.
- Pros: It's incredibly fast and efficient, which simplifies training and cuts down on unnecessary staff movement. Everyone has a defined role, minimizing errors during a crazy rush.
- Cons: Flexibility is not its strong suit. This layout can feel rigid, making it a poor choice for kitchens that need to handle complex or frequently changing menus.
A build-your-own-bowl concept is a perfect example. The line starts with the base (rice, greens), moves to proteins, then toppings, and finishes with sauces. Each station seamlessly hands off to the next.
Island Layout: A Central Hub for Your Kitchen
The island layout puts a central block of cooking equipment—like ranges and grills—right in the middle, with other zones like prep and sanitation arranged around the perimeter. This setup is fantastic for communication and is often the go-to for chef-driven restaurants where collaboration is everything.
The central island becomes the kitchen's command center, allowing the head chef to oversee every station with ease. But be warned: this layout requires a good amount of square footage to prevent the perimeter from turning into a traffic jam.
An island layout can be a dream for team dynamics, but it can quickly become a traffic nightmare if not planned meticulously. You absolutely must ensure there's ample clearance—at least 4-5 feet—around the entire central block for safe movement and cleaning access.
Zone Layout: Stations for a Diverse Menu
With a zone-style layout, you break the kitchen into separate stations based on function. You’ll have a distinct grill station, fry station, salad station, and so on. Staff members are assigned to a specific zone, allowing them to become masters of their domain.
This is a highly organized approach that works beautifully for larger restaurants with extensive and varied menus.
- Best For: Full-service restaurants, hotels, and catering kitchens.
- Pros: It allows for true specialization and the simultaneous production of many different dishes. It also helps contain messes and keeps individual workflows neat and tidy.
- Cons: You’ll likely need more staff to cover all the stations, and it can sometimes lead to less communication between zones compared to an island setup.
Galley Layout: Maximizing Small Spaces
Also known as a corridor-style kitchen, the galley layout places all equipment and workstations along two parallel walls. This is an extremely space-efficient design, making it a favorite for operations with narrow footprints, like food trucks or small city cafes.
The key to a successful galley kitchen is obsessive planning. With a tight space, every inch counts, and a poorly arranged galley can become congested and dangerous. Creating a smart workflow is non-negotiable here to prevent bottlenecks and keep your team moving efficiently.
Open Kitchen Layout: Putting on a Show
This layout is becoming more and more popular, and for good reason. The open concept removes the wall between the kitchen and the dining room, turning the act of cooking into a form of entertainment. It creates a vibrant, energetic atmosphere and a direct connection between your chefs and guests.
Of course, this "kitchen theater" has its own unique challenges. Everything is on display, so your kitchen must be spotless at all times. Noise, heat, and smells can also spill into the dining area if not managed with top-tier ventilation and intelligent design. You can learn more about finding that perfect balance in our guide to restaurant kitchen design tips.
Strategic Equipment Placement for Peak Performance
Alright, now for the fun part: playing a high-stakes game of Tetris with your kitchen equipment. Once you’ve settled on a layout, it's time to start populating it. This is where the magic really happens. A perfectly placed range or a smartly positioned prep table can be the difference between a service that flows like a dream and one that descends into chaos. This isn't just about making everything fit; it's about creating powerful, efficient workstations that let your team shine.
A great strategy I always recommend is to group your equipment by function. Think of your cooking line not as a row of individual appliances, but as one cohesive, fire-breathing unit. For instance, your grill, griddle, and charbroiler should all be neighbors. Why? They all pump out similar grease-laden vapor, which means they can share a single, powerful ventilation hood. This is way more efficient and wallet-friendly than installing a bunch of smaller, separate hoods. Same logic applies to your fryers—cluster them together to create a dedicated fry station.
Before you spend a single dollar on equipment, map out your utilities. I can't stress this enough. Create a detailed drawing showing exactly where every electrical outlet, gas line, water hookup, and drain needs to be. Trying to move these things after the walls are up or the concrete is poured is an absolute nightmare of delays and surprise costs.
This "grouping" approach creates powerful micro-zones within your kitchen. A chef working the grill station has everything they need within arm's reach, which means less running around and more cooking. This principle goes beyond the hot line, too. Your dishwashing area needs a logical flow, starting from the dirty dish drop-off, moving to the three-compartment sink, and ending at the drying racks and clean storage.
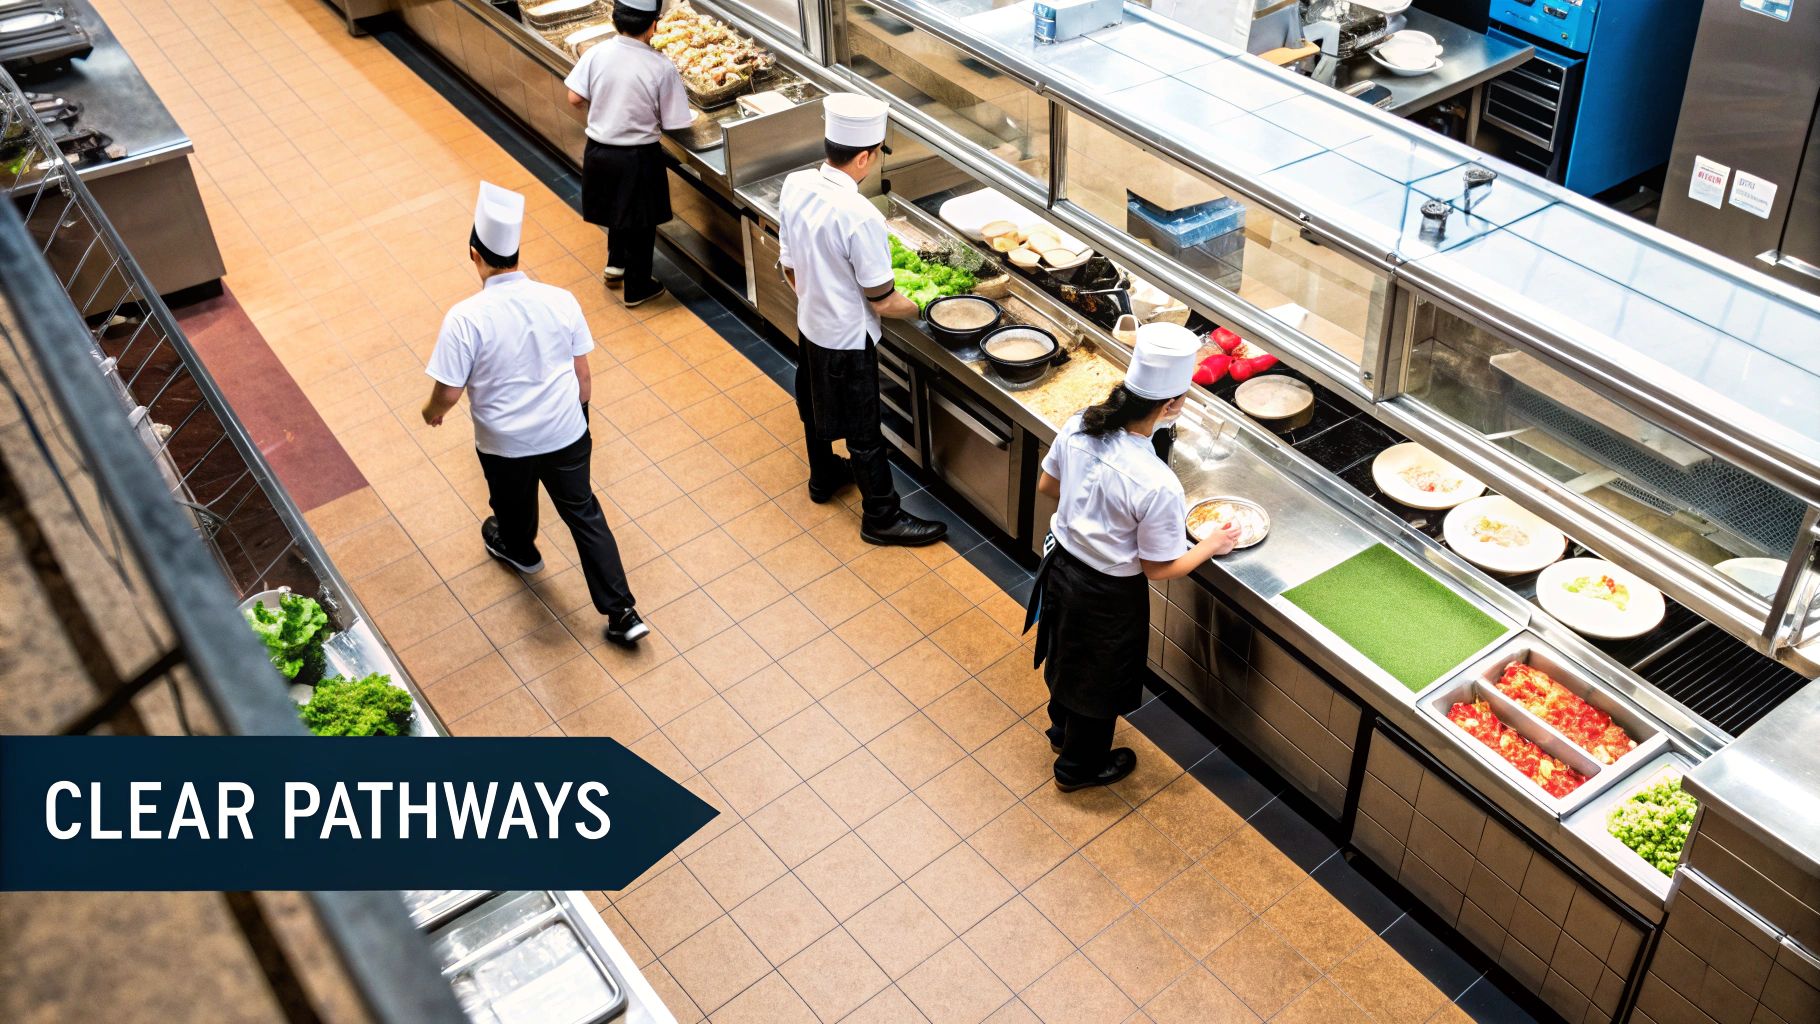
The 3x4 Rule for Clear Pathways
In a busy kitchen, space is everything—not just for comfort, but for safety and speed. This is where the "3x4 rule" comes into play. It’s a simple but powerful guideline for laying out your kitchen. The rule suggests you need at least three feet of space for minor pathways where one person typically works, and four feet of space for major pathways between major work zones. This ensures your team can move freely without bumping into each other or hot equipment. Think of it as creating dedicated traffic lanes that prevent collisions and allow staff to pass one another, even when carrying heavy stock pots or full sheet pans.
Kitchen Island and Peninsula Guidelines
An island layout can be a fantastic choice, creating a central hub where your head chef can direct the action. But as one expert notes, "An island layout can be a dream for team dynamics, but it can quickly become a traffic nightmare if not planned meticulously." To avoid this, you must ensure there's ample clearance—at least 4 to 5 feet—around the entire central block. This isn't just for walking; it's for giving staff room to open oven doors, pull out drawers on refrigerated prep tables, and work back-to-back without creating a bottleneck. This generous spacing is what makes an island a functional command center instead of a frustrating obstacle.
Smart Appliance Placement
Placing your equipment isn't just about what fits where; it's about creating intelligent workstations. A brilliant strategy is to group your equipment by function. As one kitchen designer puts it, "Think of your cooking line not as a row of individual appliances, but as one cohesive, fire-breathing unit." Grouping your deep fryers, grills, and ranges together allows them to share a single, powerful ventilation hood, which is more efficient and cost-effective. The same logic applies to your cold line. Placing your refrigerators and freezers close to your prep stations minimizes travel time and keeps ingredients within easy reach.
Dishwasher and Sink Synergy
Nowhere is smart placement more critical than in the dish pit. The workflow here needs to be seamless to keep up with service. The golden rule is that "the dishwasher should be right next to the sink." This creates a natural, ergonomic flow: scrape food scraps into a bin, rinse the dish in the sink, and then immediately place it in the dishwasher rack. This simple adjacency eliminates the need to carry dripping dishes across the floor, which prevents slips and saves your dish crew precious seconds on every single rack.
Design Tips for Small Kitchens
Working with a tight space like a food truck or a small cafe presents a unique challenge. As one designer warns, "With a tight space, every inch counts, and a poorly arranged galley can become congested and dangerous." The key is to maximize every square foot. Think vertically by installing tall shelving for storage. Invest in multi-functional equipment, like a prep table with built-in refrigeration. When you shop for restaurant equipment, look for smaller-footprint models that deliver the performance you need without hogging space. For small businesses, making smart investments is crucial, which is why exploring options like restaurant equipment financing can help you get the right gear without a massive upfront cost.
Planning for Plumbing, Gas, and Electrical
Your kitchen layout is completely tied to its utility infrastructure. You can't just drop a heavy-duty convection oven anywhere you please; these machines have serious demands for gas, electricity, and water. A high-capacity oven, for example, might need a specific voltage that your standard wall outlets can't handle. These details can't be an afterthought.
When you're laying out the cookline, the gas connections are a huge deal. Making sure you have a plan for reliable gas plumbing installation is non-negotiable for both safety and performance. Gas lines have to be properly sized for the total BTUs of your equipment and installed by a licensed pro to meet strict safety codes. Getting this wrong isn't just a performance headache; it's a major hazard.
The same goes for your water lines and drainage. Your prep sinks, dishwashers, and ice machines all need water coming in and a path for wastewater going out. Drains must be placed strategically to prevent water from pooling on the floor and creating a dangerous slip hazard. Pre-planning all these hookups on your floor plan is the only way to ensure everything connects and works correctly on installation day. To get a better handle on picking the right gear, our commercial kitchen equipment guide is a fantastic resource.
Getting Clearances and Code Compliance Right
Beyond just being efficient, where you place your equipment is heavily dictated by local health and safety codes. These rules aren't suggestions—they're law, designed to keep your staff and customers safe. Ignoring them is a fast track to failed inspections, hefty fines, and being shut down before you even open.
One of the most critical parts of this is maintaining proper clearance space around your equipment. This isn't wasted space; it's essential for a few key reasons:
- Safe Operation: Your team needs enough room to move around hot surfaces without bumping into each other or searing an arm on a hot oven. Main traffic aisles should be at least 36 to 48 inches wide.
- Cleaning Access: You absolutely must be able to get behind and underneath equipment for deep cleaning. A buildup of grease and food debris is a fire hazard and an instant health code violation. A clearance of 6 to 12 inches from walls is a common requirement.
- Maintenance and Repair: When a fryer inevitably breaks down (and it will), a technician needs room to work. If you've trapped it against a wall with no side access, a simple repair just became a major, time-consuming project.
Always, always, always consult your local health department and fire marshal to get the specific codes for your area. They’ll tell you the required aisle widths, the minimum distance between cooking equipment and combustible walls, and what you need for fire suppression systems like ANSUL hoods. Building these clearances into your plan from day one is essential for a smooth and successful opening.
## Tools and Resources for Planning Your KitchenMoving from a concept in your head to a concrete floor plan can feel like the most intimidating part of the process. But you don’t need to be a professional architect to start visualizing your space. Thanks to a wealth of online tools and resources, you can create a detailed, functional layout that brings your vision to life without spending a fortune on design software or consultants. These resources are perfect for experimenting with different ideas, spotting potential problems early, and building a solid foundation for your kitchen before you invest in the physical build-out or equipment. It’s your chance to get it right on paper before the stakes get high.
Think of this stage as your design playground. You can explore different configurations, see how equipment fits, and understand the flow of your space in a tangible way. The best approach is to combine practical planning tools with creative inspiration. Using a 3D planner helps you map out the technical details and dimensions, while browsing visual platforms can spark new ideas for efficiency and style. Before you start dragging and dropping appliances, it’s helpful to get a firm grasp on the fundamentals. Understanding the pros and cons of common kitchen layouts in a visual format will help you make smarter decisions for your own unique space and menu.
Using Free Online 3D Kitchen Planners
One of the best ways to test your floor plan is with a 3D kitchen planner. These tools transform a flat, 2D drawing into an interactive model you can virtually walk through. This perspective is invaluable for catching issues you might otherwise miss, like a walkway that’s too narrow or a poorly placed piece of equipment that disrupts the workflow. Many of these planners are free, work directly in your web browser with no download required, and are surprisingly easy to use. They allow you to experiment with different layouts and see exactly how your space will function before committing.
With a tool like RoomSketcher, you can drag and drop generic appliances, adjust dimensions, and see your kitchen from every angle. This lets you test whether an island layout truly fits or if a galley style would be more efficient for your square footage. It’s a risk-free way to validate your ideas and make confident decisions. Once you have a layout you love, you’ll have a much clearer picture of the specific equipment you need, from the right size deep fryers to the number of prep tables required.
Gathering Inspiration from Visual Platforms
Before you start arranging virtual equipment, it helps to see what’s already working for others. Visual platforms are a goldmine for design inspiration, showing you countless real-world examples of efficient and innovative commercial kitchens. This is where you can move beyond basic layouts and start thinking about the smaller details that make a kitchen truly great, like clever storage solutions, smart station setups, and effective lighting. It’s about seeing the theory put into practice and borrowing ideas that have been proven to work under pressure.
Pinterest is an incredible resource for this. A quick search for "commercial kitchen layout" will give you thousands of ideas to sift through. I recommend creating your own board to gather kitchen layout ideas that resonate with your concept. Don't just look at the aesthetics; analyze the workflow. Notice how different restaurants arrange their prep, cooking, and sanitation zones. This process helps you build a visual library of what you like and, just as importantly, what you want to avoid in your own design.
Future-Proofing Your Kitchen Design
A brilliant commercial kitchen floor plan is only as good as its ability to pass inspection. Before you get lost in visions of culinary creativity, you have to ground your design in the non-negotiables: health and safety regulations. These codes aren't just bureaucratic hurdles to jump through; they are the bedrock of a safe environment for your staff and your customers.
Trying to navigate the web of requirements from local health departments, the FDA, and fire marshals can feel overwhelming, but it’s a critical first step. These rules dictate everything from the materials you can use for countertops to the exact specs of your ventilation system. Getting this right from the beginning will save you from incredibly costly tear-outs and crippling delays down the road.
Your Kitchen Compliance Checklist
Think of compliance as the foundation of your kitchen. Without a solid, legally sound base, everything else you build is at risk. Your local health inspector will be one of your most frequent professional visitors, so understanding their checklist is paramount.
Here are a few of the big areas that demand your full attention:
- Food-Safe Surfaces: Any surface that touches food has to be smooth, non-porous, and a breeze to clean. There's a reason stainless steel is the industry standard—it’s tough as nails and resists bacterial growth.
- Proper Ventilation: Your ventilation system is one of the most important—and expensive—parts of your kitchen. It must be powerful enough to yank grease, smoke, and heat out of the air, and its design is strictly regulated to prevent fire hazards.
- Fire Suppression Systems: This is non-negotiable. Any cooking equipment that produces grease-laden vapors (like your fryers and grills) legally requires an automatic fire suppression system, like an ANSUL system, installed right in the ventilation hood.
- ADA Accessibility: The Americans with Disabilities Act (ADA) sets clear standards for accessibility. This impacts your layout by requiring certain aisles to be wide enough for wheelchair access and ensuring handwashing sinks are at an accessible height.
My best advice? Treat your local health inspector as a partner, not an adversary. Invite them to review your plans before you start construction. A 30-minute conversation can uncover issues you’d never have thought of and save you thousands of dollars and weeks of headaches.
Designing a Kitchen That Can Evolve
Getting your kitchen compliant gets you open, but having foresight is what will keep you profitable. The restaurant industry is always changing, and a kitchen designed only for today’s menu will feel outdated and clunky tomorrow. A truly great commercial kitchen floor plan is built to adapt.
Think about what's next. What if you decide to add a ghost kitchen concept to your operation? What if a new piece of culinary tech becomes essential for your menu? A flexible layout has extra electrical outlets, strategically placed water lines, and modular workstations that you can reconfigure without needing a major overhaul.
This forward-thinking approach is more important than ever. The commercial kitchen market is seeing major growth, with a projected expansion of USD 1.00 billion between 2024 and 2028. This boom is being driven by big investments in new technologies and energy-efficient equipment. To stay competitive, your floor plan has to be ready to accommodate these advancements. If you want to dig deeper, you can explore the full market research about commercial kitchen growth.
How to Incorporate Trends into Your Kitchen Plan
Designing for the future means paying attention to the trends that are reshaping modern kitchens right now. Integrating these elements into your plan from day one gives you a huge operational advantage.
Two of the biggest trends you should be thinking about are:
- Energy Efficiency: Modern commercial appliances are significantly more energy-efficient than older models. While they might have a higher price tag initially, they lead to substantial savings on utility bills over their lifespan. Your floor plan should be ready for them.
- Automation and Technology: From smart ovens you can program with your phone to automated beverage dispensers, technology is taking over repetitive kitchen tasks. Plan for the necessary power and data connections to support these tools, even if you don't plan to buy them on day one.
By designing a kitchen that is both compliant today and flexible for tomorrow, you're not just building a place to cook. You are creating a resilient, adaptable asset that can grow and evolve right alongside your business, setting you up for long-term success.
When you start digging into your commercial kitchen floor plan, the questions are going to fly. I’ve been there. It’s a complex process, no doubt about it, but getting solid answers to the most common hurdles can make a world of difference—saving you a ton of time and, more importantly, money.
Let’s tackle some of the questions I hear most often from restaurant owners.
The Rise of Smart Kitchen Technology
Smart technology is no longer just for phones; it's transforming the modern commercial kitchen. From ovens you can program remotely to refrigerators that monitor their own temperature, these tools are reshaping kitchen efficiency. The real challenge isn't just buying the latest gadget—it's designing a space that's ready for it. A truly great commercial kitchen floor plan is built to adapt. A flexible layout includes extra electrical outlets, strategically placed water lines, and modular workstations that you can reconfigure without a major overhaul. Planning for these future needs today is a low-cost way to ensure your kitchen doesn't become obsolete in just a few years.
Embracing Eco-Friendly and Sustainable Design
Sustainability is more than a buzzword; it's a smart financial strategy. Modern commercial appliances are significantly more energy-efficient than older models. While they might have a higher price tag, they lead to substantial savings on utility bills over their lifespan. When planning your layout, think about how to best incorporate these workhorses. For example, placing energy-efficient freezers away from hot cooking lines reduces how hard their compressors have to work, saving even more energy. Considering options like restaurant equipment financing can make that initial investment much more manageable, helping you access those long-term savings right away.
Advanced Space-Saving Features
For many restaurants, especially in urban areas or food trucks, every square inch is precious real estate. This is where clever design becomes your greatest asset. The galley layout, which places equipment along two parallel walls, is an extremely space-efficient design for narrow footprints. But you can get even smarter. Think vertically with wall-mounted shelving for storage, and choose multi-functional equipment like a refrigerated prep table that combines your work surface and cold storage. By selecting versatile restaurant equipment and using every dimension of your space, you can build a highly functional kitchen that feels much larger than it is.
What Is the Biggest Mistake in Kitchen Design?
The single most common—and most damaging—mistake I see is drastically underestimating the space you need for storage and sanitation. It’s so easy to get laser-focused on the shiny new cooking line and the main prep areas. But trust me, neglecting your storage and warewashing zones is a recipe for absolute disaster.
When you don't carve out enough room for dry goods, cold storage, and a proper dishwashing station, you’re setting yourself up for instant, daily chaos. This oversight leads to cluttered, unsafe walkways, constant workflow bottlenecks, and eventually, serious health code violations. A cramped dish pit can single-handedly bring a slammed dinner service to a screeching halt.
My best advice is to map out your complete storage and warewashing needs before you even start dreaming about the cooking line. Treat these areas as mission-critical, not as an afterthought. This simple shift in priorities can prevent countless operational headaches down the road.
How Much Should I Budget for the Floor Plan Design?
Budgeting for the design phase can vary pretty dramatically based on your project's scope and where you're located. For the professional architectural and design services alone, you can expect to see costs ranging anywhere from $2,000 to over $15,000. And that's just for the planning and blueprints, not the much larger expense of construction and equipment.
A good rule of thumb is to set aside 5-10% of your total project budget just for the design and architectural planning. I know it can feel like a hefty upfront cost, but investing in an expert pays for itself. A professional designer optimizes your layout for peak efficiency and ensures every inch meets code, which prevents those eye-wateringly expensive construction mistakes that would cost you far more to fix later on.
Can I Design My Own Kitchen Floor Plan with Software?
Absolutely. Using software is a fantastic way to brainstorm and get a visual feel for your initial ideas. It lets you play around with different layouts and see how equipment might fit into your space. For a little inspiration, it’s a great idea to explore various restaurant kitchen layout examples to see what’s possible.
However—and this is a big one—design software has a critical blind spot: it doesn’t understand your local health codes, fire regulations, or specific ventilation requirements. The best approach is to use software for your conceptual planning. Then, you must have a professional kitchen designer or an architect review and finalize the plans. They're the ones who will ensure your design is fully compliant, safe, and operationally sound, turning your vision into a viable, legal reality.
Ready to bring your commercial kitchen floor plan to life? At The Restaurant Warehouse, we provide the high-quality, durable equipment you need at prices that work for your budget. From refrigeration to cooking lines, we help you equip your kitchen for success. Explore our extensive catalog and flexible financing options today at https://therestaurantwarehouse.com.
Key Takeaways
- Design a One-Way Workflow: The most efficient kitchens are built around a logical flow from receiving to service. By organizing your space into the five core zones—receiving, storage, prep, cooking, and sanitation—you create a clear path that minimizes staff movement and prevents chaotic bottlenecks.
- Choose a Layout That Serves Your Service Style: Don't force a layout that doesn't fit your menu. A high-volume QSR thrives on a linear assembly-line layout for speed, while a fine-dining restaurant with a complex menu needs a zone-based layout for specialization. Let your concept dictate the shape of your kitchen.
- Build Your Plan Around Codes and Clearances: Before buying equipment, confirm all local health and safety regulations. Designating proper clearances—like 3-4 feet for main walkways—and planning for utilities from the start is non-negotiable and prevents expensive redesigns and ensures a safe, inspection-ready kitchen.
Related Articles
About The Author

Sean Kearney
Sean Kearney is the Founder of The Restaurant Warehouse, with 15 years of experience in the restaurant equipment industry and more than 30 years in ecommerce, beginning with Amazon.com. As an equipment distributor and supplier, Sean helps restaurant owners make confident purchasing decisions through clear pricing, practical guidance, and a more transparent online buying experience.
Connect with Sean on LinkedIn, Instagram, YouTube, or Facebook.