

A Practical Guide to Walk In Cooler Maintenance
Proper walk-in cooler maintenance is the difference between a reliable asset and a costly liability. It's a proactive game plan focused on preventing catastrophic failures, keeping your food safe, and managing energy costs—not just fixing things when they break.
Why Proactive Cooler Maintenance Is a Smart Investment
Your walk-in cooler is far more than just a cold box; it’s the heart of your operation, silently protecting thousands of dollars in inventory around the clock. Treating its upkeep as just another recurring chore is a common—and expensive—mistake.
Think of proactive maintenance as a high-return investment in your business’s stability. It's the strategic choice that separates thriving businesses from those constantly putting out operational fires.
Let's picture a scenario I’ve seen play out too many times: it’s the middle of a holiday rush, and your cooler’s compressor gives out. The cause? A simple, worn-out door gasket that went unnoticed for months. That tiny oversight allowed warm air to seep in, forcing the compressor to work overtime until it burned out. Now you’re facing massive product loss, an emergency repair bill, and potential damage to your reputation. This isn't a hypothetical; it’s a preventable reality.
The True Cost of Neglect
Ignoring routine checks creates a domino effect. Something as small as a clogged drain line can lead to ice buildup on the evaporator coil, which restricts airflow and throws your temperatures out of whack.
This doesn't just put your food safety at risk; it also cranks up your energy bill as the system struggles to keep up. Over time, that sustained strain leads directly to premature component failure and disruptive, expensive repairs.
The financial logic is pretty clear. Investing a small amount in regular inspections and cleanings prevents the massive costs tied to equipment failure and lost inventory. This preventative approach is also becoming an industry standard, as the global market for walk-in coolers continues to grow. Keeping your equipment in prime condition is essential for navigating this landscape. For more on market trends, check out these insights on the walk-in cooler industry from Fortune Business Insights.
This infographic breaks down how a proactive maintenance flow leads to significant operational benefits.
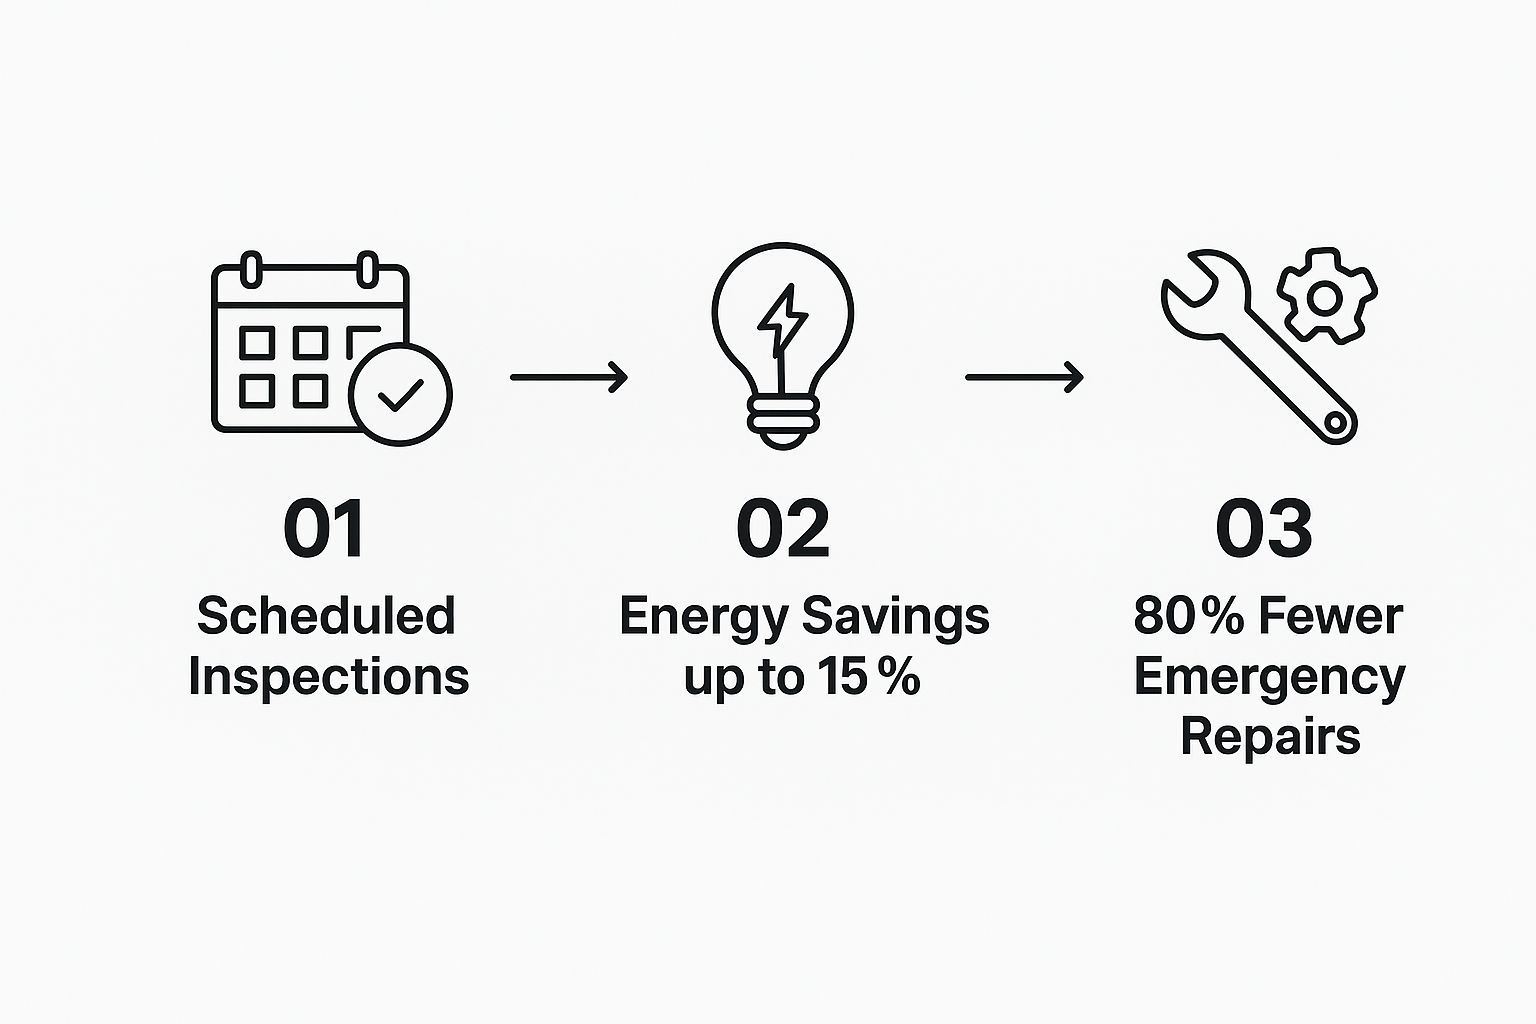
As you can see, consistent inspections directly translate into lower energy use and a dramatic drop in unexpected breakdowns. Making the right equipment choice from the start also plays a huge role. For more on that, take a look at our guide on choosing the right commercial refrigeration system.
The takeaway is simple: proactive maintenance isn't an expense—it's an operational strategy. It safeguards your assets, ensures compliance, and delivers a powerful return on investment through reduced energy bills and the prevention of costly emergencies.
The Ultimate Walk In Cooler Maintenance Checklist
When it comes to your walk-in cooler, consistency is everything. Just fixing things when they break is a surefire way to wind up with spoiled inventory and a massive repair bill. What you need is a solid, actionable game plan for your team.
This checklist breaks down the essential tasks into simple daily, weekly, monthly, and quarterly routines. Sticking to this schedule will keep your unit humming along in peak condition, saving you a ton of money and stress in the long run.
Daily Habits That Make a Difference
The most effective maintenance isn't a huge, time-consuming project. It's the small, consistent actions you take every single day. These quick checks take just a few minutes but are your first and best defense against bigger problems down the road.
Think of it this way: you wouldn't let a small drip under your sink turn into a flooded kitchen. The same logic applies here. A quick daily inspection can catch a door that isn't sealing right before it forces the compressor to burn itself out.
Here are the non-negotiables for every single day:
- Verify the Temperature: Don't just trust the external display. Keep a calibrated thermometer inside the cooler (away from the door) to get a true reading. Logging the temperature in the morning and at night is the fastest way to spot dangerous fluctuations.
- Listen for Odd Noises: You know the normal hum of your walk-in. Train your staff to recognize that sound so they can immediately flag any new grinding, clanking, or loud buzzing noises that often signal a mechanical issue.
- Quick Door Check: Make sure the door swings shut and seals tightly on its own. The handle should latch securely, and there shouldn't be anything on the floor preventing a perfect seal.
These simple habits are foundational. While every appliance is different, the core principle of routine care is universal. You'll find similar wisdom in general appliance maintenance tips, which all emphasize that regular upkeep is key to performance and long life.
Weekly Inspections and Cleaning
Once a week, it's time to dig a little deeper. These tasks focus on cleanliness and the components that see the most wear and tear. A clean cooler is an efficient one; spills and gunk can lead to nasty odors, attract pests, and even cause corrosion over time.
This is your chance to catch problems that creep up slowly. For example, a door gasket might seem fine day-to-day, but a weekly look can reveal a small tear before it compromises the entire seal and sends your energy bill soaring.
Your Weekly To-Do List:
- Deep Clean the Interior: Sweep and mop the floors to get rid of any spills or debris. Wipe down all the shelving and walls with a food-safe cleaner to keep things hygienic and prevent bacteria from building up.
- Inspect the Door Gaskets: Take a close look at the rubber or vinyl seals around the door. You're searching for any signs of cracking, brittleness, or tearing. A bad gasket is one of the biggest energy vampires in your kitchen.
- Clear All Obstructions: Make sure boxes or inventory aren't blocking airflow to the evaporator fans inside the unit. Do the same for the exterior condensing unit—keep the area around it clear of trash, equipment, or anything else that could impede airflow.
Pro Tip: Do the "dollar bill test" on your gaskets every week. Close the cooler door on a dollar bill. If you can pull it out with almost no resistance, your seal is weak. It's probably time to order a new gasket.
Monthly Deep Dives
Once a month, you need to give some love to the heart of your walk-in cooler: the mechanical components. This is where you fight back against the biggest enemies of refrigeration efficiency—dust, dirt, and grime.
Take the condenser coil, for instance. Its job is to release heat. But when it's covered in a blanket of dust, it can't do its job. This forces the compressor to run nonstop, which skyrockets your electricity bill and leads to a much shorter lifespan for your equipment.
Critical Monthly Tasks:
- Clean the Condenser and Evaporator Coils: First, kill the power to the unit. Use a soft-bristle brush and a shop vac to gently clear all the dust and gunk from the coils. Whatever you do, never use a wire brush, as it will damage the delicate fins.
- Check and Clear Drain Lines: Find the condensate drain lines and make sure they’re free of slime or blockages. A clogged drain can cause water to back up, leading to nasty ice buildup inside and potential water damage on your floor.
- Inspect Fan Motors and Blades: Check out the evaporator fans inside and the condenser fan outside. The blades should be clean and spin freely. Listen for any squeaking or grinding sounds coming from the motors.
Quarterly and Seasonal Service
These less frequent checks are all about ensuring long-term health and getting your unit ready for changing seasons. While some of these tasks are best left to a professional, an experienced manager can often handle them.
Think of this as a regular check-up for your equipment. You're checking the vitals and making sure the whole system is working together. For example, simply tightening electrical connections can prevent a power failure that shuts down your cooler at the worst possible time.
To keep it all straight, here’s a simple schedule you can follow.
Walk-In Cooler Maintenance Schedule
This schedule outlines the key maintenance tasks by frequency, giving you a clear roadmap to ensure your cooler runs efficiently and lasts for years.
| Frequency | Task | Key Focus Area |
|---|---|---|
| Daily | Check Temperature & Listen for Noises | Immediate operational safety and early problem detection. |
| Weekly | Clean Interior & Inspect Door Gaskets | Hygiene, food safety, and preventing energy loss from poor seals. |
| Monthly | Clean Coils & Clear Drain Lines | Core mechanical efficiency, preventing compressor strain and water damage. |
| Quarterly | Calibrate Thermostats & Check Refrigerant | System accuracy, long-term component health, and professional-level inspection to prevent major failures. |
By following this schedule, you can stay on top of your cooler's health and prevent small issues from turning into catastrophic failures.
Important Quarterly Actions:
- Calibrate Thermostats and Thermometers: You need to trust your readings. Make sure your thermostats are accurate to maintain precise temperature control and food safety.
- Inspect for Refrigerant Leaks: Look for any oily residue around refrigerant lines and fittings. This is a classic sign of a leak that needs to be addressed by a professional immediately.
- Tighten Electrical Connections: Make sure the power is off at the breaker first! Vibrations from the unit can loosen electrical connections over time, creating a fire hazard or causing parts to fail.
- Lubricate Door Hinges and Closers: Apply a food-safe lubricant to the door’s moving parts. This ensures it opens and closes smoothly and prevents unnecessary strain on the hardware.
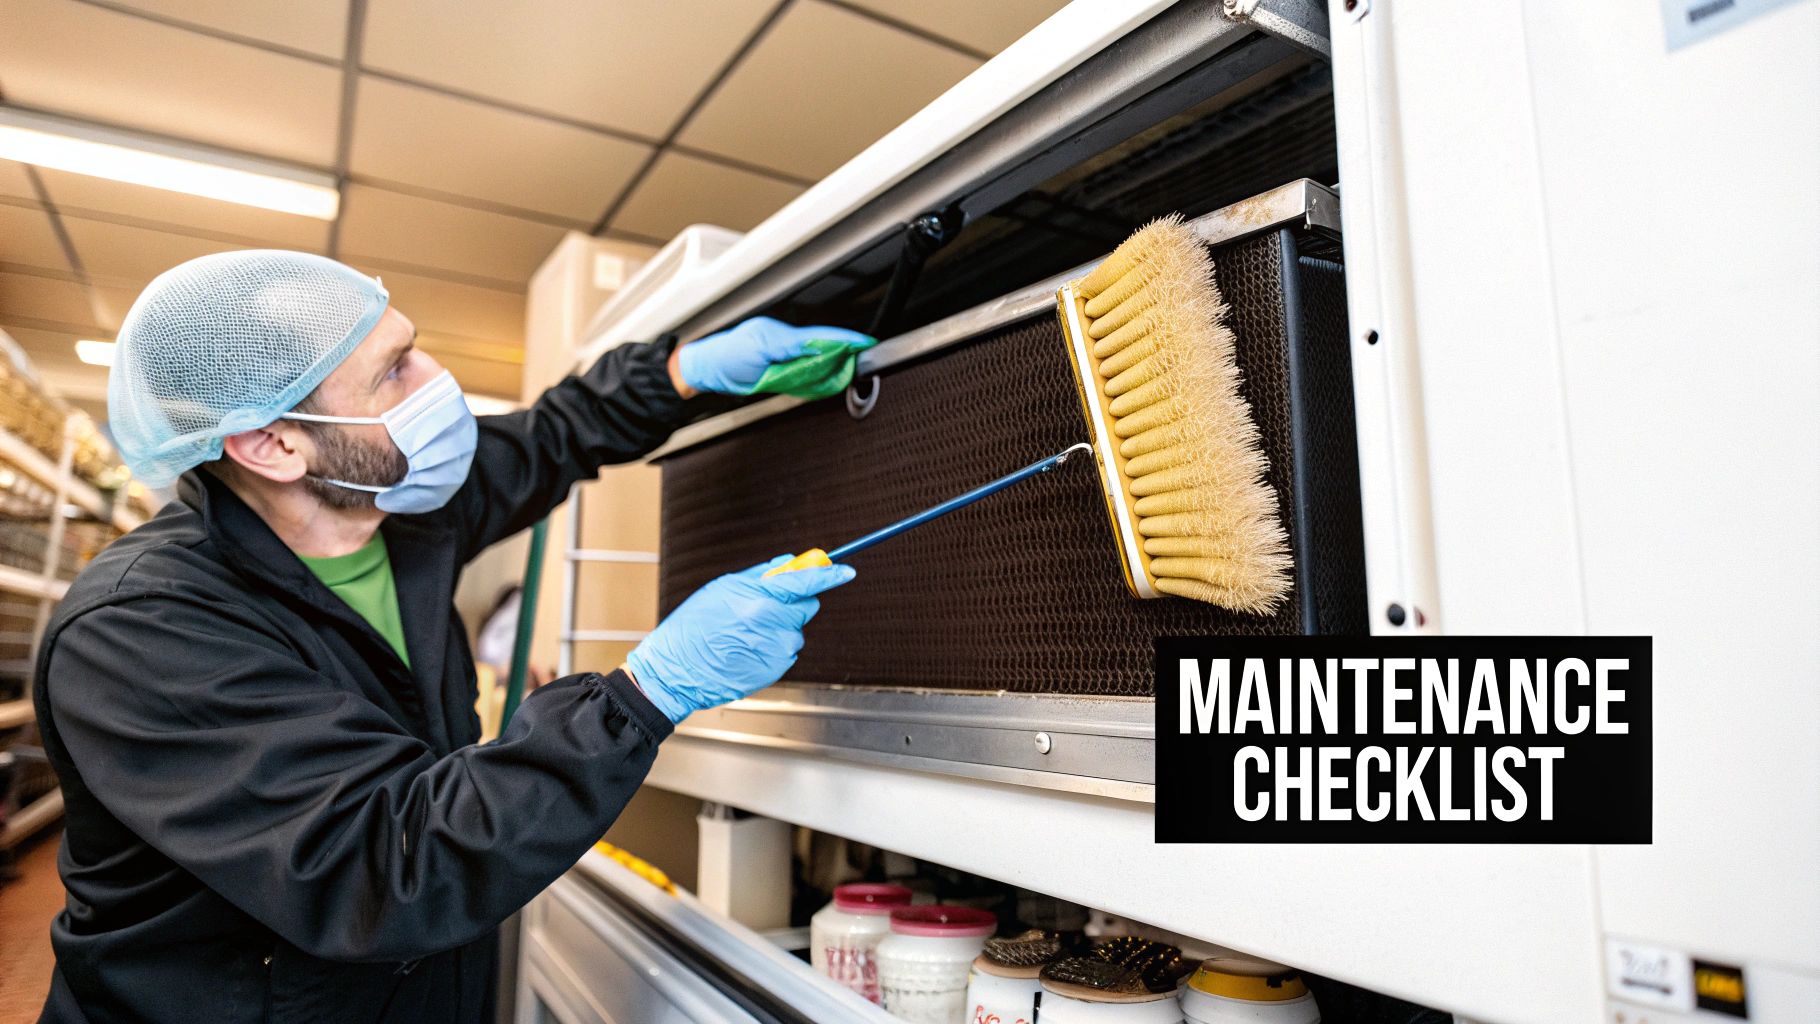
How to Properly Deep Clean Your Walk In Cooler
Going beyond the daily wipe-down with a regular deep clean isn't just a suggestion for your walk-in cooler—it's completely non-negotiable. This is a core part of your walk in cooler maintenance that has a direct line to food safety, odor prevention, and the overall efficiency of your unit.
A deep clean is where you root out the hidden bacteria and mold that love to set up camp in cold, damp corners. We're going to walk through a practical approach that gets you well beyond a simple surface scrub, ensuring you’re not just meeting health codes, but truly protecting your valuable inventory.

Preparing for the Deep Clean
Before a single drop of sanitizer hits the floor, good preparation is everything. First things first: empty the cooler completely. All of your inventory needs to be temporarily moved to another refrigerated unit. It's the only way you're going to reach every single surface that needs attention.
Next, and this is a critical safety step, head to your circuit breaker and turn off the power to the cooler. This protects you from any electrical hazards and stops the refrigeration system from kicking on while you're working.
Finally, get your supplies in order. You'll need:
- Food-safe sanitizer: Make sure you grab a product specifically made for food contact surfaces that won’t damage aluminum or stainless steel.
- Stiff-bristle brushes: A few different sizes will be a huge help for scrubbing shelves, walls, and getting into those tight corners.
- Buckets and clean cloths: Have one bucket ready for your cleaning solution and a second one just for rinsing.
- A wet/dry vacuum: This thing is a lifesaver when it comes to cleaning out the floor drain.
Tackling Walls, Shelving, and Floors
Always start cleaning from the top down. It’s a simple rule that ensures any dirt and gunk you loosen falls onto surfaces you haven't cleaned yet. Begin by scrubbing the ceiling and walls with your food-safe cleaning solution.
Give extra attention to the corners and seams where grime loves to hide. After the walls are done, move on to the shelving. If you can, remove the shelves entirely to give them a thorough cleaning on all sides.
The floor is the last interior surface on your list. Once it's scrubbed, put a major focus on the floor drain, which can be a breeding ground for mold and nasty odors. Use your wet/dry vac to suck out any standing water and debris. A clear drain is absolutely essential for proper drainage and keeping bacteria at bay.
A common mistake I see is people taking a high-pressure water hose inside the cooler. It seems fast, but that powerful spray can easily damage panel seals. This forces water into the insulation, creating much bigger, more expensive problems down the road. Stick to manual scrubbing.
Cleaning Door Gaskets and Final Steps
That rubber door gasket is crucial for holding the cold in. Over time, it collects all sorts of grime that can weaken the seal or even cause it to crack and deteriorate. Gently scrub the gasket with a soft cloth and your cleaning solution, making sure you get into all its folds.
After it's clean, apply a very thin layer of a food-safe lubricant to the gasket. This little step keeps it pliable and helps maintain a tight, energy-efficient seal. It’s a small detail that makes a huge difference in your cooler's performance.
Before you flip the power back on, make sure every single surface is completely dry. This is especially important for the floor and any components of the evaporator fan. Any lingering moisture can quickly freeze into a sheet of hazardous ice, which restricts airflow and forces your whole system to work overtime.
On that note, keeping other parts of your unit clean, like the condenser coils, is just as vital for overall health. For a more detailed guide on that, you can learn more about cleaning the condenser on our blog. Once everything is bone dry, restore the power, let the cooler get down to its target temperature, and then you can restock your impeccably clean and efficient unit.
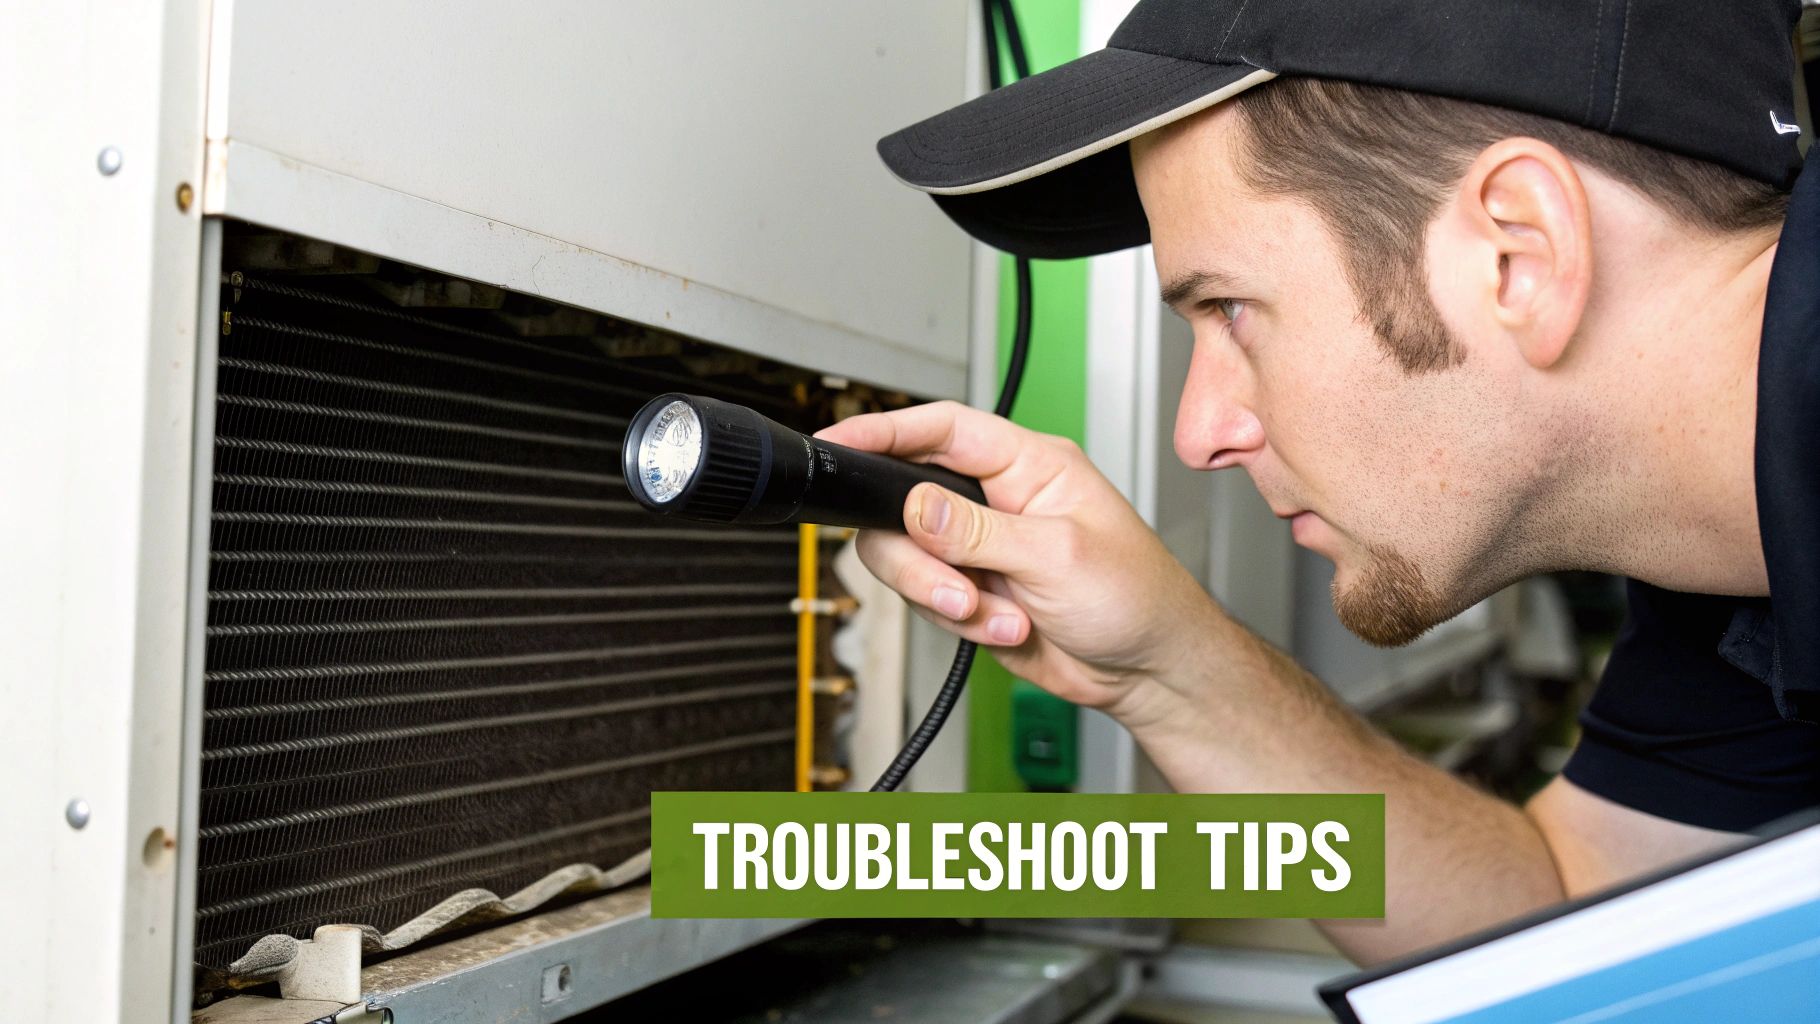
How to Troubleshoot Common Cooler Problems
Even the best-maintained walk-in cooler can have an off day. Before you hit the panic button and call for an emergency repair, it's worth knowing how to diagnose a few of the most common symptoms yourself.
Playing first responder can often solve minor hiccups on the spot. At the very least, you’ll be able to give a technician the exact info they need to fix things faster. Think of this as your practical first-aid kit for those moments of dread.
Issue One: The Temperature Is Too High
A warm walk-in is an immediate, inventory-threatening crisis. Before you pick up the phone, run through these quick checks—the culprit is often simpler than you think.
First, check the thermostat. Has it been bumped or accidentally changed? It happens more than you'd believe. Next, make sure the door was fully closed and is sealing properly. A small gap left open overnight is all it takes for the temperature to climb.
Try the dollar bill test. Close the door on a dollar bill and try to pull it out. If it slides out with zero resistance, your gasket is worn and letting warm air seep in. This is a super common and easily fixable cause of temperature problems.
Finally, take a look inside. Is inventory stacked right up against the evaporator fans? That will block airflow and stop the unit from cooling properly.
Issue Two: Excessive Ice Buildup on Coils
If you see a thick layer of frost or solid ice coating your evaporator coils, that's a major red flag. This ice acts like an insulator, preventing the coil from absorbing heat and chilling the air. It’s a sure sign your defrost cycle isn't doing its job.
Your first move is to kick off a manual defrost cycle. Most modern units have a button or setting for this. If the ice melts away and doesn't return right away, it might have just been a temporary glitch.
But if that ice comes roaring back within a day or two, you've got a more persistent problem. Common causes include:
- A faulty defrost timer: The system might not be entering the defrost cycle on schedule.
- A burned-out defrost heater: The component that's supposed to melt the ice may have failed.
- A malfunctioning termination thermostat: This sensor tells the heater when to turn off. If it's broken, the cycle might not run long enough—or at all.
A manual defrost can get you through a shift, but recurring ice almost always points to a component failure that needs a pro. Ignoring it will tank your cooling efficiency and could lead to serious compressor damage.
The need for precise temperature control is a huge driver in the refrigeration industry, a market valued at around USD 10 billion in 2023. Units designed for the 20°F to 28°F range hold a massive 35% market share, showing just how vital consistent performance is for food safety. You can dive deeper into the walk-in cooler market from industry analyses to see these trends for yourself.
Issue Three: The Compressor Makes Strange Noises
You know the familiar hum of your compressor kicking on and off. When that sound changes to something alarming—like a loud clank, a grinding noise, or a constant high-pitched buzz—it’s time to listen up.
A buzzing or humming sound where the compressor tries to start but can't could point to a bad start relay or capacitor. For a technician, this is a relatively common and inexpensive fix.
On the other hand, a loud grinding or clanking sound is much more serious. This can signal an internal mechanical failure, like a broken piston or shot bearings. If you hear this, shut the power off immediately to prevent more damage and get a pro on the phone.
Issue Four: Water Pooling on the Floor
Finding a puddle of water by your walk-in door is annoying, but it's usually a manageable problem. More often than not, the issue is a clogged condensate drain line.
This little pipe is designed to carry away moisture that condenses on the evaporator coil. Over time, it can get gunked up with slime, mold, and other debris. When that happens, the water backs up and spills onto your floor.
Here’s how to check it out:
- Find the Drain Line: Look for the PVC or copper pipe leading away from the evaporator unit.
- Inspect for Blockages: Check the end of the line for any obvious clogs.
- Try to Clear It: If you can get to it safely, using a wet/dry vac on the end of the line can often suck the blockage right out. Forcing compressed air through it can also work, but be gentle.
If you can't clear it or the leak continues, you might have a cracked drain pan or a more serious internal issue that needs an expert eye. Either way, deal with it quickly to prevent slip hazards and water damage.
Knowing When to Call a Refrigeration Professional
Every smart business owner knows the limits of DIY. While you should absolutely handle routine cleaning and some basic troubleshooting as part of your walk in cooler maintenance plan, knowing when to put the tools down and call a certified technician is just as crucial.
Trying to tackle complex repairs without the right training isn't just a gamble—it's a serious risk to your equipment, your inventory, and even your team's safety. Think of that professional service call as an insurance policy against a complete meltdown. It's a small investment that stops a minor hiccup from turning into a full-blown emergency that costs you thousands in spoiled product. The key is recognizing the red flags.
Red Flags That Demand an Expert
Some symptoms are way beyond a simple fix. If you see, hear, or smell any of these, your next move should be to pick up the phone and call a pro. Don't wait.
- A Constantly Tripping Circuit Breaker: This is a huge warning sign of a serious electrical issue, maybe a short in the wiring or a compressor pulling way too much power. Resetting it over and over is a fire hazard, plain and simple.
- Hissing Sounds and Oily Residue: This combo is the classic signature of a refrigerant leak. Handling refrigerant requires specialized tools and an EPA certification—this is absolutely not a DIY job.
- Compressor Buzzes but Won't Start: Hear the compressor hum or buzz but it never actually kicks on? That often points to a fried capacitor or relay. These are electrical parts that need a professional to diagnose and replace safely.
- Rapid, Unexplained Temperature Spikes: If your cooler suddenly can't hold its temp, and you know the coils are clean and the door seal is good, you're looking at a deeper system failure.
The Real Cost of DIY Repairs
Trying to fix complex electrical or refrigerant systems yourself is a high-stakes game. Not only is it dangerous, but it can also instantly void your manufacturer's warranty. That leaves you on the hook for the full cost of a new compressor or, even worse, a whole new unit.
Let's be real, the financial side of walk-in cooler ownership is already a challenge. Maintenance and operational costs can make up 20-30% of the total lifecycle expense. Investing in professional service is how you prevent even more painful, expensive breakdowns. You can dig deeper into the economic impact of walk-in cooler maintenance and see for yourself why these smart investments pay off.
Calling a professional isn't admitting defeat; it's making a strategic business decision. Their diagnostic tools and experience can nail down the root cause of a problem in minutes. A DIY attempt could just lead to more damage and keep you shut down longer.
When you invest in a walk-in cooler, you're also investing in its long-term care. Just like with your other critical equipment, understanding where maintenance ends and repair begins is vital. For some related insights, check out our guide on expert commercial freezer repair and maintenance. At the end of the day, a trusted technician is a key partner in protecting your most valuable assets.
Frequently Asked Questions
Even with a detailed maintenance plan, real-world questions always pop up. Walk-in coolers have a lot of moving parts, and it’s totally normal to run into specific situations that need a straight answer. Here are some of the most common questions we get from restaurant owners, with straightforward advice to help you manage your cooler with confidence.
How Cold Should My Walk In Cooler Actually Be?
This is the big one. Your walk-in cooler absolutely must be kept at or below 40°F (4.4°C) to guarantee food safety. No exceptions.
That said, the sweet spot is actually a bit colder—somewhere between 35°F and 38°F (1.6°C to 3.3°C). This lower range gives you a crucial safety buffer, helping keep your inventory safe even when the door is swinging open during a chaotic dinner rush.
A quick pro tip: never trust the external digital display alone. Always have a calibrated thermometer hanging inside the unit, away from the door, to get a true reading of the temperature where your food is actually stored.
What Is That Puddle of Water on the Floor?
Finding a puddle of water on the floor is always a bit alarming, but don't panic. It's rarely a sign of total system failure. More often than not, the culprit is a clogged condensate drain line. This little line is designed to whisk away moisture from the evaporator coils, but it can get gunked up with slime and debris over time. When that happens, the water has nowhere to go but out onto your floor.
- Quick Fix: You can often clear the blockage yourself. Just use a wet/dry vacuum at the end of the drain line to suck out the gunk.
- When to Call a Pro: If you can't get it cleared, or if the puddle stubbornly returns, you might be dealing with a cracked drain pan or a frozen line. That's a job for a technician.
A persistent puddle isn't just a nuisance; it's a serious slip-and-fall hazard for your staff. Tackling the root cause right away is critical for keeping everyone safe and preventing water damage to your cooler's flooring and panels.
How Often Should I Have My Cooler Professionally Serviced?
Even if you're on top of your in-house maintenance checklist, you absolutely need a pro to give your unit a thorough inspection. We strongly recommend scheduling professional service at least twice a year. Think of it as a wellness check for one of the most vital pieces of equipment in your entire operation.
A technician does a lot more than just a deep clean. They perform critical tasks that require specialized tools and real expertise.
- Check Refrigerant Levels: Low refrigerant is a classic sign of a leak and will torpedo your cooler's performance. A technician can safely test the pressure and patch up any leaks.
- Inspect Electrical Components: They'll tighten connections, test capacitors, and check relays to head off electrical failures and potential fire hazards.
- Calibrate Defrost Controls: Making sure the defrost cycle is running correctly is key to preventing the kind of ice buildup that can bring your whole system to its knees.
A semi-annual service plan is one of the smartest investments you can make. It stops minor issues from blowing up into a middle-of-the-night emergency that costs you thousands in spoiled inventory.
Can I Use Any Cleaner Inside My Walk In Cooler?
Absolutely not. This is a mistake you don't want to make. Using the wrong chemicals can cause serious, irreversible damage to your cooler. Harsh cleaners that contain ammonia or chlorine will corrode the aluminum and stainless steel surfaces, leading to rust and pitting. This doesn't just look bad; it creates tiny crevices where bacteria can hide and thrive.
Always stick with a food-safe, non-corrosive sanitizer that is specifically formulated for refrigeration units. If you're ever in doubt, check the manufacturer's guidelines for your specific walk-in cooler model. Protecting the interior surfaces of your unit is a huge part of long-term maintenance.
At The Restaurant Warehouse, we understand that reliable equipment is the backbone of your business. Whether you need a new walk-in cooler, expert advice on maintenance, or flexible financing to upgrade your kitchen, we're here to help. Equip your kitchen for success and explore our full range of commercial refrigeration solutions at https://therestaurantwarehouse.com.
About The Author

Sean Kearney
Sean Kearney used to work at Amazon.com and started The Restaurant Warehouse. He has more than 10 years of experience in restaurant equipment and supplies. He graduated from the University of Washington in 1993. He earned a BA in business and marketing. He also played linebacker for the Huskies football team. He helps restaurants find equipment at a fair price and offers financing options. You can connect with Sean on LinkedIn or Facebook.
Leave a comment