


Setting up a restaurant kitchen: A practical guide
Setting up a restaurant kitchen is about so much more than just buying shiny new equipment. It's about designing a strategic workflow—a system that dictates your speed, safety, and ultimately, your profitability. A high-efficiency layout cuts down on wasted steps and shrinks ticket times, creating a seamless flow from the moment a delivery arrives to when a finished plate hits the service window.
Designing a High-Efficiency Kitchen Layout
The heart of your restaurant's success beats in the kitchen. A well-designed layout isn't just a floor plan; it’s the strategic system that dictates your team's efficiency and your restaurant's bottom line. Forget abstract theories. The real goal is to design a kitchen that works for your specific menu and service style.
This all starts with mapping your menu directly to your kitchen's flow. You'll create practical zones that follow the natural journey of food from raw ingredient to finished dish.
- Receiving: Where do ingredients come in? This area needs to be a straight shot from the back door and close to storage. The last thing you want is someone hauling a 50-pound sack of potatoes through a busy cook line.
- Storage: Cold and dry storage should be placed logically. Those heavy, frequently used items—like sacks of flour or cases of oil—belong near the prep area, not tucked away in a distant corner.
- Preparation: This zone needs distinct areas for washing, chopping, and mixing. Spacing is everything here. It prevents cross-contamination and gives your chefs the elbow room they need to work safely and effectively.
- Cooking: The cook line is the main event. You'll want to arrange your equipment based on the cooking sequence to create an ergonomic and efficient "hot line."
- Service: The final plating and expo area needs a clear, unobstructed path to the dining room. This ensures dishes get to your customers quickly and at the perfect temperature.
Matching Layout to Your Concept
There's no such thing as a one-size-fits-all kitchen design. Your concept dictates the entire flow. A high-volume pizza joint, for instance, thrives on a linear "assembly line" layout where dough moves logically from proofing to toppings to the oven. A fine-dining spot, on the other hand, might use a multi-station "brigade" system, allowing specialized chefs to work in parallel on complex dishes.
The growth we're seeing in the foodservice industry really underscores the need for this kind of efficiency. The global commercial kitchen equipment market was valued at around USD 98.34 billion and is projected to hit USD 149.34 billion by 2030. That expansion reflects a rising demand for operations that can handle higher volumes without letting quality slip.
This diagram breaks down the core process: your menu choices directly influence your layout design, which in turn defines your kitchen’s operational flow.
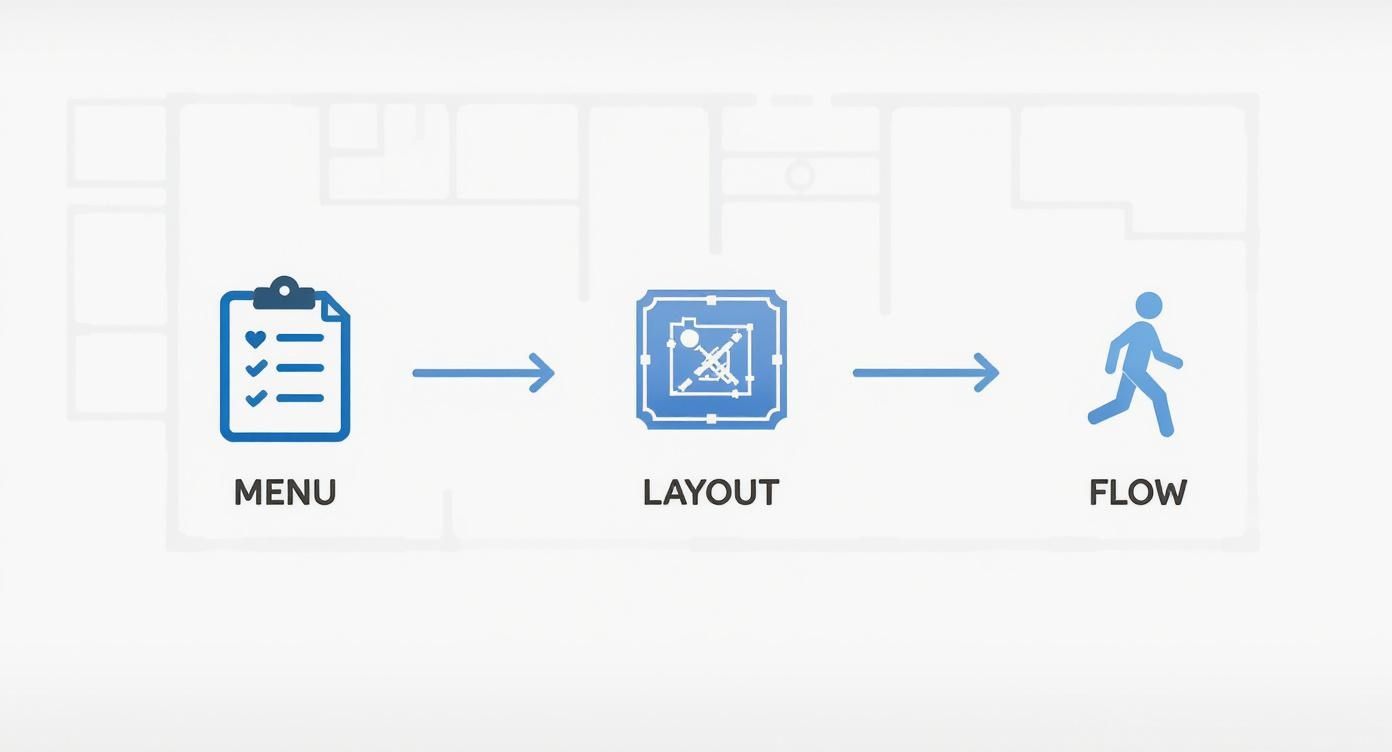
As you can see, a successful kitchen starts long before you ever buy a single piece of equipment. It begins with a thoughtful analysis of what you're actually going to cook. This foundational step ensures every appliance and every square foot of space serves a distinct purpose, maximizing your investment and your operational capacity.
Choosing the right layout is one of the most foundational decisions you'll make. It impacts everything from staff stress levels to how quickly you can turn tables. To help you visualize the options, here’s a breakdown of the three most common layouts.
Comparing Common Commercial Kitchen Layouts
| Layout Type | Ideal For | Key Advantages | Potential Drawbacks |
|---|---|---|---|
| Assembly Line | Quick-service, pizza places, concepts with linear prep | Maximizes speed and efficiency for specific tasks; easy to train staff. | Inflexible; not suited for complex or diverse menus. |
| Island | Large kitchens, fine dining, concepts with a head chef | Creates a central command post for the chef; promotes communication and supervision. | Can be inefficient for larger teams; requires significant floor space. |
| Zone-Based | Most full-service restaurants, hotels, large operations | Highly organized by station (grill, fry, sauté); allows for specialization. | Can create silos; requires good communication between zones to sync orders. |
Each of these layouts has its place. The key is to be honest about your menu, your volume, and your team structure to pick the one that will make service feel like a well-choreographed dance instead of a chaotic scramble.
Optimizing Kitchen Workflow
Optimizing your workflow really just means minimizing the number of steps an employee takes to get a task done. Think of it as choreographing a performance where every movement is purposeful and efficient.
A cook shouldn't have to walk clear across the kitchen to grab a pan or circle around a poorly placed prep table to get to the fryer. Every extra step is wasted time and energy.
A great kitchen design is invisible to the customer but felt by the staff. It reduces stress, prevents accidents, and makes the difference between a chaotic service and a smooth one.
If your project involves converting an existing structure, checking out real-world examples like remodeling an office space into a restaurant can offer some incredibly valuable insights. Seeing how others have solved spatial challenges can spark great ideas for your own design.
Ultimately, a logical flow creates a safer, less chaotic environment and lays a rock-solid foundation for your culinary operations. For a deeper dive into specific configurations, check out our guide on commercial kitchen layout and design, which explores various models in detail. By focusing on a menu-driven design, you build a kitchen that not only supports your team but also drives your business forward.
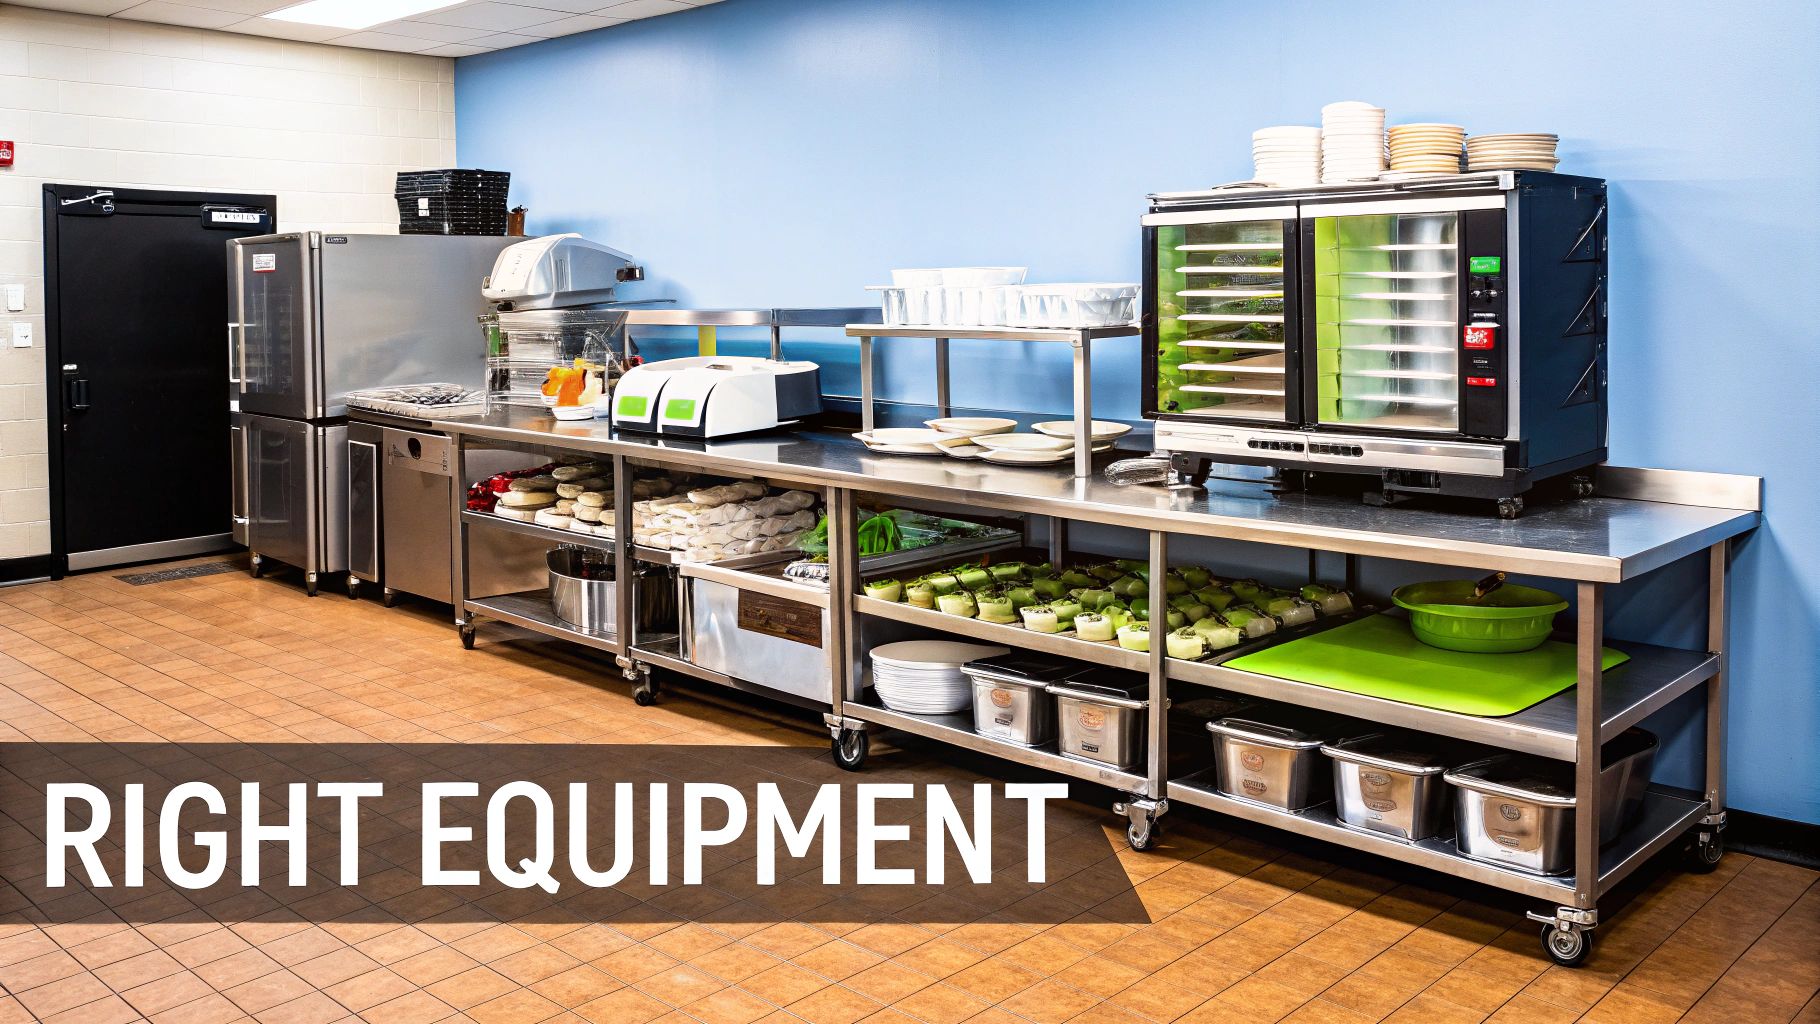
Equipping Your Kitchen for Peak Performance
Alright, let's talk about one of the biggest financial decisions you'll make when setting up your kitchen: the equipment. This isn't just about buying shiny stainless steel; you're investing in the absolute engine of your entire restaurant. The right gear empowers your crew to execute your menu flawlessly, while the wrong choices will create bottlenecks, spike your utility bills, and flat-out limit what you can do.
Think of this as your practical purchasing guide. Forget the glossy catalogs for a minute—your real starting point is your menu and how many customers you expect to serve. Those two things dictate everything else.
The Cook Line Workhorses
Your cook line is where the magic happens, and it demands equipment that can handle the heat—literally. This is where you should expect to allocate a major chunk of your budget.
A six-burner range with an oven below might be the iconic heart of a kitchen, but is it what you need? If your menu is heavy on pan-seared dishes and sautés, absolutely. But if you’re a high-volume burger joint, a big flat-top griddle is going to be your best friend. Always think about your top-selling items and equip for them first.
- Ranges and Ovens: A convection oven is a must-have for its fast, even baking—essential for bakeries or any spot with lots of roasted dishes. A combi-oven, which uses both convection and steam, is a game-changer for precision cooking. You can get perfect results on everything from delicate fish to roasted vegetables.
- Fryers: Don't just grab a standard deep fryer. Think capacity. A small café might get by with a countertop model, but if you're famous for your fish and chips, you’ll need multiple high-capacity floor units to survive a dinner rush.
- Grills and Griddles: Your menu is the boss here. Charbroilers give you that classic smoky flavor for steaks and burgers. Griddles, on the other hand, are versatile workhorses for breakfast, sandwiches, and searing just about anything.
A classic rookie mistake is buying standard-duty equipment for a heavy-duty job. That light-duty slicer might be cheaper today, but it won't survive a single month in a busy deli. Invest in equipment rated for your actual volume to avoid costly downtime and replacements.
Refrigeration and Storage: The Unsung Heroes
Solid refrigeration and storage are completely non-negotiable for food safety and managing your inventory. Without reliable cold storage, you're just throwing money away on spoiled ingredients.
You'll probably need a mix of units: reach-in coolers right on the line, walk-in coolers for your bulk storage, and under-counter units for easy access at each station. A low-boy refrigerator is a brilliant multi-tasker, giving you cold storage right under a prep surface.
When it comes to dry storage, think vertically. Stainless steel shelving is durable, a breeze to clean, and lets you maximize every inch of space. Get in the habit of using a FIFO (First-In, First-Out) system from day one.
Ventilation and Warewashing: The Foundation of Safety
A kitchen without proper ventilation isn't just uncomfortable; it's dangerous and illegal. Your ventilation hood system has to be sized correctly for the equipment under it to pull out all that smoke, grease, and heat. This is a major installation, so it’s critical to get it right and make sure it meets local fire codes.
An efficient warewashing station is just as crucial. A three-compartment sink is a must for washing, rinsing, and sanitizing. For higher volumes, a commercial dishwasher is non-negotiable. Look for high-temperature models that sanitize with hot water or low-temperature ones that use chemical sanitizers, depending on your local health codes and utility costs.
A Real-World Example: A 75-Seat Bistro
Let’s make this tangible. Imagine you’re opening a 75-seat bistro with a menu focused on seasonal American food—some roasted dishes, pan-seared proteins, fresh salads, and a really popular fried appetizer.
Here’s a sample equipment list and why it makes sense:
- Cook Line: One six-burner range with a convection oven (for searing and baking versatility), a 36-inch flat-top griddle (for brunch and searing), and a two-basket floor fryer (to handle that popular appetizer).
- Refrigeration: A walk-in cooler for bulk items, two reach-in refrigerators for the line, and one low-boy prep table refrigerator.
- Prep: Two stainless steel prep tables, a commercial stand mixer, and an immersion blender.
- Warewashing: A three-compartment sink and a high-temp passthrough dishwasher to power through dinner service rushes.
This setup balances capability with cost, giving you the tools you need without overspending on gadgets you’ll barely use. To help build out your own list, you can reference a detailed commercial kitchen equipment checklist to make sure you don't miss anything important.
The capital needed for all this is significant, and it reflects a global trend. Around 12.4 million units of commercial kitchen equipment were sold worldwide in 2023, a big jump from 10.8 million units in 2021. Cooking equipment leads the market, making up about 27.5% of total revenue, which shows you where operators are focusing their investments. You can find more insights on the expanding foodservice industry on ResearchAndMarkets.com.
Getting Your Hands on the Right Equipment and Installing It
Alright, you've mapped out your kitchen layout and have a solid equipment list. Now for the exciting part: turning that blueprint into a real, working kitchen. How you choose to get your equipment and set it up is a huge deal. These decisions will hit your budget, your opening timeline, and how smoothly things run day-to-day. It’s a stage where you’ll be making some serious practical trade-offs.
The first big question is how you're going to acquire everything. Each route has different financial implications, and the best path really boils down to your starting capital and how much risk you're comfortable with.
- Buying New: This is the most straightforward way to go. You get shiny, new equipment with a full manufacturer's warranty. The upfront cost is definitely the highest, but you're paying for reliability, the latest energy efficiency, and the peace of mind that comes with knowing you’re covered if something goes wrong.
- Buying Used: Going the pre-owned route can seriously slash your initial costs, sometimes by 50% or more. But it’s not without its risks. You're often buying gear "as-is" with no warranty, and you could be inheriting someone else’s maintenance nightmare.
- Leasing: Leasing has the lowest barrier to entry, financially speaking. You'll have minimal upfront cash outlay and predictable monthly payments, which is great for preserving capital for other essentials. The trade-off is that you'll pay more in the long run and won't own the equipment at the end of the term.
The Art of Buying Used Equipment
If you decide to dive into the used market, you need to put on your inspector's hat. A fantastic deal on a second-hand range is no deal at all if it conks out during your grand opening. Before you even think about putting money down on a pre-owned piece, give it a thorough once-over.
- Inspect for Physical Damage: Look for any major rust, deep dents, or cracks that could mess with performance or make it a sanitation nightmare. Check that doors form a tight seal and that all the knobs, handles, and legs are secure.
- Test the Core Functionality: If you can, plug it in or get it hooked up to a gas line. Does the oven actually heat up to the right temperature? Do all the burners light up properly? For a fridge or freezer, does it get cold quickly and hold its temp?
- Check for Professional Repairs: Look for signs that it's been worked on before. Are there mismatched parts or wiring that looks like a DIY project? These can be red flags for chronic problems.
- Verify Model and Age: Grab the model and serial number. A quick online search can tell you how old the unit is and, more importantly, if you can still find parts for it.
Buying used is a calculated risk. Your mission is to find a reliable workhorse, not a ticking time bomb. If a deal feels too good to be true, it probably is. Trust your gut—if something feels off, walk away.
Navigating the Installation Maze
Getting the equipment is only half the battle. Installing it correctly is where a lot of new restaurant owners get tripped up. A poorly planned installation can lead to expensive delays, failed inspections, and even serious safety hazards. The secret is to get your skilled tradespeople lined up and on the same page well in advance.
The entire process of setting up a restaurant kitchen hinges on your building's existing infrastructure. You absolutely have to confirm that your utility hookups—gas, electric, and plumbing—can handle the demands of your shiny new equipment.
Planning Your Utility Hookups
Before a single piece of equipment arrives, you need a detailed utility plan. This means mapping out the specific needs for every single item on your list and making sure your building can deliver. For example, that high-powered convection oven will need a specific voltage and amperage, while a commercial gas fryer requires a properly sized gas line and the right ventilation.
Work with your general contractor, an electrician, and a plumber to create what’s called a "rough-in" plan. This is a blueprint that marks the exact spot for every electrical outlet, gas valve, and water line. Nailing this from the start saves you from the nightmare of having to tear open walls or floors later on.
Ultimately, good coordination is everything. Your installation schedule should be baked right into your overall construction timeline. Communicate clearly with your contractors, and make sure they have the spec sheets for every piece of equipment. This ensures they know exactly what's needed for a smooth, code-compliant installation, keeping your project moving forward and avoiding the kind of delays that can derail an opening. Choosing the right partners is crucial, so take the time to find reputable commercial kitchen equipment suppliers who can guide you through both the buying and installation process.
Meeting Health Codes and Safety Standards
You can have the most brilliant kitchen design and the shiniest new equipment, but none of it matters if you can’t pass your health and safety inspections. For many new restaurant owners, navigating the tangled web of local codes and regulations is the most stressful part of the whole process. But it doesn't have to be.
The best way to think about these rules isn't as obstacles, but as a blueprint. They’re the foundation for building a genuinely safe environment for your staff and, of course, your customers. Passing your inspections starts by weaving food safety into your design from day one. This goes way beyond just wiping down counters; it's about creating a space where the safest way to work is also the easiest.

Core Systems That Inspectors Scrutinize
When health and fire inspectors walk through your kitchen, their eyes are immediately drawn to specific, critical systems. Your ventilation and fire suppression setups, in particular, will be under a microscope—and for good reason. They are your number one defense against grease fires, a constant and serious risk in any commercial kitchen.
Your ventilation hood needs to be properly sized for the cooking line beneath it and installed by a certified pro. Likewise, the fire suppression system, which is often integrated right into the hood, must meet strict codes, with nozzles aimed directly at high-risk spots like your fryers and griddle.
- Ventilation: Make sure your Type 1 hood (the one for grease-producing appliances) has the right CFM (cubic feet per minute) rating to effectively pull smoke, heat, and grease out of the air.
- Fire Suppression: The system needs the correct chemical agent for grease fires (usually a wet chemical system) and must be inspected and certified regularly.
- Emergency Exits: Every exit path has to be clearly marked and completely unobstructed. No exceptions. Don't let your staff store boxes or equipment in hallways, ever.
Designing for Food Safety and Hygiene
A truly safe kitchen is one designed to stop contamination before it even has a chance to start. This comes down to making smart choices about your surfaces, your layout, and where you place essential hygiene stations.
When it comes to surfaces, stainless steel is the undisputed king of the commercial kitchen. It’s non-porous, which means it won’t harbor bacteria, and it's tough enough to handle constant cleaning with harsh chemicals. All your prep tables, counters, and shelves should be made from food-grade stainless steel.
A common rookie mistake is overlooking the tiny details that inspectors love to find. One of their favorites is coving—the curved, sealed edge where the floor meets the wall. This small feature prevents dirt and grime from building up in sharp corners, making the entire kitchen easier to deep-clean and sanitize.
Your workflow is also a huge factor in preventing cross-contamination. Your layout has to create a clear, physical separation between areas for raw food prep and those for cooked food. For example, the station where you're breaking down raw chicken should never be right next to the area where you’re plating finished salads. This kind of logical separation is a cornerstone of safe kitchen design.
Strategic Placement of Essential Stations
Beyond the surfaces, the location of your key stations plays a massive role in day-to-day hygiene. Hand-washing sinks are a perfect example. They absolutely must be separate from your food prep and dishwashing sinks, and they need to be ridiculously convenient.
An inspector wants to see a cook turn from their station, wash their hands, and get back to work without taking a dozen steps or crossing through a dirty area.
- Hand-Washing Sinks: You need dedicated hand sinks in prep and cooking areas, always stocked with soap, hot water, and single-use paper towels.
- Dishwashing Area: A three-compartment sink (for washing, rinsing, and sanitizing) is a universal requirement. The flow here should be logical: dirty dishes come in one side, and clean dishes exit the other, preventing any re-contamination.
The standards for these setups are influenced by broader trends in the hospitality world. As the commercial kitchen appliances market grows, driven by global tourism and dining, kitchens are pushed to adopt multifunctional equipment that can handle diverse menus while still meeting strict local health codes. You can learn more about these market dynamics on the IMARC Group's website.
By understanding these regulations and building them into your plan from the very beginning, you can pass your inspections with confidence and establish a culture of safety from the moment you open your doors.
Creating Your Kitchen Budget and Timeline
Alright, let's get down to the brass tacks. Turning that kitchen dream into a working reality comes down to two documents: your budget and your timeline. Get these right, and you've got a solid roadmap. Get them wrong, and you're in for a world of hurt.
A detailed financial plan is non-negotiable. Without one, costs can spiral out of control faster than you can say "grand opening." I’ve seen it happen time and again. A first-time owner budgets for that beautiful six-burner range but completely forgets about the installation fees, the contractor’s time, or the mountain of smallwares needed just to make that one station functional.
Building a Bulletproof Kitchen Budget
Think of your budget as a living, breathing document, not something you create once and shove in a drawer. It needs to account for every single cost, from the big-ticket appliances right down to the spatulas and shelves that always get overlooked. A classic mistake is underestimating the "soft costs"—permits, architectural fees, professional consultations—which can easily tack on a significant percentage to your total spend.
To sidestep these common traps, break your budget into clear categories. Using percentages is a great way to guide your spending and make sure one area doesn't eat up all your capital before you’ve even started.
Here’s a practical breakdown I often share with clients to help them visualize where the money goes and avoid those nasty surprises.
Sample Kitchen Setup Budget Allocation
| Category | Estimated % of Total Budget | Examples of Items |
|---|---|---|
| Major Cooking Equipment | 35-45% | Ovens, ranges, fryers, grills, ventilation hoods |
| Refrigeration & Storage | 15-20% | Walk-in coolers, reach-in freezers, prep tables, shelving |
| Installation & Utilities | 10-15% | Plumbing, gas lines, electrical work, contractor fees |
| Warewashing & Sanitation | 5-10% | Dishwashers, three-compartment sinks, hand sinks |
| Smallwares & Prep Tools | 5-10% | Pots, pans, knives, cutting boards, mixing bowls, utensils |
| Contingency Fund | 10% | For unexpected costs, delays, or necessary upgrades |
Take a close look at that last line: 10% for a contingency fund. This is the most important part of your budget. I promise you, no matter how meticulously you plan, something unexpected will happen. A pipe bursts, a permit gets delayed, a piece of equipment arrives damaged. This buffer is what prevents a minor setback from turning into a full-blown financial crisis.
Mapping Your Project Timeline
With your budget locked in, it's time to build a realistic timeline. In this business, time is literally money. Delays in construction, permitting, or equipment delivery will burn through your cash reserves faster than anything else. A detailed timeline is your best defense, helping you see bottlenecks before they happen and coordinate all the moving parts.
The best way to do this is to work backward from your target opening date. This approach forces you to set firm deadlines for each major phase.
-
Design & Permitting (4-8 weeks): This is where you finalize the kitchen layout with an architect and submit plans to the city. The permitting process can be notoriously slow, so build in extra time here. Seriously, add a week or two more than you think you need.
-
Construction & Utility Rough-In (6-10 weeks): Once you have permits in hand, your contractors can get to work. This phase covers framing, drywall, and—most critically—installing the electrical, plumbing, and gas lines your equipment will need.
-
Equipment Delivery & Installation (2-3 weeks): You'll need to coordinate with suppliers to have equipment delivered just as the main construction wraps up. Installation requires careful scheduling with plumbers, electricians, and certified technicians for each piece.
-
Inspections (1-2 weeks): After everything is installed, it’s time for the final hurdles. You'll need to schedule and pass a series of inspections, including health, fire, and building safety.
-
Staff Training & Final Prep (1 week): This is the final push. Your team comes in to learn the new kitchen, stock inventory, and get everything prepped for opening day.
Your timeline is a management tool, not just a calendar. Use it to hold your contractors, suppliers, and yourself accountable to deadlines. Consistent communication is the key to keeping your project on track and on budget.
As you map out your financial strategy, it can be incredibly helpful to understand the typical cost to open a cafe or a similar foodservice business. While every concept has its unique costs, these benchmarks provide a valuable reality check for your own planning. By meticulously planning both your finances and your schedule, you’re not just hoping for a successful launch—you’re building the foundation for one.
Common Questions We Hear All the Time
Getting a new restaurant kitchen off the ground is a huge undertaking, and it's totally normal for a million questions to pop up. Beyond the big-ticket items like your six-burner range or the walk-in, it’s often the smaller, practical details that cause the most stress. We get these questions all the time from new owners, so let's clear the air on a few common ones.
Can I Just Use Residential Equipment to Save Some Cash?
This is easily one of the most tempting shortcuts people consider, but the answer is a hard no. I get it, you see a home oven that looks similar to a commercial one for a fraction of the price. But here's the reality: it’s not built for the relentless, day-in-day-out punishment of a restaurant kitchen. Commercial gear is designed for constant, high-volume use and is almost always made from stainless steel for a reason—it's durable and easy to sanitize.
Even more critical is the fact that using residential appliances is a surefire way to fail your health and fire inspections. They don't have the necessary safety certifications (like an NSF rating), which will not only get you shut down but could also void your insurance policy. It's a classic rookie mistake that puts your entire investment on the line.
What's the Real Difference Between a Ghost Kitchen and a Virtual Kitchen?
People throw these terms around interchangeably, but they're actually two distinct business models. Nailing down the difference is pretty important when you're mapping out your business plan.
- Ghost Kitchen: Think of this as a cooking facility built only for delivery. There's no dining room, no storefront, no public access. Often, you'll find multiple restaurant concepts, sometimes from totally different owners, all operating out of one shared ghost kitchen space.
- Virtual Kitchen: This is a delivery-only brand that operates out of an existing restaurant's kitchen. It’s a clever way for an established spot to launch a whole new concept and tap into a new customer base using the staff and equipment they already have. It's an extra revenue stream with almost no startup cost.
How Much Should I Actually Budget for Smallwares?
It's so easy to get fixated on the big, shiny equipment and completely forget about the small stuff. Underestimating your smallwares budget is a classic error. We're talking about all the non-mechanical tools your cooks need every single day: pots, pans, knives, cutting boards, mixing bowls, whisks, tongs, and storage containers.
A solid rule of thumb is to set aside 5% to 10% of your total kitchen budget just for smallwares. So, if you're planning a $150,000 kitchen build-out, that means you need at least $7,500 for these essential tools. Skimping here only bottlenecks your kitchen and frustrates your team.
Do I Really Need to Hire a Kitchen Design Consultant?
While it’s not a legal requirement, bringing on an experienced kitchen design consultant can be one of the smartest moves you make. These pros live and breathe local health codes, workflow efficiency, and the nitty-gritty technical specs for equipment installation. They’re the ones who can stop you from making a thousand-dollar mistake, like designing a layout that creates a permanent traffic jam or forgetting to plan for proper ventilation.
Honestly, their expertise usually pays for itself. They optimize your space, help you sail through inspections on the first try, and make sure you're buying the right equipment for your menu and volume—preventing you from overspending. Think of them less as a cost and more as a strategic partner in setting up a restaurant kitchen that’s built for success.
No matter what questions come up along the way, having the right partner makes all the difference. At The Restaurant Warehouse, we don't just sell equipment; we provide the expertise to help you build a functional, efficient, and compliant kitchen from the ground up. Check out our huge selection of commercial-grade equipment and flexible financing options at https://therestaurantwarehouse.com.
About The Author

Sean Kearney
Sean Kearney is the Founder of The Restaurant Warehouse, with 15 years of experience in the restaurant equipment industry and more than 30 years in ecommerce, beginning with Amazon.com. As an equipment distributor and supplier, Sean helps restaurant owners make confident purchasing decisions through clear pricing, practical guidance, and a more transparent online buying experience.
Connect with Sean on LinkedIn, Instagram, YouTube, or Facebook.