

Mastering Commercial Ice Machine Cleaning
Proper ice machine cleaning is one of those non-negotiable tasks in any food service business. It’s something that directly impacts customer safety, your operational costs, and, maybe most importantly, your brand's reputation. Let's be honest, neglecting this crucial piece of maintenance is a fast track to slime buildup, health code violations, and expensive equipment failure.
Why Ice Machine Cleaning Is a Business Imperative

It’s way too easy to see the ice machine as a quiet workhorse that just does its job in the corner. That is, until it breaks down during a dinner rush or a customer finds something unpleasant floating in their drink. The hard reality is that a dirty ice machine is a silent threat to your entire operation. This isn't just about making clean ice; it's about protecting your business from some very real, and very avoidable, risks.
The Real Cost of Neglect
Ignoring your ice machine cleaning schedule can spiral into consequences far worse than just cloudy cubes. The constantly damp, cool environment inside an ice maker is the perfect breeding ground for mold, slime, and nasty bacteria like E. coli and Salmonella.
A surprise health inspection that turns up slime or biofilm can lead to immediate fines or even a temporary shutdown. Beyond the financial hit, the damage to your reputation can be irreversible, especially in an age of instant online reviews. A single negative post about dirty ice can scare off countless potential customers and spark a PR crisis that takes months to fix.
Think of proactive cleaning not as an expense, but as an insurance policy against these kinds of damaging outcomes.
From Preventable Problem to PR Nightmare
Consider this real-world scenario: a busy downtown café prides itself on artisanal coffee and a top-notch customer experience. Over a few hectic months, the deep cleaning for their ice machine gets pushed back again and again. Eventually, a customer posts a picture online showing black specks in their iced latte, which was traced right back to mold in the ice machine.
The post quickly went viral in local food groups, forcing the café to issue a public apology and close for two full days for a complete sanitization. The fallout included lost revenue, an emergency service call, and a huge blow to their carefully built brand. This entire crisis could have been prevented with a routine cleaning that costs a tiny fraction of the aftermath.
This story really drives home that routine maintenance is a critical investment. The industry is responding to these concerns, too. The global ice maker market, valued at $5.3 billion, is projected to hit $7.4 billion by 2033. Much of that growth is driven by demand for machines with automated cleaning cycles and UV-light sanitation systems. You can read more about these ice maker market trends.
This shift just underscores how important hygiene and efficiency have become. Regular ice machine cleaning isn’t just a chore—it’s a core business function.
Your Essential Ice Machine Cleaning Toolkit
Trying to clean a commercial ice machine without the right gear is a recipe for disaster. It’s like a chef trying to prep for dinner service without any knives. You absolutely need a specific set of tools to get the job done right—and safely.
Getting everything together before you start is a pro move. It saves you from that frustrating mid-clean scramble to find a brush or the sudden realization that you're out of sanitizer. This isn't just about making your life easier; it's about protecting a very expensive piece of equipment and ensuring a food-safe result. Using the wrong stuff can cause serious damage or leave behind nasty chemical residues.
Choosing Your Cleaning Agents
The chemicals are the most critical part of your toolkit, and this is where people make some expensive mistakes. You need two very different products, and they are not interchangeable.
- A Nickel-Safe Ice Machine Cleaner: This is your descaler. Its whole job is to dissolve mineral buildup (that chalky white scale) without eating away at the sensitive, nickel-plated evaporator plates. Using a generic descaler can permanently etch these parts, leading to terrible ice production and, eventually, a dead machine.
- An NSF-Certified Food-Grade Sanitizer: After you've stripped away the scale, the sanitizer comes in to kill all the nasty stuff—bacteria, mold, and slime. It must be certified as safe for food contact surfaces to make sure no harmful chemicals end up in your customers' drinks.
Whatever you do, don't even think about using bleach or vinegar. Bleach will absolutely destroy your machine's internal components, and vinegar just isn't strong enough to cut through the kind of scale and biofilm you find in a commercial unit. To get a better handle on what your specific unit needs, it's worth learning more about how to choose the right commercial ice machine and its maintenance quirks.
Assembling the Right Tools
Beyond the chemicals, you'll need a handful of practical items to do the physical work. My advice? Keep a dedicated set of tools just for your ice machine. This prevents cross-contamination from other grimy kitchen jobs.
Before you start, make sure you have everything you need on hand. A quick check against a list ensures the whole process goes smoothly, safely, and without any last-minute surprises.
Essential Cleaning and Safety Supplies Checklist
| Item Category | Specific Item | Purpose and Key Considerations |
|---|---|---|
| Cleaning Agents | Nickel-Safe Descaler | Dissolves mineral scale without damaging nickel components. Never substitute. |
| NSF-Certified Sanitizer | Kills bacteria, mold, and slime post-cleaning. Must be food-grade. | |
| Physical Tools | Soft-Bristle Brushes | For scrubbing components. Never use wire brushes—they will scratch surfaces. |
| Clean, Lint-Free Cloths | For wiping down surfaces without leaving fibers behind. | |
| Designated Spray Bottle | For evenly applying cleaning and sanitizing solutions. | |
| Dedicated Bucket | For mixing chemicals. Use this bucket only for ice machine cleaning. | |
| Safety Gear | Chemical-Resistant Gloves | Protects your hands from acidic cleaners and sanitizers. |
| Safety Goggles | Shields your eyes from accidental splashes. A non-negotiable item. |
Having this full kit ready to go makes your cleaning routine efficient and, most importantly, safe for both you and your equipment.
Pro Tip: Never, ever grab the same cloth you used to wipe down a greasy cooktop to clean your ice machine. The risk of transferring contaminants is sky-high and completely defeats the purpose of cleaning in the first place.
Finally, let's talk safety—because it’s not optional. Chemical-resistant gloves and safety goggles are an absolute must. Ice machine cleaners can be acidic, and getting a splash on your skin or in your eyes can cause a world of pain. Being prepared turns a potentially hazardous chore into a safe, routine part of your maintenance schedule.
The Complete Descaling and Sanitizing Process
Alright, now we’re getting to the heart of it. A real, thorough ice machine cleaning isn't a single step; it's a two-part mission. You have to tackle it in the right order for it to actually work.
First, you descale to break down all that chalky, hard mineral buildup. Then, you sanitize to wipe out the invisible stuff like bacteria, mold, and slime. Getting this sequence right is absolutely critical for a machine that’s not just clean, but truly food-safe.
This infographic breaks down the core workflow into three simple visual stages.
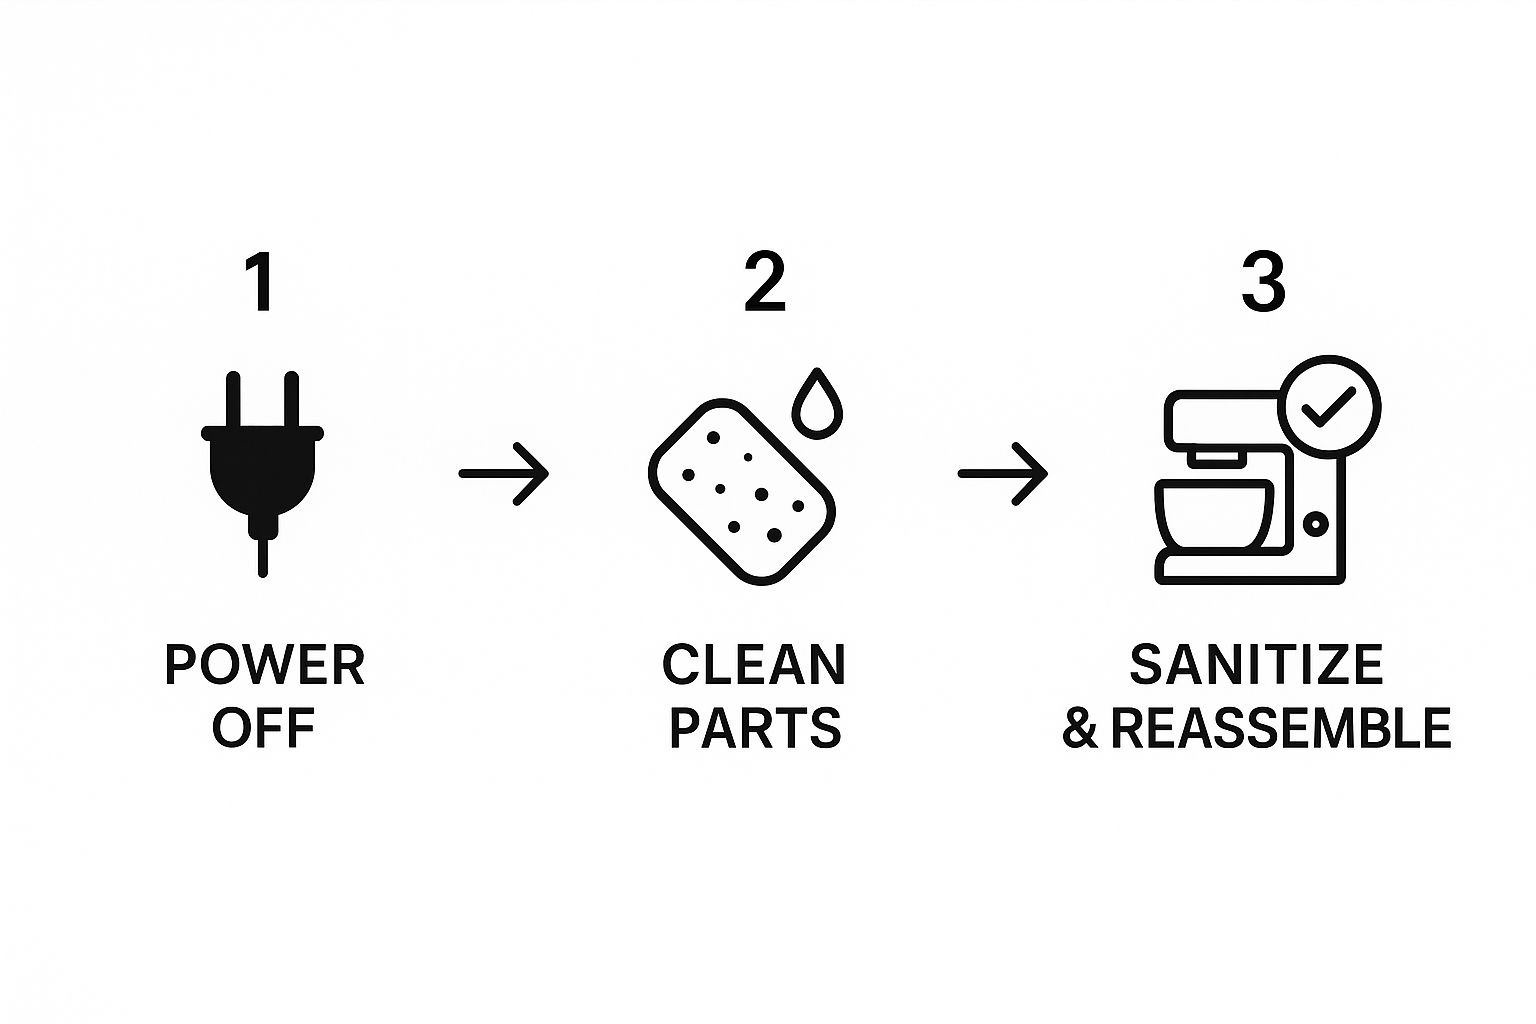
As the visual guide shows, a safe and effective cleaning always starts with powering down the unit before you ever get your hands dirty.
Prepping the Machine for a Deep Clean
Before you even think about grabbing the chemicals, proper prep is everything. This first phase is all about making sure you don't contaminate the fresh ice you’ll make later and, just as importantly, protecting yourself from any electrical hazards.
Start by turning the machine completely off and unplugging it from the wall. Safety first, always.
Next up, you have to get every single ice cube out of the storage bin. This is non-negotiable. Throw it all out; you definitely don't want any of it mixing with cleaning solutions later on. Once the bin is totally empty, you can start taking out the internal components.
Grab your owner’s manual to see exactly which parts are designed to be removed for cleaning. Typically, these will include:
- The water curtain or splash guard: This piece catches a ton of splash-back and is a prime spot for slime to start growing.
- The ice thickness probe: This is a crucial sensor that gets coated in scale, which can lead to inconsistent ice production.
- The water distribution tube: This component has tiny holes that get clogged easily by mineral deposits, messing with how evenly water flows over the evaporator plate.
- Baffles and dividers from inside the ice storage bin.
Set these parts aside in a clean, designated spot, ready for the next stage.
The Descaling Phase: Removing Mineral Buildup
This is where you go to war with the scale—that stubborn, whitish gunk caused by minerals in your water. If you let it build up, scale can clog water lines, wreck components, and make your machine incredibly inefficient.
Now’s the time to grab your nickel-safe ice machine cleaner. Mix up the descaling solution according to the product's directions, usually in a dedicated bucket or spray bottle. Give all those removable parts you set aside a thorough scrubbing with a soft-bristle brush. Pay extra attention to corners and crevices where scale loves to hide.
A common mistake I see is people reaching for a wire brush or an abrasive scouring pad. This will permanently scratch the surfaces of your components, creating tiny grooves where bacteria and slime can take hold even easier in the future. Always, always use soft bristles.
While those parts are soaking, use the rest of your solution to wipe down the inside of the ice bin and all the internal surfaces you can reach. After a good scrub, rinse every single component and surface with clean water to get all traces of the descaler off. Any leftover cleaning agent can mess with the sanitizing step and even leave a chemical taste in your ice.
For some expert-approved products, check out our guide on the best ice machine cleaning solutions reviewed to find the right one for your equipment.
The Sanitizing Phase: Eliminating Bacteria and Mold
With the scale gone, it's time to take out the microbial threats. Cleaning gets rid of the visible grime, but sanitizing kills the microscopic bacteria and mold that are a real health risk. This is the step that makes your ice truly safe for customers.
Prepare your NSF-certified, food-grade sanitizer, again following the manufacturer’s specific mixing instructions. This is usually a much more diluted solution than the descaler.
Using a clean spray bottle or cloth, apply the sanitizer to all the same surfaces and components you just descaled. You want to coat everything thoroughly: the removable parts, the inside of the bin, the evaporator plate area, and any other surface that touches food or water.
Here’s the key difference: you do not rinse the sanitizer off. It needs to air dry to actually work. This contact time is what kills off the pathogens.
After letting everything air dry completely, you can carefully put your ice machine back together. Once it's all assembled, plug it in, turn it on, and let it run through at least one or two full ice-making cycles. Make sure to discard all the ice from these first batches to flush out any residual solution before you start serving it again.
Keeping Your Machine's Exterior and Condenser in Top Shape
It’s easy to get tunnel vision and focus only on the inside of your ice machine. I've seen it happen time and time again. But that’s a rookie mistake that can undo all your hard work. The exterior surfaces and, most critically, the condenser unit, are just as important for food safety and the machine's overall health. Every part of the system works together.
Think about it: the outside of your ice machine is a high-touch area. Every time a bartender or server opens that bin door or grabs the ice scoop, they can transfer germs. Wiping down the exterior isn't just for looks; it's a non-negotiable step in preventing cross-contamination and upholding basic food safety.
Sanitizing High-Touch Surfaces
Daily wipe-downs are your first line of defense. This is a simple, powerful habit to build into your team's closing duties.
- The Ice Bin Door and Handle: This gets touched constantly all shift long. A quick wipe with a food-grade sanitizer at the end of each day is all it takes.
- The Ice Scoop: This is the direct link between hands and the ice your customers consume. It needs to be cleaned and sanitized daily. Crucially, it must be stored in a clean, protected holder—never, ever leave it inside the ice bin.
- Outer Panels: A quick wipe with a damp cloth gets rid of dust and kitchen grime. If you've got greasy buildup, a little mild detergent will cut through it before a final rinse.
This whole process takes maybe two minutes, but its impact on safety is huge.
Why You Can't Afford to Ignore the Condenser
Now, let's get to the machine's engine room: the condenser. If you have an air-cooled unit, this part works like a radiator, pushing heat out of the refrigeration system. Over time, its coils get absolutely caked in dust, grease, and all the other gunk floating around a commercial kitchen.
When those coils get clogged, your ice machine can't breathe. It struggles to get rid of heat, which forces the compressor to work overtime just to make the same amount of ice. This constant strain leads to two things you definitely don't want: sky-high energy bills and, eventually, a catastrophic compressor failure. That’s a repair that can easily run into the thousands.
Neglecting the condenser is one of the single most expensive maintenance mistakes you can make. A dirty condenser can spike your machine's energy use by up to 30% before it finally gives up and breaks down completely.
Cleaning the coils is a straightforward job that directly protects your wallet. Just power off and unplug the machine. Then, grab a stiff-bristle brush or a vacuum with a brush attachment and gently clear all the buildup from the fins. If it's really greasy, a commercial coil cleaner will do the trick.
Performing this simple task every three to six months keeps your machine running efficiently, controls energy costs, and dramatically extends the life of its most expensive part. It's a vital piece of any complete ice machine cleaning strategy.
Building a Proactive Maintenance Schedule
Moving from a one-time deep clean to a sustainable maintenance strategy is the real secret to long-term success. A consistent ice machine cleaning routine is all about prevention—it stops major issues before they ever start, protecting your investment and making sure every cube that drops is perfect. But let's be clear, there's no one-size-fits-all schedule; it has to be dialed in for your specific spot.
Think about it: a pizzeria with flour dust and yeast floating around will need to clean its machine way more often than a quiet office breakroom. The same goes for water quality. A bar in an area with super hard water is going to see scale buildup in a fraction of the time it would take in a location with softer water.
The gold standard is a full descaling and sanitization every six months. However, for high-demand environments or places with poor air or water quality, shifting to a quarterly schedule is a smart, proactive move. It's what keeps you ahead of surprise breakdowns and frustrating health code violations.
Understanding these variables is the first step to creating a realistic plan that your team can actually follow.
Creating a Practical Routine
The key to making maintenance manageable is breaking it down by frequency. Instead of letting everything build up for a massive six-month deep clean, you can weave smaller daily and weekly checks into your team's workflow. This keeps the machine in much better shape between the big services.
This proactive approach dramatically cuts down on the grime and scale you'll have to battle later on. Here’s a simple framework to get you started:
- Daily Tasks: Wipe down the exterior, the door handle, and always sanitize the ice scoop. Make sure that scoop is stored in a clean, designated holder—never, ever in the ice bin itself.
- Weekly Tasks: Pop open the air filter and check for dust and debris. If it's dirty, give it a clean. A quick visual inspection inside the bin can also help you catch any early signs of slime or mold before they take hold.
- Semi-Annual Tasks: This is the big one—your full deep clean. It's when you'll do the complete descaling and sanitizing process and give the condenser coils a thorough cleaning.
This tiered approach turns what feels like a daunting chore into a simple set of habits.
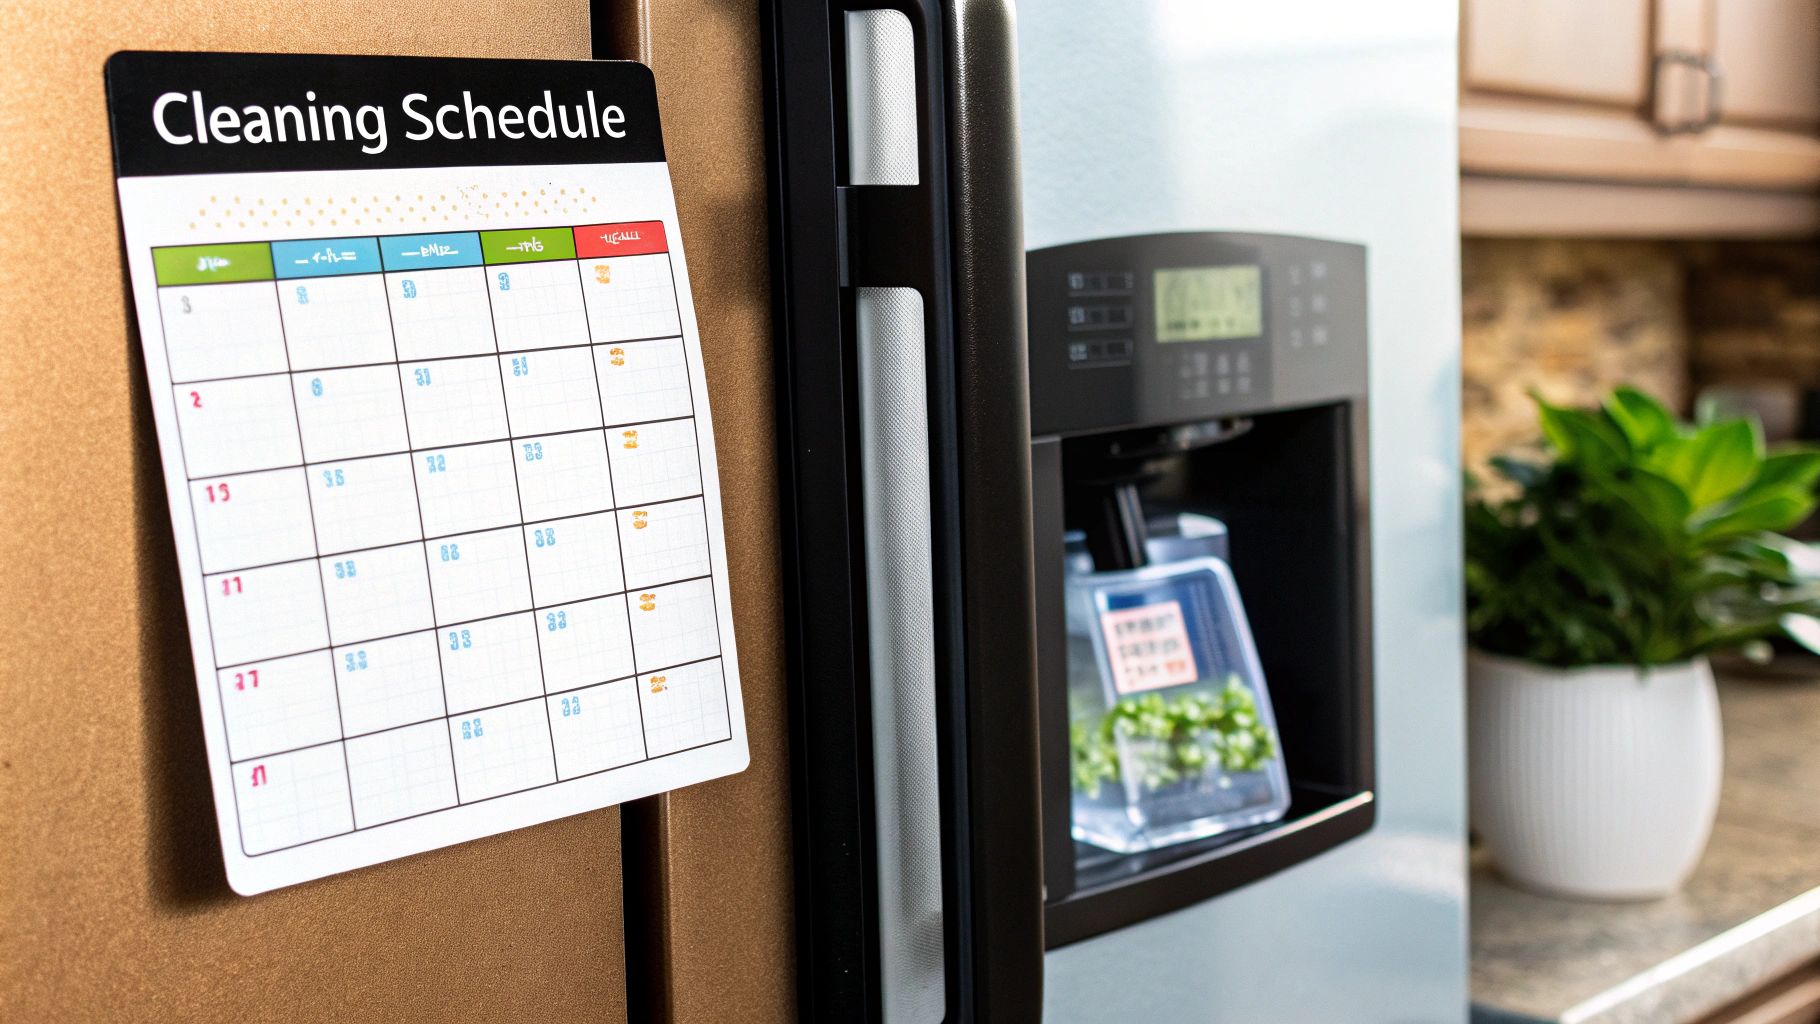
Below is a sample schedule you can adapt for your own operation. Posting a clear, easy-to-read chart like this near the ice machine is a great way to keep everyone on the same page and ensure these crucial tasks don't get overlooked during a busy week.
Sample Ice Machine Maintenance Schedule
| Frequency | Task | Key Focus Area |
|---|---|---|
| Daily | Wipe Exterior & Sanitize Scoop | External Hygiene & Food Safety |
| Daily | Visual Check of Ice Quality | Clarity & Odor Prevention |
| Weekly | Clean Air Filter | Airflow & Cooling Efficiency |
| Weekly | Inspect Bin for Slime/Mold | Internal Hygiene & Contamination |
| Monthly | Check Water Filter (if applicable) | Water Quality & Scale Prevention |
| Quarterly | Full Descaling (in high-use areas) | Mineral Buildup & Performance |
| Semi-Annually | Full Descaling & Sanitizing | Complete System Health |
| Semi-Annually | Clean Condenser Coils | Heat Exchange & Energy Use |
Remember, this is just a starting point. Adjust the frequencies based on your machine's performance and your kitchen's specific conditions to create a routine that truly works for you.
The Rise of Automated Cleaning
The industry is also seeing a shift toward making this whole process easier. The global market for automatic cleaning ice machines has already hit an estimated $2.5 billion, a number driven by businesses that are prioritizing both hygiene and efficiency.
These systems can significantly cut down on labor costs and improve sanitation, making it simpler to stay on top of food safety regulations. You can learn more about the growth of automatic cleaning ice machine technology and how it's changing the game. While they aren't a complete substitute for a manual deep clean, they represent a huge step forward in maintaining consistent hygiene with a lot less effort.
Got Questions About Cleaning Your Ice Machine? We've Got Answers.
Even when you have a solid process down, questions are bound to pop up when you're cleaning an ice machine. Getting some straight answers is the best way to build confidence and make sure you're doing the job right—and safely. Let's dig into some of the most common questions and troubleshooting scenarios we hear from restaurant owners all the time.
How Often Do I Really Need to Clean My Commercial Ice Machine?
Look, the standard recommendation is a full deep clean every six months, but please don't treat that as a one-size-fits-all rule. Think of it more like a starting point.
If your business is in an environment with a lot of stuff floating in the air—like a pizzeria with flour dust everywhere or a brewery with yeast—you absolutely need to bump that up to every three months. The same goes for any location with really hard water, which will speed up mineral scale buildup like you wouldn't believe. Your manufacturer's manual is always the best place to start, but your actual environment dictates the true cleaning schedule.
The biggest mistake we see is people waiting for a problem to show up. By the time your ice looks cloudy or you can smell something musty, you've already got a serious biofilm and scale situation on your hands. Proactive cleaning is the only way to get ahead of it.
Is It Safe to Use Bleach or Vinegar for Cleaning?
This is a hard no. Let me be clear: using bleach is one of the fastest ways to completely destroy your machine's internal parts, especially those sensitive nickel-plated evaporator plates. It causes corrosion that leads to permanent, expensive damage and can leach harmful chemicals into your ice.
Vinegar, on the other hand, just isn't strong enough to cut through the kind of commercial-grade mineral scale you're dealing with. Plus, it can leave a funky, unpleasant taste and smell in your ice that customers will definitely notice. Always stick to a food-grade, nickel-safe ice machine cleaner and a separate, NSF-certified sanitizer. These products are formulated specifically for this job. You can get more great tips by checking out our guide on cleaning restaurant equipment.
What Is That Pink or Black Slime in My Ice Machine?
Finding slime inside your ice machine is always a nasty surprise. That pinkish-orange film you're seeing is typically an airborne bacteria called Serratia marcescens, while the black gunk is usually a type of mold. Both of them absolutely love the cool, constantly damp environment inside an ice machine.
Seeing either of these is a huge red flag. It's a significant health hazard and a clear sign that a deep cleaning is way overdue. These biofilms can easily contaminate your ice and pose a real risk to your customers. A consistent, proactive cleaning schedule is the only way to keep them from taking hold.
What Happens If I Skip Cleaning the Condenser Coils?
Ignoring the condenser coils is easily one of the most expensive maintenance mistakes you can make. The coils are like the machine's radiator—their job is to release heat. When they get clogged up with grease and dust, the machine can't cool itself down properly.
This forces the compressor to work way harder and run much longer just to make the same amount of ice, which will make your energy bills skyrocket. Eventually, all that strain will cause the compressor to burn out completely. We're not talking about a minor fix here; that’s a multi-thousand-dollar repair that could have been completely avoided with a simple five-minute brushing every couple of months.
At The Restaurant Warehouse, we understand that having reliable, efficient, and clean equipment is the backbone of your business. From high-performance ice machines to all the essential cleaning supplies, we provide the tools you need to maintain the highest standards of safety and quality. Equip your kitchen for success by exploring our full range of products at https://therestaurantwarehouse.com.
About The Author

Sean Kearney
Sean Kearney used to work at Amazon.com and started The Restaurant Warehouse. He has more than 10 years of experience in restaurant equipment and supplies. He graduated from the University of Washington in 1993. He earned a BA in business and marketing. He also played linebacker for the Huskies football team. He helps restaurants find equipment at a fair price and offers financing options. You can connect with Sean on LinkedIn or Facebook.
Leave a comment